


Honeywell Life Safety AS, Po. Box 3514, N-3007 Drammen, Norway
http://www.hls-nordic.com
Network Master WiFi
Installation:
The Wireless Network Master WiFi is the master (Gateway) device of the wireless network. It transfers the
received data from the PC Software to the wireless network and vice versa. One only Network Master can exist
in every wireless network. It is recommended that the Wireless Network Master WiFi is positioned at a central
point of the entire wireless luminaire network installation. At least 2 or 3 luminaires should be inside the signal
range of the Gateway in order to create alternative routes for re-transmitting messages to other devices inside
their own range. Install the device to a stable and visible position which has access to mains power and WiFi
network. Avoid metallic surfaces, as they can affect RF signal strength. It is recommended that while fitted, the
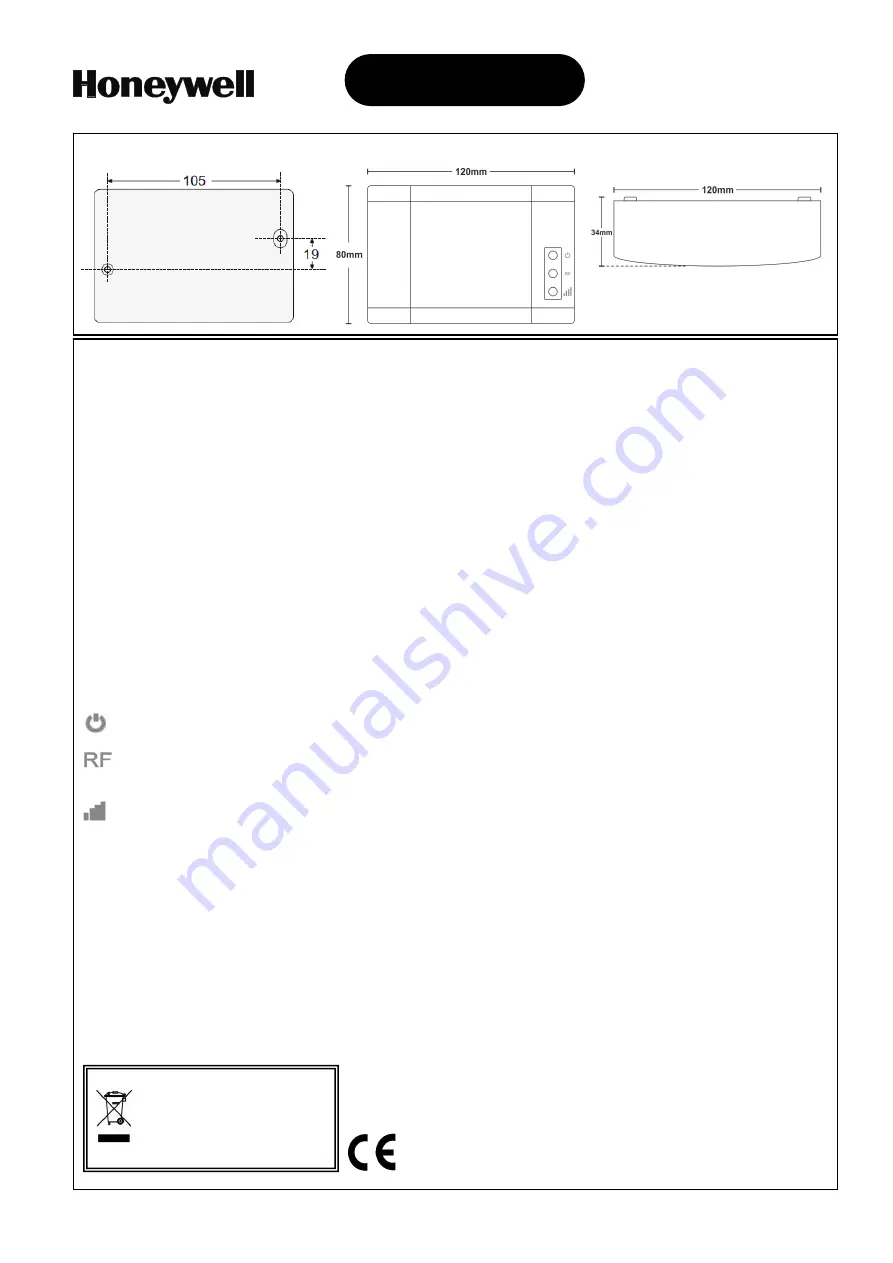
LED indications are visible to a technician. Use the 2 mounting holes to fit the base on a vertical wall
(concrete/brick/wood) and the embedded spirit level to make fine (horizontal) adjustments. Tighten the
mounting screws when done. Connect mains voltage (L and N).
Note:
This device is powered from the mains, so in case of mains interruption it will stop working. If your wireless
network needs to be “alive” during mains interruption, care should be taken so that the device is powered by a
UPS system.
Function
This device has three indication LEDs:
Power ON LED (green). Lit when the device is activated.
RF LED (yellow). On when there is at least one device connected to the Gateway and there is traffic over
the network. Off when the network is empty.
Signal broadcasting LED (yellow): Flashing indicates Gateway transmissions (beacon).
Button functions,
BT1
(accessible when front cover is removed):
Short press (<1 sec.): Send status message to the PC software
Long press (between 1 and 10 secs.): Reset Gateway
Extended press (>10 secs.): Load default setting to the Gateway
Button functions,
BT2
(accessible when front cover is removed, see fig. 1):
Long press (2 secs.): Establish Mini Access Point (TELA WiFi), LED7 2 blinks/sec.
Wireless
At the end of their useful life the
packaging and product should be
disposed of via a suitable
recycling centre. Do not dispose
of with your normal household
waste. Do not burn.
GB
Dimensional drawings:
Part no.:
290092
Operation voltage:
200-240VAC 50-60Hz
Maximum power consumption: 1.4VA
Ambient temperature range: 5 to 40°C
Relative humidity:
Up to 95%
Weight: 193g
IP20
Default settings Gateway:
SID: 00000001
Channel 13 (869.525MHz)
Techn. menu code (webserver): 1000
Mini Access Point Gateway IP: 192.168.0.50
Technical description


