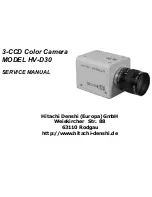
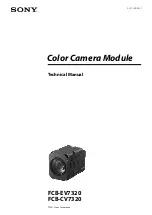
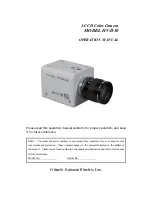
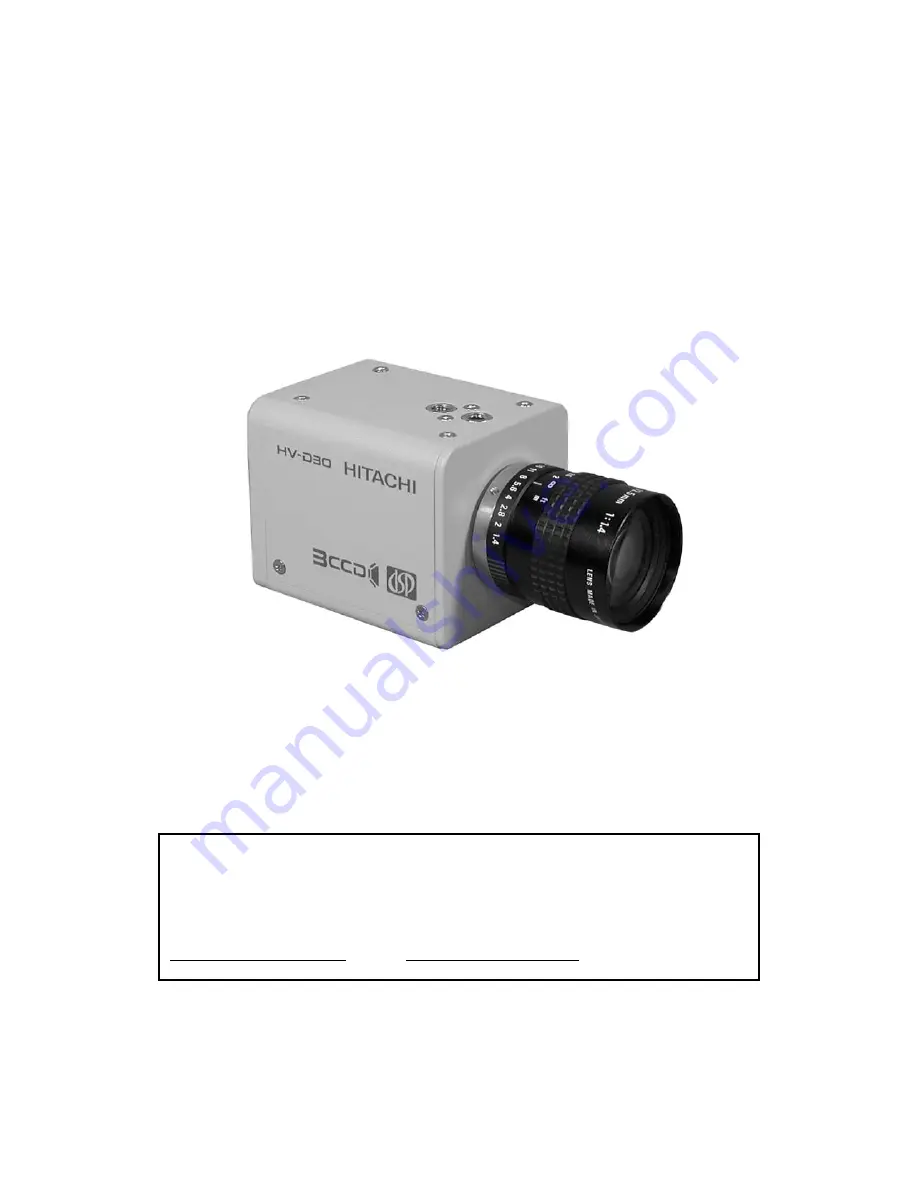
background image

3-CCD Color Camera 

MODEL HV-D30 


OPERATION MANUAL 


Please read this operation manual carefully for proper operation, and keep 
it for future reference.


Note:

  The model and serial numbers of your product are important for you to keep for your 

convenience and protection.  These numbers appear on the nameplate located on the bottom of 

the product.    Please record these numbers in the spaces provided below, and retain this manual 

for future reference.


Model No.                             

Serial No.                             


Hitachi Kokusai Electric Inc.


Summary of Contents for HV-D30

Page 1: ...ence Note The model and serial numbers of your product are important for you to keep for your convenience and protection These numbers appear on the nameplate located on the bottom of the product Please record these numbers in the spaces provided below and retain this manual for future reference Model No Serial No Hitachi Kokusai Electric Inc ...

Page 2: ...product on an unstable cart stand tripod bracket or table The product may fall causing serious injury to a child or adult and serious damage to the product Use only with a cart stand tripod bracket or table recommended by the manufacturer or sold with the product Any mounting of the product should follow the manufacturer s instructions and should use a mounting accessory recommended by the manufac...

Page 3: ...y exit from the product 14 Lightning For added protection for this product during a lightning storm or when it is left unattended and unused for long periods of time unplug it from the wall outlet This will prevent damage to the product due to lightning and power line surges 15 Overloading Do not overload wall outlets extension cords or integral convenience receptacles as this can result in a risk...

Page 4: ...been dropped or damaged in any way f When the product exhibits a distinct change in performance this indicates a need for service 21 Replacement Parts When replacement parts are required be sure the service technician has used replacement parts specified by the manufacturer or have the same characteristics as the original part Unauthorized substitutions may result in fire electric shock or other h...

Page 5: ... Wasser und Feuchtigkeit Dieses Erzeugnis nicht in der Nähe von Wasser verwenden z B in der Nähe einer Badewanne eines Waschbeckens einer Küchenspüle eines Waschzubers in einem nassen Keller in der Nähe eines Schwimmbeckens usw 8 Aufstellung Das Erzeugnis nicht auf einen unstabilen Wagen Stand Dreifuß Träger oder Tisch stellen Das Erzeugnis kann sonst herunterfallen und ein kind oder einen Erwachs...

Page 6: ...dose Dies ist eine Sicherheitsmaßnahme Wenn Sie den Stecker nicht in die Steckdose stecken können so wenden Sie sich bitte an ihren Elektriker damit er die veraltete Schuts des Schutzkontaktsteckers unwirksam 13 Netzkabelschutz Netzkabel sollten so verlegt werden deß möglichst nicht darauf getreten wird und daß sie nicht eingeklemmt werden mit besonderer Beachtung der kabel an Stackern Verlängerun...

Page 7: ...ächtliche Arbeit durch einen qualifizierten Techniker erfordert um das Erzeugnis wieder zu normalem Betrieb zurückzubringen e Wenn das Erzeugnis fallen gelassen oder beschädigt worden ist f Wenn das Erzeugnis eine klare Änderung in der Leistung zeigt dies weist darauf hin daß Wartung erforderlich ist 21 Ersatzteile Wenn Ersatzteile erforderlich sind darauf achten daß der Wartungstechniker nur die ...

Page 8: ...r le fabricant de l appareil car elles pourraient être source de danger 7 Eau et humidité Ne pas utiliser l appareil á proximité d eau par exemple prés d une baignoire d un lavabo d un évier ou d un bac á lessive dans un sous sol humide ou prés d une piscine etc 8 Accessoires Ne pas placer l appareil sur un chariot un socle un pied un support ou one table instables L appareil pourrait tomber bless...

Page 9: ... ne rentre pas dans la prise faire remplacer la prise désuéte par un électricien Ne pas rendre vaine la measure de sécurité assurée par cette prise avec mise á la terre 13 Protection du cordon d alimentation Acheminer les cordons d alimentation de facon qu on ne risque pas de marcher dessus ou de les coincer sous un objet placé dessus ou contre eux Faire particuliérement attention aux fiches des c...

Page 10: ...t des travaux de réparation coûteux par un technicien qualifié pour remettre l appareil en état de marche e Si l appareil est tombé ou qu il a été endommagé f Si l appareil affiche une nette modification de ses performances cela signifie qu il a besoin d être réparé 21 Piéces de rechange Si l on a besoin de piéces de rechange veiller á ce que le technicien de réparation utilise exclusivement les p...

Page 11: ...oduct in a residential area is likely to cause harmful interference in which case the user will be required to correct the interference at his own expense WARNING Changes or modifications not expressly approved by Hitachi Denshi responsible for compliance could void the user s authority to operate the equipment For Canada This product does not exceed the class A class B limits for radio noise emis...

Page 12: ...㨯㨯㨯㨯㨯㨯㨯㨯㨯㨯㨯㨯㨯㨯㨯 㨯㨯㨯㨯㨯㨯㨯㨯㨯㨯㨯㨯㨯㨯㨯㨯㨯㨯㨯㨯㨯㨯㨯㨯㨯㨯㨯㨯㨯㨯㨯㨯㨯㨯㨯㨯㨯㨯㨯㨯㨯㨯㨯㨯㨯㨯㨯㨯㨯㨯㨯㨯㨯㨯㨯㨯㨯㨯㨯㨯㨯㨯㨯㨯㨯 㨯㨯㨯㨯㨯㨯㨯㨯㨯㨯㨯㨯㨯㨯㨯㨯㨯㨯㨯㨯㨯㨯㨯㨯㨯㨯㨯㨯㨯㨯㨯㨯㨯㨯㨯㨯㨯㨯㨯㨯㨯㨯㨯㨯㨯㨯㨯㨯㨯㨯㨯㨯㨯㨯㨯㨯 㨯㨯㨯㨯㨯㨯㨯㨯㨯㨯㨯㨯㨯㨯㨯㨯㨯㨯㨯㨯㨯㨯㨯㨯㨯㨯㨯㨯㨯㨯㨯㨯㨯㨯㨯㨯㨯㨯㨯㨯㨯㨯㨯㨯㨯㨯㨯㨯㨯㨯㨯㨯㨯㨯㨯㨯㨯㨯㨯㨯㨯㨯㨯㨯 㨯㨯㨯㨯㨯㨯㨯㨯㨯㨯㨯㨯㨯㨯㨯㨯㨯㨯㨯㨯㨯㨯㨯㨯㨯㨯㨯㨯㨯㨯㨯㨯㨯㨯㨯㨯㨯㨯㨯㨯㨯㨯㨯㨯㨯㨯㨯㨯㨯㨯㨯㨯㨯㨯㨯㨯 㨯㨯㨯㨯㨯㨯㨯㨯㨯㨯㨯㨯㨯㨯㨯㨯㨯㨯㨯㨯㨯㨯㨯㨯㨯㨯㨯㨯㨯㨯㨯㨯㨯㨯㨯㨯㨯㨯㨯㨯㨯㨯㨯㨯㨯㨯㨯㨯㨯㨯㨯㨯㨯㨯㨯㨯㨯㨯㨯㨯㨯㨯㨯 㨯㨯㨯㨯㨯㨯㨯㨯㨯㨯㨯㨯㨯㨯㨯㨯㨯㨯㨯㨯㨯㨯㨯㨯㨯㨯㨯㨯㨯㨯㨯㨯㨯㨯㨯㨯㨯㨯㨯㨯㨯㨯㨯㨯㨯㨯㨯㨯㨯㨯㨯㨯㨯㨯㨯㨯㨯㨯㨯 㨯㨯㨯㨯㨯㨯㨯㨯㨯㨯㨯㨯㨯㨯㨯...

Page 13: ...㨯㨯㨯㨯㨯㨯㨯㨯㨯㨯㨯㨯㨯㨯㨯㨯㨯㨯㨯㨯㨯㨯㨯㨯㨯㨯㨯 㨯㨯㨯㨯㨯㨯㨯㨯㨯㨯㨯㨯㨯㨯㨯㨯㨯㨯㨯㨯㨯㨯㨯㨯㨯㨯㨯㨯㨯㨯㨯㨯㨯㨯㨯㨯㨯㨯㨯㨯㨯㨯㨯㨯㨯㨯㨯㨯㨯㨯㨯㨯㨯㨯㨯㨯㨯㨯㨯㨯㨯 㨯㨯㨯㨯㨯㨯㨯㨯㨯㨯㨯㨯㨯㨯㨯㨯㨯㨯㨯㨯㨯㨯㨯㨯㨯㨯㨯㨯㨯㨯㨯㨯㨯㨯㨯㨯㨯㨯㨯㨯㨯㨯㨯㨯㨯㨯㨯㨯㨯㨯㨯㨯㨯㨯㨯㨯㨯㨯㨯 㨯㨯㨯㨯㨯㨯㨯㨯㨯㨯㨯㨯㨯㨯㨯㨯㨯㨯㨯㨯㨯㨯㨯㨯㨯㨯㨯㨯㨯㨯㨯㨯㨯㨯㨯㨯㨯㨯㨯㨯㨯㨯㨯㨯㨯㨯㨯㨯㨯㨯㨯 㨯㨯㨯㨯㨯㨯㨯㨯㨯㨯㨯㨯㨯㨯㨯㨯㨯㨯㨯㨯㨯㨯㨯㨯㨯㨯㨯㨯㨯㨯㨯㨯㨯㨯㨯㨯㨯㨯㨯㨯㨯㨯㨯㨯㨯㨯㨯㨯㨯㨯㨯㨯㨯㨯㨯 㨯㨯㨯㨯㨯㨯㨯㨯㨯㨯㨯㨯㨯㨯㨯㨯㨯㨯㨯㨯㨯㨯㨯㨯㨯㨯㨯㨯㨯㨯㨯㨯㨯㨯㨯㨯㨯㨯㨯㨯㨯㨯㨯㨯㨯㨯㨯㨯㨯㨯㨯㨯㨯㨯㨯㨯㨯㨯㨯㨯㨯 Black Balance Adjustment 33 White Balance Adjustment 34 Real time Auto White 36 ...

Page 14: ...lows use with a broad range of optical systems and opens up applications in a wide variety of fields Features Single chip LSI camera signal processor x x x Hitachi s leading edge processing technology 0 18 Ǵm internal core 1 8V drive and 3 million gates is contained on a single newly developed ultra LSI chip The system is compact and consumes very little power Also the 12 bit A D converter and 14 ...

Page 15: ...r the camera interior These may lead to failure or accident z Do not modify the camera or use the camera with external covers removed These may cause failure void any warranties and pose a safety hazard z Stop using the camera at the approach of an electrical storm thunder audible Protect the camera from rain if using it outdoors z In event the camera shows any abnormality switch off the camera an...

Page 16: ...otographer s blower or lens brush can be used for clearing dust from the lens and optical filters z Wipe dust from the case with a soft dry cloth If soiling is severe moisten the cloth with a solution of neutral detergent Afterwards wipe the cover with a dry cloth z Do not use petroleum distillates alcohol or spray type cleaners Transportation Remove the lens install lens mount cap and other attac...

Page 17: ... striped necktie to result in a Moire pattern The effect should be considered when selecting costumes props and other scene elements 4 Ghosting Strong direct or reflected light near an object of interest can cause ghosting of the object to appear in the picture The effect is more obtrusive with certain iris settings and lens types Select the scene layout and camera pointing direction carefully in ...

Page 18: ...th the remote control box RC Z3 or personal computer Pilot lamp Lights when power is supplied VIDEO conector Outputs a composite video signal 1Vp 75 hms 䌎䌕 䌅䌒 䌍䌕䌌䌔䌉 䌌䌅 䌁䌗䌂 䌆䌉䌌䌅 䋫 䋭 䌁 䌂 䌃 㪬 䌎䌓 䌂䌁䌒 㪛 㪩 㪣 㪘㪪㪚 䌖䌉䌄䌅䌏 䌍䌅 䌐䌏䌗 䌒䌅䌍䌏䌔䌅 䌄䌃䇭䌉䌎 BAR D button DERECT mode Press this button to turn on off a color bar signal MENU mode Pressing this button moves the cursor up FILE R button DERECT mode Selects the sc...

Page 19: ...ris approaches fully open problems such as loss of resolution shading and flare overall image white out can detract from picture quality When using in applications that call for open iris the lenses for 3 CCD are recommended If another lens is contemplated check the performance beforehand 2 Auto iris lens Main types are Video with self contained iris amplifier and DC DC voltage applied to open len...

Page 20: ... more than 3 meters distant Turn the focus ring to adjust the focus 2 Set the lens to wide angle and while using care not to disturb the focus ring turn the flangeback ring to adjust the focus Repeat the above steps until focus is obtained at both the telephoto and wide angle ends NEAR FAR Video signal type lens adjustment Adjustment is required after replacing the lens or if using the camera for ...

Page 21: ...f lower㧘 the triangle mark to the left of L is moved 3 Lens adjustment difficult or impossible 1 Video signal level indication unstable Unstable indication can occur if the light source has 㨍 flicker component 㧔 e g fluorescent or mercury lighting㧕 change the electronic shutter mode Sub menu 1 shutter or Variable to reduce the flicker 2 Lens Level control fully at Hi but auto iris inoperative Redu...

Page 22: ...t the top and bottom These allow mounting to either a tripod or a mounting bracket Screw type U 1 4 20 Length 4 5 to 6 mm Screws longer than 6 mm can cause internal damage while less than 5 mm prevents secure fastening and risks dropping to cause damage and injury 㧸 9 ...

Page 23: ...ote Control Box RC Z3 Color Monitor Cam era G raphic Stand Microscope Lens Rem ote Lens 㪮㩷㩷㪫 PAN TILT PAN TILT Lens Controller TV Conferencing Surv eillance Supplied by PAN TILT system m aker Junction Box JU Z2 PC Long cable Max 8 cam era Alev el conv erter is required if controlling the camera from a personal com puter v ia RS 232C intergace ov er a distance m ore than 15 m eter 10 ...

Page 24: ...ge data setting use the L or R button 䂓㪤㪘㪠㪥㩷㪤㪜㪥㪬 䇭 䇭㪚㪘㪤㪜㪩㪘㩷㪤㪦㪛㪜㩷㩷㪑㩷㪤㪘㪥㪬㪘㪣 䇭㪮㪟㪠㪫㪜㩷㪙㪘㪣㪘㪥㪚㪜㪑㩷㪧㪩㪜㪪㪜㪫㩷㪊㪉㪇㪇㪢 䇭㪘㪞㪚㩷㩷㩷㩷㩷㩷㩷㩷㩷㩷㩷㩷㩷㩷㩷㩷㩷㩷㩷㪑㩷㪦㪝㪝 䇭㩷㪞㪘㪠㪥㩷㩷㩷㩷㩷㩷㩷㩷㩷㩷㩷㩷㩷㩷㩷㩷㩷㪑㩷㪇㪻㪙 䇭㪛㪫㪣㩷㩷㩷㩷㩷㩷㩷㩷㩷㩷㩷㩷㩷㩷㩷㩷㩷㩷㩷㩷㪑㩷㪣㪦㪮 䇭㩷㪭㪘㪩㪠㪘㪙㪣㪜㩷㩷㩷㩷㩷㩷㩷㩷㩷㪑㩷㪦㪝㪝 䇭㪪㪬㪙㩷㪤㪜㪥㪬㪈㩷㩷㩷㩷㩷㩷㩷㪑㩷㪄㪕 䇭㪪㪬㪙㩷㪤㪜㪥㪬㪉㩷㩷㩷㩷㩷㩷㩷㪑㩷㪄㪕 䇭㪘㪣㪚㩷㩷㩷㩷㩷㩷㩷㩷㩷㩷㩷㩷㩷㩷㩷㩷㩷㩷㩷㪑㩷㪄㪕 䇭㪝㪠㪣㪜㩷㪪㪜㪣㪜㪚㪫㩷㩷㪑㪝㪠㪣㪜㪄㪈 䇭 䂓㪪㪬㪙㩷㪤㪜㪥㪬㪈 䇭 䇭㪤㪅㩷㪙㪣㪘㪚㪢㩷㩷㩷㩷㩷㩷㩷㩷㩷㩷㪑㩷㪇 䇭㪪㪟㪬㪫㪫㪜㪩㩷㩷㩷㩷㩷㩷㩷㩷㩷㩷㩷㪑㩷㪭㪘㪩㪠㪘㪙㪣㪜 䇭㩷㪭㪘㪩㪠㪘㪙㪣㪜㩷㩷㩷㩷㩷㩷㩷㩷㩷㪑㩷㪈...

Page 25: ... R HUE 0 R SAT 0 Y HUE 0 Y SAT 0 G HUE 0 G SAT 0 C HUE 0 C SAT 0 B HUE 0 B SAT 0 M HUE 0 M SAT 0 INITIALIZE FILE SEL FILE 1 䂓GAMMA ON GAMMA TABLE STANDARD TOTAL GAMMA 0 R GAMMA 0 B GAMMA 0 INITIALIZE 䇭FILE SELECT FILE 1 䂓DTL SUB ON 䇭 LEVEL DEP 0 CRISP 0 H V BALANCE 0 INITIALIZE 䂓OUTPUT SYNC OUTPUT R G B COLOR BAR OFF MONO OFF NEGA OFF SYNC ON G OFF GL IN 75ohm GL MODE VBS SC COARSE 0㫦 SC FINE 0 H ...

Page 26: ...㩷㪭㪘㪩㪠㪘㪙㪣㪜 䇭㩷㪭㪘㪩㪠㪘㪙㪣㪜㩷㩷㩷㩷㩷㩷㩷㩷㪑㩷㩷㪇 䇭㪪㪬㪙㩷㪤㪜㪥㪬㪈㩷㩷㩷㩷㩷㩷㩷㪑㩷㪄㪕 䇭㪪㪬㪙㩷㪤㪜㪥㪬㪉㩷㩷㩷㩷㩷㩷㩷㪑㩷㪄㪕 䇭㪘㪣㪚㩷㩷㩷㩷㩷㩷㩷㩷㩷㩷㩷㩷㩷㩷㩷㩷㩷㩷㪑㩷㪄㪕 䇭㪝㪠㪣㪜㩷㪪㪜㪣㪜㪚㪫㩷㩷㩷㩷㩷㩷㪑㩷㪝㪠㪣㪜㪄㪈 䇭 2 WHITE BAL White balance mode PRST 3200K The white balance condition is optimized at a color temperature of 3200K x x x x x x x x x x PRST 5600K The white balance condition is optimized at a color temperature of 5600K MEM White balance is automatically adjusted by t...

Page 27: ...ously to scene files and the conditions most suitable for a scene can be read and set There is a FILE SELECT item in the following menu The function operation are same It can memory each setting data of the following MENU as the scene file MAIN MENU SUB MENU 1 SUB MENU 2 ALC SPECIAL SET LEVEL SPECIAL SET MASKING SPECIAL SET GAMMA SPECIAL SET DTL SPECIAL SET EXT TRIGGER 3 SUB MENU 1 1 M BLACK Maste...

Page 28: ...tting Optimum image level is obtained under strong light conditions Effectively used for special optical systems such as microscope or fixed iris lens which do not have automatic light adjustment functions Limit settings can be selected from 1 500 to 1 100000 second Note AES cannot be used with Lens Type Video To use AES with a manual iris lens set the Lens Type to DC and Iris Mode to Manual If th...

Page 29: ...effect with striped images e g performer wearing a striped necktie Note Less reduction effect in PAL systems producing a soft image 9 FILE SELECT Select scene file from among 1 2 3 4 and PRESET 㧠 SUB MENU 2 1 DYNA CHROMA Dynamic chroma ON OFF On setting improves coloration in bright scene components 2 CHROMA GAIN Level setting in chroma signal Setting range is 128 to 127 Press R and L to respectiv...

Page 30: ...description on Page 36 9 AUTO BLACK Press R for automatic black balance adjustment 10 FILE SELECT Select scene file from among 1 2 3 and 4 5 ALC 1 PEAK AVE Set auto level control for Peak or Average in 4 steps of 50 50 25 75 18 85 or 0 100 At high Average setting background may be difficult to see in picture bright components Increasing the Peak setting may render spotlighted components easier to ...

Page 31: ...ER RIDE 0 SPEED STANDARD ALC GATE ON ALC GATE SEL PATTERN3 FILE SELECT FILE1 䇭 PEAK AVERAGE 18 85 OVER RIDE 0 SPEED STANDARD ALC GATE ON ALC GATE SEL PATTERN2 FILE SELECT FILE1 䇭ALC PATTERN4 䇭ALC PATTERN4 䇭 PEAK AVERAGE 18 85 OVER RIDE 0 SPEED STANDARD ALC GATE ON ALC GATE SEL PATTERN5 FILE SELECT FILE1 䇭 PEAK AVERAGE 18 85 OVER RIDE 0 SPEED STANDARD ALC GATE ON ALC GATE SEL PATTERN4 FILE SELECT F...

Page 32: ...GAMMA menu Gamma response balance and other properties are set 6 DTL Change to DTL menu DTL burst frequency color crisp and other properties are set 7 EXT TRIGGER Chainge to EXT TRIGGER menu Sets polarity video signal output timing and other properties 8 OUTPUT SYNC Change to OUTPUT SYNC menu Camera output signal switching and phase settings during genlock operation 9 FILE SET Change to FILE SET m...

Page 33: ...ics e g microscope Note Be sure to set the Iris Mode when combining AGC and AES 3 SELECTION Sets iris control voltage Lens Type is DC mode Cosmicar Control voltage is 1 5 to 5 5 V e g Cosmicar with manual over ride Others Control voltage is 2 5 to 7 5 V 4 SPEED Sets auto iris speed Lens Type is DC mode Set in a range of 1 to 15 where hunting is not produced Press R to increase and L to decrease th...

Page 34: ...ontrol voltage gain adjustment Lens Type is Video mode Adjustment is required when replacing a Video type lens or if using the camera for the first time The setting range is from 10 to 10 Press R to increase and L to decrease the setting Simultaneously press the L and R buttons for about 2 seconds to set to 0 Next adjust the lens Level control to highlight the central marker of the video signal le...

Page 35: ...ance control The window does not appear 2 GATE AREA UP DOWN The window can be shifted up down To shift the window up press the R button To shift it down press the L button 3 GATE AREA LEFT RIGHT he window can be shifted left right To shift the window rightward press the R button To shift it leftward press the L button 8 LEVEL This menu screen allows you to set up a black level and gain of R B vide...

Page 36: ... for approx two seconds Note In case of CAM MODE AUTO numeric values of R BLK B BLK become ineffective 5 Initialize Returns level menu settings to preset values Simultaneously press L and R for about 2 seconds 6 File select Selects scene files 1 4 and preset 9 MASKING Menu for setting the masking 1 R HUE Change red color phase 2 Y HUE Change yellow color phase 3 G HUE Change green color phase 4 C ...

Page 37: ...ontrast Off Normal High 1 GAMMA TABLE Sets gamma rising slope Low Dark component gradation reduced Standard Standard setting High Dark component gradation increased 2 TOTAL GAMMA Sets total R G and B gamma point Setting range is from 128 to 127 Press R to raise and L to lower RGB video signal gamma point Simultaneously press the L and R buttons for about 2 seconds to set to 0 3 R ADJUST Sets red g...

Page 38: ...icates OK when completed 5 Level Sets color detail level Range is 128 soft to 127 sharp Press both L and R for about 2 seconds to set to 0 6 Phase Sets color detail phase Present phase is indicated beside the setting values Since the VBS output is shown as monochrome on the monitor a monochrome indication can also be used for an approximate setting At Auto setup the automatically detected phase se...

Page 39: ... Reduces noise when DTL setting is in the range of 128 to 127 However at high settings some loss of sharpness occurs in detailed scene components Setting range is 128 to 127 Press the R button to increase the value and the detail noise Press the L button to decrease the value and reduce detail noise Set to 0 by simultaneously pressing the L and R buttons for about 2 seconds 3 H V BALANCE Balance s...

Page 40: ...0 H Can be used with a strobe light source to provide an optimum image with a frame grabber 3 Trig polarity Selects positive or negative trigger pulse polarity 4 WE polarity Selects WE pulse polarity Selects pulse WE output synchronized to image obtained from the camera rear panel multi connector for 1 field or 1 frame Use to match the interface of an external frame grabber or other equipment The ...

Page 41: ...ODE MODE2 CCD MODE FLD External trigger pulse EVEN ODD Video signal output W E pulse output SYNC reset SYNC reset more than 2 fields Exposure time EVEN ODD EVEN ODD EVEN ODD EVEN ODD ODD more than 2 fields d MODE MODE2 CCD MODE FRM External trigger pulse EVEN ODD Video signal output W E pulse pulse SYNC res SYNC reset more than 2 fields Exposure time EVEN ODD EVEN ODD EVEN ODD EVEN ODD ODD more th...

Page 42: ...en output is RGB with Sync on and G on Sync is added to the G video signal 6 GL IN Impedance changeover of input to the GL IN connector HIGH The high impedance level is provided 75ǡ An impedance of 75 ohms is provided Note When power to the camera is turned off the high impedance level is provided So do not use this function in a system where power is turned off for the camera unit only 7 GL MODE ...

Page 43: ...e than 1 second to initialize selected scene file data to preset values 5 All INITIALIZE Press L and R for more than 1 second to initialize all scene file data to preset values 16 OTHER FUNC 1 FLARE Flare compensation on off Corrects for extraneous reflections in the optical and CCD systems which end to weaken bright image components Normally set to on 2 FLARE LEVEL Setting range is 128 smaller to...

Page 44: ...he off setting might provide better results in such cases 17 ID TITLE ID and title display position and data setting menu 1 ID ID display position setting Once an ID is assigned it becomes possible to control a particular camera unit remotely from a personal computer according to its ID That is multiple camera units can be remote controlled individually from one persona computer At this function i...

Page 45: ...st character flashes ii Using the L R U and D buttons select an input character iii Press the SET UP button and the selected character will be entered The cursor will then move to the next character position iv In the same manner repeat the above steps ii and iii to enter an ID code and TITLE v On completion of character input bring the cursor to RET using the L R U or D button Then press the SET ...

Page 46: ...reen image is provided from the CCD image sensor during adjustment When picturing after adjustment a white screen image appears momentarily This phenomenon is not a symptom of trouble however 3 In case that the manual iris lens is used do not attempt auto black balance adjustment while taking an image of subject having extremely high luminance such as the sun This may deteriorate black balance acc...

Page 47: ...try white balance adjustment again Error message Procedure AUTO WHITE㧦NG CHANGE TO CAM TRY AGAIN Turn off the color bar AUTO WHITE㧦NG CHANGE TO MEMORY MODE TRY AGAIN Set up WHITE BAL MEM AUTO WHITE㧦NG LOW LIGHT TRY AGAIN White balance cannot be made due to insufficient illumination Increase the intensity of illumination turn lens iris toward open direction or increase the gain to provide a proper ...

Page 48: ...If there is no problem in practical application use the camera under the current condition Add a filter to the lens or illumination to increase the color temperature AUTO WHITE㧦NG LONG SHUTTER MODE CHANGE SHUTTER MODE TRY AGAIN Release the long shutter mode CAM MODE㧦AUTO CHANGE TO MANUAL Set camera mode to manual 35 ...

Page 49: ... Color shading may occur in the vertical direction on screen due to any characteristic of lens This camera is equipped with a function for correcting color shading automatically 1 Provide a proper aperture value of lens using the auto iris function or manually 2 Take an white image fully on screen At this step take care so that uneven brightness will not occur in the vertical direction 3 In the DI...

Page 50: ...on Note㧦 1㧚AES cannot be combined with a Video type lens 2㧚When not using an auto iris lens at the Lens menu set Lens Type to DC and Iris Mode to Manual 6dB to 24dB 0dB OPEN LIMIT CLOSE LIMIT to 1 100 000s AGC AUTO IRIS AES AGC range AUTO IRIS range DC type lens AES range AGC range AUTO IRIS range DC type VIDEO type lens AGC AUTO IRIS AES range AUTO IRIS range DC type lens AUTO IRIS AES AGC range ...

Page 51: ...ignal Store charge on CCD line A Video signal Store time 1 15 s Example WE signal In the field store mode both the CCD lines A and B are read out simultaneously After completion of storing video signal output is made on the next field Immediately before the field on which video signal output is made the WE signal is delivered from the D SUB connector equipped on the rear panel Even field CCD line ...

Page 52: ...LK CONTRST ON OFF IRIS 2 MENU controls All control items are set from menu Press the FUNCTION button of the remote control panel to produce the menu mode and display the MAIN MENU screen Again press the FUNCTION button to extinguish the menu screen and return to the direct mode Operate the menu with the UP DOWN LEFT and RIGHT buttons Note While pressing the UP button presses the FUNCTION button fo...

Page 53: ... SHUTTER CONTRAST 7 64 GAIN A WHT A BLK HIGH NORM LOW 8 4 F GAIN AUTO MEM PRESET 18 6 0 3 DTL IRIS WHIT MANU REMOTE AUTO EXTENDER FUNCTION PRESET STOR 1 2 3 4 SCENE FILE GAIN 0 BLACK M BLK IRIS CAMERA CONTROL PANEL RC Z3 BAR CAM 26 DTL switch 1 ULTRA 40 CONTROL switch ON red LED Normal camera control from LOCK red LED All controls and switch RC Z3 has locked at present settings except IRIS and M B...

Page 54: ... lights then flashes when the application file data are changed Flashing continues if the data are changed or the original value is returned When again pressed the button lights steadily 2 Setting data store The Store function is used to save the application file item data The common file item data are saved during adjustment and operation Store operation After entering the settings with the menu ...

Page 55: ...low adjusting Note When CAM MODE AUTO R B black cannot be adjusted ENABLE button ON Button lights to indicate R B gain and R B black adjustments are effective OFF Adjustments are ineffective when the ENABLE button is extinguished Note When CAM MODE AUTO the ENABLE button is ineffective TALLY CALL button TALLY CALL button lights when pressed However function is ineffective in the HV D30 camera SHUT...

Page 56: ...ET Optimum white balance at 3200 K and 5600 K color temperature Select between 3200 K and 5600 K in the menu mode at W PRST MODE of the MAIN MENU screen MEM Press the A WHT button for automatic white balance adjustment Select between 3200 K and 5600 K in the menu mode at W MEM MODE of the MAIN MENU screen AUTO White balance is automatically adjusted in real time ATW When the RC Z3 white balance mo...

Page 57: ... M BLK control Adjusts the master black level 2 Menu screen composition Camera settings other than the RC Z3 items can be customized using the main and special set menus The menu structure is same as one of camera 44 ...

Page 58: ...3 position For connection with the personal computer set SW806 to the RS 232C position At shipment from factory SW806 is set at the RS 232C position RC Z3 RS 232C SW806 2 SW401 For selection SYNC or HD VD output and GL or HD VD input of multi connector At shipment from factory SW401 is set at the OUT position SW401 IN OUT 45 ...

Page 59: ...put 2 G Y Y OUT 2 RXD SD input 3 B B Y VBS 3 TXD SD output 4 WE OUT 4 GND 5 GND 6 VIDEO GND Plug HR10A 7P 4P 7 VIDEO GND 8 VIDEO GND 9 UNREG 12V IN 10 TRIG IN 11 GND 12 RXD 13 HD IN HD OUT SYNC OUT 14 VD IN GL IN VD OUT 15 TXD 1 4 2 3 PLAG Housing KEC 15P Pin contact JK SP2140 Cover JK C151C 㧖Use M2 6 plug retaining screws 1 5 6 10 11 15 46 ...

Page 60: ...LENS connector D4 151N 100 DC IN connector R03 R3M2 Pin No Signal designation Pin No Signal designation 1 12V A GND 2 NC B 12V input 3 Control C NC 4 GND Plug E4 191J 100 Plug R03 P3F 1 2 3 4 A C B 47 ...

Page 61: ...zontal resolution 800 TV lines luminance signal center Y out and DTL off 10 S N NTSC 64 dB type DNR on 61 dB type DNR off PAL 62 dB type DNR on 59 dB type DNR off Y out ǫ 1 DTL off GAIN 0 dB 11 Standard sensitivity 2000 lx F9 5 12 Minimum illumination 0 9 lx 50 IRE F2 2 GAIN 24 dB DIGITAL GAIN 12 dB 13 Gamma correction 0 45 1 0 on off 14 Geometric distortion Full screen 0 not including lens charac...

Page 62: ...tion Field frame integration selectable NTSC 1 30 to approx 8 seconds 1 frame steps PAL 1 25 to approx 8 seconds 1 frame steps external image memory needed for continuous image Frame readout improves vertical resolution residual image response deterioration 23 Color bar NTSC SMPTE PAL Full 24 Power supply voltage 12 V rated Stable operation at 10 5 to 15 VDC ripple and noise absent 25 Power consum...

Page 63: ... to connected equipment A level converter JU C20 is required if controlling the camera from a personal computer via RS 232C interface over a distance more than approx 15 meter 2 Output signal ratings 1 Component video output VIDEO MULTI connector VBS 1 0 Vp p 75㱅 2 Y C output MULTI connector Y 1 0 Vp p 75ǡ C NTSC 0 286 Vp p burst 75ǡ PAL 0 3 Vp p burst 75ǡ 3 Component output MULTI connector Y 1 0 ...

Page 64: ...o RC Z3 JU C2 JU Z2 RS 232C level when connected to personal computer Note Set internal switches according to connected equipment 7 Lens iris control output Lens connector manual override IRIS CONT 1 5 V closed to 5 5 V open or 2 5 V closed to 7 5 V open Selectable 51 ...

Page 65: ...Major accessories Camera control box RC Z3 Camera Junction box JU Z2 RS 232C level converter JU C20 Dimensions 䌖䌉䌄䌅䌏 䌍䌅䌎䌕 䌐䌏䌗䌅䌒 䌒䌅䌍䌏䌔䌅 䌍䌕䌌䌔䌉 䌄䌃䇭䌉䌎 䌌䌅䌎䌓 䌁䌗䌂 䌆䌉䌌䌅 䌂䌁䌒 䋫 䋭 䌁 䌂 䌃 㪬 㪛 㪩 㪣 㪘㪪㪚 52 ...

Reviews: