


Manufactured under license from Dolby Laboratories. “Dolby” , “Pro Logic” and the double D symbol are trademarks of Dolby
Laboratories.
Confidential Unpublished Works. © 1992-1997 Dolby Laboratories, Inc. All rights reserved.
Gebruiksaanwijzing
Guía de operación
Bruksanvisning
Betjeningsvejledning
English ............................................. page 0
2
~
4
6
Français ........................................... page
4
7
~
9
2
Deutsch .....................................
...........S e
i t e
9
3
~
13
8
Italiano .......................................... pag. 1
39
~1
8
4
Nederlands .................................... blz. 1
8
5
~
23
0
Español .................................... página 2
3
1
~2
7
6
Svenska ......................................... sid. 2
7
7
~3
2
2
Dansk ............................................ side
32
3
~
36
8
Before operating please read all these instructions thoroughly.
Veuiltez lire ces instructions dans le détail avant de mettre l’appareil en fonction.
Bitte lesen Sie diese Bedienungsanleitung vor der Inbetriebnahme sorgfältig durch.
Prima dell’uso, leggere attentamente le seguenti istruzioni.
Lees deze gebruiksaanwijzing aandachtig door alvorens dit toestel in gebruik te nemen.
Antes de ponerlo en funcionamiento lea la totalidad de estas instrucciones.
Läs dessa anvisningar noga, innan du börjar att använda apparaten.
Læs venligst instruktionerne igennem, før De tager apparatet i brug.
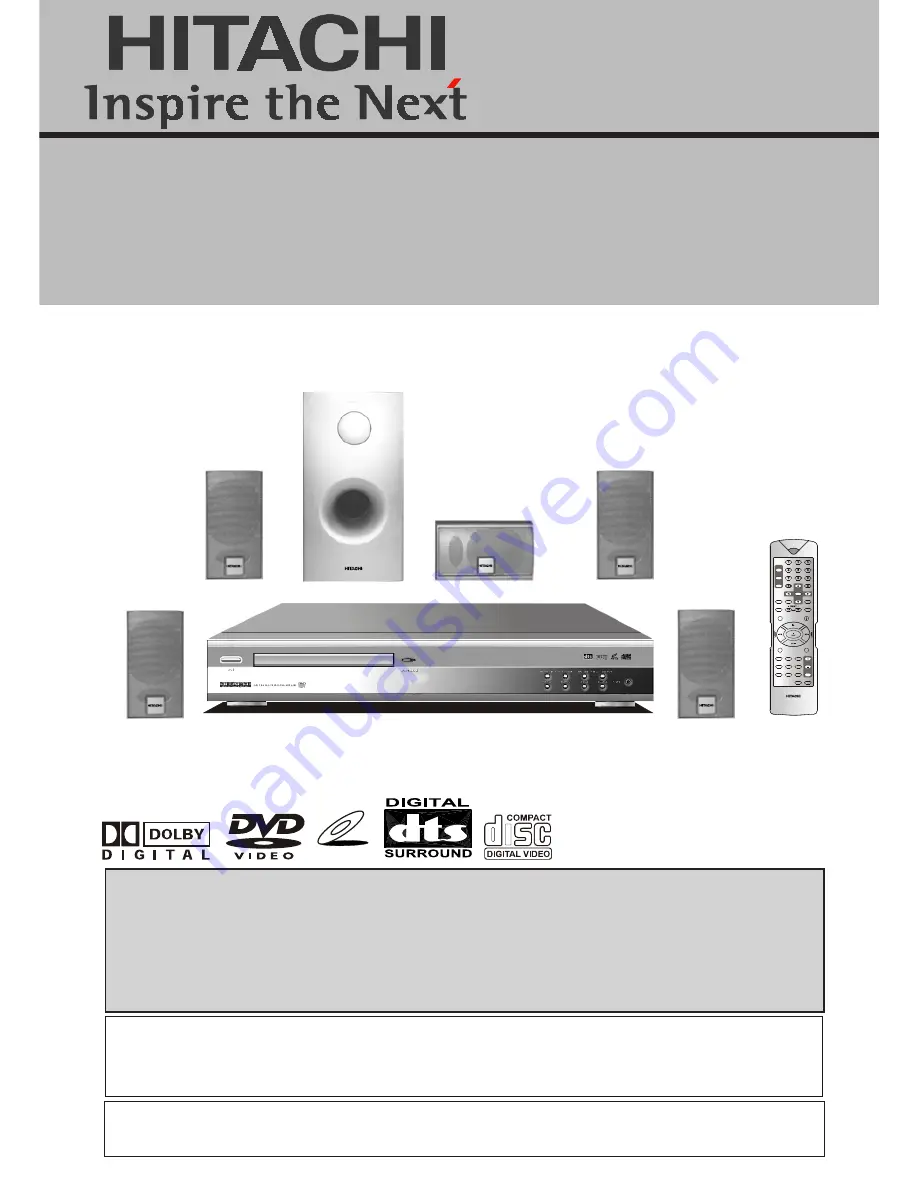
DVD DIGITAL THEATER SYSTEM
HTD-K160
DVD/VCD/CD PLAYER WITH
AV SURROUND RECEIVER
Instruction manual
Mode d’emploi
Bedienungsanleitung
Istruzioni per l’uso
This product incorporates copyright protection technology that is protected by method claims of certain U.S.
Patents and other intellectual property rights owned by Macrovision Corporation and other rights owners. Use of
this copyright protection technology must be authorized by Macrovision Corporation, and is Intended for home and
other limited viewing uses only unless otherwise authorized by Macrovision Corporation. Reverse engineering or
disassembly is prohibited.
VIDEO CD
STANDBY
DVD
TUNER
AUX
2
5
8
0
SLEEP
REPEAT
A-B
N/P
SETUP
TITLE
PLAY/PAUSE
OPEN/CLOSE
PROG
ENT
REMOTE CONTROLLER
RB-HTDK160
STANDBY
MENU/PBC
SL
OW/MEMORY
Zoom
EQ
Language
AUDIO
To
Return
DISPLAY
LISTENING
ADJ/VOL
SELECT
MUTE
Sub Title
ANGLE
Go


