

Contents
Before Use
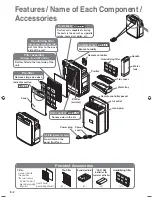
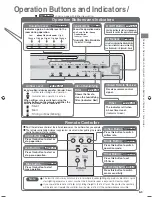
Features / Name of Each Component / Operation
Buttons and Indicators / Accessories · · · · · · · · ·
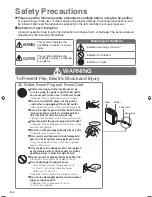
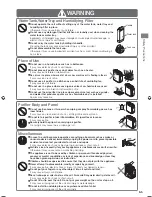
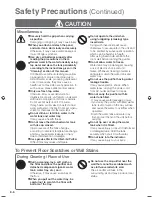
Safety Precautions · · · · · · · · · · · · · · · · · · ·
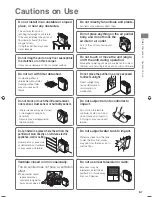
Cautions on Use · · · · · · · · · · · · · · · · · · · · ·
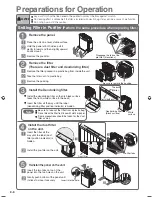
Preparations for Operation · · · · · · · · · · · · ·
·
Setting Filter in Purifi er
· · · · · · · · · · · · · · · · · ·
·
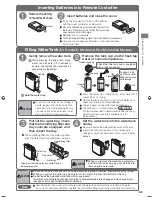
Inserting Batteries into Remote Controller
· · · · · · ·
·
Filling Water Tank
· · · · · · · · · · · · · · · · · · · · ·
Installation · · · · · · · · · · · · · · · · · · · · · · · · · ·
Operating Air Purifi er
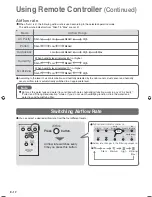
Using Remote Controller · · · · · · · · · · · · · ·
·
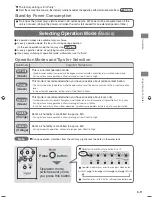
Starting Operation
· · · · · · · · · · · · · · · · · · · ·
·
Selecting Operation Mode
· · · · · · · · · · · · · · ·
·
Switching Airfl ow Rate
· · · · · · · · · · · · · · · · ·
·
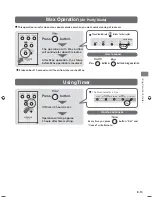
Max Operation
· · · · · · · · · · · · · · · · · · · · · ·
·
Using Timer
· · · · · · · · · · · · · · · · · · · · · · · ·
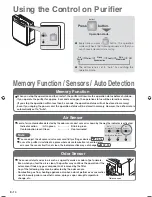
Using the Control on Purifi er · · · · · · · · · · ·
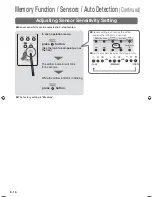
Memory Function / Sensors / Auto Detection· · · · · ·
·
Memory Function
· · · · · · · · · · · · · · · · · · · ·
·
Air Sensor
· · · · · · · · · · · · · · · · · · · · · · · · ·
·
Odor Sensor
· · · · · · · · · · · · · · · · · · · · · · · ·
·
Dust sensor
·
Humidity Sensor
· · · · · · · · · · ·
·
Auto Detection
· · · · · · · · · · · · · · · · · · · · · ·
·
Adjusting Sensor Sensitivity Setting
· · · · · · · · ·
Useful Feature · · · · · · · · · · · · · · · · · · · · · ·
·
Eco Operation
· · · · · · · · · · · · · · · · · · · · · · ·
·
Dimmer Control
· · · · · · · · · · · · · · · · · · · · · ·
Cleaning and Maintenance
Cleaning · · · · · · · · · · · · · · · · · · · · · · · · · ·
·
When the “Clean Humidifying Filter” Indicator Comes On
· · · · · ·
·
Water Tank
·
Humidifying Filter
· · · · · · · · · · ·
·
Replacing Humidifying Filter
· · · · · · · · · · · · ·
·
Water Tray / Tray Cover
· · · · · · · · · · · · · · · · ·
·
Pre-fi lter
· · · · · · · · · · · · · · · · · · · · · · · · · ·
·
Purifi er Body
·
Dust sensor
· · · · · · · · · · · · ·
Filter Replacement · · · · · · · · · · · · · · · · · ·
·
Replacement Interval
·
Precautions on Filter Handling
· · · · · ·
·
Replacing the Filter
· · · · · · · · · · · · · · · · · · ·
Alert Display · · · · · · · · · · · · · · · · · · · · · · ·
Troubleshooting Guide · · · · · · · · · · · · · · ·
Replacement Parts · · · · · · · · · · · · · · · · · ·
Specifi cations · · · · · · · · · · · · · · · · · · · · · ·
Read the “Safety Precautions” P.E-4
,
E-6
to ensure proper use.
E-2
E-4
E-7
E-8
E-8
E-9
E-9
E-10
E-10
E-10
E-11
E-12
E-13
E-13
E-14
E-14
E-14
E-14
E-14
E-15
E-15
E-16
E-17
E-17
E-17
E-18
E-18
E-19
E-20
E-20
E-21
E-22
E-23
E-23
E-24
E-25
E-25
E-28
E-28
Thank you for purchasing a Hitachi air
purifi er.
This air purifi er is for home use only. Do
not use it for any other purpose than air
purifying.
Please read this instruction manual
carefully before use to ensure proper
operation of the unit.
Keep this manual for future reference in
an easily accessible place.
I
n
struction
Manual
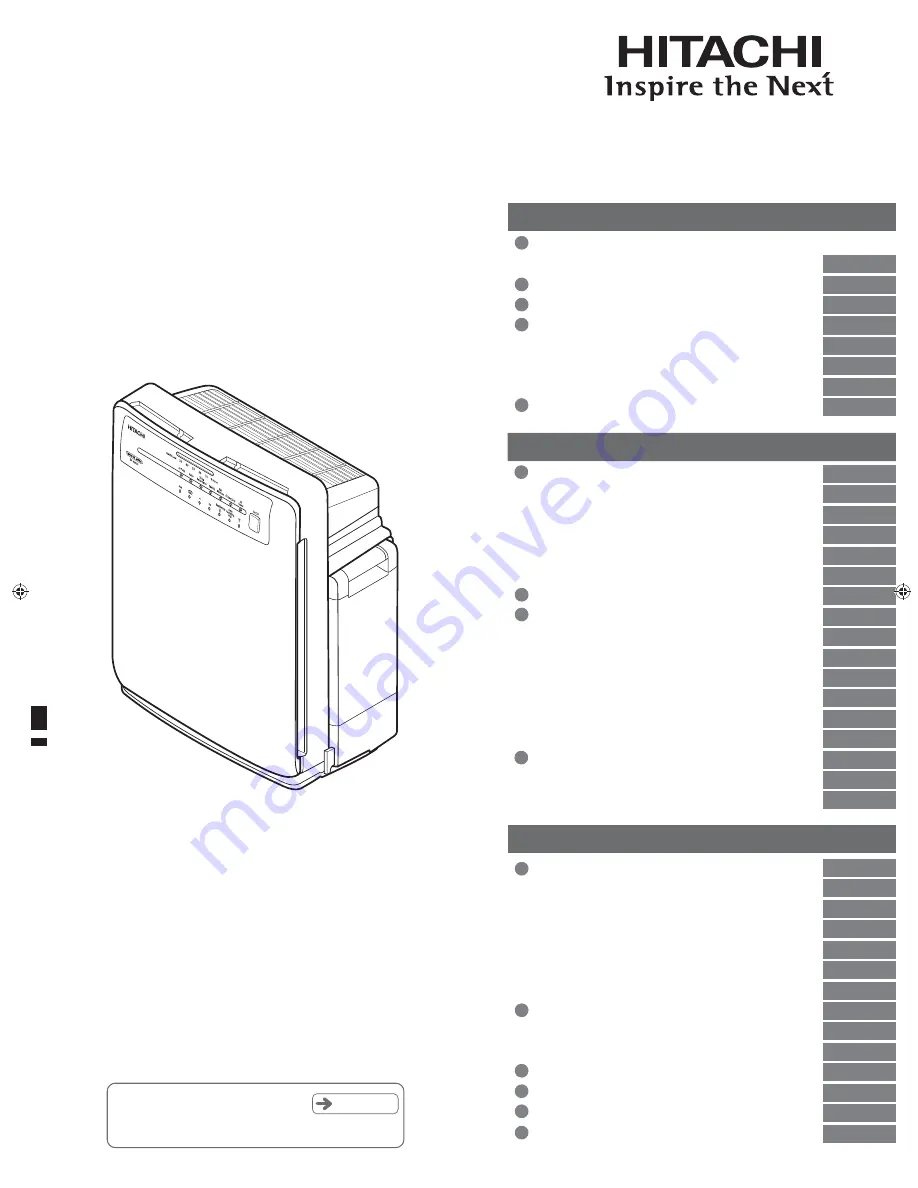
Hitachi Air Purifi er
with Humidifying Function
EP-A6000
Model
T_S-EP-A6000.indd 1
T_S-EP-A6000.indd 1
11/18/2011 11:20:31 AM
11/18/2011 11:20:31 AM


