background image

HITACHI AMERICA, LTD. 
UBIQUITOUS PLATFORM SYSTEMS 

900 Hitachi Way 
Chula Vista, CA 91914-3556 
Service Hotline: 1-800-HITACHI  
(1-800-448-2244) 

This manual was printed  
with soy based ink. 

HITACHI Camcorder PC Software Support Center 

URL http://dvdcam-pc.support.hitachi.ca/ 

Hitachi, Ltd. Japan 

Support Center phone numbers for software provided: 

PIXELA CORPORATION 
 +1-800-458-4029 (Toll-free) 
 +1-213-341-0163 
URL:http://www.pixela.co.jp/oem/hitachi/e/index.html 

Printed on recycled paper

Printed in Japan OY–Y (I)

QR76412 ©Hitachi, Ltd. 2008
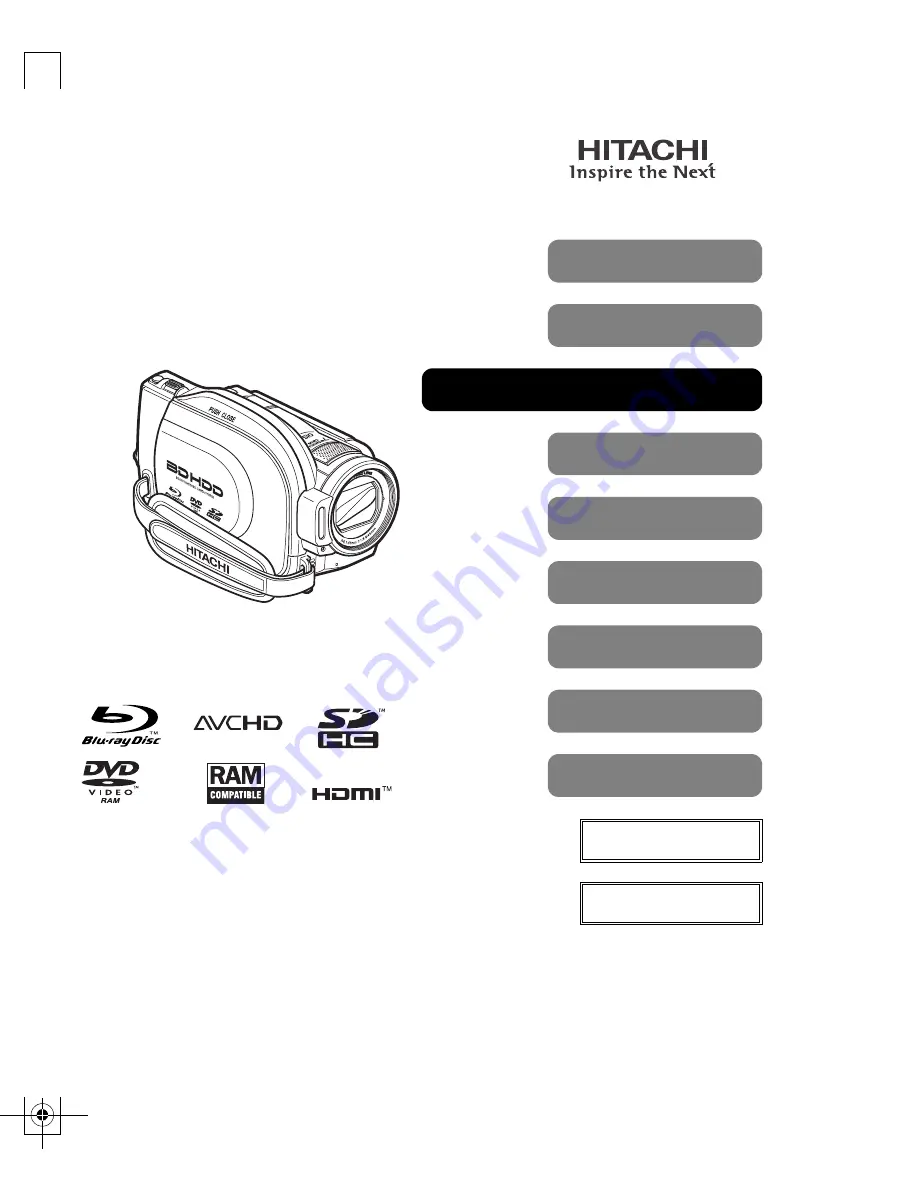
DZ-BD10HA

In

s

tructi

on Manual

Introduction

HDD/BD/DVD/Cards
Battery Pack

Various Recording 
Techniques

Dubbing on BD/DVD/
Card

Editing

Viewing on the 
Other Devices

Connecting to 
your PC

Additional 
Information

Instruction Manual

(English)

Thank you for purchasing this Hitachi Camcorder.
Please read this Instruction Manual to understand its proper use.
After reading the Instruction Manual, store it safely.

Let’s Get Started
Recording — Viewing

DZ-BD10HA

QUICK GUIDE

DZ-BD10HA_USe0100_Cover_Print.fm  Page 1  Monday, August 4, 2008  3:43 PM

Summary of Contents for DZ-BD10HA

Page 1: ...ting Viewing on the Other Devices Connecting to your PC Additional Information Instruction Manual English Thank you for purchasing this Hitachi Camcorder Please read this Instruction Manual to understand its proper use After reading the Instruction Manual store it safely Let s Get Started Recording Viewing DZ BD10HA QUICK GUIDE ...

Page 2: ...ON IF BATTERY IS INCORRECTLY REPLACED REPLACE ONLY WITH THE SAME OR EQUIVALENT TYPE WARNING TO PREVENT FIRE OR SHOCK HAZARD BE SURE TO USE THE SPECIFIED AC ADAPTER CHARGER DZ ACS2 CAUTION RISK OF ELECTRIC SHOCK DO NOT OPEN This symbol warns the user that uninsulated voltage within the unit may have sufficient magnitude to cause electric shock Therefore it is dangerous to make any kind of contact w...

Page 3: ...vice must accept any interference received including interference that may cause undesired operation Note This equipment has been tested and found to comply with the limits for a Class B digital device pursuant to Part 15 of the FCC Rules These limits are designed to provide reasonable protection against harmful interference in a residential installation This equipment generates uses and can radia...

Page 4: ...iers 9 Protect the power cable and cord from being walked on or pinched particularly at the plugs power outlets and at connection points to the camcorder 10 Only use the attachments and accessories specified by the manufacturer 11 Use the camcorder only with a cart stand tripod bracket or table specified by the manufacturer or sold with the camcorder When using a cart to move the camcorder use cau...

Page 5: ...ery pack 33 Playing Recorded Movies Stills 34 Choosing and playing back multiple scenes 35 Jumping to the designated scene 36 Adjusting speaker volume during movie playback 37 Information display during playback 37 Simple functions you can use during playback or playback pause 38 Playing still pictures on a card automatically Slide Show 39 Capturing a still picture from a movie PHOTO Capture 40 Pl...

Page 6: ...ur TV for Viewing 73 Connecting to a TV 73 Adjusting the camcorder s output settings according to your TV 74 Viewing on your TV 75 Viewing on Other Players Recorders 76 Before Playing Back a BD DVD on Another BD DVD Recorder Player Finalizing 76 Finalizing a Disc 77 Unfinalizing a Disc 78 Software installation 80 Before importing scenes from BD R DVD RW DVD R to your PC 81 Connecting the camcorder...

Page 7: ...all of the following possible Stills Movies Record movies and stills with this one device View on large screen by hooking up the camcorder to a TV Store the recordings Create a gift disc Select a disc easily Various media HDD BD DVD SDHC card You can easily figure out what can be recorded to which medium Press to solve your questions After recording After Watching View on the TV Disc selection is ...

Page 8: ...extended periods is possible Youcandelete edittheimageson HDD Card using this camcorder After recording or editing the images recorded on HDD Card can be dubbed to BDs Cards Image degradation from dubbing will not occur After recording or editing the imagesrecordedonHDD Cardcan also be dubbed to DVDs image quality will be standard SD One hour length 1920 1080 Full High Definition movie can be reco...

Page 9: ... time recording Playable on devices that are compatible with 8 cm DVD RAM or 8 cm DVD RW VR mode accordingly DVD RW VR mode DVD RW VF mode DVD R DVD RAM Playable on most other DVD players recorders once they are finalized after recording Re recordable YES Do you want to play the disc on a DVD player recorder For details refer to the standards stated in Recording format p 111 ...

Page 10: ... specifications is not supported How to Read this Instruction Manual Movies Stills SDHC memory card 4 GB 32 GB 4 GB 32 GB SD memory card 1 GB 2 GB 32 MB 2GB HDD BD R RAM RW VR R RW VF BD RE CARD Collective term Icon Media HDD Built in hard disk drive HDD BD BD RE Rewritable Blu ray Disc BD R Non rewritable Blu ray Disc DVD DVD RAM DVD RW VR mode DVD RW VF Video mode DVD R Card SDHC memory card SD ...

Page 11: ...SS indicator p 14 is lit do not subject the camcorder to strong vibrations or impacts Caution should be particularly observed while the indicator remains lit for a while after the end of recording About BD DVD We recommend using Hitachi Maxell brand discs The compatibility of the discs with this camcorder is confirmed If there is concern that the camcorder may be subjected to large vibrations or i...

Page 12: ...ding or editing Be sure to turn the power switch to OFF first and detach the AC adapter charger or battery pack Hitachi cannot compensate for any damages caused when recording is not made normally or recorded contents cannot be played back because of a defect in the camcorder disc or card Also Hitachi cannot be responsible for your recorded video and audio In the event that your camcorder is sent ...

Page 13: ...this battery away from children If swallowed consult a physician immediately for emergency treatment Power cable Connects the AC adapter charger to the AC outlet AV cable Use this cable to view images from the camcorder on a TV Or output the images and sound to another video recording device Component cable Use this cable when a component terminal is equipped on your TV Use the AV cable for audio ...

Page 14: ... 29 BD DVD indicator p 28 HDD indicator p 27 PHOTO button p 29 Movie Stills switch p 27 ACCESS indicator p 11 23 30 Disc compartment p 27 Face Detection button p 50 BATT battery eject switch p 26 Battery platform p 18 A V OUT terminal p 74 Cooling fan inlet A ventilation fan operates to reduce heat buildup during the camcorder use Do not obstruct the cooling fan inlet DISC EJECT switch p 27 Record...

Page 15: ... revealing the optical 10x zoom lens Lens hood Stereo microphone Do not block the microphone with your hand during recording Zoom lever volume p 37 44 Card slot p 29 CARD ACCESS indicator p 30 Flash p 52 Light receiving sensor Used to control flash amount Do not block the light receiving sensor with your hand when recording still pictures Cooling fan outlet Aventilationfanoperates to reduceheat bu...

Page 16: ...reverse skip button p 34 38 c forward search button p 34 38 Confirmation button p 34 38 C stop cancel button p 41 e forward skip button p 34 38 While inserting a thin tipped instrument paperclip etc into the hole marked PUSH swing the battery holder arm out Insert the lithium battery with the positive terminal facing down Slide the cover to close it Battery holder Warning BATTERY MAY EXPLODE IF NO...

Page 17: ...is turned on while being powered from an AC power outlet the LCD Brightness setting will be reset to the brightest About the LCD monitor display when recording yourself the lens and LCD monitor are facing you The LCD monitor displays a mirror image of the subject The remaining battery charge indicator will only appear when battery power is almost gone The battery charge indicator flashes red in th...

Page 18: ... the battery pack Charge Status CHARGE indicator CHARGE indicator During charge lit For details on charging time see p 25 Charge complete Unlit Terminal at bottom Note Charging will not occur if the DC power cord is connected If the CHARGE indicator does not light check that the connections are firmly connected CHARGE indicator Notes Charge battery pack in temperatures above 50 degrees F 10 degree...

Page 19: ...Let s Get Started Turning on the power 1 Turn on the power 2 Open the LCD monitor SD CARD DISC EJECT MODE OFF ON ACCESS PHOTO MENU SELECT 1 2 Press and hold the lock button and turn the power switch to ON ...

Page 20: ... Set 10 1 2008 10 00 AM MOVE CHANGE RETURN Set the month date year hour minute and AM PM using the joystick and then press the confirmation button The set time and date appear in the LCD monitor The confirmation button press firmly Open the LCD monitor p 17 Press MENU Select Date Setup then Date Set using the joystick For instructions on how to use the joystick see p 34 Initial Setup u ENTER EXIT ...

Page 21: ...ies with the medium type 2 Must be finalized Not playable on some devices 3 As finalizing is unnecessary cannot be performed additional recordings are possible at any time 4 To make additional recordings the finalized disc must be unfinalized 5 The provided software is used 6 Finalize the disc to edit on a PC 7 A DVD VR disc can be created 8 A DVD video disc can be created Usable discs and their l...

Page 22: ...y including fingerprints or scratch the surface of the discs when handling When using a double sided disc take great care with handling it Using non Hitachi Maxell discs may not allow the camcorder to deliver optimum performance DVD housed in a square cartridge caddy case or a round DVD holder cannot be used as is The DVD must be removed from its case holder before it can be used Note on BD R DVD ...

Page 23: ...h your hand Place the recording surface of the BD DVD face down then push down on the center of the BD DVD until it clicks into place For single sided discs the side opposite the label is the recording surface To record on the other side for double sided discs remove the disc p 24 flip it over and reload it Notes The disc mechanism will be very hot immediately after use Do not touch the metallic a...

Page 24: ...ly on the center hub with a finger grip the edge of the disc by your thumb and lift the disc out as shown MENU SELECT The confirmation button Note Be careful that the power is not accidentally cut off during formatting Otherwise the disc will become unusable When using a BD RE BD R Formatting will start Skip step When using a DVD RW Proceed to step VR Mode After recording you can perform various e...

Page 25: ... BD DVD Card DZ BP14S supplied DZ BP14SW sold separately 80 70 80 40 35 40 DZ BP21SW sold separately 120 105 120 60 50 60 Lights Charging Goes out Charge Complete Blinks See Troubleshooting p 97 Approx charging time at approx 77 F 25 C DZ BP14S supplied approx 2 hours 45 minutes DZ BP14SW sold separately DZ BP21SW sold separately approx 3 hours 55 minutes Notes In low temperature environments reco...

Page 26: ...y should be replaced Purchase a new one Power Save function To save power do not leave the camcorder in recording pause mode for too long Even during recording pause battery power is consumed at about the same level as during recording By turning the power save function On the camcorder will automatically turn off if left idle for approximately five minutes in recording pause mode For power save f...

Page 27: ...1 Insert a BD DVD Turn the power switch to MODE until the HDD indicator lights SD CARD OFF ON MODE SD CARD ON OFF MODE CARD EJECT ACCESS PHOTO DISC EJECT Attach the charged battery pack When handling a disc Do not touch the recording surface of a disc p 11 Place the recording surface of the BD DVD face down For single sided discs the side opposite the label is the recording surface Recording ...

Page 28: ...gain CARD ON OFF MODE CARD EJECT MODE ON OFF SD CARD PHOTO ACCESS Turn the power switch to MODE until the BD DVD indicator lights Hint If the format confirmation screen appears after loading a new BD RE BD R DVD RW format the disc as guided through the LCD screens p 24 Formatting is not necessary when recording on a DVD RAM DVD R ...

Page 29: ...use recording press the record button again When recording stills Press PHOTO Press PHOTO halfway down so that a subject in the center of the screen is focused Fully press PHOTO to record Single press of the PHOTO button of the remote control enables focusing and recording at the same time Turn the power switch to MODE until the SD CARD indicator lights SD CARD MODE ON OFF ON MODE OFF SD CARD MODE...

Page 30: ...D BD DVD Card capacity and number of remaining recordable pictures p 112 Notes Do not detach the AC adapter charger or battery pack from the camcorder during recording The recorded scene will be lost The CARD ACCESS indicator remains flashing for a while even after you finish recording While the CARD ACCESS indicator is flashing or when a message appears on the display reporting that the recording...

Page 31: ...ay reappear press C On Screen Information See the next page for details DISPLAY HDD Access REM 53MIN Program AE White Balance Backlight Compensation Optical Image Stabilizer OIS Face Detection Movie Quality Zoom Exposure Manual Focus Self Timer Flash MIC Filter HDMI audio output Remaining battery level Current time date p 20 The above display is for explanation and different from the actual displa...

Page 32: ...Portrait Sand Snow Spotlight Low Light White Balance p 48 No icon Auto Set Indoor 1 Outdoors Indoor 2 Backlight Compensation p 47 On No icon OFF Optical Image Stabilizer OIS p 50 On No icon OFF Face Detection p 50 when using HDD BD Card No icon Off On Unavailable Appears when recording with digital zoom HD movie recording quality p 54 when using HDD BD Card HX High quality HS Extended recording HF...

Page 33: ...tdown Flash p 52 when using Card No icon Auto Flash On Flash Off MIC Filter when recording Movies p 51 No icon Off On HDMI audio output p 73 In case of the HDMI connection audio signals are output only while playback No icon Audio signals are output No audio signals are output Remaining battery level p 25 Recording status Recording Recording pause lit green Focus is locked lit purple when using Ca...

Page 34: ...c navigation screen To promptly return to the disc navigation screen press C or To return to recording pause mode press C or again If you press the confirmation button while i is displayed playback starts from the first scene HDD BD R RAM RW VR R RW VF BD RE CARD Disc Navigation All Scenes PLAY DESELECT ALL 10 1 2008 0001 0027 10 10 10AM HX 1hour 3min 30sec Select 1 Bar graph Currently selected sc...

Page 35: ...tarting point select multiple previous or succeeding consecutive scenes Press and hold SELECT until the cursor frame becomes blue Choose a final scene by pressing d c f e then press the confirmation button to confirm the setting Select all scenes from the first scene to the current scene Menu option Start Current Press MENU select Scene by pressing c then select Select by pressing f e Press c or t...

Page 36: ... point by time by pressing f e d c f To select the beginning e To select the end d c once To move the cursor one minute back or forward for HDD ten seconds for BD DVD Card one still for card Go To Go To END RETURN CURRENT TOP ENTER Position of currently played back image Total recording time of all selected scenes Cursor Cursor position Press and hold d c To move the cursor in ten minutes incremen...

Page 37: ...ded on a device other than this model is loaded HDD BD R RAM RW VR R RW VF BD RE CARD Decreases the volume Increases the volume HDD BD R RAM RW VR R RW VF BD RE CARD Movie Stills Current medium HDD BD DVD Card 3 Counter Playback operation 5 Repeat play 4 Date Playlist No 2 Scene No Playback condition All Scenes Date Playlist 1 When playing movies When playing stills Scene No File name Slide Show 4...

Page 38: ...e If you press e while the last scene is playing back playback is paused at the final frame of the last scene Continuous skipping e Forward f Reverse and hold HDD BD R RAM RW VR R RW VF BD RE CARD HDD BD R RAM RW VR R RW VF BD RE CARD Functions Press Frame by frame playback forward reverse c Forward d Reverse No sound will be heard Frames are advanced in intervals of approx 0 03 seconds and revers...

Page 39: ...ss MENU on the disc navigation screen p 34 Select Playback Setting by pressing f e then press c Select Slide Show and press c to select On Press MENU to return to the Disc Navigation Screen and select a still picture scene Functions Press Playing previous or later scenes stills e c Forward f d Reverse Each time you press e c or f d the next or previous still is shown If you continue pressing still...

Page 40: ...itable for images with fast moving subjects Frame Suitable for images with slow moving subjects The captured photo will be in high image quality but image can easily be blurred Playing back scenes repeatedly Repeat Play If a range of scenes or just one scene is specified p 35 playback of the specified scenes will be repeated Press MENU on the disc navigation screen p 34 Select Others by pressing f...

Page 41: ...era Functions Setup ENTER EXIT ENTER EXIT ENTER RETURN Auto Auto On White Balance 40x Off Off HX HD Video Mode Quick Start On The title of the selected icon on the left appears at the top Press up down to move the cursor up or down Camera Functions Setup White Balance a white balance mode Current settings appear first After selecting one of the setup items its options appear To cancel exit and ret...

Page 42: ... 74 LCD Setup LCD Adjust p 42 Date Setup Date Set 1 1 2008 12 00 AM p 20 Date Mode M D Y p 43 Initial Setup Beep On p 42 Power Save Off p 42 Record LED On p 53 Language English p 20 Demo Mode Auto p 43 Reset p 42 Menu items Explanation of functions LCD Adjust Color Level Adjusts the color level of the LCD monitor Beep Select Off to turn off the beeps that sound when any button is pressed Power Sav...

Page 43: ...ff for 24 hours About the demonstration function At time of purchase of this camcorder this function is set to Auto A demonstration starts automatically when you turn the camcorder on using the AC adapter charger as a power source and leave it idle for more than approx ten minutes without inserting a medium BD DVD Card To cancel the demonstration press any one of the camcorder buttons Changing the...

Page 44: ...lephoto Magnifies recording W Wide angle Recording over a wide range Recording at Close Range Macro Recording When you record a small subject at close range you can bring the lens surface as close as approx 13 16 2 cm to the subject This will allow you to enlarge the subject to cover the entire screen 1 Point the camcorder at the subject and push the zoom lever toward the W side until the wide ang...

Page 45: ...e at the T telephoto side will be from approx 9 84 feet 3 m to infinity When the white balance doesn t function adjust the white balance manually p 49 Adjusting the Focus Manually Manual Focus If it is difficult to adjust the focus automatically you can adjust it manually Manual Focus See also the hints on p 46 When you zoom while the conversion lens is attached the four corners of the screen may ...

Page 46: ...automatically adjusted However depending on the recording conditions the exposure can be adjusted manually Hints To manually adjust the focus always push the zoom lever toward the T telephoto side to magnify the subject This prevents blurred images when you switch to wide angle zooming If you wish to adjust exposure while focusing manually press f The exposure bar lights in orange To return to man...

Page 47: ...le adjusting exposure press e The manual focus icon lights in orange To return to exposure adjustment press f HDD BD R RAM RW VR R RW VF BD RE CARD 1 During recording pause or recording press BLC The backlight compensation icon appears in the LCD monitor Each time you press BLC the backlight setting turns On or Off The backlight compensation icon appears only when this function is On When the powe...

Page 48: ...ay appear if the subject is moving or if camera shake occurs Use a tripod for best results Adjusting the Color White Balance Light is required when recording subjects While the naked eye perceives colors as they are images recorded by a camera may appear redder or bluer than they actually are To record white colored subjects as white images adjust the white balance The camcorder normally adjusts t...

Page 49: ...ur recording Infrared sensor 1 Point the camcorder at the white object so that it fills the screen 2 During recording pause press MENU 3 Select Camera Functions Setup White Balance Set 4 Press the confirmation button flashes in the LCD monitor 5 Press the confirmation button again and continue holding the button down until stops flashing and lights steadily The white balance setting is complete 6 ...

Page 50: ...W VR R RW VF BD RE CARD Using the Face Detection Face Detection automatically recognizes up to five faces and shows them in green frames 1 Press When the function is turned On appears in the LCD monitor p 31 Face Detection is retained in memory even when the power is turned off Recording with digital zoom disables Face Detection even if it is set to On When recording with digital zoom p 44 appears...

Page 51: ...ons as a face Some filming photographing environments may not allow Face Detection to work properly In this case turn Face Detection Off Displaying Recording Guidelines Auxiliary Line You can display recording guidelines to help compose your shots 1 During recording pause press MENU 2 Select Camera Functions Setup Auxiliary Line On Off 3 Press the confirmation button to confirm then MENU to end Wh...

Page 52: ...ing mode Auto p 47 White Balance Auto p 48 OIS Optical Image Stabilizer On p 50 MIC Filter Off p 51 Face Detection On p 50 HDD BD R RAM RW VR R RW VF BD RE CARD 1 During recording pause or recording press FULL AUTO FULL AUTO appears in the LCD monitor for a while and the settings are reset to their default settings Using the Flash As shutter speed will slow down when still photos are recorded in d...

Page 53: ...he flash may not be sufficiently adjusted if the distance to the subject is too distant or too near When recording consecutive shots using the flash the flash may not fire or the amount of light emitted may not be sufficiently adjusted Do not emit the flash close up in front of a person s eyes Turning Off the Recording Indicator Beneath the Lens You can turn the indicator off when recording throug...

Page 54: ...n to view stills on a widescreen TV aspect ratio 16 9 you can select Wide 16 9 to change the screen ratio for recordings Normal 4 3 sets the screen ration to 4 3 HDD BD R RAM RW VR R RW VF BD RE CARD CARD 1 During still picture recording pause press MENU 2 Select Record Functions Setup 16 9 Wide 16 9 or Normal 4 3 3 Press the confirmation button to confirm then MENU to end The Wide Mode setting is...

Page 55: ...r is set and q10 appears in the LCD monitor p 31 4 Press PHOTO halfway to adjust the focus then press it all the way down A countdown starts In the LCD monitor the countdown is shown as follows q10 q9 The photo will be recorded about 10 seconds later During countdown the recording indicator on the lens side also flashes To cancel the countdown and return to q10 press PHOTO or C The Self Timer is s...

Page 56: ...y Before you begin z Prepare a recordable disc or card p 21 22 z Be sure to use the AC adapter charger to power the camcorder during dubbing z During a single dubbing dubbing to different media BD DVD discs and cards is not possible To dub to multiple discs or cards prepare either multiple BD discs multiple DVD discs or cards of the same type Original data HDD High Definition Card High Definition ...

Page 57: ... z Dub marks do not appear for the thumbnails when scenes are dubbed from a locked card onto a BD DVD disc z Set the Category to Un Dubbed if you wish to select only the scenes on the HDD Card that has not been dubbed yet z You must finalize a BD R DVD RW VF mode DVD R dubbed on this camcorder before playing it back on a BD DVD recorder player This camcorder lets you finalize the disc after dubbin...

Page 58: ...m the camcorder during dubbing The recorded scenes will be lost z The time shown during dubbing is approximate z We recommend first confirming that the dubbed disc or card can be played back normally before deleting scenes on the HDD Card dubbed Dubbing 1 ConnecttheACadapter charger to the camcorder p 25 Dubbing is not possible if a battery pack is used as a power source 2 Turn the power switch to...

Page 59: ...nfirmation button 11 Select Execute then press the confirmation button Dubbing starts SELECT Dubbing Select All Scenes ENTER RETURN 10 1 2008 0010 0027 10 10 10AM HX 1hour 3min 30sec SEL 12 When another disc or card is needed to continue dubbing a message screen requesting another blank disc or card appears Replace the disc or card with a new one 13 After the dubbing is complete the confirmation s...

Page 60: ...set Category You can use New dubbing again by clearing the dub mark DisplayingonlyDubbedor Not Dubbed Scenes Category 1 Press then press MENU 2 Select Others Category a Category option 3 Press the confirmation button The Category setting will return to All if you exit the disc navigation screen Clearing the dub marks on Thumbnails MARK OFF 1 Press 2 Choose a scene for which you want to clear the d...

Page 61: ...an original movie by changing the playback order of scenes p 63 Initialization z z z z z z z You can delete all data recorded on the HDD BD DVD Card p 71 Protection z z z You can protect a disc to prevent deletion or editing by mistake p 72 Unprotection z z z You can cancel the protection p 72 Remaining display Capacity z z z z z z z z z The remaining recordable movie time or number of recordable ...

Page 62: ...playlist is displayed 3 This menu item appears only while playlist is displayed HDD Setting Disc Setting BD DVD SD Card Setting Finalize Disc p 77 BD RE DVD RW only Unfinalize Disc p 78 BD RE only Format HDD Disc SD Card p 71 Protect BD DVD only p 72 Unprotect BD DVD only p 72 Capacity p 72 Update Control Info p 101 Full Format p 109 HDD only Others Repeat Play p 40 On Off Category p 60 HDD Card o...

Page 63: ...the confirmation button The Date Select screen appears 3 Select the date you want to watch then press the confirmation button The disc navigation screen of the selected date will appear HDD BD R RAM RW VR R RW VF BD RE CARD Hints Pressing C on the Date Select screen will restore the disc navigation screen If you recorded movies in different Video Mode settings on the same day or load a disc record...

Page 64: ...rom the HDD or disc Likewise editing scenes on a playlist will not affect the original data scenes If a scene has the fade setting or a dub mark that information will also be added to the playlist You can add other scenes or remove unnecessary scenes to from the created playlist see p 64 p 65 Notes If free space available on the HDD BD DVD Card is insufficient creation of a new playlist may not be...

Page 65: ...ition Hint Pressing C in the middle of adding scenes will display the exit confirmation screen Select Yes to exit Select No to restore the Edit Playlist screen 1 Press then press MENU 2 Perform steps 2 4 in Adding scenes to a Playlist Edit p 64 3 Press e to move the cursor to the lower row then choose a scene you wish to delete by pressing d c You can also choose multiple scenes p 35 4 Press the c...

Page 66: ... appears 3 Select the playlist you wan to delete then press the confirmation button The targeted playlist screen appears 4 Press MENU then select Playlist Delete then press the confirmation button After deletion the disc navigation screen will be restored To quit deletion press C instead of the confirmation button Deleting Scenes Edit Delete 1 Press 2 Select the scene you want to delete then press...

Page 67: ...e disc divide the scene first then delete the unnecessary part Notes After deleting scenes the remaining free space of the HDD BD DVD Card may not show any increase in the HDD disc or card remaining space indicator The locked scenes Stills on a card cannot be deleted p 69 HDD RAM RW VR BD RE 5 Select Yes then press the confirmation button The selected scene will be divided then the display will re...

Page 68: ...irst p 63 then combine such scenes on the Playlist You cannot add movies recorded in different HD Video Mode settings If you combine scenes both with and without dub marks the dub mark will not appear on the combined scene Adding Special Effects Edit Fade 1 Press 2 Select the scene you want to apply a special effect to then press MENU You can also choose multiple scenes p 35 3 Select Scene Edit Fa...

Page 69: ...in the scenes for which fade in or fade out has been set Disc Naviga All Scenes OUT IN Notes If a BD DVD disc with a special effect created on this camcorder is played on another BD DVD reorder player or the scene is captured on a PC the special effect will not be reflected When dubbing on a BD R DVD RW VF mode DVD R disc p 56 the special effect will not be reflected Go To 1 Press then MENU 2 Sele...

Page 70: ...d HDD BD R RAM RW VR R RW VF BD RE CARD 3 Select Scene Detail then press the confirmation button The detailed information of the scene appears 1 Not displayed with BD R DVD RW VF mode DVD R discs 2 Dubbed appears only when you selected a scene from the HDD Card Movies with a dub mark on its thumbnail 3 Not displayed with BD DVD Card recorded on another device 4 Will not appear if the loaded card d...

Page 71: ... VF BD RE CARD Note Formatting will delete all the recorded contents on the HDD disc or card All movies and still pictures will be deleted from the card 1 Insert the medium you want to format except for the HDD 2 Press then press MENU 3 Select HDD Setting or Disc Setting or SD Card Setting For HDD Setting select Format HDD then press the confirmationbutton Likewise for Disc Setting select Format D...

Page 72: ...ng repeat the same steps to select Unprotect Disc in step 3 RAM RW VR BD RE Hint To protect a card lock its erasure prevention switch p 22 Checking the Remaining Recording Capacity 1 Insert the medium you want to check except for the HDD 2 Press then press MENU 3 Select HDD Setting Disc Setting or SD Card Setting Capacity then press the confirmation button The information of the chosen medium appe...

Page 73: ...wling from your TV speakers Insert the connector cables straight into the terminals Inserting them at an angle may cause the terminals to break HDMI HDMI Mini to Standard Cable sold separately To HDMI OUT terminal Notes 1080i signals are output from the camcorder s HDMI OUT terminal When the camcorder is connected to a TV which is not compliant with 1080i signals the message Playback error has occ...

Page 74: ...ponent Output by pressing f e then press c Select either 1080i or 480i by pressing f e then press the confirmation button to confirm the setting Not to be connected To A V OUT terminal To COMPONENT terminal A V cable supplied Component cable supplied R L Audio Input Component Input white red Do not connect anything to the camcorder s HDMI OUT terminal green blue red yellow Do not connect anything ...

Page 75: ...are connected to a TV at the same time the image will be output from the COMPONENT terminal only Hints Volume can be adjusted on your TV When operating the camcorder while viewing your TV screen using the supplied remote control is convenient However if you are using other Hitachi brand A V devices they may be operated by the camcorder s remote control Notes If you have a wide screen TV screen rat...

Page 76: ...at supports 8 cm DVD RAM DVD RW VR mode without finalizing it About DVD RW VR Mode Discs z A DVD RW VR mode disc can be played back on a DVD recorder player that supports DVD RW VR mode without finalizing it z Before importing scenes to your PC from DVD RW VR mode you need to finalize the disc using the disc navigation screen on the camcorder z You can use a finalized DVD RW VR mode disc for recor...

Page 77: ...but not finalized on a recorder manufactured by a company other than Hitachi into this camcorder Doing so may make the disc unusable You must finalize a disc recorded dubbed on this camcorder before playing it back on a player recorder or on a PC Note that no further recording dubbing is possible for a finalized BD R DVD R Likewise no further recording dubbing is possible for a finalized BD RE DVD...

Page 78: ...D player SELECT Disc Navigation All Scenes PLAY 10 1 2008 0010 0027 10 10 10AM SF 1hour 3min 30sec EXIT SEL Finalized BD DVD Notes If the disc in the camcorder has already been finalized Finalize Disc does not appear in the menu The time required to finalize that appears on the Finalize Disc screen is only for reference In case of a DVD R it takes longer to finalize it if recording length is short...

Page 79: ...SP2 or greater Microsoft Windows Vista 32 bit Edition PC IBM PC AT computer one of the above OS pre installed CPU Intel Pentium 4 2 4 GHz Processor or greater Intel CoreΤΜ 2 Duo 2 13 GHz or greater is recommended Memory 512 MB or greater Minimum 1 GB is recommended for Windows XP 2 GB for Windows Vista HDD 300MBof freespace necessary to install the application At time of DVD creation approx 3 time...

Page 80: ... Confirm the software license agreement Read the software license agreement carefully If you agree with the terms select I accept the terms of the license agreement then click Next 6 Select the installation destination If there is no change to the installation destination click Next If you wish to change the installation destination click Change and specify the installation destination then click ...

Page 81: ... monitor goes out and the camcorder PC connection begins The camcorder is automatically recognized from the PC After recognition there are occasions when you will be required to restart the PC In this case restart the PC according to the indicated instructions USB cable supplied USB terminal on the PC To USB terminal Notes Be sure to turn on the camcorder power when connecting it to a PC You canno...

Page 82: ...the disc you are using you can use the disc as is Before terminating PC connection removing USB cable and changing the power switch setting Note Do not directly handle the files on the HDD BD DVD Card in the camcorder using Windows Explorer Doing so may cause your valuable image data to be lost and damage to the medium and thus the medium becomes unusable Please use the supplied software 1 Detach ...

Page 83: ...ITACHI window Copying images recorded on the camcorder to your PC and playing them back ImageMixer 3 AVCHD Edition for HITACHI allows you to transfer movies and stills recorded on the camcorder to your PC and to play them back 2 Select USB mass storage device Drive E and click STOP The drive name E etc will differ according to your PC 3 Confirm the device again and click OK Detach the USB cable Us...

Page 84: ...PC To select multiple files click on the thumbnails while holding down the Shift key to select consecutive files Or to select nonconsecutive files hold down the Ctrl key and click another thumbnail The images are stored in the IMxLibrary folder in My Documents To change the image storage location select Settings Preferences then change the Library destination settings from the ImageMixer 3 AVCHD E...

Page 85: ...m right corner of the window Using Table 1 as a reference select a creation list suited to the medium you inserted into the disc drive or the card slot in step 2 Click Created list 4 Set up the disc you are creating Double click on the created list to display a list setup screen Set the image quality and menu only for DVD Video here 5 Add images to the creation list Click Library to display an ima...

Page 86: ... 6 Write to the media Display the list created in steps 3 5 Click Write at the bottom of the window to display the write setup screen Click Estimated disc capacity Hint To select multiple files click on the thumbnails while holding down the Shift key to select consecutive files or the Ctrl key to select non consecutive files Note Image quality will be converted when you added standard quality imag...

Page 87: ... at approx 86 F 30 C z In particular if an error occurs while writing to BD R or DVD R the disc will no longer be usable Make sure to prevent the camcorder from overheating When connecting the camcorder to your PC detach all cables or camera accessories other than the USB cable and AC adapter charger Camcorder connection to your PC is not possible when the camcorder power is OFF The supplied softw...

Page 88: ...ry DZ BP14SW Battery DZ BP21SW Optional Accessories When using camera accessories be sure to read the instruction manuals for each accessory Refer to the catalog for details The models and specifications of the optional accessories shown on this page are subject to change and their production may be discontinued Additional Information ...

Page 89: ... while the camcorder is recognizing it Removing the disc will deactivate the file repair function Be sure to use the AC adapter charger to power the camcorder when repairing data Repair is not possible using a battery If a battery is attached turn the power switch off connect the AC adapter charger and then turn the power back on and follow the on screen instructions Repair will normally take seve...

Page 90: ...rror occurred while the disc was being recognized Make sure that there is no scratch or dirt on disc that the surface back of disc is not reversed and that the disc is firmly pushed against the turntable See 3 and 4 on p 96 23 107 Cannot record video Set Movie Stills switch to Movie This message will appear when the record button is pressed with the movie stills switch set to 27 Cannot take still ...

Page 91: ... disc inserted and then turn it on again The camcorder will attempt to restore scenes Disc error has occurred Unfinalizing is not complete This message will appear when a disc error occurs during the unfinalization process Replace the disc 78 Disc must be finalized before it can be played on another device This message will appear if you remove a BD R DVD RW VF mode DVD R disc that has not been fi...

Page 92: ...Playlist The Playlist menu was selected but no playlists are stored 64 HDD error has occurred Format the HDD before using the camcorder Formatting the HDD will delete all data recorded on it 71 HDD error has occurred Format the HDD now HDD error has occurred Format the HDD now Did you interrupt the formatting of the HDD Choose YES and then format the HDD Formatting the HDD will delete all data rec...

Page 93: ...umber of playlists is already reached No more playlists can be created or copied 63 Please insert disc This message may appear when the camcorder or disc is moved from a cold place to a warm place Condensation has occurred on the lens or the HDD DVD drive Do not remove the disc leave the camcorder turned off in a dry place for 1 2 hours 106 Insert a disc 23 The disc is not inserted correctly Push ...

Page 94: ...ed Choose YES to format the card Formatting the card deletes all recorded contents 71 SD Card error has occurred Keep SD Card inside restart Card error could have occurred during editing of scenes Turn off the camcorder with the card inserted and then turn it on again The camcorder will attempt to restore scenes SD card full No more recording on this card can be done Delete unnecessary scenes or u...

Page 95: ...r if you try to delete multiple scenes when all the selected scenes have been locked Release the lock on scenes before deleting 66 69 This disc cannot be used Please replace disc A disc that cannot be used on this camcorder has been loaded Check the type of disc 21 This disc is recorded by the PAL system Please replace disc This camcorder can use only discs recorded in the NTSC system A disc recor...

Page 96: ...en condensation occurs Wait until the camcorder dries out and then turn it on again 4 This message will appear when a single sided disc is inserted the wrong way upside down Reinsert the disc correctly Insert the disc with the label printed surface facing toward the outside 5 Do not insert a DVD RW VF mode DVD R disc that has not been finalized into any DVD recorder The disc may become unusable ...

Page 97: ...Battery weakens fast Are you using the camcorder where the temperature is low A fully charged battery DZ BP14S DZ BP14SW DZ BP21SW may be discharged sooner than usual at low temperatures Keep extra batteries on hand 25 Battery may be dead The performance of the battery will deteriorate if it is used for an extended period of time or frequently Purchase a new battery 26 The CHARGE indicator on AC a...

Page 98: ...sc If there is still no improvement replace the disc Be sure to use a SD card or Class 4 or greater 108 No photo can be recorded Check to see whether the proper type of card is loaded Set the Movie Stills switch to If the card is locked unlock it Check the remaining free space on the card 22 29 72 The LCD screen is hard to see Has the brightness of the LCD screen been adjusted Stop recording and a...

Page 99: ...r recording sound Recording volume level cannot be adjusted manually The LCD screen appears unevenly Did you press the LCD monitor or the area around it If the LCD monitor is pressed some distortion will occur Release your hand and leave the LCD monitor for a while The LCD screen will recover Focus is not correct Is it difficult to use auto focus with your subject Focus manually 45 Does the manual...

Page 100: ...nnected jacks If the camcorder is connected to a VCR set its input selector to external input LINE 75 Is the camcorder connected to the TV correctly When connected through the HDMI terminal video will not display for a TV which is not 1080i compliant Please change the terminal 73 The disc menu does not appear when playing back a finalized BD RE disc on a player Use the camcorder and unfinalize it ...

Page 101: ...ome BD DVD Card which cannot be used even by following the above procedures The disc navigation screen does not show more than 3 999 stills from the inserted card If the inserted card contains more than 3 999 still pictures only 3 999 stills can be shown in the disc navigation screen However it is possible to play back more than 3 999 pictures Photos on a card cannot be played back This camcorder ...

Page 102: ...en starting ImageMixer 3 AVCHD Edition for HITACHI Make sure that your PC display adapter video card conforms to Direct X 9 0c 79 The DISC EJECT switch does not work when the camcorder is connected to a PC While the camcorder is connected to the PC use Explorer to right click the camcorder drive icon and select Eject 82 When the time stamp of a file on a disc is viewed on a PC it is different from...

Page 103: ...heck the colors of the cursor and bar graph on the thumbnail screen 66 Disc cannot be removed Cover will not open Connect a charged battery or the AC adapter charger to the camcorder and then turn the power switch to OFF then press down the DISC EJECT switch 18 25 Unable to playback the recorded BD RE BD R DVD RW VF mode DVD R disc on a BD DVD player recorder Use the camorder and finalize the BD R...

Page 104: ...mains lit or flashing After a disc or card is inserted it takes some time until recording is possible In the following cases it will take more time than usual until operation is possible Immediately after a disc is inserted When a long time has elapsed since the camcorder was turned off last When the temperature is greatly different from the status of previous recording When a scratched or dirty d...

Page 105: ...ssional applications The LCD is a very delicate display device Do not hold the LCD monitor when lifting the camcorder The LCD monitor could detach and the camcorder may fall Do not press its surface with force hit it or prick it with a sharp object If you push the LCD surface unevenness in display may occur Do not place the camcorder with the open LCD monitor down Close the LCD monitor when not us...

Page 106: ...or going out of a cooled room or vehicle condensation vapor in air warmed or cooled to water droplets could occur on the lens and or inside the camcorder If condensation occurs do not open the disc compartment lid or card slot cover if possible If condensation occurs on the lens wipe it off with a soft dry cloth Even if the external surface of camcorder has dried condensation may remain inside The...

Page 107: ...camcorder Cleaning the LCD monitor Use dry soft cloth to wipe dirt off When cleaning the LCD monitor be careful not to use force scratch it or subject it to impact Cleaning the surface of the camcorder Use soft cloth to gently wipe dirt off the surface of the camcorder Do not use benzene or thinner to clean the surface of the camcorder The coating of the case could peel off or the case could deter...

Page 108: ...order is not used for long periods of time remove the disc from the camcorder When storing disc replace it in the plastic case in which it was purchased Be careful that no condensation occurs on disc Do not place disc in following places Direct sunlight for a long time Where humidity is high or in dusty place Where there is heat from a heater etc If the above countermeasures are not taken the foll...

Page 109: ...the setting and begin HDD full format When transferring or discarding a disc it is recommended that you physically destroy it or use deletion exclusive software generally available to completely delete the data on it It is user s responsibility to control the data on disc and memory card Hitachi will not accept any responsibility for leaking of personal data If the camcorder does not operate norma...

Page 110: ...lease E mail us at tvsoftwaresupport hhea hitachi com The accompanying CD ROM contains the license agreement for DZ BD10HA Please review the license agreement to ensure that you remain in compliance with the agreement The license agreement license pdf is stored in the License folder on the CD ROM You will need Adobe Acrobat Reader to view the file You may download Adobe s Acrobat Reader from the A...

Page 111: ...ie recording pixels HX 1920 1080 HF HS 1440 1080 SX SF 720 480 Recordable discs 8 cm BD RE 7 5 GB 2x Ver 2 1 8 cm BD R 7 5 GB 2x Ver 1 1 8 cm DVD RAM conforming to DVD RAM Ver 2 1 8 cm DVD RW conforming to DVD RW Ver 1 1 2x speed 2x 1x 8 cm DVD R conforming to DVD R for General Ver 2 0 Recordable card SDHC memory card SD memory card Recording format Movie HDD Card AVCHD standard BD RE BD RE Ver 3 ...

Page 112: ...e operating altitude 9 842 feet 3 000 m or less Weight Approx 1 10 lb 500 g without battery pack nor disc card Total weight when recording Approx 1 27 lb 575 g When using the battery pack DZ BP14S and disc Recording quality Movie recordable time HDD BD Card HX High quality 1 Approx 4 hours 20 minutes Approx 1 hour Approx 1 hour 5 minutes HF Standard quality 2 Approx 5 hours 45 minutes Approx 1 hou...

Page 113: ...l not increase the remaining number of recordable scenes If there are combined scenes the maximum number of scenes in the table may not be the same as the actual maximum number of scenes that can be recorded dubbed Recording media Maximum number of dates HDD 1 999 BD RE 2 900 BD R 2 750 DVD RAM 2 DVD RW 2 DVD R 2 99 Card 999 1 Recording only 2 Per disc one side Wide Mode Setup SD 512MB SD 1GB SD 2...

Page 114: ...Formatting The process of preparing a disc for use by creating an empty file system This is also known as initializing a disc HDMI output terminal Connects the camcorder to a TV The HDMI output terminal provides better picture quality on the connected TV than the component jacks HD movie image quality HD image quality Refers to High Definition image quality HD is an abbreviation for High Definitio...

Page 115: ...you cannot make additional recordings on the DVD RW disc regardless of its free space The advantage of VF mode is that it is highly compatible with other DVD players VR mode One of two modes for using a DVD RW disc The advantage of VR mode is that you can edit split delete and combine movies using the camcorder and by deleting unnecessary scenes you can free up space for more recording ...

Page 116: ... DCF 114 Defaults 52 Delete playlist 65 66 Delete scene 66 Demo mode 43 Detail 70 Digital zoom 44 Disc navigation 34 61 exit 34 Divide 67 Dubbing Dub mark 57 60 from HDD to disc 56 mark off 60 DVD available functions 21 cleaning 108 handling 107 protect 72 recorder 12 storing 108 DVD R finalize 77 insert remove 23 24 27 note 22 DVD RAM format 71 insert remove 23 24 27 DVD RW finalize 77 format 71 ...

Page 117: ...ist 64 Repeat Play 40 Slide Show 39 Playlist 63 Power Save 42 Program AE 47 Protect 72 Q Quick Start 33 R Recording LED 53 Remote control Inserting a battery 16 Repeat play 40 Reset 42 S Scene Detail 70 SDHC memory card 22 SD memory card 22 Searching for image 38 Self timer 55 Skip scene 38 Slide show 39 Slow playback 38 System reset 109 T Tele conversion lens 45 Transferring data to your PC 83 Tr...

Page 118: ...r each computer from Pixela Corporation You may not let any third party use this program by granting reuse transfer lease lending etc You may not modify alter decompile or deassemble all or any part of this program or its accessories And you may not allow any third party do so Termination of Agreement If you duplicate this program and its accessories without permission or fail to comply with the a...

Page 119: ...is device may not cause harmful interference and 2 this device must accept any interference received including interference that may cause undesired operation To Order in the United States Service Hotline 1 800 HITACHI 1 800 448 2244 Products CAMCORDER Models DZ BD10HA Trade Name HITACHI Responsible Party HITACHI AMERICA LTD 900 Hitachi Way Chula Vista CA 91914 3556 U S A Tel 619 591 5200 Home Ele...

Page 120: ...New products purchased or service performed outside of the continental United States or its possessions F Product used for a commercial or industrial purpose NO PERSON AGENT DISTRIBUTOR DEALER SERVICE FACILITY OR COMPANY IS AUTHORIZED TO CHANGE MODIFY OR AMEND THE TERMS OF THIS LIMITED WARRANTY IN ANY MANNER OR FASHION WHATSOEVER EXCEPT AND TO THE EXTENT PROVIDED IN THIS LIMITED WARRANTY HITACHI M...

Page 121: ...s at no charge to the original owner Parts used for replacement are warranted for the remainder of the original Limited Warranty period For 90 days from the date of original purchase Hitachi will provide labor for the repair or replacement of defective parts without charge subject to the following conditions 1 Owner must provide verification of the date of purchase when requesting Limited Warranty...

Reviews: