background image

01EN01DVDS253A(AU).book  Page 1  Wednesday, June 7, 2006  3:39 PM

Summary of Contents for DV-DS163A

Page 1: ...01EN01DVDS253A AU book Page 1 Wednesday June 7 2006 3 39 PM ...

Page 2: ...e Power Cord Most appliances recommend they be placed upon a dedicated circuit That is a single outlet circuit which powers only that appliance and has no additional outlets or branch circuits Check the specification page of this owner s manual to be certain Do not overload wall outlets Overloaded wall outlets loose or damaged wall outlets extension cords frayed power cords or damaged or cracked w...

Page 3: ... 23 Playback 24 General Explanation of On Screen Display 24 Displaying Information While Watching TV 24 Displaying Disc Information on screen 24 General Playback Features 25 If a menu screen is displayed 27 Moving to another TITLE 27 Time Search 27 Marker Search 27 Camera Angle 27 3D Surround 28 Last Condition Memory 28 Playing a DivX Movie File 28 Notice for displaying the DivX subtitle 28 Movie ...

Page 4: ...mbining Chapters 52 Moving a Playlist Chapter 53 Hide a Chapter Title 53 Protect a Title 53 Full Play 53 Dubbing 54 Before Dubbing 54 What is CPRM 54 Fast copying Maximum 12 54 Dubbing from HDD to DVD 55 Dubbing from DVD to HDD 55 One Touch Copy HDD to DVD 56 One Touch Copy DVD to HDD 56 Reference 57 Additional Information 57 Overwriting Recording 57 Display on other Recorders or Players 57 Playin...

Page 5: ...les MP3 files WMA files JPEG files About the Symbol Display may appear on your TV display during operation and indicates that the function explained in this owner s manual is not available on that specific DVD video disc Notes on Discs Handling Discs Do not touch the playback side of the disc Hold the disc by the edges so that fingerprints do not get on the surface Never stick paper or tape on the...

Page 6: ...ar DVD players after finalization Limited editing features DVD RW These Discs can be recorded on repeatedly Recordings can be erased then you can record again on the same Disc Playable on DVD RW compatible players automatically finalization The edited contents are playable on DVD RW compatible players only after finalization Recordings can be edited the title chapter DVD R These Discs can be recor...

Page 7: ...may not play if the disc is damaged or dirty or if there is dirt or condensation on the Recorder s lens If you record a disc using a personal computer even if it is recorded in a compatible format there are cases in which it may not play because of the settings of the application software used to create the disc Check with the software publisher for more detailed information Regional code of the r...

Page 8: ...n in the display wait at least two minutes 2 Unplug from the wall socket 3 Move the recorder If there s a power failure while the recorder is on there is a chance that some data on the HDD will be lost The HDD is very delicate If used improperly or in an unsuitable environment it is possible that the HDD will fail after a few years of use Signs of problems include playback unexpectedly freezing an...

Page 9: ...nto place Removing the card Slot 1 Withdraw the card carefully Slot 2 Press on the center of the card then withdraw the card carefully Notes Keep the memory card out of reach of children If swallowed seek medical advice immediately A memory card may not be used for this recorder Do not extract the memory card in operating play copy move etc Using Memory Card 1 Insert a memory card 2 Press HOME on ...

Page 10: ...The recorder is DVD mode HDD W X DVD The recorder is dubbing TV Indicates when the recorder is in TV tuner mode Indicates when the recorder is in timer recording or a timer recording is programmed Indicates clock total playing time elapsed time title number chapter track number channel etc Remote Sensor Point the recorder remote control here MEMORY CARD Slot 1 Insert a memory card CF MD ST1 MD MEM...

Page 11: ...ton only after turning the recorder on PAUSE STEP page 25 Pause playback or recording temporarily press again to exit pause mode PLAY page 25 Starts playback I POWER page 25 Switches the recorder ON or OFF RANDOM page 30 Plays tracks in random order z REC page 36 37 38 Starts recording Press repeatedly to set the recording time REC MODE page 36 38 Selects the recording mode XP SP LP or EP REPEAT p...

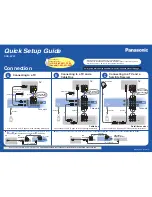
Page 12: ...cal audio equipment Cooling fan AC Power Cord Plug into the power source RF OUT Passes the signal from the AERIAL to your TV monitor S VIDEO OUT Connect to a S Video Input on TV COMPONENT PROGRESSIVE SCAN VIDEO OUT Y Pb Pr Connect to a TV with Y Pb Pr inputs Connecting to the Aerial Remove the aerial cable plug from your TV set and insert it into the aerial socket at the back of the recorder Plug ...

Page 13: ... Video cable S Component Video connection Connect the COMPONENT PROGRESSIVE SCAN VIDEO OUT jacks on the recorder to the corresponding input jacks on the TV using an Y Pb Pr cable C Progressive Scan connection If your television is a high definition or digital ready television you may take advantage of the recorder s progressive scan output for the highest video resolution possible If your TV does ...

Page 14: ...p menu See page 20 If your TV is not equipped with DTS decoder set the DTS options to OFF on the setup menu See page 20 To enjoy DTS multi channel surround you must connect this recorder to a DTS compatible receiver via one of this recorder s digital audio outputs The arrow on the cable connector body should face up for correct alignment with the connector on the recorder If there is noise or line...

Page 15: ...d a multi channel Audio Video receiver that supports one or more of the audio formats supported by your recorder MPEG 2 Dolby Digital and DTS Check the receiver manual and the logos on the front of the receiver Caution Due to the DTS Licensing agreement the digital output will be in DTS digital out when DTS audio stream is selected Notes Six Channel Digital Surround Sound via digital connection ca...

Page 16: ...IN jack on the front panel is not available Connecting a Digital Camcorder Using the front panel DV IN jack it is possible to connect a DV digital camcorder and digitally transfer DV tapes to DVD Use a DV cable not supplied to connect the DV in out jack of your DV camcorder to the front panel DV IN jack of this recorder See page 43 for operating input switch Notes This jack is for connection to DV...

Page 17: ...Music List or Audio CD menu for disc Memory Card 1 2 Displays Music List menu for memory card SETUP See page 17 Start Displays Setup menu Initial Settings In this menu system there are several ways to customize the settings provided Most menus consist of three levels to set up the options but some require greater depth for the variety of settings General Operation 1 Press SETUP and the Setup menu ...

Page 18: ...ly to exit Program List menu Program Edit You can perform a search to select and store TV channels manually When you select Program Edit in step 4 above the display for setting channels appears 1 Use W X to select the item and press S T to change the setting PR indicates the selected programme position Seek Searches for a channel automatically Searching stops when the recorder tunes in a channel C...

Page 19: ...ializes the HDD Hard Disk Drive everything recorded on the HDD will be erased M C format Initializes the M C Memory Card everything recorded on the Memory Card will be erased 1 Select Initialize option then press X 2 Press S T to select the desired option then press ENTER The confirm message will appear 3 Use W X to select Yes or No then press ENTER Language Settings Display Menu Select a language...

Page 20: ... DRC to ON for this effect Vocal Set Vocal to ON only when a multi channel karaoke DVD is playing The karaoke channels on the disc will mix into normal stereo sound Lock Parental Control Settings Rating Blocks playback of rated DVDs based on their content Not all discs are rated 1 Select Rating option then press X 2 To access the Rating Password and Area Code features you must input the 4 digit se...

Page 21: ...de to purchase or rent the videos from DivX VOD service at www divx com vod Follow the instructions and download the video onto a disc for playback on this unit Note All the downloaded videos from DivX VOD can only be played back on this unit Recording Settings Record Mode Set You can set the picture quality for recording XP High Quality SP Standard Quality LP Low Quality EP Extend Quality 1 Selec...

Page 22: ...select a desired mode VR Mode or Video Mode then press ENTER Confirm message will appear For DVD RAMs DVD RWs go to step 4 4 Use W X to select OK then press ENTER It takes a few moments to initialize the disc Note Even with a DVD RAM you must format a brand new disc Follow the instructions on screen Caution If you want to change the disc format everything recorded on the disc will be erased Finali...

Page 23: ... long For discs formatted on a different recorder you will see only a limited character set 1 Select Disc Label option then press X 2 Press ENTER while Edit is selected Keyboard menu appears To enter characters see page 50 Disc Protect When recording in DVD RAM DVD RW R disc or VR mode formatted DVD RW disc set to ON to prevent accidental recording editing or deleting of the disc loaded If you nee...

Page 24: ...ms displayed differ depending on the disc type or playing status 3 You can select an item by pressing S T and change or select the setting by pressing W X For details about each item see the pages in parentheses Title Current title or track number total number of titles or tracks page 25 Chapter Current chapter number total number of chapters page 25 Time Elapsed playing time page 27 Audio Selecte...

Page 25: ...essing W X repeatedly during PAUSE mode The picture frame by frame picture in reverse is not available for Video CD SKIP During playback press SKIP or to go to the next chapter track or to return to the beginning of the current chapter track Press SKIP twice briefly to step back to the previous chapter track Tips To go directly to any chapter during DVD playback press DISPLAY twice and press S T t...

Page 26: ...select a desired subtitle language AUDIO Press AUDIO then press W X repeatedly to hear a different audio language or audio track Note Some discs feature both Dolby Digital and DTS soundtracks There is no analog audio output when DTS is selected To listen to the DTS soundtrack connect this recorder to a DTS decoder via one of the digital outputs See page 15 for connection details Press AUDIO then p...

Page 27: ...eft to right If you enter the wrong numbers press W X to move the under bar _ to the wrong number Then enter the correct numbers 4 Press ENTER to confirm Playback starts from the selected time Marker Search To enter a Marker You can start playback from up to six memorized points To enter a marker press MARKER at the desired point on the disc The Marker icon appears on the TV screen briefly Repeat ...

Page 28: ...les read DivX file requirement on page 29 Note This recorder cannot play back the DivX file s in the Memory Card 1 Press HOME then select MOVIE option 2 Select a media that contains DivX file s then press ENTER The Movie List menu appears on the TV screen 3 Press S T to select a folder and press ENTER A list of files in the folder appears If you are in a file list and want to return to the Folder ...

Page 29: ...edia page 35 DivX file requirement Available resolution size 720 576 W H pixel DivX file extensions avi divx Playable DivX subtitle smi srt sub Micro DVD format only txt Micro DVD format only Playable Codec format DIV3 MP43 DIVX XVID DX50 Playable Audio format AC3 PCM MP2 MP3 WMA Sampling frequency within 8 48kHz MP3 within 32 48kHz WMA Bit rate within 8 320kbps MP3 32 192kbps WMA CD R Format ISO ...

Page 30: ...s 1 Press S T to select a folder file on the Audio CD or Music menu then press ENTER The menu options appear The menu options displayed differ depending on the selected media 2 Press S T W X to select an option and press ENTER Play Start playback the selected title Random Start or stop random playback Open Opens the folder and a list of files in the folder appears Delete Deletes the file s from th...

Page 31: ...een by pressing DISC MENU LIST Program List menu options 1 Press S T to select a track file on the Program List then press ENTER The menu options appear 2 Use S T to select an option then press ENTER to confirm your selection Play Playback begins in the order in which you programmed the tracks from the selected track Random Start or stop random playback Delete Deletes the track s from the Program ...

Page 32: ... Photo List menu appears Photo List menu options 1 Press S T to select a file on the Program List then press ENTER The menu options appear The menu options displayed differ depending on the selected media You can select all files and folders on the menu by pressing CLEAR button To cancel the selections press CLEAR again Selecting multiple files folders 1 Press MARKER A check mark appears on the fi...

Page 33: ...show simultaneously You can display photo files while listening to MP3 WMA music files recorded on HDD 1 Select Slide Show option on the Photo List menu Refer to Photo List menu options on page 32 2 Press ENTER The Slide Show menu appears 3 Select Simultaneous Music play option on the Slide Show menu 4 Press ENTER Simultaneous Music play menu appears 5 Press MARKER to select multiple files Select ...

Page 34: ...ultiple files folders 1 Press MARKER A check mark appears on the file or folder Press MARKER again to cancel the marked file or folder 2 Repeat step 1 to mark additional file folders 2 Press ENTER The menu options appear on the menu 3 Select Delete option then press ENTER The selected file s is deleted from HDD or Memory Card Naming a file You can name MP3 WMA files on the HDD or Memory Card indep...

Page 35: ...t appears 2 Select a folder Also you can create new album folder Select New Album option on the Copy menu then press ENTER NONAME folder is created 6 Select Copy option then press ENTER to begin copying Note If a folder s depth is more than 5 level the copy is not available Moving a file s You can move a file s folder s to another media or folder After moving the file s folder s are deleted from t...

Page 36: ...e HDD allows you to record a maximum of 12 hours continuously Notes for recording Make sure you change the recording format Video mode or VR mode before you record anything on the disc See page 22 Disc Format for how to do this Overwrite recording is available The recorder will execute the Menu making operation to update the new title and editing when removing the disc from the recorder Always set...

Page 37: ...Timeshift mode Press MARKER at the desired point during Timeshift Press SEARCH to recall the marked scene Clip Record You can edit during Timeshift to store the program on the HDD Hard Disk Drive 1 During Timeshift use pause step search and slow motion to find the starting point 2 Press z REC at the starting point of the section you want to record Progress of the edit is indicated in red on the Pr...

Page 38: ...t 7 Press STOP to stop recording Changing TV Audio Channel You can select the audio channel language to listen by pressing AUDIO during viewing TV program The current audio channel is displayed on screen Stereo or mono broadcast Stereo Left Right Mono Bilingual broadcast Main Sub Main Sub For TV recording with bilingual set audio channel from the TV Rec Audio in sub menu of the Setup menu see page...

Page 39: ...g and ending time Note If you use a completely blank disc for timer recording you must format the disc before starting timer recording Refer to Disc Format on page 22 Turn the recorder off for timer recording 1 Press TIMER REC The Timer Record menu will appear Media Choose a media to record HDD or DVD PR Choose a memorized program number or one of the external inputs from which to record Date Choo...

Page 40: ...channel from the TV Rec Audio in sub menu of the Setup menu see page 21 If you set a timer recording to record to DVD but there isn t a recordable DVD loaded at the time of the recording the Recovery Recording feature will automatically record the program to the HDD for you Using the HDD allows you to record a maximum of 12 hours continuously 01EN01DVDS253A AU book Page 40 Wednesday June 7 2006 3 ...

Page 41: ...r W X left right move the cursor left right If you make a mistake before pressing ENTER press CLEAR repeatedly to delete password numbers one by one then correct it 3 Use W X to move the cursor to the Repeat column then use S T to select Repeat option Once Daily Monday Friday or Weekly 4 Press ENTER after filling in all the program information The program will be memorized by the recorder 5 You ca...

Page 42: ...r program takes priority When the earlier program finishes the later program starts If two programs are set to start at exactly the same time the program entered first takes priority If the disc is damaged the recording may not complete successfully In this case even though the Check field shows Rec OK it may not be Note If a program is timer recorded with PDC ON Rec OK will not appear in the Chec...

Page 43: ...rol this unit remotely from a component connected to the DV IN jack You cannot record date and time information from a DV cassette 1 Make sure your digital camcorder is connected to the front panel DV IN jack see page 16 2 Select TV HDD or TV DVD option on the HOME menu then press ENTER see page 17 3 Check that the DV audio input is as you require You can choose between Audio 1 original audio and ...

Page 44: ...a from the other mode Notes You cannot use simultaneous playback and recording while copying You cannot edit programs during simultaneous recording and playback Playback current title during recording You can play back the current title in recording simultaneously 1 Start HDD recording 2 Press PLAY The playback starts and the recording will continue while playing back You can use PAUSE STEP and SC...

Page 45: ...g different to the current setting of the recorder During recording these titles cannot be played 1 Press DISC MENU LIST to display the Title List menu Playback should be stopped when you do this You can also access it using HOME menu select MOVIE option then select HDD or DVD option and press ENTER When selecting titles use the S T buttons to display the previous next page if there are more than ...

Page 46: ...apter The hidden titles and chapters on the DVD R RW cannot be play back Playlist Add Adds the title or chapter to the Playlist page 48 Protect Protects accidental recording editing or deleting of the title page 53 Rename Title Name Edits the title name page 50 Search Chapter Displays Chapter List of the Title Time Search time for you want start point of the title page 50 Sort Lists the programs o...

Page 47: ...laylist menu Caution When editing using the Delete Add and Move functions the start and end frames may not be exactly as set in the start and end point display During Playlist playback you may notice a momentary pause between edits This is not a malfunction Adding Chapter Markers You can create chapters within a title by inserting chapter marks at the desired points Notes Chapter markers are inser...

Page 48: ...f the menu 2 Use S T to select Playlist Add option then press ENTER 3 Select New Playlist then press ENTER The new title appears in the updated Playlist All chapters of the title are added to the Playlist Adding Title Chapters to the Playlist You can add an Original title or chapter to add to a Playlist title even if it is already registered 1 Choose a title or chapter on the Title List Original m...

Page 49: ...eted the chapter will be erased When you are deleting a title or chapter only the last one on DVD RW increases remaining recording time Deleting a Part You can delete a part which you do not want in the title 1 Use W X S T to choose a title you want to delete on the Title List menu then press ENTER The options appear on the left side of the menu 2 Select Delete Part option then press ENTER Title E...

Page 50: ...ent program EDU Education program News News program Drama Drama ANI Animation program Sports Sports program Movie Movie Show TV show AV IN External input program etc etcetera Choosing etc will erase the genre display HDD 4 Choose OK then press ENTER to fix the name and return to the previous menu screen 5 Press RETURN repeatedly to exit the menu Notes To erase the displayed genre choose etc Names ...

Page 51: ... ejecting the disc from the recorder or switching the recorder into standby mode You can still undo a deletion even after exiting the menu display Tip You can redo the last undo action using the Redo option Combining Titles Use this function to combine two adjacent Original HDD titles into one Notes This function is not available if there is only one title within the HDD If there are more than 60 ...

Page 52: ...es It take up to 4 minutes to divide Notes You cannot select dividing point less than 3 seconds Fast copying cannot be specified for divided tiles If Divide is executed the chapter in the title will be erased HDD Combining Chapters Use this function to combine two adjacent Playlist or Original chapters into one Note This function is not available if there is only one chapter within the title 1 On ...

Page 53: ... DVD RW 3 Press ENTER to confirm The chapter s or title s thumbnail will dim Tip If you select a hidden chapter or title on the Title List or Chapter List menu you can show it by choosing Show option on the menu After doing that you are able to see the chapter or title Protect a Title Use this function to protect against accidental recording editing or deleting of the title 1 Press DISC MENU LIST ...

Page 54: ...ption or consented to by the rights owner This product incorporates copyright protection technology that is protected by method claims of certain U S patents and other intellectual property rights owned by Macrovision Corporation and other rights owners Use of this copyright protection technology must be authorized by Macrovision Corporation and is intended for home and other limited viewing uses ...

Page 55: ...disc is insufficient the Fast mode is not available The Fast mode is not available for edited HDD title and Clip Recording title FR choose when PDC is off If Fast is chosen the chapters set on HDD will not be dubbed Dubbing from DVD to HDD 1 On the Title List menu select a title you want to dub then press ENTER Menu options appears on the left side of the screen 2 Use S T to select Dubbing option ...

Page 56: ...ne Touch Copy function to copy a title if any part of the title is copy once protected The DUBBING button will not work while a Title List is being displayed One Touch Copy DVD to HDD One Touch Copy from DVD to HDD copies a single title to the HDD in real time When you start copying playback jumps back to the start of the title then continues through to the end of the title when recording automati...

Page 57: ...eady 2 Press TITLE MENU in Play mode Title List menu will appear as shown below Tip You can remove the Title List menu by pressing STOP 3 To play back a title select the title you want then press ENTER or PLAY Playing on other Players Finalized Most regular DVD players can play finalized discs recorded in Video mode finalized DVD RW or DVD Rs A small number of players can also play DVD RW discs re...

Page 58: ...Rhaeto Romance 8277 Urdu 8582 Corsican 6779 Kannada 7578 Rumanian 8279 Uzbek 8590 Croatian 7282 Kashmiri 7583 Russian 8285 Vietnamese 8673 Czech 6783 Kazakh 7575 Samoan 8377 Volapük 8679 Danish 6865 Kirghiz 7589 Sanskrit 8365 Welsh 6789 Dutch 7876 Korean 7579 Scots Gaelic 7168 Wolof 8779 English 6978 Kurdish 7585 Serbian 8382 Xhosa 8872 Esperanto 6979 Laothian 7679 Serbo Croatian 8372 Yiddish 7473...

Page 59: ...UTE Temporarily turns TV sound OFF press again to restore TV Control Buttons Manufacturer Code Number HITACHI 011 DEFAULT 013 015 017 021 022 023 024 028 029 030 035 039 040 041 048 053 054 055 056 057 120 127 128 129 134 135 140 143 145 147 151 156 159 173 193 219 ADMIRAL 137 204 ADYSON 159 219 AKAI 009 010 108 132 133 135 139 140 156 174 175 AKURA 064 086 108 110 155 171 ALBA 009 060 064 ALLSTAR...

Page 60: ...37 141 146 147 148 165 179 210 INTERVISION 010 086 108 132 144 166 Manufacturer Code Number IRRADIO 163 235 237 ITC 144 159 ITS 009 010 064 171 ITT 141 151 186 JVC 009 169 KAIDO 136 KAPSCH 089 147 148 197 KARCHER 084 108 KATHREIN 109 KAWA 009 KENDO 060 108 137 157 KENNEDY 197 KNEISSEL 108 KONKA 009 KORTING 086 204 209 KUBA 233 KUBA ELECTRONIC 233 KURA 134 LENCO 108 170 LG 001 038 050 108 110 136 1...

Page 61: ...1 159 163 233 SEG 010 064 108 144 159 165 171 185 219 SEI SINUDYNE 025 108 204 212 SELECO 088 089 137 157 197 222 SENTRA 064 133 SHARP 081 082 083 222 SHINTOM 108 SHINTOSHI 108 SHIVAKI 108 SIAREM 204 SIEMENS 092 096 097 098 100 101 108 210 218 219 221 SIESTA 085 SILVER 010 064 SINGER 108 164 204 SINUDYNE 118 131 SMARAGO 172 SOLAVOX 133 SONOLOR 140 156 SONTEC 108 SONY 072 074 211 212 213 214 215 21...

Page 62: ...and regional code The disc is placed upside down Place the disc with the playback side down The disc is not placed within the guide Place the disc on the disc tray correctly inside the guide The disc is dirty Clean the disc The Rating level is set Cancel the Rating function or change the rating level The picture from the external input is distorted The video signal from the external component is c...

Page 63: ... jacks Make A V connections Stereo is available only via A V output from the recorder The recorder Audio Video Out is not selected for viewing at the TV Select AUX or A V source as TV input The recorder s TV audio channel is set to mono Set TV audio channel mode to Stereo See Changing TV Audio Channel on page 38 The remote control does not work properly The remote control is not pointed at the rem...

Page 64: ...ding format Sampling frequency 27MHz Compression format MPEG 2 VBR support Audio recording format Sampling frequency 48kHz Compression format Dolby Digital Playback Frequency response DVD PCM 48 kHz 8 Hz to 20 kHz CD 8 Hz to 20 kHz DVD PCM 96 kHz 8 Hz to 44 kHz Signal to noise ratio More than 100 dB AUDIO OUT connector Harmonic distortion Less than 0 008 AUDIO OUT connector Dynamic range More than...

Page 65: ...01EN01DVDS253A AU book Page 1 Wednesday June 7 2006 3 39 PM ...

Page 66: ... BWPJE QFSNBOFOU EBNBHF UP ZPVS EJTQMBZ t 1SPKFDUPS MBNQT BSF B DPOTVNBCMF JUBDIJ VTUSBMJB UE XJMM SFQMBDF UIF PSJHJOBM QSPKFDUPS MBNQ GSFF PG DIBSHF XIFSF UIF DMBJN JT NBEF XJUIJO UIF mSTU IPVST PG PQFSBUJPO PG UIF QSPKFDUPS PS mSTU NPOUIT GSPN EBUF PG QVSDIBTF PG UIF QSPKFDUPS XIJDI FWFS PDDVST mSTU BJMVSF UP GPMMPX UIF DPSSFDU PQFSBUJOH BOE TIVUEPXO QSPDFEVSFT NBZ EBNBHF UIF MBNQ BOE WPJE UIF X...

Reviews: