background image

Confidential

DSP-45WT6N
DSP-55WT6N
DSP-75WT6N
DSP-55VWTN
DSP-75VWTN

“Instructions for the use of this manual”
Use this Service Manual in conjunction with Instruction Manual.
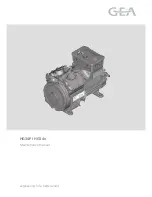
HITACHI 
OIL-FREE SCREW COMPRESSOR

NEXT series

Water-Cooled

DSP–017

 Mechanical SERVICE MANUAL 

DSP-45AT6N
DSP-55AT6N
DSP-75AT6N
DSP-55VATN
DSP-75VATN

Air-Cooled

Summary of Contents for DSP-45AT6N

Page 1: ...WTN Instructions for the use of this manual Use this Service Manual in conjunction with Instruction Manual HITACHI OIL FREE SCREW COMPRESSOR NEXT series Water Cooled DSP 017 Mechanical SERVICE MANUAL DSP 45AT6N DSP 55AT6N DSP 75AT6N DSP 55VATN DSP 75VATN Air Cooled ...

Page 2: ...Side Bi Annually 24 4 5 Replacement of Oil Filter Secondary Side Annually 24 4 6 Operation Check of Air Relief Valve Bi Annually 25 4 7 Cleaning of Control Line Filter Bi Annually Fixed speed type 25 4 8 Clean Cooler Annually 26 4 9 Replacement of Check Valve 2 Yearly 27 4 10 Main Motor Greasing 28 4 11 Maintenance of Main Motor 29 4 12 Maintenance of Oil Mist Remover 30 4 13 Maintenance of Coolin...

Page 3: ...ill the gear case with oil This indicates the quantity of the oil in the gear case Check the oil level before starting the DSP and when operating it Use the sling fitting when moving and installing the DSP air compressor Read carefully the plate before operating and servicing the DSP Open the left door only when servicing the DSP air compressor Keep it closed when operating the DSP air compressor ...

Page 4: ...Air intake filter Oil mist remover OMR Discharge pipe Compressed air discharge Oil level gauge Control panel Enclosure Instrument panel Main motor Oil filter 1st stage Airend 2nd stage Airend Check valve Cooling fan Common base Air relief valve Front View Rear View ...

Page 5: ...SP and when operating it Read carefully the plate before operating and servicing the DSP This panel discharges the hot air generated in the air compressor Check the specifications supply voltage and frequency before connecting the power Vtype only Air Exhaust Air Compressor Package Air Intake Inlet to the Air End Left Door Open the left door only when servicing the DSP air compressor Keep it close...

Page 6: ...r Oil cooler Air intake filter Oil mist remover OMR Control panel Enclosure Instrument panel Main motor Discharge pipe Compressed air discharge Check valve Common Base Air relief valve Oil filter 1st stage Airend 2nd stage Airend Oil level gauge Front View Rear View ...

Page 7: ...rifice 14 Drain Solenoid 15 Y strainer 16 Drain trap 17 Demister 18 Motorized Isolation Valve 19 Hi Precooler only for 125 psi 0 86 MPa type 20 Drain separator Capacity Control Blowoff Air Flow 21 Air Intake Filter 22 Suction Throttle Valve 23 Blowoff Valve 24 Blowoff Silencer Oil Flow 31 Oil Strainer 32 Oil Pump 33 Oil Relief Valve 34 Oil Cooler 35 Oil Filter 36 Temperature Control Valve 38 Oil D...

Page 8: ...e Sensor 2nd stage out TH5 Temperature Sensor oil THM Temperature Sensor for main motor surface temperature 63SV Pressure Differential Sensor For suction filter clogging detection Capacity Control Blowoff Air Flow 21 Air Intake Filter 22 Blowoff Solenoid Valve 1 23 Blowoff Solenoid Valve 2 24 Blowoff Silencer Oil Flow 31 Oil Strainer 32 Oil Pump 33 Oil Relief Valve 34 Oil Cooler 35 Oil Filter 36 T...

Page 9: ...alve 13 Orifice 14 Drain Solenoid 15 Y type Strainer 16 Drain trap 17 Demister 18 Motorized isolation valve 20 Drain separator Capacity Control Blowoff Air Flow 21 Air Intake Filter 22 Suction Throttle Valve 23 Blowoff Valve 24 Blowoff Silencer 25 Blowoff Cooler Oil Flow 31 Oil Strainer 32 Oil Pump 33 Oil Relief Valve 34 Oil Cooler 35 Oil Filter 36 Temperature Control Valve 38 Oil Drain Valve 39 O...

Page 10: ... stage out TH3 Temperature Sensor 2nd stage out TH5 Temperature Sensor oil THM Temperature Sensor for main motor surface temperature 63SV Pressure Differential Sensor For suction filter clogging detection Capacity Control Blowoff Air Flow 21 Air Intake Filter 22 Blowoff Solenoid Valve 1 23 Blowoff Solenoid Valve 2 24 Blowoff Silencer Oil Flow 31 Oil Strainer 32 Oil Pump 33 Oil Relief Valve 34 Oil ...

Page 11: ...oling water outlet Cooling water inlet Water relief pet cock Compressed air flow Cooling water flow M 1st stage airend 2nd stage airend Aftercooler Intercooler Oil cooler Motorized water isolation valve WIVM Cooling Water Flow ...

Page 12: ...ve 20Ux switched over to pressurize Chamber A STOP button ON Suction throttle valve STV closes Blowoff valve opens Internal air in discharge pipe is exhausted to atmosphere Compressor stops To Chamber B To Chamber A 3 Way Solenoid Valve 4 3 Way Solenoid Valve 20US 3 Way Solenoid Valve 1 Starting Stopping Loading Unloading For 20 seconds after starting with a star delta starter 3 Way Solenoid Valve...

Page 13: ...hamber A STOP button ON Suction throttle valve STV closes Blowoff valve opens Internal air in discharge pipe is exhausted to atmosphere Compressor stops Load Unload Operation AUTO Operation How long has motor been running Load rate Has motor stopped and restarted 3 times or more for 90 minutes Motor stops automatically Less than specified What is the plant compressed air piping pressure How long h...

Page 14: ...r water cooled type Model Rated pressure psi MPa Air consumption Operating frequency Hz Capacity control system Pressure setting psi MPa Capacity control type Initial Example of Lower 55 kW 125 0 86 100 75 65 134 136 108 108 CPCS motor speed control Control pressure 125 0 86 120 0 83 AUTO ON VSDA or AUTO OFF VSDB 75 kW 100 60 50 133 137 80 72 55 kW 125 0 86 75 65 5 82 Two step purge control Cut ou...

Page 15: ... Type Remarks Dally Every 3months LCD indications Check Fixed V Record data in the OPERATION RECORD LOGBOOK Oil level Check Fixed V Add as required Aftercooler Intercooler Condensate Drain Fixed V Control line filter Condensate Check Fixed Main motor greasing Fixed V Fixed speed type both DE NDE side Vtype DE side 3 Annual and 3 Year Schedule for 8 000 hours year or less operation Part or Item Act...

Page 16: ...e Fixed V Smoothing condenser Controller Replace V PC board assembly Including LCD Check Clean Replace Fixed V Check for contamination and discoloration Replace as required Can be used further if appropriate Power PCB Controller Check Clean Replace V Communication board Check Clean Replace Fixed V Electromagnetic contactor Check Fixed V Replace as required Lithium battery Replace Fixed V Fan inver...

Page 17: ...pe Blowoff solenoid valve Operation Check Fixed V Check valve Air leak Check Fixed V Air relief valve Operation Check Fixed V 1 Daily Schedule for 4 000 hours year or less operation 2 Bi Annual Schedule for 4 000 hours year or less operation Part or Item Action Category Type Remarks Lubrication oil Replace Fixed V Replace every 8 000h operating hour or 2 year whichever comes earlier Joints Bolts N...

Page 18: ...mister Drain separator Replace Fixed V 3 Way solenoid valve capacity control system Replace Fixed Oil strainer primary Replace Fixed V Control line filter Condensate Replace Fixed Oil level gauge Replace Fixed V Shaft seal Main motor Check Clean Fixed V Temperature control valve Replace Fixed V Smoothing condenser Controller Replace V PC board assembly Including LCD Check Clean Replace Fixed V Che...

Page 19: ...ce in house Ask your distributor to service 3 2 Maintenance Schedule for Oil Mist Remover The oil mist remover reduces oil consumption to almost zero However the oil should still be replaced annually CAUTION Item Daily Bi annually Annually 6 yearly Remarks Regulator settings Vacuum indicator Relief valve Regulator performance Float trap nozzle Disassemble and clean Vacuum indicator Disassemble and...

Page 20: ... disconnect the power and verify no internal pressure Remove the front door 1 Remove the cover and wipe away the dirt inside of the duct before removing the air intake filter Loosen the wing nut and remove the air intake filter Make sure the contamination and or dust doesn t enter the airend side Tap the air intake filter to remove large particles Then blow air to clean the surface of filter In th...

Page 21: ...ince unloading the valve opens 1 second If unload is continued the valve will open 1 second in every 600 seconds During operation stop including automatic stop After 1 second has passed since operation stop the valve opens 1 second If the valve is open at the time of operation stop the valve will be closed once After operation stop The valve opens 1 second in every 30 minutes 30min 1S Check the co...

Page 22: ... 1 Ref No 911 and rear panel 3 Ref No 913 1 Intercooler side Turn the three way change valve from Ⓐ to Ⓑ 2 Aftercooler side Turn the ball valve 1 from Ⓒ to Ⓓ And Turn the ball valve 2 from Ⓔ to Ⓕ Verify that the interstage pressure INTSTG P and discharge pressure DIS PRESS is 0 zero on the LCD monitor In addition remove the parts slowly because the pressure is still remained in air pipings due to ...

Page 23: ...rifices annually Be sure to stop the air compressor before inspecting and or cleaning the orifices Replacement of the strainer and solenoid valve Replace the solenoid valve and the strainer every 2 years if operating 8000 hours year or 3 years if operating 4000 hours year to new whole assembled parts Orifice Orifice Cleaning of orifice CAUTION Verify that there is discharged air with condensate is...

Page 24: ...g the strainer plug Remove the strainer element Wash the element with water and blow air and reassemble it Turn three way change valve from Ⓑ to Ⓐ 2 Aftercooler side Turn ball valve 1 on the aftercooler side from Ⓒ to Ⓓ Check that ball valve 2 is completely closed Ⓔ side In this state strainer pressure in the solenoid valve is released by solenoid valve action After verifying the compressed air is...

Page 25: ...e the plug from oil drain port to drain lubricating oil Replace all lubricating oil annually Also once a year remove the oil port cover and wipe the sludge off of the bottom of the gear case with a sponge and clean Close oil drain valves and Tighten removed plugs with seal tape to oil drain ports and oil air vent Oil filling Remove the oil filling port plug and fill the oil until the oil reaches t...

Page 26: ...sor restart verify that there is no leaks on the oil filter Pan Prepare a pan with a size of approx 20 x 100 x 250 mm Clogging of the oil filter drops the oil pressure of the air compressor Vtype If oil pressure sensor detects an oil pressure as low as 12 psi 0 08MPa or lower for operation frequency 110 Hz or higher or 6 psi 0 04MPa for operation frequency less than 110Hz the air compressor automa...

Page 27: ...ction of the operation of the air relief valve use the appropriate facial protection High pressure air containing dust particles can cause severe injury Relief valve Relief valve ring Rear cover 3 Rear cover 2 Rear cover 1 Maintain the rated maximum discharge pressure ex 100psi 0 70MPa Pull the ring connected to air relief valve Verify that the air relief valve operates properly and get a hand off...

Page 28: ... the cooler Use an air nozzle to blow the cooler surfaces Generally there are 3 kinds of dust and dirt particles Light dust particles Heavy dust particles Greasy dust particles Contact the local HITACHI distributor master dealer or representative office for the detail 4 8 Clean Cooler Annually Instrument panel Front door 2 Front door 1 Front panel Front frame Maintenance cover 2 Rear panel 3 Rear ...

Page 29: ...ve cover upper for air cooled Check valve cover for water cooled Remove the check valve cover check valve and gasket Be careful for installing direction of the check valve 4 Cleaning and Inspection Sufficiently clean the check valve and check valve cover and so on Make sure that no rust particles and or fragmented gaskets are left on the valve and or gasket contacting surfaces Water Cooled 4 9 Rep...

Page 30: ... 000 hours or less operating hours per year Every 3 months Fill 2 3 oz 65 g each on the load and opposite sides Fill 2 6 oz 75 g on the load side For 4 000 hours or less operating hours per year Every 6 months Open the front door Inject a specified amount of grease through the grease inlet using a grease gun If used grease is discharged in the grease pan under the grease inlet clean the pan as nec...

Page 31: ...ion Resistance Corrective Action Frame Bearing Installation Loose bolts Retighten the bolts Wiring Poor grounding Ground properly Inadequate breaker capacity Note 3 Replace with properly specified capacity breaker Broken wires Install new wires Failed breaker controller or contactor Note 3 Check the contacts and replace if necessary Environment Dust accumulation reduced cooling performance Properl...

Page 32: ...all the new diaphragm upside down 3 Maintenance of ReliefValve See Fig A Turn the nut at the top of the relief valve and remove the plate Replace the sheet and the spring with new components Ensure that the spring is positioned at the center before assembly 4 Maintenance ofVacuum Indicator See Fig B Contamination of the vacuum indicator may cause malfunction of indicator Remove and clean the indic...

Page 33: ...bolt Fan Motor weight 45 55kW approx 80lbs 35kg 75kW approx 90lbs 40kg Turbo Fun weight 45 55 75kW approx 35lbs 15kg F motor mount weight 45 55kW approx 18lbs 8kg 75kW approx 20lbs 9kg Part name Model 55 kW 75 kW 460V Fan Motor Output HP kW 2 0 1 5 2 9 2 2 Turbo fan Part number 59042170 59042180 Shaft diameter inch mm φ 0 866h6 0 0 000512 φ 22h6 0 0 013 Fan diameter mm φ 23 6 φ 600 No of impeller ...

Page 34: ...ply Pipe Motor Cover Fixing bracket Air End side Motor side Motor Connection Bolts M16 Motor Cover Fixing bracket Figure viewed from motor anti load side 55kW 75kW Be sufficiently careful not to damage the temperature sensor Temperature Sensor Fixing Bolt M8 16 The temperature sensing portion is brazed into the portion circled in red Be careful not to damage this brazed portion when fixing 2 Assem...

Page 35: ... the temperature sensor Pull out the temperature sensor 5 M6 25 3 Fix the motor cover 1 and 2 to the motor cover fixing bracket by M6 bolt and motor eyebolt Notch Rubber Bush Temperature Sensor Motor Cover 2 Motor Cover 1 Motor eyebolt Pull out the temperature sensor Be sufficiently careful not to damage the temperature sensor 5 M6 25 55kW 75kW ...

Page 36: ...wooden hammer do not use a steel hammer Thus the assembly of shaft bearings and oil seal can be removed Support Bolt gear M10 Bolt M6 Bolt 2 places Loosen the bolts and remove the bearing housing O ring outer rotor inner rotor and inner key in this order Remove the snap ring Removing procedure Fix the oil pump gear and the gear removing tool with M6 bolts and remove the gear using the axial force ...

Page 37: ...lightly tapped when fitting the oil seal If the tool is hit hard the shaft may dislocate and will not rotate smoothly Manually rotate the shaft to check the rotating condition If the shaft does not rotate smoothly lightly tap the pump side end of the shaft to adjust it After the components are assembled completely manually rotate the shaft again to check the rotating condition Oil Pump Gear Assemb...

Page 38: ...mm B 0 31inch 8mm O Ring 33211090 A 3 79inch 96 2mm B 0 12inch 3 1mm Ball bearing 28015931 2 A 2 05inch 52mm B 0 59inch 15mm Needle bearing 28015980 A 0 91inch 23mm B 0 98inch 25mm Tool 㸦㸮㸬㸴㸱㸮㹧㹬㹡㹦㸧 㸯㸴㹫㹫 㹋㸯㸮 㸴㸮㹫㹫㸦㸰㸬㸱㸴㹧㹬㹡㹦㸧 㸯㸰㹫㹫 㸦㸮㸬㸲㸵㸰㹧㹬㹡㹦㸧 㸯㸴㹫㹫 㸦㸮㸬㸴㸱㸮㹧㹬㹡㹦㸧 㸷㹫㹫 㸦㸮㸬㸱㸳㸲㹧㹬㹡㹦㸧 ࠉࠉࠉࠉࠉ㹎㹟㹰㹲ࠉ㹡㹭㹢㹣ࠉࠉ㹌㹭㸸㸳㸷㸮㸯㸱㸮㸮㸮 㸱㸮㹫㹫 㸦㸯㸬㸯㸶㹧㹬㹡㹦㸧 㸶㹫㹫 㸦㸮㸬㸱㸯㸳㹧㹬㹡㹦㸧 Fig 1 Oil pump gear removing tool ȭ㸳㸯㹫㹫㸦ȭ㸰㸬㸮㸮㸶㹧㹬㹡㹦㸧 ȭ㸰㸴㹫㹫 㸦ȭ㸯㸬㸮㸰㸱㹧㹬㹡...

Page 39: ...for details Remove the filter box filter box gasket 513 and U cover 1 554 Remove the pipes of air cylinder operating components and the air exhaust valve Remove the bolt that attaches the air intake duct to the 1st stage air end block After that raise the suction throttle valve assembly using a hoist to remove it After removing the suction throttle valve assembly take necessary measures to prevent...

Page 40: ... O ring 540 attached to the inner diameter of air cylinder cover 526 526 515 540 525 536 535 Remove the backup ring F28 and pull out air cylinder cover 1 504 cover 2 505 from both sides of air cylinder tube 503 Then remove air cylinder O ring 520 F28 504 520 503 520 505 Remove the snapring F27 key 541 and pull out spindle 509 from air cylinder tube 503 Then remove seal packing 3 518 attached to pi...

Page 41: ... packing 4 and 5 519 and 521 respectively to the inner surface of the air cylinder cover 1 504 Attach air cylinder O ring 540 and valve gasket 550 to the outer surface the cover 2 505 Attach rod metal 510 Apply specified grease to the seal packing grooves in advance Specified grease Daphne Coronex No 1 approx 0 1oz 3 g 515 516 522 504 520 Fig 3 Cover 1 504 510 520 522 540 504 519 550 521 Fig 4 Cov...

Page 42: ... air cylinder Attach that fix them with bolts Fix blowoff valve body 532 with bolts 532 506 507 508 534 When attaching the valve make sure that the direction of the valve is correct Attach air cylinder packing 511 to the STV body and then mount the air cylinder assembly Check the matching mark around the air cylinder in advance Mount the blowoff silencer assembly and attach the suction throttle va...

Page 43: ... 541 F27 525 536 535 519 521 518 510 550 540 Fig 7 Air cylinder inner structure 530 522 529 542 509 574 514 521 F28 515 516 538 520 503 517 505 522 540 550 526 504 F27 537 541 525 536 535 519 521 518 45kW 100psi 0 69MPa 125psi 0 86MPa 55kW 125psi 0 86MPa 55kW 100psi 0 69MPa 75kW 100psi 0 69MPa 125psi 0 86MPa ...

Page 44: ...ch 30mm C 0 26inch 6 5mm Seal gasket 3 24215180 2 Fluorine containing rubber A 3 94inch 100mm B 3 35inch 85mm C 0 37inch 9 5mm Backup ring 5372F280 1 PTFE A 1 30inch 33mm B 0 98inch 25mm C 0 04inch 1 0mm O ring 45915201 2 Fluorine containing rubber A 3 88inch 98 53mm B 3 74inch 94 97mm C 0 070inch 1 78mm C shaped snap ring Retaining ring 5372F270 1 SUS304 A 1 29inch 32 8mm B 1 10inch 27 9mm C 0 06...

Page 45: ...cating oil from the gear case After that disconnect the oil piping and remove the oil pump from the gear case When removing the oil pump be careful not to damage the gear 4 17 2 Airend removal After removing the pipings and suction throttle valve cover the openings Fig 4 17 2 1 㹈㹧㹥ࠉ㹤㹭㹰ࠉ㹩㹬㹭㹡㹩ࠉ㹮㹧㹬 㸦㸯㸬㸱㸶㹧㹬㹡㹦㸧 㸱㸳㹫㹫 㸦ȭ㸮㸬㸳㸳㸯㹧㹬㹡㹦㸧 ȭ㸯㸲㹫㹫 ȭ㸯㸶㹫㹫 㸦ȭ㸮㸬㸵㸮㸷㹧㹬㹡㹦㸧 㸦㸮㸬㸲㸷㸰㹧㹬㹡㹦㸧 㸯㸰㸬㸳㹫㹫 㸦㸯㸬㸳㸵㹧㹬㹡㹦㸧 㸲㸮㹫㹫 㹋㸶㸫㸲㸳 㹩㹬㹭㹡㹩ࠉ㹮㹧...

Page 46: ...for 1st stage airend M16 for 2nd stage airend Screw the jig two guide bolts into the bolt holes at the top on the airend Fig 4 17 2 3 Remove bolts on the airend flange Fig 4 17 2 4 Guide bolt M16 for 1st stage airend M12 for 2nd stage airend Using the jig two stud bolts remove the airend as follows Put the stud bolts in the removal holes of airend flange Tighten the stud bolts slowly and evenly Fi...

Page 47: ...ing weight 73 lbs 33 kg Eyebolt M12 Oil casing 4 M12 50 Gear casing 1st stage side 2nd stage side 8 M16 45 Eyebolt shall be fixed by the nut Hoist the gear casing using a suspension tool as shown in the left Remove the bolt and detach the gear casing Gear casing weight 112 lbs 51 kg 4 18 Oil casing and Gear casing removal 4 18 2 Gear casing removal ...

Page 48: ...g using the 2 M16 80 bolt 2 M16 80 bolt shall be tightened slowly and evenly When the shaft seal cover is removed from the gear casing change the 2 M16 80 bolt to 2 M16 eyebolts Hang the motor by three eyebolts so that motor can keep the horizontal situation Move the motor for ODE side until bull gear can be seen Remove the motor If you want to remove the motor for horizontal direction lift the mo...

Page 49: ...ll be tightened alternately When the shaft seal cover is removed from the gear casing change the 2 M16 80 bolt to 2 M16 eyebolts Hang the motor by four motor eyebolts so that motor can keep the horizontal situation Move the motor for ODE side until bull gear can be seen Remove the motor If you want to remove the motor for horizontal direction lift the motor by crane so that shaft seal cover does n...

Page 50: ...ar shaft It is not necessary to remove the oil pump gear from the oil pump gear shaft Oil Pump Gear Shaft Oil Pump Gear M10 bolt Removal hole M10 4 20 4 Bull gear removal Remove the gear retaining plate Keep in mind that M20 bolt is the left hand screw Put the jig for bull gear removal 1 and 2 indicated in the next page on the bull gear Tighten the jig 2 bolt to remove the bull gear Remove the key...

Page 51: ... Fig 2 Jig for bull gear removal 1 dimension 㸱㸯㸬㸰㹫㹫 㸦㸯㸬㸰㸰㸶㹧㹬㹡㹦㸧 㸰㸵㹫㹫 㸦㸯㸬㸮㸴㸱㹧㹬㹡㹦㸧 㸦㸮㸬㸲㸵㸰㹧㹬㹡㹦㸧 㸯㸰㹫㹫 㸱㸮r 㸦㸮㸬㸶㸮㸵㹧㹬㹡㹦㸧 㸰㸮 㸳㹫㹫 㸦㸵㸬㸶㸵㸲㹧㹬㹡㹦㸧 㸰㸮㸮㹫㹫 㹋㸯㸶 㸯 㸳 㸦㸴㸬㸲㸷㸴㹧㹬㹡㹦㸧 㸯㸴㸳㹫㹫 㸦㸮㸬㸮㸷㸶㸲㹧㹬㹡㹦㸧 㸰 㸳㹫㹫 Fixed speed type A External diameter φ13 8654 φ15 3250inch φ352 181 φ389 257mm B Internal φ2 36inch φ60mm Weight 42 11 50 93 lbs 19 1 23 1 kg Vtype A External diameter φ15 0637 φ15 7013inch φ382 620 φ398 813mm B Inte...

Page 52: ...e collar onto the main motor shaft by shrink fitting The collar shall be contact the motor slinger The temperature for the shrink fitting shall be c B Vtype Adjust the position of the M6 set screw for the collar and for the motor shaft Tighten the M6 set screw with applying the adhesive ThreeBond TB1324N red Attach the O ring and bushing Tighten the 4 M8 flat head bolt Attach the shaft seal cover ...

Page 53: ...tach the air end Attach the key Apply the anti seizing paste between the motor shaft and the bull gear Anti seizing paste shall be the molybdenum disulfide basis Attach the bull gear onto the main motor shaft by shrink fitting The bull gear shall be contact the motor shaft end face The temperature for the shrink fitting shall be 300 150 Attach the gear retaining plate Keep in mind that M20 bolt is...

Page 54: ...eck for oil leak 4 21 Pinion Gear Replacement Procedure Air End Shaft Dia Max Oil Pressure Required 1st stage φ 1 17 inch φ 29 8mm 21750 psi 150MPa 2nd stage φ 0 976 inch φ 24 8mm 20300 psi 140MPa 1 O Ring 2 O Ring Shaft Pinion Gear Pull Out Tool To Pump Pump connecting port PS1 4 4 21 3 Shrink Fitting the Pinion Gear Shrink fit the pinion gear Be sure to fully insert the component until it comes ...

Page 55: ...1 Thermal refining required quenching at 850 C to 950 C 1562 to 1742 tempering at 550 C to 650 C 1022 to 1202 Hardness HRC 32 to 40 2 M12 screws must be machined with a cutting tool 3 Applicable model DSP 45 55 75N 2nd stage side Drill through 2 dia PS1 4 13 deep Pilot hole 11 5 dia 15 deep Drilled hole 6 dia 110 deep mm 2 O Ring Model Part Name Nominal No d1 d2 Part Code No 1st stage O ring 1 AS5...

Page 56: ...ry shall be returned to your distributor or disposed of properly in accordance with your local government disposal regulations Used battery is furthermore shorted if the positive and negative terminals come in contact with each other or come in contact other metal objects and could cause the battery to produce heart rupture or catch fire Do not expose the battery to fire Used batteries cannot be r...

Page 57: ...sure sensor For 1st stage discharge pressure Main board side PS2 Pressure sensor For 2nd stage discharge pressure Main board side PS4 Pressure sensor For oil pressure LCD side TH2 Thermistor For 2nd stage suction temperature Main board side TH3 Thermistor For 2nd stage discharge temperature Main board side TH4 Thermistor For 1st stage discharge temperature LCD side TH5 Thermistor For oil temperatu...

Page 58: ...N13 From TH3 CN2 From TH10 CN1 From PS1 CN16 From PS2 CN10 From TH2 CN11 From PS1 CN13 From TH3 CN16 From PS2 THM Sensor position for air cooled type TH2 TH3 TH4 TH5 PS1 PS4 PS2 PS1 PS4 PS2 LCD PCB side See the back side of instrument panel CPU PCB side control panel side Fixed speed type Fixed speed type ...

Page 59: ...r 234 Gasket 2nd stage air end discharge cover 235 Gasket 2nd stage air end jacket cover 238 Knock pin 2nd stage air end 243 Pinion Gear 1st stage air end 299 1ststageand2ndstageAirEndAssembly new Ref No Description 301 Gear Case 307 Gear oil pump 316 Gasket oil filling port 317 Plug oil filling port 318 Cover oil filling port 319 O Ring 320 Oil Nozzle 1 321 Oil Nozzle 2 322 Gasket 1st stage air e...

Page 60: ... 340 Key 365 O Ring 367 Cover Gear 387 Collar 391 Shaft Seal 392 Cover visco seal 393 O Ring shaft seal 394 O Ring shaft seal 395 Wave Spring visco seal 397 Snap Ring 102 401 Motor 410 Rubber Bush 425 Vibration Isolation Rubber 430 Base motor 1 431 Base motor 2 432 Base motor 3 436 Motor Cover 1 437 Motor Cover 2 438 Fixing Bracket Motor Cover 453 Bearing Load side 454 Bearing Anti Load side 455 G...

Page 61: ...er 510 Rod Metal 511 Gasket air cylinder 512 Gasket 1 air end air intake 513 Gasket STV cover 514 Valve Plate STV 515 Seal Gasket 1 516 Seal Gasket 2 517 Piston air cylinder 518 Seal Gasket 3 519 Seal Gasket 4 520 O Ring air cylinder 521 Seal Gasket 5 522 Bush air cylinder 525 Tying Rod air cylinder 526 Cover air cylinder 529 Spring Washer SUS 530 Rod Nut 532 Body blowoff valve 534 Seal Washer air...

Page 62: ...l 6 647 Duct Panel 7 648 Duct Panel 8 649 Duct Panel 9 650 Duct Panel 10 651 Duct Panel 11 652 Duct Panel 12 653 Cover 1 Intercooler 685 Cover 2 Intercooler 691 Cover 3 Intercooler 692 Duct Panel 1 Intercooler 693 Duct Panel 2 Intercooler 694 Duct Panel 3 Intercooler 695 Duct Oil cooler 696 Duct Panel 1 Aftercooler 697 Duct Panel 2 Aftercooler 698 Duct Panel 3 Aftercooler E51 Maintenance Cover 1 E...

Page 63: ...cooler water chamber 613 Gasket oil cooler water chamber cover 614 Cover oil cooler 615 Gasket oil cooler cover 623 Intercooler Assembly 624 Shell intercooler 625 Tube Nest intercooler 626 Gasket intercooler tube nest 627 Support 1 oil cooler 632 Plug E39 Vibration Isolation Rubber E76 Support 2 oil cooler Ref No Description 628 Base coolers 629 Duct air exhaust 630 Support 1 base frame 631 Suppor...

Page 64: ... Parts Kit oil pump 327 Oil Pump Assembly 328 Bearing 329 Oil Seal 342 Oil Pump body 343 Housing oil pump bearing 345 Key 356 Key 362 Snap Ring 363 O Ring 378 Bush Bearing Ref No Description 719 Digital Panel 744 Lithium Battery 746 Control PCB 748 Seat instrument panel 755 PCB Cover G57 E Stop H39 UNLOAD STOP Button H43 Switch Guard H79 Rubber Bush H80 OPE Code Pipe H81 OPE Code 1 H82 OPE Code 2 ...

Page 65: ... 6 704 Electromagnetic Contactor Fan Motor 705 Fuse 1A 706 Fuse 1 25A 707 Fuse 1 6A 708 Current Transformer 709 Terminal Block 1 729 Electromagnetic Contactor 52 730 Condenser 745 PC Board B44 Door Control Box D06 Terminal Block 2 D10 Surge Absober D12 Cooling Fan D73 Reversed Phase Relay D75 Transformer E09 Line Noise Filter E45 Rubber Bush E47 Rubber Bush E48 Rubber Bush G04 Conduit nut G05 Cond...

Page 66: ...DCBL Controller E17 DC Reactor 2 E18 Cover Fin 1 E45 Rubber Bush E46 Rubber Bush E47 Rubber Bush E48 Rubber Bush F73 Cover Fin 2 G04 Conduit Nut G05 Conduit G06 Conduit Nut G07 Conduit G13 Relay MY2N G14 Relay MY4N G15 AVR 60W G16 AVR 10W G17 AVR 90W G18 Circuit Breaker G19 Circuit Breaker G20 FUSE 4A G21 FUSE 10A J14 Inverter Cooling Fan J15 Communication Board Ref No Description 700 Control Pane...

Page 67: ...ormer 745 PC Board 753 DC Reactor 1 B44 Door Control Box D06 Terminal Block 2 D10 Surge Absober D12 Cooling Fan D73 Reversed Phase Relay D75 Transformer E04 Controller Fan 1 DCBL Controller E06 Power Printed Circuit Board E07 Smoothing Condenser E09 Line Noise Filter E10 DCBL Controller E18 Cover Fin 1 E45 Rubber Bush E47 Rubber Bush F73 Cover Fin 2 G04 Conduit Nut G05 Conduit G06 Conduit Nut G07 ...

Page 68: ...ransformer 730 Condenser 745 PC Board 753 DC Reactor 1 B44 Door Control Box D06 Terminal Block 2 D10 Surge Absober D12 Cooling Fan D73 Reversed Phase Relay D75 Transformer E04 Controller Fan 1 DCBL Controller E06 Power Printed Circuit Board E07 Smoothing Condenser E09 Line Noise Filter E10 DCBL Controller E18 Cover Fin 1 E45 Rubber Bush E47 Rubber Bush F73 Cover Fin 2 G04 Conduit Nut G05 Conduit G...

Page 69: ...sket 1st stage air end discharge flange 035 Gasket cooler 037 Gasket 2nd stage suction 039 Gasket 2nd stage air end discharge flange 040 Piping Aftercooler Condensate Water 041 Air Relief Valve seat 056 Air Piping 9 057 Air Piping 10 058 Support discharge piping 059 Piping Support 1 060 Piping Support 2 061 Piping Support 3 670 Hi Precooler 865 Gasket 2 868 Lower Cover check valve 869 Upper Cover ...

Page 70: ...oler Header 2 025 Air Piping 3 026 Air Piping 4 027 Air Piping 5 028 Air Piping 6 029 Air Piping 7 033 Gasket 1 034 Gasket 1st stage air end discharge flange 036 O Ring intercooler 037 Gasket 2nd stage suction 038 Gasket cooler header 039 Gasket 2nd stage air end discharge flange 044 Intercooler Header 1 865 Gasket 2 868 Cover check valve 869 Aftercooler Header 1 870 Gasket 871 Check Valve 875 Air...

Page 71: ... piping B36 Support 4 condensate piping F48 Vibration Isolation Rubber F67 3 way Switching Valve F68 Support 1 condensate piping F69 Support 2 condensate piping H74 Condensate Solenoid Valve H75 2 way Valve 2 Ref No Description 768 Seat oil piping 769 Support greasing port 770 Oil Piping 1 771 Oil Piping 2 773 Piping 1 oil drain 774 Piping 2 oil drain 785 Support oil piping 786 Fixing Plate 1 oil ...

Page 72: ... 1 774 Oil Drain Piping 2 775 Oil Piping 2 776 Oil Piping 3 828 Orifice 880 Oil Strainer 882 Oil Filter Element 888 Oil Temperature Sensor 996 Filter Wrench A D35 O Ring D80 Seat oil piping E40 Seat oil air ventilation H73 O Ring Does not come with the product Ref No Description 768 Seat oil piping 769 Support greasing port 770 Oil Piping 1 771 Oil Piping 2 773 Piping 1 oil drain 774 Piping 2 oil ...

Page 73: ...charge 773 Oil Drain Piping 1 774 Oil Drain Piping 2 828 Orifice 880 Oil Strainer 882 Oil Filter Element 888 Oil Temperature Sensor 996 Filter Wrench A D35 O Ring D80 Seat oil piping H73 O Ring Does not come with the product Ref No Description 008 Piping 1 009 Piping 2 011 Pet Cock 012 Piping 3 016 Piping 4 017 Stop Valve for a water flow control 018 Seat cooling water piping 096 Stop Valve draina...

Page 74: ...lowoff piping E33 Support blowoff piping 1 E34 Support blowoff piping 2 E94 Blowoff Air Piping Ref No Description 900 Blowoff Silencer 901 Seat blowoff silencer 902 Cover blowoff silencer B38 Plate blowoff piping E21 Blowoff Solenoid Valve 1 E22 Blowoff Solenoid Valve 2 E23 Adapter E33 Support blowoff piping 1 E34 Support blowoff piping 2 E80 Support silencer cover E94 Blowoff Air Piping 1 E95 Blo...

Page 75: ...er 902 Cover blowoff silencer A90 Tee Fitting E93 Blowoff Cooler E94 Blowoff Air Piping 1 E95 Blowoff Air Piping 2 Ref No Description 900 Blowoff Silencer 901 Seat blowoff silencer 902 Cover blowoff silencer A90 Tee Fitting E21 Blowoff Solenoid Valve 1 E22 Blowoff Solenoid Valve 2 E23 Adapter E80 Support silencer cover E94 Blowoff Air Piping 1 E95 Blowoff Air Piping 2 E96 Blowoff Air Piping 3 ...

Page 76: ... filter 799 Element control line filter 849 Support pressure sensor 892 Support plate solenoid valve 896 3 Way Solenoid Valve 897 Control Line Filter 898 Pressure Differential Indicator 899 Solenoid Valve Manifold A92 Seat sensor A95 Adapter control air piping A98 Nipple D26 Pressure Sensor discharge air D79 Filter Nipple D99 Pressure Sensor interstage H83 Pressure Sensor oil ...

Page 77: ...f No Description 849 Support pressure sensor 898 Pressure Differential Indicator A92 Seat sensor D26 Pressure Sensor discharge air D79 Filter Nipple D99 Pressure Sensor interstage E40 Seat 1 pressure detecting pipe H63 Seat 2 pressure detecting pipe H83 Pressure Sensor oil ...

Page 78: ...e filter 799 Element control line filter 849 Support pressure sensor 892 Support plate solenoid valve 896 3 Way Solenoid Valve 897 Control Line Filter 898 Pressure Differential Indicator 899 Solenoid Valve Manifold A92 Seat sensor A95 Adapter control air piping A98 Nipple D26 Pressure Sensor discharge air D79 Filter Nipple D99 Pressure Sensor interstage H83 Pressure Sensor oil ...

Page 79: ...ef No Description 849 Support pressure sensor 898 Pressure Differential Indicator A92 Seat sensor D26 Pressure Sensor discharge air D79 Filter Nipple D99 Pressure Sensor interstage E40 Seat 1 pressure detecting pipe H63 Seat 2 pressure detecting pipe H83 Pressure Sensor oil ...

Page 80: ... Panel 2 913 Rear Panel 3 914 Top Panel 1 915 Top Panel 2 925 cover 1 piping 926 cover 2 piping 929 Rubber Bush control cable 938 Handle 939 Rubber Bush 940 Rubber Bush 942 Common Base 943 Left Frame 944 Front Frame 945 Right Frame 946 Rear Panel 4 953 Instrument Panel 966 Top Panel 3 976 Rear Duct 1 977 Rear Duct 2 990 Cover 991 Left Door A71 Fork Slot Cover D14 Magnet D25 Chain H59 Left Corner C...

Page 81: ... 921 975 H96 982 Ref No Description 917 Duct air intake 921 Cover air intake filter duct 922 Air Intake Filter 932 Wing Nut 933 Stud Bolt 937 Bolt with assistant 975 Duct motor 982 Support Frame 3 H88 Protective Cover H95 Support Frame 1 H96 Support Frame 2 ...

Page 82: ... Panel 2 913 Rear Panel 3 914 Top Panel 1 915 Top Panel 2 925 cover 1 piping 926 cover 2 piping 929 Rubber Bush control cable 938 Handle 939 Rubber Bush 940 Rubber Bush 942 Common Base 944 Front Frame 946 Rear Panel 4 951 Left Frame 953 Instrument Panel 966 Top Panel 3 969 Right Frame 990 Cover 991 Left Door A71 Fork Slot Cover D14 Magnet D25 Chain D91 Seal Cover 1 D96 Seal Cover 2 H59 Left Corner...

Page 83: ...Duct air intake 921 Cover air intake filter duct 922 Air Intake Filter 932 Wing Nut 933 Stud Bolt 937 Bolt with assistant 975 Cover 1 motor duct 976 Duct motor 1 977 Duct motor 2 978 Cover 2 motor duct E59 Duct 1 Starter Box E60 Duct 2 Starter Box H87 Protective Cover 1 H88 Protective Cover 2 H95 Support Frame 1 H96 Support Frame 2 ...

Page 84: ...0 Pressure Gauge D41 Ejector D42 Vacuum Indicator D43 Valve Sheet D44 Valve Spring D45 Air Filter Air Pressure Regulator D46 Diaphragm air pressure regulator D48 Element air filter D49 Float Trap D78 Packing E62 O Ring air pressure regulator E63 OMR Consumable Parts Kit E96 OMR Relief Valve H17 Valve H18 Stem H76 Tube Fitting Assy 1 H77 Tube Fitting Assy 2 Does not come with the product ...

Page 85: ...Printed in Japan Hitachi Industrial Equipment Systems Co Ltd DSP Service Manual A 2014 10 ...

Reviews: