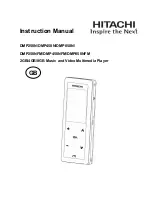
background image


Instruction Manual 


DMP250N/DMP450N/DMP850N/ 

DMP250NFM/DMP450NFM/DMP850NFM 

2GB/4GB/8GB Music and Video Multimedia Player 


 GB


Summary of Contents for DMP250N

Page 1: ...Instruction Manual DMP250N DMP450N DMP850N DMP250NFM DMP450NFM DMP850NFM 2GB 4GB 8GB Music and Video Multimedia Player GB ...

Page 2: ...empt to repair the player yourself as it does not contain any user serviceable parts The rechargeable battery in the player should only be replaced by an authorized service centre Please refer to page 40 for contact details 3 Listening to loud sounds for prolonged periods may permanently damage your hearing Before putting on the earphones turn the volume down then put the earphones on and slowly i...

Page 3: ...a on a PC in order to protect against corruption data loss or device malfunction Please note that Hitachi Europe Ltd shall not accept any liability for damage or loss of stored data 3 The player operates best in temperatures between 5º and 40º C Its play time may temporarily shorten when it is operating in low temperature conditions 4 Store your player in a place where the temperature is always be...

Page 4: ...mputer 9 System Support 9 Connecting the Player to the Computer 9 Transferring Files 10 For Windows Users 11 MSC Mode For Windows 2000 XP Service Pack 1 users 11 MTP Mode For Windows XP Service Pack 2 with WMP 10 users 12 MTP Mode For Windows XP Service Pack 2 WMP11 Vista with WMP 11 users 15 For Macintosh users 17 Formatting the Player 17 For Windows Users 17 MSC Mode 17 MTP Mode 18 For Macintosh...

Page 5: ...back 23 Pausing Playback 23 Stop Playback 23 Select Next Previous Track 23 Fast Forwarding Rewinding Current Track 23 Adjusting the Volume Level 23 Record 24 Start Record 24 Start Recording 24 Pause Recording 24 Stop Recording 24 Settings 24 Format 25 Channel 25 Rate 25 Voice 26 Playing a Voice Record 26 FM For DMP250NFM DMP450NFM DMP850NFM Models Only 27 Starting the FM Radio 27 Listening to FM R...

Page 6: ...lizer Setting 30 Repeat 31 Contrast 31 Backlight 31 Power Savings 32 Language 32 Default 32 Format 33 About 33 Navigation 34 Appendix 35 Video Conversion Tool 35 Recovering the Firmware For Windows 2000 XP Vista Users Only 36 Troubleshooting 38 Technical Specifications 39 Quick Start Guide 41 ...

Page 7: ...allation CD CTPCDDIXI081002 0 00 Quick Start Guide CTPGUDIXO243668 0 00 CTPGUDIXO243669 0 00 CTPGUDIXO243670 0 00 Getting Started Features Touch pad WMA MP3 player Video player Photo player Voice recorder WMA DRM support not for Mac users USB mass storage device Integrated USB connector Backlight display Superb audio quality Touch Pad The player is designed with a high sensitivity touch pad Tap th...

Page 8: ...mes with a rechargeable battery On the first charge before using this will take approximately 8 hours for the battery to be fully charged But thereafter it would normally take 3 hours to be fully charged 1 Turn on the computer 2 Connect the player with the computer with a USB cable A battery icon progresses indicating charging is undergoing The icon stays full when charging finished NOTE Fully cha...

Page 9: ...stored the longer the start up time will be But the start up time will resume to normal in the next start up When the player boots up the HITACHI logo and startup image appears in sequence The player automatically goes to the music playback mode after boot up Hold Function You may lock the touch pad to prevent accidental operation Slide the Power Hold switch down to the lock icon and then a screen...

Page 10: ...rt Supports Windows 2000 XP Vista Supports Macintosh OS X version 10 2 6 or later Connecting the Player to the Computer Connect the player with the computer with the USB cable The screen displays USB Connected indicating the player is in USB mode Windows will show Found New Hardware when the player is first attached The player will then recognize as a new device under My Computer NOTE It may take ...

Page 11: ...ows XP SP1 without WMP10 11 Windows XP SP2 with WMP10 11 Windows Vista MSC MTP NOTE MSC stands for Mass Storage Class It doesn t require separate drive installation when It s first connected to PC and it can be used as an external mass storage device using drag and drop method with Windows Explorer MTP stands for Media Transfer Protocol It is to facilitate communication between devices and connect...

Page 12: ...rvice Pack 1 without Windows Media Player 10 11 1 Double click My Computer in Windows Explorer the player is recognized by the computer as a removable disk Double click it to explore the device 2 Drag the files of your favourite songs to Removable Disk NOTE You are strongly recommended to organize you songs in different folders systematically so that you can locate your songs easily in the Navigat...

Page 13: ...ndows XP Service Pack 2 with Windows Media Player 10 11 Windows Vista with Windows Media Player 11 MTP Mode For Windows XP Service Pack 2 with WMP 10 users 1 After connecting the player to the computer the MTP Media Player window appears 2a Select Sync digital media files to this device and click OK 3a Select Manual and click Finish ...

Page 14: ...DMP250N DMP450N DMP850N DMP250NFM DMP450NFM DMP850NFM Instruction Manual 13 4a Click Sync and drag the file you want to transfer to the left window 5a Click Start Sync ...

Page 15: ...drop all data files to the Data folder Media folder You can only drag and drop the media files music videos and photos the player supports to the Media folder 5b Drag the file to the portable media drive NOTE To play the DRM protected music you should use Windows Media Player 10 via MTP connection to store the DRM files to the player If encountering any problem about DRM file transfer Windows Medi...

Page 16: ...ervice Pack 2 WMP11 Vista with WMP 11 users 1 After connecting the player to the computer the Portable Device for Windows XP SP2 or AutoPlay for Windows Vista window appears 2a Select Sync digital media files to this device and click OK For Windows XP SP2 For Windows Vista 3a Click Sync on the menu bar ...

Page 17: ...ading or writing To play the DRM protected music you should use Windows Media Player 11 via MTP connection to store the DRM files to the player If you have any problem about DRM file transfer 9 For Windows Media Player 11 users visit the following link to restore the Windows Media Player 11 http www microsoft com downloads details aspx FamilyID 1d224714 e238 4e45 8668 5166114010ca DisplayLang en 9...

Page 18: ...e songs to Unlabeled or Untitled NOTE Apple MAC OS does not support the transfer of copy protected music to the player Formatting the Player If you want to erase all files in the internal memory of the player format the player on the computer NOTE Please back up all your songs or other media files before formatting your player For Windows Users MSC Mode 1 Double click My Computer 2 Right click the...

Page 19: ...P Mode For Windows XP with WMP10 users 1 Double click My Computer 2 Right click the disk named DMP X50N series or MTP Device and select Format 3 Click OK 4 Click OK when formatting finishes For Windows XP with WMP11 Windows Vista users 1 Double click My Computer and then double click the device MTP Player 2 Right click Internal Storage and select Format For Windows XP For Windows Vista 3 Click OK ...

Page 20: ...e Player from the Computer For Windows Users MSC Mode 1 The screen will display USB Connected again when the file transfer or formatting is completed Disconnect the player from the computer only when all data reading writing is finished 2 Double click the Unplug or Eject icon in the system tray 3 Select USB Mass Storage Device and click Stop 4 Click OK 5 Disconnect the USB cable from the computer ...

Page 21: ...rther operation How to Navigate the Menu Tap or to scroll menu options right or left respectively Tap OK to enter the submenu list Tap or scroll the submenu list down or up respectively Tap OK to confirm the selection Tap M to return to the upper level menu or exit Now Playing You can jump back the current music playback screen by the following steps 1 Tap M 2 Tap or to select Now Playing 3 Tap OK...

Page 22: ... to fast forward the current track and release to stop forwarding Touch and hold to fast rewind the current track and release to stop rewinding Adjusting the Volume Level Tap to increase the volume level or touch and hold to increase fast Tap to decrease the volume level or touch and hold to decrease fast Music Player A B K J I A ID3 Tag Artist Album Genre Year B Progress Bar C Play Pause Stop D E...

Page 23: ...rm the selected category All Songs Play all music files in the player Artists Play music files in the albums by different artists Albums Play music files by album Genres Play music files by genre Year Play music files by time of issuance Video The player only supports video files in smv format For other files convert them into the smv format by using the supplied video conversion tool See Video Co...

Page 24: ...eo file list Select Next Previous Track Tap during playback to play the next file Tap within the first five seconds of the playback to play the previous file Tap after five seconds of the playback to play the current file from the beginning Fast Forwarding Rewinding Current Track Touch and hold to fast forward the current file Touch and hold to fast rewind the current file Adjusting the Volume Lev...

Page 25: ...ce When the player is switched from MUSIC or PHOTO mode to RECORD mode surrounding sound will be recorded Start Recording 1 Tap M to display the menu 2 Tap or to select Record 3 Tap OK 4 Tap or to select Start Record 5 Tap OK Pause Recording Tap OK during recording to pause and tap OK again to resume recording Stop Recording Tap M to stop recording Settings In the Record submenu 1 Tap or to select...

Page 26: ...M ADPCM Low recording quality MS ADPCM Medium recording quality PCM High recording quality Channel 1 Tap or to select Channel 2 Tap OK 3 Tap or to select an option Mono Stereo 4 Tap OK to confirm Rate 1 Tap or to select Rate 2 Tap OK 3 Tap or to select a recording rate 4 Tap OK to confirm NOTE The higher rate you select the better quality the record is but the more space the file occupies ...

Page 27: ...to select FM or Voice and tap OK for DMP250NFM DMP450NFM DMP850NFM models only 5 Tap or to select a record file 6 Tap OK to play the selected record file for DMP250NFM DMP450NFM DMP850NFM models only NOTE FM records are available only for DMP250NFM DMP450NFM DMP850NFM models The record files can be found in the folders FMRecord or MicRecords when connecting your player to PC ...

Page 28: ... to confirm When using the FM radio for the first time the player automatically starts to seek all available FM radio channels and save them to the preset list Listening to FM Radio After finishing automatic seeking the FM radio stops at the first preset frequency P1 You may tap OK each time to switch to the next FM radio frequency in the preset list that you want to listen to Manual Tune 1 Tap or...

Page 29: ...tap OK 4 Tap or to select a preset number which is used for the current radio frequency 5 Tap OK to save Load Preset 1 Touch and hold OK for a while and release it A FM window pops up 2 Select Load Preset and tap OK 3 Tap or to select a preset radio frequency 4 Tap OK Auto Scan 1 Touch and hold OK for a while and release it A FM window pops up 2 Select Auto Scan and tap OK The player starts seekin...

Page 30: ...t the preset radio frequency you want to delete 4 Tap OK to confirm 5 Tap or to select Yes to delete the preset frequency and No to cancel the operation 6 Tap OK to confirm Delete All 1 Touch and hold OK for a while and release it A FM window pops up 2 Select Delete All and tap OK 3 Tap OK again 4 Tap or to select Yes to delete all preset frequencies and No to cancel the operation 5 Tap OK to conf...

Page 31: ...y one Slide Show The player automatically displays all photos one by one Thumbnail A maximum of nine photos in the thumbnail size can be shown on the screen per a time Settings To navigate the Settings list 1 Tap M to display the menu 2 Tap or to select Settings 3 Tap OK 4 Tap or to select a setting in the list Equalizer Setting There are six preset equalizer settings for music playback effect Nor...

Page 32: ...peat 2 Tap OK 3 Tap or to select an option Normal Repeat One Repeat All Random 4 Tap OK to confirm the selected play mode Contrast 1 Tap or to select Contrast 2 Tap OK 3 Tap or to increase or decrease the contrast level 4 Tap OK to confirm the screen contrast Backlight Backlight time is the time for the backlight to be on after a button is tagged When the set time passed and with no button being t...

Page 33: ... it will shut down automatically 1 Tap or to select Power Savings 2 Tap OK 3 Tap or to select an option Off 1min 2mins 5mins 10mins 15mins 4 Tap OK to confirm the auto off time Language 1 Tap or to select Language 2 Tap OK 3 Tap or to select your favorite OSD language 4 Tap OK to confirm Default 1 Tap or to select Default 2 Tap OK 3 Tap or to select Yes or No Select Yes to load factory default set...

Page 34: ... format the player or No to cancel operation 4 Tap OK to confirm Please refer to Formatting the Player in the section of Connecting to the Computer for details on formatting the player on the computer About You may check the player s system information including firmware version used memory and free memory 1 Tap M to display the menu 2 Tap or to select About in the menu 3 Tap OK 4 Tap M to exit an...

Page 35: ... the player All Audio Tracks List all audio files in the player All Video Tracks List all video files in the player All Image Tracks List all image files in the player 6 Tap or to select a file 7 Touch and hold OK and an Option submenu pops up when you release OK 8 Tap or to select Play Delete Cancel Play Select Play and tap OK to play the selected file Delete Select Delete and tap OK Tap or to se...

Page 36: ...le you want to convert Clear the selected file from the source file list Start conversion Select the output destination Select Full Image or Full Screen Selecting Full Image lets the image fit to the left and right borders of the player screen Selecting Full Screen let the image fit to the top and bottom borders of the player screen Fixed 128x160 as the image size Select the quality setting for th...

Page 37: ...w steps to recover the firmware 1 Insert the support disk supplied with the player into the CD ROM drive 2 Click the Firmware Recovery button on the splash screen If the splash screen fails to appear automatically browse the disk content and double click the stupdaterapp exe file to run the firmware recovery program 3 Slide and hold the Power Hold Switch in the direction of the icon and connect th...

Page 38: ... minutes reset the player by depressing the reset opening and try the above steps again If Format Data Area is checked the recovery utility reinstalls the firmware and formats the player Otherwise the utility only reinstall the firmware Firmware recovery is only available for Windows 2000 XP Vista OS users 5 Firmware recovery finishes when Complete appears on the Firmware Download screen Click Clo...

Page 39: ... not recognize the player The computer is not compatible with the player The player only works on Windows 2000 XP Vista OS and Macintosh OS X version 10 2 6 or later Cannotplaycopy protected music files Incorrect downloading methods Transfer copy protected music files to the player by using the Windows Media Player s sync function of the music management software provided by the online music store...

Page 40: ...g Approx 3 hours via PC Display 128x160 Dot Matrix 1 8 TFT with touch pad File Support Audio WMA MP3 Video SMV Image JPEG Progressive JPEG is not supported BMP Signal to Noise Ratio 90 dB Frequency Response 20 Hz 20 KHz Headphones Output 4 4 mW each output Firmware Flash based Upgradeable for Windows users only Supported OS Windows 2000 XP Vista Macintosh OS X 10 2 6 or later Max number of folders...

Page 41: ...re than 0 0005 Mercury or more than 0 002 Cadmium or more than 0 004 Lead Visit Partmaster co uk today for the easiest way to buy electrical spares and accessories With over 1 million spares and accessories available we can deliver direct to your door the very next day Visit www partmaster co uk or call 0870 6001 338 UK customers only Calls charged at National Rate If you require a replacement for...

Page 42: ...ndows Media Player can be used to see if files are copyprotected Package Content Main Unit DMP250N DMP450N DMP850N DMP250NFM DMP450NFM DMP850NFM Instruction Manual included in the Installation CD USB cable for PC connection and battery charging CTPCLUSB07072B0 0 00 Earphone EPEARJYE800B000 0 00 EPEARNLDEP10100 0 00 Installation CD CTPCDDIXI081002 0 00 Quick Start Guide CTPGUDIXO243668 0 00 CTPGUDI...

Page 43: ...adphone Socket 1 Charging the Battery The player comes with a rechargeable battery On the first charge before using this will take approximately 8 hours for the battery to be fully charged But thereafter it would normally take 3 hours to be fully charged 1 1 Turn on the computer 1 2 Connect the player with the computer with a USB cable A battery icon progresses indicating charging is undergoing Th...

Page 44: ... or later 4 Connecting the Player to the Computer 4 1 Connect the player with the computer with the USB cable The screen displays USB Connected indicating the player is in USB mode 5 Transferring Files After connecting the player to the computer the player works in Mass Storage Class MSC or Media Transfer Protocol MTP mode The player s working mode depends on the operation system and Windows Media...

Page 45: ...ow appears 2a Select Sync digital media files to this device and click OK 3a Select Manual and click Finish 4a Click Sync and drag the file you want to transfer to the Sync List window 5a Click Start Sync You also can copy the media files to the player by the drag and drop method 2b Select Take no action and click OK 3b Double click My Computer 4b Double click DMP X50N series or MTP Device Data fo...

Page 46: ...rop method 2b Select Open device to view files and click OK 3b Double click Internal Storage 4b Drag the files to the Internal Storage NOTE x To play the DRM protected music you should use Windows Media Player 11 via MTP connection to store the DRM files to the player x Windows Vista users must use Windows Media Player 11 to transfer music files to the player For Macintosh Users 1 The player is re...

Page 47: ...8 4 Tap OK to confirm the selection 8 5 Tap M to return to the upper level menu or exit 9 Listening to Music The player automatically enters the music playback mode when you turn it on 9 1 Tap OK to start playback 9 2 Tap OK to pause during playback 9 3 Tap to increase the volume level or touch and hold to increase fast Tap ʊ to decrease the volume level or touch and hold ʊ to decrease fast 9 4 Ta...

Page 48: ...ng any spent or discarded batteries as unsorted municipal waste but use the return and collection systems available If the batteries or accumulators included with this equipment display the chemical symbol Hg Cd or Pb then it means that the battery has a heavy metal content of more than 0 0005 Mercury or more than 0 002 Cadmium or more than 0 004 Lead Visit Partmaster co uk today for the easiest w...

Reviews: