background image

FCC Statement

This equipment has been tested and found to comply with the limits for a Class B
digital device, pursuant to Part 15 of the FCC Rules. These limits are designed to
provide reasonable protection against harmful interference in a residential installation.
This equipment generates uses and can radiate radio frequency energy and, if not
installed and used in accordance with the instructions, may cause harmful
interference to radio communications. However, there is no guarantee that
interference will not occur in a particular installation. If this equipment does cause
harmful interference to radio or television reception, which can be determined by
turning the equipment off and on, the user is encouraged to try to correct the
interference by one or more of the following measures:

-- Reorient or relocate the receiving antenna.
-- Increase the separation between the equipment and receiver.
-- Connect the equipment into an outlet on a circuit different from that to which the

receiver is connected.

-- Consult the dealer or an experienced radio/TV technician for help.

This device complies with part 15 of the FCC Rules. Operation is subject to the
following two conditions:
(1) This device may not cause harmful interference, and (2) this device must accept
any interference received, including interference that may cause undesired operation.

Changes or modifications not expressly approved by the party responsible for
compliance could void the user's authority to operate the equipment

Summary of Contents for PAD700

Page 1: ...can be determined by turning the equipment off and on the user is encouraged to try to correct the interference by one or more of the following measures Reorient or relocate the receiving antenna Increase the separation between the equipment and receiver Connect the equipment into an outlet on a circuit different from that to which the receiver is connected Consult the dealer or an experienced rad...
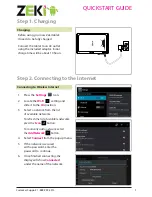
Page 2: ...efly press to lock or unlock the screen 2 VOL Increase the volume VOL Decrease the volume 3 Micro USB port Connects to PC via USB cable Connects to USB memory device keyboard mouse Microphone The microphone is located near the USB port inside the cabinet 4 Camera Built in Webcam 5 Earphone Socket Connects to stereo earphones 6 Speaker 7 Reset Pin Hole Reset your device if the device freezes 8 Micr...

Page 3: ...s to fully charge the battery Install Memory Card To install a memory card find the card slot on the device and then insert the memory card into the slot in the correct orientation Transfer Files from PC You may need to transfer media files from a computer to the device 1 Connect the device to a computer with the supplied USB cable 2 Once the connection is done an icon of mobile phone internal mem...

Page 4: ...icon on the Home Screen to open the system setting menu Here you can setup the working environment for the device e g Language Display WiFi Sound Apps etc Display all Applications and Widgets The device has many useful pre installed applications widgets You can tap the Application Tab to display applications You can tap the homepage until pop up the interface as the left picture Then tap the WIDGE...

Page 5: ...d release it To remove a Home Screen item hold your finger onto it to highlight it drag it to the recycle bin X Remove and then release your finger To change the wallpaper hold your tap on the Home screen till a menu appears then tap on Wallpaper to set the desktop wallpaper Make Wi Fi Connection Before launching the web browser you first need to activate the Wi Fi and configure a Wi Fi network 1 ...

Page 6: ...e of Bluetooth device and this function can be opened which indicates your MID Bluetooth can be searched by other Bluetooth devices The default time of this opening is 120 seconds Scan to search for device By using this function you can detect the device you want to connect Bluetooth devices After you have scanned to search for the device the Bluetooth devices your Tablet PC has searched will be d...

Page 7: ...o view the photo in full screen 4 To display the previous next picture slide your finger on the screen horizontally 5 To zoom in or out the picture pinch your finger on the picture Managing the Files You can check or manage your files with Explorer application 1 Tap the Explorer icon in the apps page to open this mode 2 In this mode you can look through all your file resources 3 You can also manag...

Page 8: ...e app In this case you shall have to check the Unknown sources in the pop up setting menu before you go on with the installation 3 Once the installation finishes you can find the icon of the app in the apps screen It is available for you now Uninstall 3rd party apps 1 Tap the Settings icon to display setting menus 2 Select Apps 3 Tab on the application that you want to uninstall 4 Tab on Uninstall...

Page 9: ...ce If you do not select this option you can install only applications downloaded from Play Store Storage View memory information for your device and memory card You can also format the memory card Formatting a memory card will permanently delete all data from the memory location The actual available capacity of the internal memory is less than the specified capacity because the operating system an...

Page 10: ...omatic date and time Set to receive time information from the network and update the time and date automatically Set date Set the current date manually Set time Set the current time manually Automatic time zone Set to receive time zone information from the network when you move across time zones Select time zone Select a time zone Use 24 hour format Set to show the time in 24 hour format or 12 hou...

Page 11: ...and data Back up my data Set to back up your settings and application data to the Google server Backup account Set up or edit your Google backup account Automatic restore Set to restore your settings and application data when you must reinstall an application Factory data reset Reset your settings to the factory defaults and delete all your data ...

Page 12: ... buttons at the same time for 10 seconds Use Vol Vol to move the highlight to wipe data factory reset Press power button to select Use Vol Vol to move the highlight to Yes delete all user data Press power button to select WARNING Your tablet will be reset to factory default and all data will be deleted ...

Page 13: ...7V System hardware configuration Type Details Descriptions CPU Type RK3026 Dual Core Cortex A9 Speed 1 0 GHz GPU Type Mali 400MP2 Speed 400MHz RAM Capacity 1G ROM Flash Capacity 8G Camera Front Facing 0 3MP Rear Facing 2 0MP Speaker Size Built in 8Ω 1W speaker x 1 G sensor Built in Gravity acceleration sensor Network Connections Type Details Descriptions WIFI WIFI module WIFI 802 11b g n Bluetooth...

Page 14: ...ector Keyboard Input device Wired Wireless Supportive Mouse Input device Wired Wireless Supportive Necessary Accessories Type Details Descriptions Power adaptor Standard Configuration DC 5V 2A USB data cable Standard Configuration Connect to PC USB patch cord Standard Configuration OTG to HOST Software Configuration Type Details Descriptions Operating System Operating system version Andriod 4 4 La...

Reviews: