Haier LE32U5000A, Owner'S Manual
The Haier LE32U5000A is a high-quality television designed to deliver stunning visuals and immersive audio. To help you make the most of its features, we provide a comprehensive Owner's Manual for free download on our website. Explore the manual and unlock the full potential of your product today!
Share
Download


Reviews:
No comments
Related manuals for LE32U5000A
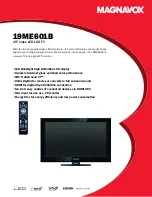
19ME601B
Brand: Magnavox Pages: 2
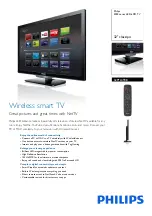
1000 Series 32PFL1508/F8
Brand: Philips Pages: 3
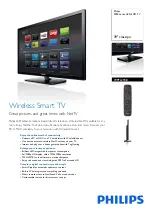
1000 Series 50PFL1908/F8
Brand: Philips Pages: 3
2000 Series 32PFL2508/F8
Brand: Philips Pages: 3

2000 Series 32PFL2908/F8
Brand: Philips Pages: 3
2000 series 39PFL2608/F7
Brand: Philips Pages: 3
2000 Series 39PFL2708/F7
Brand: Philips Pages: 3

3000 series 32PFL3508/F7
Brand: Philips Pages: 3

3000 Series 46PFL3608/F7
Brand: Philips Pages: 3

3000 Series 46PFL3708/F7
Brand: Philips Pages: 3
3000 series 46PFL3708/F8
Brand: Philips Pages: 3
3000 Series 46PFL3908/F8
Brand: Philips Pages: 3
3000 series 50PFL3908/F7
Brand: Philips Pages: 3
32HFL4663D/F7
Brand: Philips Pages: 12

32PFL3508/F7
Brand: Philips Pages: 3
32PFL4908/F7
Brand: Philips Pages: 3
39PFL2908/F7
Brand: Philips Pages: 3

4000 series 29PFL4908/F7
Brand: Philips Pages: 3


