background image

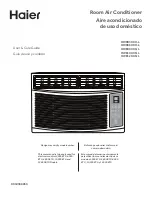
Design may vary by model number.

El diseño puede variar conforme al 

número de modelo

This user manual is to be only used for 
electronic control 5,000 BTU, 6,000  
BTU, 8,000 BTU ,10,000 BTU and  
12,000 BTU Models.


Este manual del usuario es únicamente 
para utilizar los controles electrónicos 
modelos 5,000 BTU, 6,000 BTU,8,000  
BTU , 10,000 BTU y 12,000 BTU. 

User & Care Guide
Guía de uso y cuidado  

Room Air Conditioner

Aire acondicionado

de uso doméstico

0010568059

HWR05XCR-L
HWR06XCR-L
HWE08XCR-L
HWE10XCR-L
HWE12XCR-L

Summary of Contents for HWR05XCR-L

Page 1: ...6 000 BTU 8 000 BTU 10 000 BTU and 12 000 BTU Models Este manual del usuario es únicamente para utilizar los controles electrónicos modelos 5 000 BTU 6 000 BTU 8 000 BTU 10 000 BTU y 12 000 BTU User Care Guide Guía de uso y cuidado Room Air Conditioner Aire acondicionado de uso doméstico 0010568059 HWR05XCR L HWR06XCR L HWE08XCR L HWE10XCR L HWE12XCR L ...

Page 2: ......

Page 3: ...rtant Safety Precautions 2 3 Operational Safety Warnings 4 INSTALLATION REQUIREMENTS 5 Tools and Parts 5 Location Requirements 6 Electrical Requirements 7 9 HOW TO INSTALL 10 Unpacking the Air Conditioner 10 Preparing the Air Conditioner 10 11 Preparing the Window 12 Completing the Installation 13 USING YOUR AIR CONDITIONER 14 Starting the Air Conditioner 14 18 Using the Remote Control 18 19 Chang...

Page 4: ...y cord that is cracked split cut or damaged anywhere along its length or either at the plug end or connector end 5 Turn off the air conditioner and unplug it from the wall outlet before performing any cleaning or maintenance 6 Do not store or use combustible or flammable materials or liquids on or near the air conditioner 7 If the wall outlet configuration does not match the plug configuration on ...

Page 5: ......

Page 6: ...conditioner 4 DO NOT place fingers or objects in the air discharge or air intake in the front of the air conditioner 5 DO NOT operate the air conditioner with a protective cover on the outside section 6 DO NOT block the air discharge or air intake areas on the front panel 7 DO NOT block the side louvers on the outside of the air conditioner 8 DO NOT place any objects either on the indoor or outdoo...

Page 7: ... call Haier Customer Service 1 877 337 3639 Phillips head screwdriver Scissors Level Tape measure Drill and 1 8 bit Pencil IMAGE PART 5 000BTU 6 000BTU 8 000BTU 10 000BTU 12 000BTU Top channel 1 1 Foam seal 1 1 Side bracket 2 2 Window lock bracket 1 1 3 8 self tapping screws 3 4 1 wood screws 9 9 Side curtains 2 2 Side curtain frames 2 2 Remote control 1 1 INSTALLATION REQUIREMENTS PAGE 5 ON OFF M...

Page 8: ...he room to be cooled A large enough window opening for the air conditioner See Fig 2 The air conditioner must not be installed in a through the wall sleeve or in a wall It can only be installed in a double hung window NOTE The outside cabinet louvers and air discharge must not be obstructed by bushes trees etc Air must be able to pass freely through the cabinet louvers See Fig 1 WINDOW INSTALLATIO...

Page 9: ...use the air conditioner and contact a qualified service technician 5 Have the wall outlet and circuit inspected by a qualified electrician to ensure that the wall outlet is properly grounded 6 If there is a 2 prong wall outlet present and not a 3 prong wall outlet it is the responsibility of the user to have it replaced with a properly grounded 3 prong outlet 7 The air conditioner should always be...

Page 10: ...d POWER SUPPLY CORD See Fig 4 NOTE Your air conditioner s plug may differ slightly in appearance from the one shown A Reset button B Test button This room air conditioner is equipped with an a leakage current detection interrupter LCDI power supply cord required by UL This power supply cord contains a current detection device If the power supply cord is crushed this device will detect current leak...

Page 11: ... the air conditioner on or off at the control panel or by using the remote control A damaged power supply cord must be replaced with a new power supply cord obtained from the product manufacturer and installed my a qualified service professional It cannot be purchased at a retail store and must not be repaired by the user If the power supply cord is damaged please call Haier Customer Service 1 877...

Page 12: ...lining up the holes in the top channel with the holes in the top of the unit Make sure the channel is facing forward as indicated by the illustrations See Fig 7 8 2 g n i s U 3 8 self tapping screws attach the top channel to the top of the air conditioner See Fig 8 Use three 3 3 8 self tapping screws for models HWR05XCR L HWR06XCR L Use four 4 3 8 self tapping screws for models HWE08XCR L HWE10XCR...

Page 13: ...over the top of the side curtain then into the channel on the top of the air conditioner and into the track on the bottom of the air conditioner See Fig 12 4 Slide the side curtain frame as close to the air conditioner cabinet as necessary to lock the side curtain to the frame Gently press the frame until it clicks See Fig 10 Fig 12 5 Repeat above steps for the left hand side curtain and frame Mak...

Page 14: ... the one shown 4 Loosen the screw located on the lower right hand corner of the air conditioner 5 Slide the side bracket over the screw The side bracket should be resting on the window sill See Fig 16 6 Partially tighten the screw Secure the unit before tightening completely 7 Use 1 8 drill bit to drill a starter hole through the holes in the side bracket 8 Using two 2 1 wood screws attach the sid...

Page 15: ... hole of the right hand curtain and into the window sill See Fig 19 7 Repeat for the left hand curtain FINAL INSTALLATION 1 Uncoil the included foam seal See Fig 20 2 Insert the foam seal behind the top of the lower window sash and against the glass of the upper window 3 Place the window lock bracket as shown in the diagram using a screwdriver Use a 1 8 drill bit to drill a starter hole through th...

Page 16: ... control wait at least 3 minutes before turning it back on This prevents the compressor from overloading This 3 minute delay also applies when switching from cool mode to fan and back Note There is a built in 3 minute delay You may notice the compressor might not start right away This was designed to protect the unit Do not operate your air conditioner in the Cool mode when the outside temperature...

Page 17: ... you see the indicator light come on next to the desired setting 2 Choose Fan Cool Energy Save or Dehum FAN Only the fan runs Press SPEED to select High Med or Low fan speed The display shows the current room temperature NOTE In fan mode the temperature cannot be set ENERGY SAVE In this mode the fan runs only when cooling is needed The fan will run for 3 minute after the compressor shuts off The fa...

Page 18: ... conditioner will turn off 2 Press the TEMP TIME up or down arrow button to change the delay time from 1 hour to 24 hours 3 Timer Off indicator light will remain on The display will show the left time to Timer Off TIMER ON To set the air conditioner to turn on bwtween 1 and 24 hours 1 Press TIMER until Timer On indicator light illuminates The display will show the remaining hours before the air condi...

Page 19: ...ill turn on 2 The temperature will increase by 2 F 1 hour after the mode is chosen The temperature then increases another 2 F after 1 hour The unit will hold this temperature for 6 hours then stops 3 To turn off Sleep mode press the TIMER button until the indicator light is off TEMP TIME 1 Press the TEMP TIME up arrow button to raise the temperature Each time you press the TEMP TIME up arrow butto...

Page 20: ...erature of 72 F You can select any other mode to satisfy your needs Mode Press MODE to choose Fan Energy Save Cool or Dehum Speed Press SPEED to choose High Med Low or Auto Cool TIMER To set the air conditioner to turn off after a set amount between 1 hour and 24 hours unit must be ON 1 Press TIMER Timer OFF indicator light on the air conditioner control panel will illuminate 2 Press the TEMP TIME ...

Page 21: ...utton to choose Sleep mode The indicator light will turn on 2 The temperature will increase by 2 F 1 hour after the mode is chosen The temperature then increases another 2 F after 1 hour The unit will hold this temperature for 6 hours then stops 3 To turn off Sleep mode press the TIMER button until the indicator light is off TEMP TIME Press the TEMP TIME up arrow button to raise the temperature Each...

Page 22: ...e airflow The airflow can be directed left to right See Fig 23 HWR06XCR L HWE08XCR L HWE10XCR L HWE12XCR L 4 Way Air Flow The air directional louvers let you control the direction of the airflow The airflow can be directed up down and left to right See Fig 24 ENGLISH PAGE 20 USING YOUR AIR CONDITIONER Fig 23 open Fig 24 ...

Page 23: ...oving the air filter Some models may have a filter that slides out instead and does not require opening of the front panel See Fig 25 Fig 26 3 Use a vacuum cleaner with the hose attachment to clean the air filter If the air filter is very dirty wash it in warm water with a mild detergent Do not wash the air filter in a dishwasher or clothes washer or use any chemical cleaners Do not use a clothes ...

Page 24: ...e the air conditioner without the filter in place 1 Turn off the air conditioner and unplug the power supply cord from the outlet 2 Clean the front panel with a soft cloth Do not use chemical cleaners especially spray cleaners sharp instruments or flammable fluids These products can damage the surface of your air conditioner 3 Air dry the front panel completely 4 Plug the power supply cord in the ...

Page 25: ... REASON Air movement Air rotating around the fan Window vibration Installation not correct Refer to Install section Pinging Water droplets being thrown against the outside coil This helps cool the condenser coil You can reduce this noise by removing the subbase water plug See Fig 27 Removing this plug will lower the Energy Efficiency of your unit NOTE Do not drill hole in base pan High pitched hum T...

Page 26: ...ow is restricted Make sure the air discharge area is not blocked Room feels too cold Temperature set too low Raise the set temperature Air conditioner cycles on and off too often Air filter is dirty or restricted Clean the air filter Air flow is restricted Make sure the air discharge area is not blocked Outside air temperature is below 61 F Do not operate the unit when the outside temperature is below...

Page 27: ...es from misuse abuse accident alteration lack of proper care and maintenance or incorrect current or voltage 5 Damage from other than household use 6 Damages from service by other than an authorized dealer or service center 7 Decorative trims 8 Labor service transportation and shipping charges for the removal of defective parts and installation of replacement parts beyond the initial 12 month peri...

Page 28: ......

Page 29: ...funcionamiento y advertencias 4 REQUISITOS DE INSTALACIÓN 5 Herramientas y partes 5 Requisitos de ubicación 6 Requisitos eléctricos 7 9 CÓMO INSTALAR 10 Cómo desempacar el aire acondicionado 10 Cómo preparar el aire acondicionado 10 11 Cómo preparar la ventana 12 Cómo finalizar la instalación 13 CÓMO UTILIZAR EL AIRE ACONDICIONADO 14 Cómo encender el aire acondicionado 14 18 Uso del control remoto ...

Page 30: ...es o que tenga daños en algún lugar a lo largo del cable mismo o bien en el extremo de la clavija o en el extremo conector 5 Apague el aire acondicionado y desconéctelo del tomacorriente en la pared antes de limpiarlo o de darle mantenimiento 6 No almacene ni utilice materiales ni líquidos combustibles ni inflamables en el aire acondicionado o cerca de este 7 Si la configuración del tomacorriente ...

Page 31: ......

Page 32: ...s u objetos donde se descarga el aire o donde entra el aire en la parte delantera del aire acondicionado 5 NO ponga en funcionamiento el aire acondicionado con una cubierta protectora en la sección exterior 6 NO obstruya las partes por donde se descarga el aire o por donde entra el aire en el panel frontal 7 No obstruya las rejillas laterales del exterior del aire acondicionado 8 NO coloque ningún...

Page 33: ...e de Haier 1 877 337 3639 Destornillador Phillips Tijeras Nivel Cinta métrica Taladro y broca de 1 8 de pulg Lápiz Control remoto REQUISITOS DE INSTALACIÓN ON OFF MODE SPEED TIMER TEMP TIME TEMP TIME IMAGEN PARTE Canaleta superior 1 1 Cinta de espuma 1 1 Soporte lateral 2 2 Soporte del seguro de la ventana 1 1 Tornillos autorroscantes de 3 8 de pulgada 3 4 Tornillosparamadera de1pulgada 9 9 Cortin...

Page 34: ...abitación que va a enfriarse a n U abertura lo suficientemente grande para el acondicionador de aire véase la Figura 2 l E aire acondicionado no debe instalarse en una carcasa para instalación en pared ni en una pared Únicamente puede instalarse en una ventana de guillotina NOTA s a L rejillas del gabinete externo y la salida del aire no deben estar obstruidas por arbustos árboles etc El aire tiene...

Page 35: ...en contacto con un técnico de servicio calificado 5 Pida a un electricista calificado que inspeccione el tomacorriente en la pared y el circuito para asegurarse de que aquel esté conectado a tierra de manera apropiada 6 Si tiene un tomacorriente en la pared de 2 clavijas y no de 3 es responsabilidad del usuario reemplazarlo por un tomacorriente en la pared de 3 clavijas conectado a tierra de maner...

Page 36: ...ra 4 NOTA El enchufe del aire acondicionado puede ser ligeramente diferente en apariencia al que se muestra A Botón Reset B Botón Test Este aire acondicionado de uso doméstico está equipado con un interruptor en caso de detección de fuga de corriente LCDI y un cable de suministro eléctrico exigido por UL Este cable de suministro eléctrico contiene un dispositivo de detección de corriente Si el cab...

Page 37: ...apague el aire acondicionado siempre en el panel control o con el control remoto Si el cable de suministro eléctrico está dañado debe sustituirse por uno nuevo que se obtenga del fabricante del producto y debe instalarlo un profesional de servicio calificado No debe comprarse en una tienda ni debe repararlo el usuario Si el cable de suministro eléctrico está dañado llame al centro de servicio al c...

Page 38: ...a superior con los orificios de la parte superior de la unidad Asegúrese de que la canaleta quede viendo de frente como lo indica la etiqueta véase la Figura 7 8 2 Utilice tornillos autorroscantes de 3 8 de pulgada para fijar la canaleta superior a la parte superior del aire acondicionado véase la Figura 8 Utilice tres 3 tornillos autorroscantes de 3 8 de pulgada para los modelos Utilice cuatro 4 to...

Page 39: ... en la canaleta de la parte superior del aire acondicionado y dentro de la guía de la parte inferior del aire acondicionado véase la Figura 12 4 Deslice el marco de la cortina lateral lo más cerca posible al gabinete del aire acondicionado lo suficiente para poder asegurar la cortina lateral en el marco Presione con cuidado el marco hasta que se escuche un clic véase las Figuras 10 y 12 5 Repita l...

Page 40: ...a que se muestra 4 Afloje el tornillo que se encuentra en la esquina inferior derecha del aire acondicionado 5 Deslice el soporte lateral sobre el tornillo El soporte lateral debe descansar en la base de la ventana véase la Figura 16 6 Apriete parcialmente el tornillo Asegure la unidad antes de apretarlo completamente 7 Utilice una broca de taladro de 1 8 de pulgada para hacer un orificio inicial ...

Page 41: ...tina derecha y dentro del marco de la ventana véase la Figura 19 7 Haga lo mismo para la cortina izquierda INSTALACIÓN FINAL 1 Desenrolle la cinta de espuma que se incluye véase la Figura 20 2 Introduzca la cinta de espuma detrás de la parte superior del bastidor inferior de la ventana y contra el vidrio de la ventana superior 3 Coloque el soporte del seguro de la ventana como se muestra en el dia...

Page 42: ...Hay una demora incorporada de 3 minutos Puede notar que el compresor no se enciende de inmediato Esto se diseñó para proteger la unidad No ponga en funcionamiento el aire acondicionado en el modo Cool enfriar cuando la temperatura exterior sea menor a los 61 F 16 C La bobina evaporadora interior se congelará y el aire acondicionado no funcionará correctamente PÁGINA 14 USO DEL AIRE ACONDICIONADO P...

Page 43: ... 1 OprimaMODEhastaqueveaquelaluzindicadoraseenciendeparalaconfiguracióndeseada 2 ElijaFan ventilador Cool enfriar EnergySave ahorrodeenergía oDehum deshumidificar FAN Sólohacefuncionarelventilador OprimaSPEEDparaseleccionarlavelocidaddelventilador High MedoLow Lapantallamuestralatemperaturaactualdelahabitación COOL Enfríalahabitación OprimaSPEEDparaseleccionarlavelocidaddelventilador High Med Low ...

Page 44: ...reacondicionadoseapague 2 OprimaelbotónconlaflechahaciaarribaohaciaabajoTEMP TIMEpara cambiareltiempodedemorade1hasta24horas 3 Despuésde5segundos laluzindicadoraTimerOff Temporizadorapagado permanecerá encendida Lapantallamostraráeltiemporestanteparaqueseapagueeltemporizador TIMERON TEMPORIZADORENCENDIDO Paraconfigurareltemporizadorparaqueenciendaelaireacondicionadoconlosajustesprevios 1 Enciendal...

Page 45: ...mperatura SLEEP DORMIR 1 OprimaelbotónTIMERparaelegirelmodoSleep Seencenderálaluzindicadora 2 Latemperaturaaumentará2 F 1horadespuésdehaberseleccionadoelmodo Posteriormente latemperaturaaumentaráotros2 Fdespuésde1hora Launidadmantendráestatemperatura durante6horasydespuéssedetendrá 3 ParaapagarelmodoSleep oprimaelbotónTIMERhastaquelaluzindicadoraseapague TEMP TIME 1 Oprimaelbotónconlaflechahaciaar...

Page 46: ...ADO paraencenderel acondicionador deaire Cuandopresiona por primeravezON OFF ENCENDIDO APAGADO el acondicionadorde aire funcionaráen elmodo de ahorro deenergía convelocidadde ventilador bajayuna temperaturade72 F Puedeseleccionarcualquierotromodo parasatisfacersus necesidades MODO OprimaMODEparaelegirFan Energy Save Cool oDehum SPEED OprimaSPEED para elegir High Med Lowo Auto Cool TIMER Paraconfigu...

Page 47: ...acia abajoTEMP TIMEparaaumentarodisminuireltiempo SLEEP 1 OprimaelbotónTIMERparaelegirelmodoSleep Seencenderálaluzindicadora 2 Latemperaturaaumentará2 F1horadespuésdehaberseleccionadoelmodo Posteriormente latemperaturaaumentaráotros2 Fdespuésde1hora Launidadmantendráestatemperatura durante6horasydespuéssedetendrá 3 ParaapagarelmodoSleep oprimaelbotónTIMERhastaquelaluzindicadoraseapague TEMP TIME O...

Page 48: ...che droite voir la figure 23 Flujo de Aire en 4 Direcciones Las rejillas direccionales de aire permiten controlar la dirección del flujo de aire El flujo de aire puede dirigirse hacia arriba o abajo y a la izquierda o a la derecha véase la Figura 24 Fig 24 HWR05XCR L HWR06XCR L HWE08XCR L HWE10XCR L HWE12XCR L CAMBIO DE LA DIRECCIÓN DEL AIRE PÁGINA 20 USO DEL AIRE ACONDICIONADO ESPAÑOL Fig 23 open ...

Page 49: ...iarelfiltrodeaire Sielfiltrodeaire estámuysucio láveloconaguatibiayundetergentesuave Nolaveelfiltrodeaireenunlavavajillas nilavadoraniutilicelimpiadoresquímicos Noutiliceunasecadoraderopanihornodemicroondas parasecarlo Déjelosecaralairecompletamenteantesdevolveracolocarloenlaunidad 4 Vuelvaacolocarelfiltrodeaireenelaireacondicionado 5 Cierreelpanelfrontal 6 Enchufeelcabledeenergíaeneltomacorriente...

Page 50: ...ERVICIO AL CLIENTE SERVICIO AL CLIENTE 1 877 337 3639 1 Apagueelaireacondicionadoydesenchufeelcabledesuministroeléctricodeltomacorriente 2 Limpieelpanelfrontalconunpañosuave Noutilicelimpiadoresquímicos enespeciallimpiadores enaerosol utensiliosfilososnilíquidosinflamables Estosproductospuedendañarlasuperficie delaireacondicionado 3 Déjelosecaralairecompletamente 4 Conecteelcabledesuministroeléctr...

Page 51: ...ADO SONIDOS MOTIVO Movimiento de aire Aire que gira alrededor del ventilador Vibración en la ventana Instalación incorrecta Consulte la sección Instalación Sonido metálico Gotas de agua arrojadas contra la bobina externa del condensador Esto ayuda a enfriar la bobina del condensador Puede reducir el sonido quitando el tapón de agua de la sub base véase las Figuras 27 Nota No perfore agujero en la ...

Page 52: ... el aire no esté obstruida La habitación se siente demasiado fría La configuración de la temperatura está demasiado baja Aumente la temperatura establecida El aire acondicionado inicia y finaliza el ciclo con demasiada frecuencia El filtro de aire está sucio o bloqueado Limpie el filtro de aire El flujo de aire está bloqueado Asegúrese de que la zona por donde se descarga el aire no esté obstruida...

Page 53: ...nte alteración falta de cuidado y mantenimiento adecuados o corriente o voltaje incorrectos 5 Daño por uso distinto al doméstico 6 Daños por un servicio brindado por alguien distinto a un distribuidor o centro de servicio autorizado 7 Acabados decorativos 8 Cargos por mano de obra servicio viáticos y transporte para el retiro de partes defectuosas e instalación de las refacciones después del perío...

Page 54: ...NOTES ...

Page 55: ......

Page 56: ...Model HWR05XCR L HWR06XCR L HWE08XCR L HWE10XCR L HWE12XCR L Issued Date September 2015 Haier America Wayne NJ 07470 2016 Haier America Trading LLC www Haier com ...

Reviews: