background image

Please READ this manual carefully before 
operating your TV, and retain it for future 
reference. 

TFT-LCD TV

OWNER S MANUAL

'

MODEL :


S

HL26S         
HL32S  
HL26B         
HL32B  
HL26BG      
HL32BG    

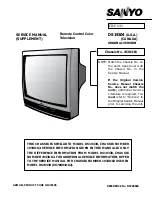
Summary of Contents for HL32S-A

Page 1: ...Please READ this manual carefully before operating your TV and retain it for future reference TFT LCD TV OWNER S MANUAL MODEL S HL26S HL32S HL26B HL32B HL26BG HL32BG A A A A A A ...

Page 2: ... the dealer or an experienced radio TV technician for help This device compiles with Part 15 of the FCC Rules Operation is subject to the following two conditions 1 This device may be not cause harmful interference and 2 this device must accept any interference received including interference that may cause undesired operation FCC CAUTION To assure continued compliance and possible undesirable int...

Page 3: ...ey exit from the apparatus 11 Only use attachments accessories specified by the manufacturer 12 Use only with the cart stand tripod bracket or table specified by the manufacturer or sold with the apparatus When a cart is used use caution when moving the cart apparatus combination to avoid injury from tip over 13 Unplug this apparatus during lightning storms or when unused for long periods of time ...

Page 4: ...ill guide you in getting the best use of your product Remember to record the model and serial number They are on label in back of the unit Model number serial number Date of purchase Staple your receipt to your manual You will need it to obtain warranty service 4 TV LCD TFT Safety Instructions ...

Page 5: ...elect picture mode How to customize your own picture status How to select audio mode How to customize your own audio status Time Menu Function Menu Menu Language DTV Caption Style Menu Screen Setup for Component or PC mode Lock Menu Parental Control rating and categories Lock setup Others Functions Brief Info Aspect Ratio Control CC Closed Caption Display Maintenance Product Specifications Trouble...

Page 6: ...D TFT Controls CH VOL POWER HL26S HL32S VIDEO AV3 AUDIO Input connect to hear stereo sound from an external device AV3 VIDEO Input Connects the video signal from a video device Earphone jack Earphone audio output terminal AUDIO R AUDIO L VIDEO AUDIO AV3 AUDIO Input connect to hear stereo sound from an external device AV3 VIDEO Input Connects the video signal from a video device Earphone jack Earph...

Page 7: ...o the S VIDEO input Digital Audio Output Connect digital audio from various types of equipment Note In standby mode these ports will not work PC DVI Audio Input Connect the audio out from the external device used while linking PC audio frequency output terminals or using a DVI to HDMI connector DVD DTV Input Component Connect a component video device to these jacks PC VIDEO Input Connect the monit...

Page 8: ...hannel EXIT Clears all on screen displays and returns toTV viewing from any menu INPUT show the input source mode MUTE Switches the sound on or off CC closed caption Select a closed caption TIME Shows time INFO When you watch the TV press the key the information displays on top of the screen MENU Brings up the main menu to the screen TV Press to enter TV signal VIDEO Press to enter VIDEO signal S ...

Page 9: ...ful not to bend the bronze wire when connecting the antenna Bronze Wire To improve the picture quality in a poor signal area please purchase a signal amplifier and install properly If the antenna needs to be split for two TV s install a 2 Way Signal Splitter in the connections To install the antenna properly please contact a professional in your area Installation Accessories Remote control Owner s...

Page 10: ...CR output switch to channel 3 or 4 and then tune the TV to the same channel number Connection Option 2 1 Connect the audio and video cables from the VCR s output jacks to the TV input jacks as shown in the figure When connecting the TV to VCR match the jack colors Video yellow Audio Left white and Audio Right red If you connect an S VIDEO output from VCR to the S VIDEO input the picture quality is...

Page 11: ...ayer s manual for operating instructions External Equipment Connections How to connect Connect the audio and video cables from the external equipment s output jacks to the TV input jacks as shown in the figure When connecting the TV to external equipment match the jack colors Video yellow Audio Left white and Audio Right red How to use 1 Select the input source with using the INPUT button on the r...

Page 12: ...x Refer to the owner s manual for the digital set top box 2 Use INPUT on the remote control to select COMPONENT PC or HDMI DVI source Send the TV s audio to external audio equipment stereo system via the Digital Audio Output Optical port How to connect 1 Connect one end of an optical cable to the TV Digital Audio Optical Output port 2 Connect the other end of the optical cable to the digital audio...

Page 13: ...heTV s remotecontrol 3 UseINPUT onthe remote controlto selectPC or HDMI DVI source 4 Check the image on your TV There may be noise associated with the resolution vertical pattern contrast or brightness in PC mode If noise is present change the PC mode to another resolution change the refresh rate to another rate or adjust the brightness and contrast on the menu until the picture is clear If the re...

Page 14: ...e source device DVD player or Set Top Box supports DVI How To Connect 1 Connect the source device to HDMI port of this TV with a HDMI to DVI cable not supplied with this product 2 Aseparated audio connection is necessary 3 If the source device has an analog audio output connector connect the source device audio output to DVI Audio In port located on the left side of HDMI port How To Use If the sou...

Page 15: ...HDMI Cable not supplied with the product HDMI to DVI Cable not supplied with the product Analog Audio Cable Stereo to RCA type not supplied with the product Installation Cable sample Owner s Manual 15 ...

Page 16: ...e a static discharge when touching the unit and the unit fails to function simply unplug the unit from the AC outlet and plug it back in The unit should return to normal operation Polarized AC Cord Plug AC Outlet Wider Hole and Blade You can connect a set of headphones to your set if you wish to watch a TV programme without disturbing the other people in the room Connecting Headphones Note Prolong...

Page 17: ...le stand if you don t want to use the table stand Take the table stand off Please release the screws 6XM4 see the picture HL26S HL32S Please release the screws 6XM4 see the picture HL26B HL32B HL26BG HL32BG A A A A A A Owner s Manual 17 A ...

Page 18: ...n to normal viewing or press the MENU button to return to the previous menu 1 First connect power cord correctly 2 Select the viewing source by using INPUT button on the remote control 3 When finished using the TV press the POWER button on the remote control The TV reverts to standby mode 4 If you intend to be away on vacation disconnect the power plug from the wall power outlet Change the picture...

Page 19: ... Channels 0 Progress 64 Auto Scan 1 Press the MENU button and then select the Channel menu 2 Press the or OK button and then use button to select Tuner 3 Press the or OK button Select Cable or Antenna mode 4 Press the button to select Auto Scan 5 Press the or OK button to start searching 6 To cancel searching press the EXIT MENU button Note When Antenna is selected the TV will detect antenna signa...

Page 20: ...e MENU button and then select the Channel menu 2 Press the or OK button and then use button to select Tuner 3 Press the or OK button Select Cable or Antenna mode 4 Press the button to select 5 Press the or OK button to start searching 6 To cancel searching press the EXIT MENU button Add Channel Scan Ch 16 0 Move Change EXIT Exit Rename Only search the new channel so the old channel will not be cle...

Page 21: ... volume level The range is 0 100 When the volume buttons are pressed the volume level is displayed automatically on the TV screen Operation Mute When you need to pay attention to or there is a telephone calling you or there are some guests visiting you the sound elimination mute function is very convenient a conversation 1 Press the MUTE button on the remote control and type face will display on t...

Page 22: ...he pre defined images settings There are four settings standard vivid mild custom Standard Vivid Mild Custom normal mode mode of watching the movement of picture produces a softer picture allows adjustment of the picture to your personal taste Note Only when the item of mode is custom the Contrast Brightness Tint color Sharpness and can be set by user In other mode the value of them are preset by ...

Page 23: ...nector to an external amplifier or receiver Press the or OK button to switch ON or OFF of the loudspeaker Bass Treble TV Speaker 1 Press the MENU button and then use button to select the Audio menu 2 Press the or OK button and then use button to select the desired items 3 Press the or OK button and then use button to adjust the setting 4 When you are satisfied with your choice press MENU button to...

Page 24: ...lable on the digital signal select them with the SAP button 2 Press EXIT button to save and return to TV viewing Operation Date Time setting 1 Press the MENU button and then use button to select the Time menu 2 Press the or OK button and then use button to select the Date Time 3 Press the or OK button and then use button to select the Mode Manual or Auto 4 When you are satisfied with your choice p...

Page 25: ... the SLEEP button also to select quickly the sleep timer Video Audio Time Lock Function Channel Date Time Time Zone Pacific Sleep Timer Off Timer Time menu Time zone setting 1 Press the MENU button and then use button to select the Time menu 2 Press the or OK button and then use button to select the Time Zone items 3 Press the or OK button to select your viewing area time zone Eastern Central Moun...

Page 26: ...then use button to select the On Mode 4 Press the OK button to confirm Then press button to move cursor press button to set 5 When you are satisfied with your choice press MENU button to return to the previous menu or press the EXIT button to return to TV viewing 1 Press the MENU button and then use button to select the Time menu 2 Press the or OK button and then use button to select the Timer 3 P...

Page 27: ...wn preference Press the or OK button to select Default or Custom Size Select this option to select the size of caption display according to your own preference Press the or OK button to select Small Normal or Large Font Select this option to select the font of caption display according to your own preference Press the or OK button to select Default Font1 Font2 Font3 Font4 Font5 Font6 or Font7 Text...

Page 28: ...input this function is used Adjustment for screen Position Clock Phase Setting Display Adjust menu by pressing INPUT button then use button to select the the source of Component1 Component2 or PC item Position Adjust the screen position Clock Adjust the clock of input signal Phase Adjust the phase of Pixel clock Auto sync Automatically adjust display of the picture Olny available in PC source Sett...

Page 29: ...Movie Rating System MPAA only Ratings for Movies previously shown in theaters Movie Ratings NR Permits all programs G General audience PG Parental guidance suggested PG 13 Parents strongly cautioned R Restricted NC 17 No one 17 and under admitted X Adult only If you set PG 13 G and PG movies will be available PG 13 R NC 17 and X will be blocked Ratings for Television programs including made for TV...

Page 30: ... CA Eng Rating and CAFren Rating will be no useful Parental MPAA Rating Blocks movies according to the movie ratings limits specified so children cannot view certain movies You can set the ratings limit by blocking out all the movies with the ratings above a specified level Keep in mind that the movie ratings limit only applies to movies shown on TV not TV programs such as soap operas 1 Press butt...

Page 31: ... the EXIT button to return to TV viewing or OK OK CA Eng Rating C C8 G PG 14 18 Block All CA Fren Rating Block All G 8 ans 13 16 18 ans ans ans Lock Menu Owner s Manual 31 Note The will automatically block certain categories that are more restrictive For example if you block TV Y category then TV Y7 will automatically be blocked Similarly if you block the TV G category then all the categories in t...

Page 32: ...ply press the Q VIEW button If you wantto return tochannel 18 pressthe button again Use this function you can easily change between the channel you are using and the channel you used lasttime 2 3 This function enables quick swap to the last watched program Brief Info Quick program view Other Functions Function Show the present screen information Press the INFO button or EXIT button to exit A Video...

Page 33: ... an effective system for the hearing impaired and it can also aid in teaching language skills CC Closed Caption Display Note The captions do not always use correct spelling and grammar Not all TV programs and product commercials are made for broadcast with Closed Caption information included Refer to your area s TV program listings for the TV channels and times of Closed Caption shows The captione...

Page 34: ... can be done press OK to save current 3 digits code and exiting manually programming mode b Return to beginning of step 3 Reprogram the control 5 If user s input is incorrect LED will blink 12 times in 3 seconds And then keep twice per second blink user now can return to step 3 and re program the device 6 Within 10 seconds user should enter the 3 digit brand code corresponding to your device If ti...

Page 35: ...plicable for all devices and brands that do not use the volume control buttons for other purposes Transport Key Punch Through The DVD or VCR transport key punch through feature lets you control the PLAY STOP PAUSE REWIND FF and RECORD functions of your DVD or VCR while the control operates in other modes The feature is applicable for all devices and brands that do not use the transport keys for ot...

Page 36: ...116 139 082 094 110 082 092 106 108 112 117 134 074 137 139 087 071 142 073 075 070 075 084 087 104 118 127 149 153 155 104 105 131 140 017 073 075 080 087 104 105 112 114 1 17 118 119 126 131 153 071 073 075 087 105 112 116 1 17 118 153 075 Memorex MGA Mitsubishi Montgomery Ward Motorola MTC Multitech Multivision NAD NEC Nikko Noblex Onwa Optimus Optonica Orion Panasonic Philco Philips Pioneer Po...

Page 37: ...non Dimensia Electrohome Emerson Fisher Fuji Funai Garrard GE Go Video Goldstar Gradiente Harman Kardon Harwood Hitachi JBL JC Penney Jensen JVC Kenwood KLH Kodak LG Lloyds Logik LXI Magnasonic Magnavox Marantz Matsushita Memorex MGA MGN Minolta Mitsubishi Montgomery Ward Motorola MTC Multitech NEC Nikko Noblex Olympus Optimus Optonica Orion Panasonic Pentax Philco Philips Pioneer Portland Proscan...

Page 38: ... 85 86 87 88 89 90 91 92 93 94 95 96 97 98 99 100 101 102 103 104 105 106 107 108 109 110 111 112 113 114 CABLE NO Brand Code 1 2 3 4 5 6 7 8 9 10 11 12 13 14 15 16 17 18 19 20 21 22 23 24 25 26 27 28 29 30 31 32 33 34 35 ABC Archer Cableview Contec Eastern GE Gemini General Instruments Hamlin Hitachi Jerrold Magnavox Motorola Movie Time NEC NSC Oak Panasonic Philips Pioneer Proscan RCA Realistic ...

Page 39: ...s Denon Fisher GE Kenwood NAD Nakamichi Onkyo Optimus Panasonic Philips Pioneer Proscan Quasar Radio Shack RCA Sansui Sanyo Sherwood Sony Technics Yamaha NO Brand Code 1 2 3 4 5 6 7 8 9 10 11 12 13 14 15 16 17 18 19 20 21 22 23 039 041 052 042 049 070 048 056 040 054 055 041 047 015 050 013 018 041 045 070 050 047 070 057 044 047 043 050 053 Audio Cassette NO Brand Code 1 2 3 4 5 6 7 8 9 10 11 12 ...

Page 40: ... s a great way to keep the dust off your screen for a while Wet a soft cloth in a mixture of lukewarm water and a little fabric softener or dish washing detergent Wring the cloth until it s almost dry and then use it to wipe the screen 2 Make sure the excess water is off the screen and then let it air dry before you turn on your TV Cleaning the Cabinet Extended Absence If you expect to leave your ...

Page 41: ...7X9 7X20 7 inches 679X246X525mm Product Specification HL26S HL32S HL32BG HL26BG HL26B HL32B 28 12 5 31 9X9 7X24 4 inches 8 1 1 X 2 4 6 X 6 2 1 m m 35 16 0 26 7X9 7X20 7 inches 679X246X525mm 31 9X9 7X24 4 inches 8 1 1 X 2 4 6 X 6 2 1 m m 28 12 5 35 16 0 39 7 18 0 A Owner s Manual 41 A A A A A MODEL Weight pounds kg Resolution Power requirement Color system Color Operating Temperature Range Operatin...

Page 42: ...e television is properly plugged Verify if the television is properly supplied power Verify if electricity is available Blank screen Verify if correct signals are input Press INPUT button to change signal input to TV input Restart the television of power supply is interrupted No sound Press Mute button and verify if Mute mode is set Switch to other channel and verify if the same problem happens Pr...

Page 43: ... described herein shall be the sole and exclusive warranties granted by Haier and shall be the sole and exclusive remedy available to the purchaser Correction of defects in the manner and for the period of time described herein shall constitute complete fulfillment of all abilities and Responsibility of Haier to the purchaser with respect to the product and shall constitute full satisfaction of al...

Page 44: ......

Reviews: