background image

Copyright     2009 Haier 

Haier America Trading LLC

. All rights reserved

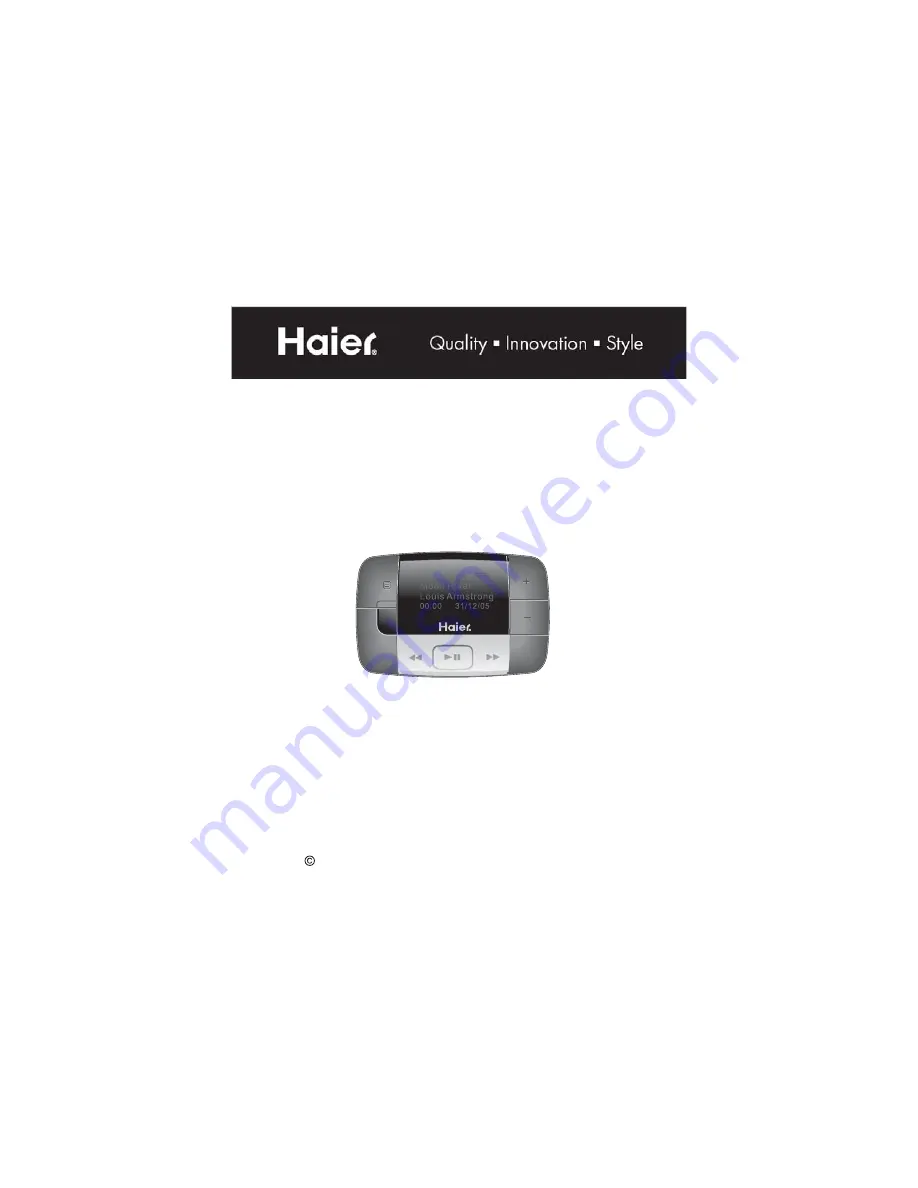
USER MANUAL

Trainer

HHH1A-2G

Summary of Contents for HHH1A-2G

Page 1: ...Copyright 2009 Haier Haier America Trading LLC All rights reserved USER MANUAL Trainer HHH1A 2G ...

Page 2: ...re beginning a weight loss or exercise program 3 Consult your physician before using this device when pregnant 4 Operate the device only as intended Do not use for any other purpose 5 Do not place heavy objects on the device and keep the device away from humid dusty and smoky environments 6 Do not use water chemicals or detergent to clean the device Clean the surface with a soft cloth 7 Do not use...

Page 3: ...rts and accessories not approved for use with the device may damage the unit 13 When you upload or download files using a USB cable do not disconnect the USB cable during data transfer or turn the device off 14 Data can be damaged because of physical impact lightning and power failure 9 To avoid damage make sure you do not drop smash bend or abuse the device ...

Page 4: ...KEYS 11 NAVIGATING THROUGH THE MODES 12 MUSIC MODE 13 Song Screen 13 Listening to Music 13 Setting Up Music Play Sequence Repeat option and Equalizer 15 Music Play Sequence 15 Repeat Option 16 Equalizer 16 WORKOUT MODE 17 Wearing your Device 17 Start the Counter 17 Counter Screens 18 Stopwatch 19 Review the Saved Information 20 Select Workout Program 21 HEART BEAT MODE 22 Heart Beat Screens 22 Tak...

Page 5: ...reset 27 SETTINGS MODE 28 Profile Editing 28 Calibration 29 Language 30 Display 30 Auto Power Off 30 Time Date 30 Units 31 System Info 31 Reset all 31 CONNECTION TO COMPUTE 32 Minimum System Requirement 32 Connect the Device to PC 32 PC Software HeartPal 33 Start HeartPal 34 My Home 35 My Runs 36 My Goal 37 My Music 39 My Community 39 My Profile 41 My Support 42 ...

Page 6: ...ce from PC 45 BATTERY POWER INDICATION AND LOW BATTERY WARNING 46 Charging your Player 46 TROUBLE SHOOTING 47 RESET PLAYER 49 LIABILITY EXEMPTION STATEMENT 49 TRADEMARKS 49 REGULATORY INFORMATION 50 For customers in USA or Canada 50 For customers in Europe 50 DISPOSAL OF YOUR OLD PRODUCT 51 SPECIFICATION 52 RHAPSODY INFORMATION 53 TRAINER WARRANTY INFORMATION 55 ...

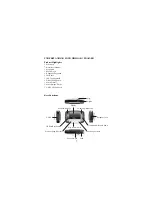
Page 7: ...Supported FM Radio ID3 Tag Supported DRM 10 Supported Music Library Mass Storage Device USB 2 0 High Speed Keys Functions USB 2 0 IR Hear Beat Sensor Play Pause Enter Display Option Clip Earphone Jack Previous Song Decrease Power On Off Lock Mode Back Page Volume up Browse up Volume down Browse down Next Song Increase ...

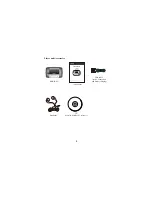
Page 8: ...Accessories HHH1A 2G User Manual CD contains HeartPal PC software Earphones USB cable for PC connection and battery charging Copyright 2009 Haier America Trading LLC All rights reserved USER MANUAL Trainer HHH1A 2G ...

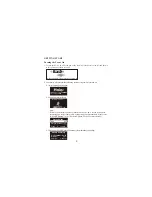
Page 9: ...r device will perform the following actions every time it is turned on 2 2 Load your music library 2 1 Haier message will appear Note If this is the first time you have turned your device on a screen will appear prompting you to edit your profile by inputting your personal data Please refer to Profile Editing in the Workout Options section for more details 2 3 Show your Weekly Workout Summary from...

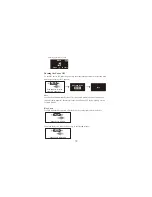
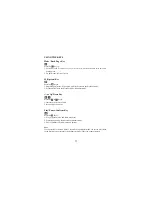
Page 10: ...t time period default is three minutes Please refer to the Auto Power Off in the Setting section for more details Key Lock To avoid unwanted key pressed slide the Power key to the right to lock the device To unlock the device slide the Power key to the left and release Bye Slide and hold for three second to power OFF Slide the key to LOCK Slide the key to UNLOCK Music Press to start 2 4 Bring up t...

Page 11: ... the option list in the Workout mode Heartbeat mode or Up Down Key Press the or key to 1 Increase or decrease volume 2 Browse up or down list Play Pause Confirm Key Press the key to 1 Play or pause music and radio broadcast 2 Start step counting start heart beat measurement 3 Enter Confirm selected modes and options Note If no operation is chosen within 15 seconds of a particular mode the screen w...

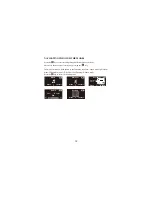
Page 12: ...rent mode selections Advance to the next mode selection by pressing the key The mode selections will be shown in the following sequence Music mode Workout Press the key to select the desired mode Radio 01 11 87 9MHz CH 01 Workout Press to start Setting Press to start HeartBeat Press to start Heartbeat Sensor Music Press to start ...

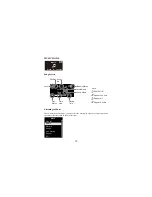
Page 13: ...n and equalizer effect describe in the next section 0001 1000 02 45 Song Name Artist Name Lock Play Status Time Line Playing Time Shuffle Battery Status Song No Song Name Artist Name Shuffle ON Repeat one time Repeat all Repeat Shuffle 1 A S Note Play all Artists Albums Songs Now Playing Repeat EQ Music Music Press to start ...

Page 14: ...sic playback Press the key to go back to the Music mode screen Music will not stop until you pause the current playing song under music playback screen 0001 1000 02 45 Song Name Artist Name 0001 1000 02 45 Song Name Artist Name 0001 1000 02 45 Song Name Artist Name 0001 1000 02 45 Song Name Artist Name 0001 1000 02 45 Song Name Artist Name Volume up Volume down Music Press to start Press the key t...

Page 15: ...ss the key to confirm selection Music Play Sequence Play all Play all songs in their loaded sequence in your device Artist Play songs by selected artist Album Play songs in selected album Play all Albums Album 001 Album 002 Play all Artists Artist 001 Artist 002 Play all Artists Albums Songs Now Playing Repeat EQ Music ...

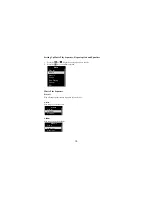
Page 16: ...y the current song repeatedly 3 Repeat All After the last songs in sequence is played replay from the first song 4 Shuffle Play all songs in random sequence 5 Repeat Shuffle Replay the songs in random sequence Equalizer Select any of the following equalizer effect Normal Pop Rock Jazz and Classical Play all Songs Song 001 Song 002 Repeat Off Repeat Repeat All Shuffle Repeat One Repeat Shuffle Norm...

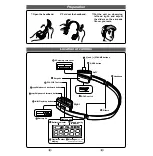
Page 17: ...e you should begin to jog or walk Wearing your Device In order for the device to measure your workout information accurately you must wear the device at one of the positions as illustrated in the diagram You may use the clip at the back of device to attach it to your clothing and close to your body Start the Counter Press the key to start Workout Press to start Workout Press to start Distance 0 00...

Page 18: ...ens in sequence Distance Steps Speed Clock to view the different counters Steps 0 0 Cal 0000 00 00 00 R W Stop Split Speed Avg 0 00 miles hour Max 0 00 miles hour Stop Split Distance 0 00mi 0 00mi Cal 0000 00 00 00 R W Distance by run Distance by walk Lock Title Battery status Calories burn Time counter Stop Split 2007 12 22 Sun AM 27 12 35 Split Stop Time Date Day AM PM Lock Battery status Step s...

Page 19: ...nloaded via the USB to the PC Software supplied for further analysis Or press the key to go back to the main menu without saving the information Data Saved 3mi 1mi Cal 57 00 15 43 R W Save Distance Stopwatch In the Distance Steps Speed screen press the Split key to log the current elapsed time The logged time can only be seen at the bottom right hand corner of the Distance Steps screen marked by a...

Page 20: ...ptions menu and choose Weekly Summary to review workout information Review the Saved Information You may review your workout information saved either once it s downloaded to your PC or on the device Workout Press to start View Records Weekly Summary Options Select Mode Records 2 26 12 08 11 47 3 27 12 08 12 13 25 12 08 12 20 Distance 8mi Heartrate 147bpm Calories 140cal Duration 00 53 29 1 25 12 0...

Page 21: ...nce monitoring Default for Workout mode 2 health training with static heart beat measured after training The device will automatically enter the heart beat mode to take your heart beat measurement after your ended the Workout mode Basic Optimum for self training with Information Advanced Multi counter for fitness and Select Mode Basic Advanced Descriptions ...

Page 22: ...red Note Consult your physician or healthcare provider to help you determine your maximum heart beat rate resting heart beat rate and target heart beat rate required exercise frequency and appropriate duration Lens of the sensor 16 32 16 12 32 16 12 06 2007 11 06 2007 85bpm 89bpm HB Records Heart Beat Time Date Lock Battery Status Title Lock Blinking Indicator Icon Instruction Battery Status Title...

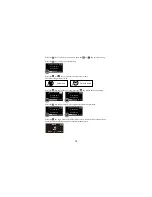
Page 23: ...l take 15 20 seconds to complete during the process you will see the following screen Do not move your thumb 4 When the heart beat measurement has completed your reading will appear and the heart icon will stop blinking You can move your thumb away from the sensor 50 ___bpm Heartbeat Save Exit 75bpm 5 Press the key to save the heart beat measurement Or press the key to go back to the main menu wit...

Page 24: ...eat Sensor View Records Options HB Records 12 32 16 12 32 16 12 06 2007 11 06 2007 89bpm 85bpm Note If the heart icon does not blink or an error message shows up you may have pressed on the lens too hard not covering the lens entirely with your thumb or moved your thumb away from the lens during the measurement process Repeat from Step 1 of Taking your Heart Beat Rate Press to try again Improper p...

Page 25: ... frequencies the Preset Mode will be displayed You can select Manual Mode or Preset Mode as the default setting Please refer to FM Radio Setup section for more details 2 Press the key to listen to the selected radio station Manual Station Screen Lock Playing status Frequency Bar Preset Channel no Max Channel no First Channel no Battery status Title Lock Title Min Frequency Playing status Max Frequ...

Page 26: ...cans the radio stations in all frequencies and saves them as the preset channels automatically Manual Scan Note Manual Scan active in Manual status only described in the next section 1 Go to radio mode screen and play any radio station 2 Press the key to frequency down press the key to frequency up in 0 1 MHz per step 3 Or press and hold the or key for 3 seconds The device scan automatically stops...

Page 27: ...e screen select a radio station manually 2 Press the key 3 Select Add Preset option The radio station is saved in the preset channel list Delete Preset Delete a radio station from the preset channel list 1 At the radio mode screen press the key 2 Select Delete Preset option 3 Select the radio station from the preset channel list 4 Press the key The radio station is deleted from the preset channel ...

Page 28: ...diting This profile is share between the device and the PC software and can be altered in this setting or with the PC Software Input your own personal health information into this profile for personalized activity reports generated by the PC Software Age Default setting is 25 Range from 1 99 Weight Default setting is 165 Range from 11 550 pounds Height Default setting is 71 Range from 11 98 inches...

Page 29: ...ride length separately 1 Press the or key to select Run Walk 2 Press the key 3 As in this illustration you have selected to calibrate jogging running steps Press the key as soon as you start to run for 400 meters press stop as soon as you reach the 400 meters mark 4 The device counts the number of steps you take to jog run for 400 meters and uses it to calculate jog run distance Press the key to s...

Page 30: ...et screen display brightness level The range is from 0 to 100 Auto Power Off This function allows you to preset the time to turn off your device automatically when it is not in use Default is three minutes Time Date Set current time and date Default setting of Time format is 12 Hours Tra chiness Sim chines French Language English Display Brightness Display Timer Auto Power Off 3 min Time Format Ti...

Page 31: ...tem Info Version Firmware version for upgrade and problem reporting purpose Capacity Built in memory size in the device Free Mem Memory space left for storing songs and saving workout and heart beat measurement records Reset all To reset all the above settings to default setting System Info Version 1 002 916MB 876MB Capacity Free Mem Reset Setting Confirm Cancel Kilometers Miles Units ...

Page 32: ...our PC system must meet the following minimum requirements Windows 2000 Windows XP Windows Vista Other operating systems are not supported CD ROM drive USB 1 1 port or above USB 2 0 is recommended Connect the Device to PC Connect the smaller end of the included USB cable to the USB 2 0 port on the device and the bigger end to a free USB port on your computer ...

Page 33: ...onal icon in Removable Disk type which represents the device PC Software HeartPal 1 Please insert the supplied CD and install the HeartPal software 2 Follow the instruction and complete the installation Install HeartPal software ...

Page 34: ...lick Start HeartPal HeartPal Create new account On HeartPal initial page click Sign up The New Account page will show Please fill in all fields and then click the button Login HeartPal with existing account On HeartPal initial page enter login name and password and then click the button Log in ...

Page 35: ...also enables HeartPal to save changes made in your account to the device Click to skip uploading data from device to PC My Home Click the My Home button in the bottom to go to My Home page This page shows the user s name total number of runs total distance run and total time of runs This page also show the status of the latest goal if there is any Yes No ...

Page 36: ...onths Click the heart rate button to show heart rate data Click the calories button to show calories data Click the line graph button on top left to show run data in line graph Click the bar chart button on top left to show run data in bar chart Click the or button to move forward or backward current display time frame Weeks Months My Runs ...

Page 37: ...eriod unit days weeks or months 5 Enter modify the number for the time period 6 Clicked button Clicked button Edit goal 1 Select the goal record on the right side of the page that needs to be edited 2 Select type of goal distance time or calories 3 Modify the target number for the type of goal 4 Modify the Start At date 5 Select time period unit days weeks or months 6 Modify the number for the tim...

Page 38: ...get is reached 001 1km 2days finished start at 10 07 08 Delete at 12 07 08 002 10km 7days finished start at 10 07 08 Delete at 17 06 08 003 10km 7km to go 1days start at 10 07 08 Delete Clicked button Delete goal 1 Select the goal record on the right side of the page that needs to be deleted 2 Delete My Music Click the button along the bottom to invoke Windows Media Player My Music ...

Page 39: ...d Events page Click the button will bring up Fitness information link page Click the button will bring up Health care tips page My Community World Events Click the button to bring up web site www runday com in web browser My Community World Events links Fitness information link Health care tips Calendar of Events ...

Page 40: ...n will bring up the web page shown on the button My Community Health Care Tips Click the button will bring up the web page shown on the button http waling about com es howtoloseweight a howcalburn htm http waling about com es howtoloseweight a howcalburn htm ...

Page 41: ...be saved to both device and PC Otherwise the changes will only be saved on PC It is recommended to have the device connected when making changes to the profile so that the data on both the device and PC can be in sync Delete Profile Deleting just the profile data is not supported You can choose to remove the account under My Support However both profile and run data for the account will be deleted...

Page 42: ...tton and it will bring up confirmation page 2 Click the button to confirm This will bring up the initial login page Exit the Software Click the button on the top right corner to quit the software Format Content Run Data of Device 1 Connect device to PC 2 Delete the FR Dat file in the device in window explorer 3 Disconnect device from PC My Suport Click the button This will bring up the confirmatio...

Page 43: ...evice as an USB storage device and save data files from PC on it Data files that are stored on the device cannot be browsed using the device s interface Synchronization using Windows Media Player 10 1 Connect your device to the computer 2 When the window of MTP Media Player window pops up choose Synchronize media files to the device using Windows Media Player click ok to confirm 3 Choose Manual an...

Page 44: ...elect a playlist from the drop down menu of Sync List then click Start Sync Files in the list will be transferred to your device Tips For further details on media files transfer using WMP 10 please go to the help option of the Windows Media Player program and search for Synchronizing content to devices ...

Page 45: ... disconnect the USB cable from your PC If you are using Windows Media Player 10 synchronization you can just unplug the device after the transfer is completed 2 Click the popup message as shown below and a window will appear Disconnect the device from PC 1 Double click the hardware icon on the task tray of your computer as shown below ...

Page 46: ... Battery Low screen shows up Charging your player Your device comes with a re chargeable battery Once connected to a PC via the supplied USB cable your device will begin charging immediately Note 1 Charge the device for at least four hours before using it for the first time 2 If the device is connected to a PC via a USB hub the USB hub must be self powered in order to charge the battery properly 3...

Page 47: ...ttached to both the device and the PC Check to see whether the PC meets the minimum requirements Try another USB port if available No sound during playback Check if the volume level is set too low Check if the earphones are inserted firmly Check if the earphone plugs are dirty Clean it with soft cloth There is noise during playback Check if the earphones are inserted firmly Check if the earphone p...

Page 48: ... moving vehicle Such as riding a bicycle automobile train or bus as step counts The device cannot count steps accurately with a Standing up or sitting down movement b Playing sports other than walking jogging running c Ascending or descending movements on stairs or hills Inaccurate personal profile setting without calibration Check the setting Please refer to Profile Editing Calibration in Setting...

Page 49: ... device or other indirect loss resulting from mal operation of software maintenance or restoration of any personal data lost 4 Haier America Trading LLC reserves the right to modify software hardware and the user manual of this device without prior notice 5 Any copies publishings transfers storage in a traceable systems or translations without written authorization from Haier America Trading LLC i...

Page 50: ...d in accordance with the instructions may cause harmful interference to radio communications However there is no guarantee that interference will not occur in a particular installation If this equipment does cause harmful interference to radio and television reception which can be determined by turning the equipment off and on the user is encouraged to try to correct the interference by one or mor...

Page 51: ...h can be recycled and reused To prevent any potential negative consequences for the environment and human health please act according to your local rules regarding the disposal of this device When this crossed out wheeled bin symbol is attached to a product it means the product is covered by European Directive 2002 96 EC ...

Page 52: ...ote The above specifications of the device are subject to change without prior notice for the purpose of performance upgrading 55 x 36 x 20mm 24g 2GB OLED Display MP3 WMA 87 5MHz 108MHz Charging through USB Mini USB port USB 2 0 High Speed Windows 2000 Windows XP Windows Vista 0 40 C FCC CE Pedometer 22 Hours Music Pedometer 10 Hours Built in Re chargeable Li Polymer Battery 140mAH 3 7V Music 11 H...

Page 53: ...the on screen instructions to complete the installation Signing in to Rhapsody 1 Start Rhapsody on your computer 2 Click Sign In on the top right or bottom left of your Rhapsody screen 3 Type in your username and password 4 Optional If you select both Remember password and Auto sign in at launch you will be automatically signed in each time you start Rhapsody 5 Click Sign In To connect the player ...

Page 54: ...ick the player icon in the Sources area The tracks and channels you have added to the player are listed in the Display area Click Disconnect to disconnect your player When the player screen shows Disconnected you can unplug the USB cable You can import music from your hard drives to your Rhapsody Library and then transfer the music to your device Select Add Media to My Library from the Rhapsody Fi...

Page 55: ...t used for a long period of time This product must only be serviced by a qualified professional Service is required when the product is damaged or altered in any way This includes damage to the adapter exposure to water rain and moisture and hard impact dropping or crushing the Trainer When the Trainer does not work normally it must be brought in for service Caution Do not expose this product to w...

Page 56: ... can still be damaged after a long period of time The louder the sound the less time it takes to damage your hearing Hearing loud sounds or music during a day is cumulative it adds up If you are exposed to other loud sounds during the day it will take less time for the Trainer to damage your hearing As a general guideline keep the Trainer volume at a level where you can converse normally with peop...

Page 57: ...n around them stop use immediately This might indicate a developing or future infection Prevent Seizures Blackouts and Eye Strain If you have ever had a seizure or blackout or if these symptoms exist in your family s medical history please speak with a doctor before using the video functions on the Trainer device if available Stop using the Trainer immediately if you experience eye twitches muscle...

Page 58: ...tomer service or visit www haieramerica com support Repairs Do not repair or alter this product on your own Attempts to fix this product may result in electric shock or other hazards If we determine that you have tried to repair the product by yourself evidenced by peeling puncturing or removal of labels your warranty will be voided Qualified service professionals must do all servicing on this dev...

Page 59: ... Trainer headphones have low intensity magnets in them This magnetic charge may disrupt pacemakers or erase magnetic storage data in certain devices including credit cards and ATM cards Keep the headphones several inches away from these items and anything that is sensitive or could be affected by a magnetic field Disposing of the Trainer Device Disposal of the Trainer device may be regulated by ce...

Page 60: ...rvice including expansion and upgrade that was performed by anyone who is not a representative for Haier 5 to the appearance of the product or the exterior of the product which has been damaged or defaced altered or modified in design or construction 6 to any and all of the additional excluded items set forth below The warranty commences on the date the item was purchased and the original purchase...

Page 61: ...parts Any defects discovered after the Warranty Period ends are not covered by this warranty or any conditions Where to obtain service For the location of the nearest Haier authorized service center or to obtain product literature accessories supplies or customer assistance please call 1 877 337 3639 How to obtain service from your warranty Ship or carry in your product to a Haier authorized servi...

Page 62: ...eer it except as is specifically permitted by applicable law notwithstanding this limitation You are entirely responsible to comply with any copyright laws that apply to you in your use of music video and other content with this Trainer product Your Trainer product and all of its internal parts and components are new pursuant to industry standards unless it is otherwise indicated on the Trainer pr...

Page 63: ...e a revocation list with the licenses You may be required by content owners to upgrade WMDRM to access their content If you decline an upgrade you will not be able to access any content that requires the upgrade Patent Information United States and or international patents pending Customer Service and Support For information about Trainer read all documentation included with the product If you sti...

Page 64: ... to try to correct the interference by one or more of the following measures Reorient or relocate the receiving antenna Increase the separation between the equipment and receiver Connect the equipment into an outlet on a circuit different from that to which the receiver is connected Consult the dealer or an experienced radio TV technician to help This device complies with Part 15 of the FCC Rules ...

Reviews: