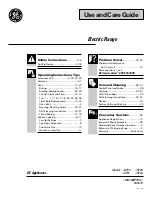
background image

Safety Instructions 

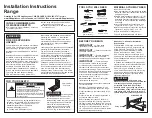
Anti-Tip Device .........................................3, 31

Operating Instructions, Tips

Aluminum Foil ...................................5, 16,21

 Care and 

Cooktop 

Problem 

Thermostat 


 Yourself . . . . . . . . . . . . . . . . . . . . . . . . . . . . . . . . . . . . . ........18

More questions 

GE Answer Center” 800.626.2000

Consumer Services ...................35

Appliance Registration 

Important Phone Numbers .......................35

Model and Serial Number Location ...........2

Removal of Packaging 

Warranty ........................................Back Cover
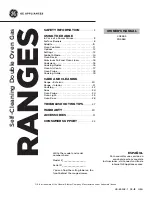
Models:

JSP26
JSP28

GE Appliances


 5

Summary of Contents for JSP26

Page 1: ...30 Cooktop 3O Problem Solver 32 Thermostat Adjustment Do It Yourself 18 More questions call GE Answer Center 800 626 2000 QqlConsumer Services 35 Appliance Registration 2 Important Phone Numbers 35 Model and Serial Number Location 2 Removal of Packaging Tape 2 Warranty BackCover Models JSP26 JSP28 GE Appliances JSP31 MNU073 Re 5 ...

Page 2: ... protect the surface NOTE The plastic tape that is not removed from the chrome trim on range parts cannot be removed if baked on Use these numbers in any correspondence or service calls concerning your range If you received a damaged range Immediately contact the dealer or builder that sold you the range Save time and money Before you request service Check the Problem Solver in the back of this gu...

Page 3: ...ase refer to the Anti Tip device information in the back of this guide Failure to take this precaution could result in tipping of the range and injury Do not leave children alone children should not be left alone or unattended in an area where an appliance is in use They should never be allowed to sit or stand on any part of the appliance Do not allow anyone to climb stand or hang on the door draw...

Page 4: ...re of at least 170 F This assures that in the remote possibility that trichina may be present in the meat it will be killed and the meat will be safe to eat Oven Stand away from the range when opening the oven door Hot air or steam which escapes can cause burns to hands face and or eyes Do not heat unopened food containers Pressure could build up and the container could burst causing an injury Kee...

Page 5: ...if used on a hot surface Never leave jars or cans of fat drippings on or near your range Only certain types of glass glass ceramic earthenware or other glazed containers are suitable for range top service others may break because of the sudden change in temperature To minimize the possibility of burns ignition of flammable materials and spillage the handle of a container should be turned toward th...

Page 6: ...FEATu s OF YOUR RANGE Models JSP26 JSP28 JSP31 L I 6 ...

Page 7: ...erior oven light on and off 11 Oven Vent located under right rear surface unit 4 28 12 Anti Tip Device 3 31 13 Oven Control Clock and Timer 8 10 13 15 18 20 14 Surface Unit ON Indicator Light 10 15 Automatic Oven Light Switch 13 16 Oven Shelf Supports 4 13 14 Shelf position for cooking are suggested in the Baking Roasting and Broiling sections I 17 Oven Shelves with Stop Locks 4 13 14 23 30 I 18 L...

Page 8: ... Press and hold pad to decrease time or temperature by larger amounts 8 BAKE Press this pad to select the bake function 9 BROIL Press this pad to select the broil function 10 CLEAN Press this pad to select the self cleaning function See the Operating the Self Cleaning Oven section 11 COOK TIME Press this pad for Timed Baking operations 12 STOP TIME Use this pad along with the COOK TIME or CLEAN pa...

Page 9: ...r To Cancel the Timer lf TIMER is showing press the INCREASE or Press the TIMER ON OFF pad while the word DECREASE pad until desired time is reached TIMER is flashing If TIMER is not showing press the TIMER ON OFF pad first then follow the instructions above to set the timer End of Cycle Tone Display Messages The end of cycle tone is a series of 3 beeps followed If DOOr appears in the display the ...

Page 10: ... pushed in to set only from the OFF position When the control is in any position other than OFF it maybe rotated without pushing in Be sure you turn the control knob to OFF when yoLl finish cooking An indicator light will glow when ANY heat on any surface unit is on Cooking Guide for Using Heat Settings HI Quick start for cooking bring water to boil Medium High Fast fry pan broil maintain fast boi...

Page 11: ...ookware Aluminum Right cookware conducts heat faster than other metals Cast iron and coated cast iron cookware are slow to absorb heat but generally cook evenly at low to medium heat settings Steel pans may cook unevenly if not combined with other metals For best cooking results pans should be flat on the bottom Match the size of the saucepan to the size of the surface unit The pan should not exte...

Page 12: ...oes not allow the canner to be centered on the surface unit use smaller diameter pots for good canning results 2 Flat bottomed canners must be used Do not use canners with flanged or rippled bottoms often found in enamelware because they don t make enough contact with the surface unit and take too Iorlg to boil water 3 When canning use recipes and procedures from reputable sources Reliable recipes...

Page 13: ...e door is opened Use the switch on the control panel to turn the oven light on when the door is closed Shelf Positions he oven has four shelf supports identified in this illustration as A bottom B C and D top Shelf positions for cooking are suggested in the Baking Roasting and Broiling sections Oven Shelves The shelves are designed with stop locks so when placed correctly on the shelf supports the...

Page 14: ...o change the oven temperature during BAKE cycle press the BAKE pad and then the INCREASE or DECREASE pad to get the new temperature Oven Shelves Arrange the oven shelf or shelves in the desired locations while the oven is cool The correct shelf position depends on the kind of food and the browning desired As a general rule place most foods in the middle of the oven on either shelf positions B or C...

Page 15: ...d baking mixes follow package recipe or instructions for the best baking results Cookies When baking cookies flat cookie sheets without sides produce better looking cookies Cookies baked in a jelly roll pan short sides all around may have Iarker edges and pale or light browning may occur Do not use a cookie sheet so large that it touches the walls or the door of the oven Never entirely cover a she...

Page 16: ...Time the oven will turn off automatically 1 Press the COOK TIME pad NOTE If your recipe requires preheating you may need to add additional time to the length of the Cook Time 2 Press the INCREASE pad until the desired length of baking time appears in the display 3 Press the BAKE pad The oven will start automatically The word ON and 100 will be displayed The Cook Time will begin to count down As th...

Page 17: ...s 3 hours Adding 3 hours to the time of day equals 5 00 4 Change the Stop Time from 5 00 to 7 00 by pressing the INCREASE pad until 7 00 appears in the display n5 Press the BAKE pad BAKE 6 Press the INCREASE or DECREASE pad until 325 is displayed At 4 00 the oven will turn on automatically The word ON and 100 will be displayed The Cook Time will begin to count down As the oven heats up the display...

Page 18: ...ores to check the temperature setting of your new oven These thermometers may vary 2043 degrees To Adjust the Thermostat c1 1 Press the BAKE pad BAKE 2 Select an oven temperature between 500 F and 550 F 3 Immediately before the BAKE indicator stops flashing press and hold the BAKE pad for about 4 seconds The display will change to the oven adjustment display 4 The oven temperature can be adjusted ...

Page 19: ...c1 5 Press the CLEAIUOFF pad when CLEAR roasting is finished and then remove m the food from the oven Most meats continue to cook slightly while standing after being removed from the oven Standing time recommended for roasts is 10 to 20 minutes This allows roasts to firm up and makes them easier to carve Internal temperature will rise about 5 to 10 F to compensate for temperature rise if desired r...

Page 20: ...Be sure to cut across the grain of the meat the meat Type Meat Tender cuts rib high quality sirloin tip rump or top round Lamb leg or bone in shoulder Veal shouider leg or loin Pork loin rib or shoulder Ham precooked Poultry Chicken or Duck Chicken pieces Turkey ROASTING GUIDE Oven Temperature 325 325 325 325 325 Doneness Rare Medium Well Done Rare Medium Well Done Well Done Well Done To Warm 5 E ...

Page 21: ...ately and leave the pan outside the oven to cool during the meal for easiest cleaning Use of Aluminum Foil You can use aluminum foil to line Without the slits the foil will your broiler pan and broiler rack prevent fat and meat juices from However you must mold the foil draining to the broiler pan The tightly to the rack and cut slits in it juices could become hot enough to just like the rack catc...

Page 22: ...let fatty edges hang over the sides These could soil the oven bottom 6 The broiler does not need to be preheated However for very thin foods or to increase browning preheat if desired 7 Frozen steaks can be broiled by positioning the oven shelf at next lowest shelf position and increasing cooking time given in this guide 1X times per side 8 If your range is connected to 208 volts rare steaks may b...

Page 23: ...ater or a soap filled steel wool pad Rinse well with a vinegar and water solution This will help prevent a brown residue from forming when the oven is heated Buff these areas with a dry cloth Do not clean the gasket Never use a commercial oven cleaner in or around the self cleaning oven Clean the top sides and outside front of the oven door with soap and water Do not use abrasives or oven cleaners...

Page 24: ... will automatically begin after CLEAN is displayed and the wcid ON appears in the display When the oven heats to a high temperature the word LOCK will appear in the display It will not be possible to open the oven door until the temperature drops below the lock temperature and the LOCK light goes off 4 When the LOCK light is off open the door NOTE You can find out when the clean cycle will be fini...

Page 25: ...ess the CLEAN pad Press the INCREASE or DECREASE pad to enter Clean Time Press the STOP TIME pad STOP TIME and the earliest Stop Time you can set will appear in the display 5 Press the INCREASE pad to change the Stop Time to a later time of day if desired For example If you set Stop Time at 11 00 oven will start clean cycle at 8 00 and end at 11 00 The door latches automatically The self clean cyc...

Page 26: ...uring both the cooking and cleaning functions Q Should there be any odor during the cleaning A Yes there will be an odor during the first few cleanings Failure to wipe out excessive soil might also cause a strong odor when cleaning Q What causes the hair like lines on the enameled surface of my oven A This is a normal condition resulting from heating and cooling during cleaning These lines do not ...

Page 27: ...ol panel after each use Clean with mild soap and water or vinegar and water rinse with clean water and polish dry with a soft cloth Do not use abrasive cleansers strong liquid cleansers plastic scouring pads or oven cleaners on the control panel they will damage the finish A 50 50 solution of vinegar and hot water works well The control knobs may be removed for easier cleaning Before removing the ...

Page 28: ...ean the drip pans by hand Place them in a covered container or a plastic bag with 1 4 cLlp ammonia to loosen the soil Then scrub with a soap filled scouring pad if necessary Rinse with clean water and polish with a clean soft cloth The drip pans may also be cleaned in the dishwasher Black drip pans cm some models may be cleaned in a self cleaning oven after they have been thoroughly rinsed Howerve...

Page 29: ...ell fitting oven door gasket is essential for energy efficient oven operation and good baking results If you notice the gasket becoming worn frayed or damaged in any way or if it has become displaced on the door you should have it replaced NOTE The gasket is designed with a gap at the bottom to allow for proper air circulation 14 I 4 IN I Inside Gasket w Outside of the door Use soap and water to t...

Page 30: ...e electrical outlet Let the bulb cool completely before removing it For your safety do not touch a hot bulb with a damp cloth If you do the bulb will break To remove Unscrew the cover and remove the bulb To replace Put in a new 40 watt appliance bulb NOTE A 40 watt appliance bulb is smaller than a standard 40 watt household bulb Install and tighten the cover Reconnect electrical power to the range...

Page 31: ...an baseboard and that there are no electrical wires or plumbing in the area which the screw could penetrate Attach the stability chain in a location which will allow the chain to be in line with the bracket side to aide as much as possible when attached to the unit Test to see if the chain is securely fastened by tugging on the chain o II n 3 Temporarily attach the loose end of the chain to the re...

Page 32: ...l stop position as recommended Improper shelf position being used See the Broiling Guide Food is being cooked on a hot pan Cookware is not suited for broiling c Aluminum foil used on the broiler pan and rack has not been fitted properly and slit as recommended Oven controls not set properly See the Baking or Roasting section Shelf position is incorrect See the Roasting or Baking section Incorrect ...

Page 33: ...NOTES 33 ...

Page 34: ...NOTES 34 ...

Page 35: ...ing or speech who have Braille controls for a variety of GE access to a TDD or a conventional teletypewriter may appliances and a brochure to call 800 TDD GEAC 800 833 4322 to request assist in planning a barrier free information or service kitchen for persons wilh limited mobility To obtain these items free of charge call 800 626 2000 Service Contrac13 800L626 2224 YOLI can have the secure feelin...

Page 36: ... material If you then have any questions about operating the product please contact your dealer or our Consumer Affairs office at the address below or call toll free GE Answer Center 800 626 2000 consumer information service Improper installation If you have an installation problem contact your dealer or installer You are responsible for providing adequate electrical gas exhausting and other conne...

Reviews: