


GE Appliances
JKD910
JTD910
Owner’s Manual
Warming Drawer
Electric
164D3333P163
49-8933-1 05-00 JR
350A4502P201
www.geappliances.com
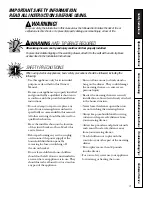
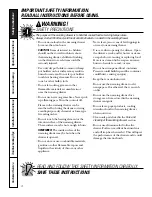
Safety Information
Anti-Tip Device . . . . . . . . . . . . . . 3
Safety Precautions . . . . . . . . . 3, 4
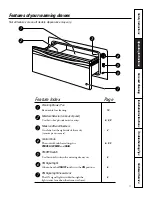
Operating Instructions
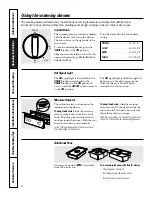
Control Knob . . . . . . . . . . . . . . . .6
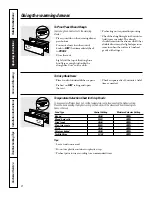
Crisping Stale Items . . . . . . . . . .8
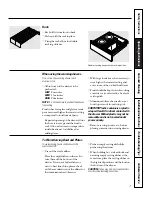
Drawer . . . . . . . . . . . . . . . . . . . . . .7
Features . . . . . . . . . . . . . . . . . . . . .5
Moisture Selector . . . . . . . . . . . . .6
ON Signal Light . . . . . . . . . . . . . .6
Pans . . . . . . . . . . . . . . . . . . . . . . . . 6
Proofing Yeast Bread
and Dough . . . . . . . . . . . . . . . . . .8
Rack . . . . . . . . . . . . . . . . . . . . . . . .7
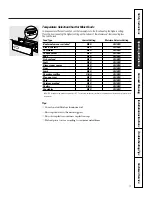
Temperature Selection
Charts . . . . . . . . . . . . . . . . . . . .8, 9
Warming Serving Bowl
and Plates . . . . . . . . . . . . . . . . . . .7
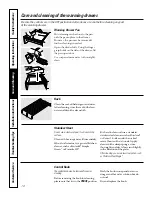
Care and Cleaning
Control Knob . . . . . . . . . . . . . . 10
Rack . . . . . . . . . . . . . . . . . . . . . . 10
Stainless Steel . . . . . . . . . . . . . . 10
Warming Drawer Pan . . . . . . . . 10
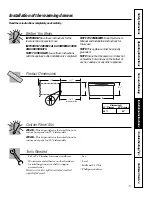
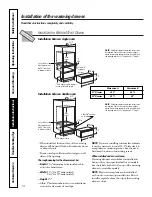
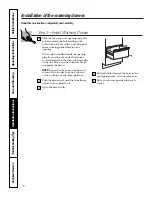
Installation . . . . . . . . . . .
11–16
Troubleshooting Tips . . . . .
17
Customer Service
Product Registration . . . . . . . . . .2
Service Telephone
Numbers . . . . . . . . 2, Back Cover
Warranty for Customers
in Canada . . . . . . . . . . . . . . . . . . 19
Warranty for Customers
in U.S. . . . . . . . . . . . . . . . . . . . . . 18