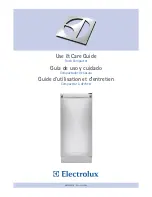


GEAppliances.com
Trash
compactors
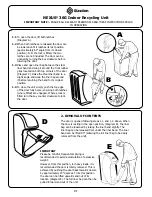
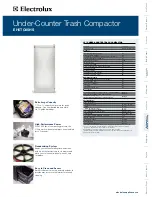
LOCK/OFF
ON
START
WARNING
Loren Ipsum deces Gomeum. Loren Ipsum deces Gomeum. Loren Ipsum deces Gomeu.
Hepes migjom Jasdpum runstew W
adf dvcdf. Loren Ipsum deces Gomeum. Loren Ipsu
m deces Gomeum. Loren Ipsum deces Gomeu.Hepes migjom Jasdpum runstew W
adf .
Loren Ipsum deces Gomeum. Loren Ipsum deces Gomeum. Loren Ipsum deces Gomeu.
Hepes migjom Jasdpum runstew W
adf dvcdf. Loren Ipsum deces Gomeum. Loren Ipsu
m deces Gomeum. Loren Ipsum deces Gomeu.Hepes migjom Jasdpum runstew W
adf .
Loren Ipsum deces Gomeum. Loren Ipsum deces Gomeum. Loren Ipsum deces Gomeu.
Hepes migjom Jasdpum runstew W
adf dvcdf. Loren Ipsum deces Gomeum. Loren Ipsu
m deces Gomeum. Loren Ipsum deces Gomeu.Hepes migjom Jasdpum runstew W
adf .
Loren Ipsum deces Gomeum. Loren Ipsum deces Gomeum. Loren I
psum deces Gomeu.Hepes migjom Jasdpum runstew W
adf dvcdf. L
oren Ipsum deces Gomeum. Loren Ipsum deces Gomeum. Loren Ips
um deces Gomeu.Hepes migjom Jasdpum runstew W
adf .Loren Ipsu
m deces Gomeum. Loren Ipsum deces Gomeum. Loren Ipsum deces
Gomeu. Hepes migjom Jasdpum runstew W
adf dvcdf. Loren Ipsum
deces Gomeum. Loren Ipsum deces Gomeum. Loren Ipsum deces G
omeu.Hepes migjom Jasdpum runstew W
adf Loren Ipsum deces Go
meum. Loren Ipsum deces Gomeum. Loren Ipsum deces Gomeu.
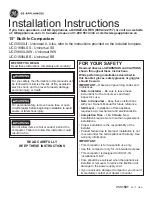
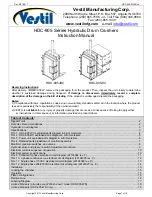
ATTENTION
GCG1520
GCG1530
GCG1540
GCG1550
Owner’s Manual
and Installation
Part No. 165D4700P206
Pub. No. 49-5880-1
10-01 JR
9871764 Rev. A