


Compactor
❑
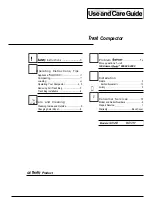
instructions .........................3
❑
, Operating Instructions, Tips
Appliance
Compacting
Loading
Operating Your Compactor .....................4, 5
Removing Full Trash Bag ..............................7
Trash Bag Installation ....................................6
❑
Care and Cleaning
Cleaning, Inside and Outside .......................8
Changing Color Panel ....................................9
GE
Product
❑
●
Problem
I
More questions
GE Answer
800.626.2000
❑
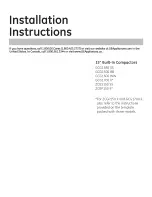
Installation
Installation . . . . . . . . . . . . . . . . . . . . . . . . . . . . . . . . . . . . . . . . . . . . . . . . . . . 10
Electrical Requirements . . . . . . . . . . . . . . . . . . . . . . . . . . 10
Grounding . . . . . . . . . . . . . . . . . . . . . . . . . . . . . . . . . . . . . . . . . . . . . . . . . . . . 10
❑
✍
Consumer Services
Model and Serial Numbers ..........................2
Repair Service
Warranty ........................................Back Cover
Models:
I