background image

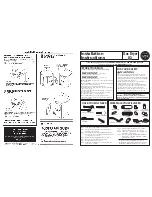
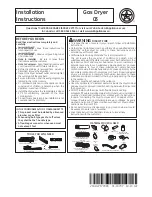
With Installation Instructions

500A

280P013

Use and Care Guide

Dryer

Safety Instructions

................ 3, 4

Installation Instructions

Exhaust ............................................5, 6
Electric Dryer.......................................7
Gas Dryer ........................................7, 8
Reversible Door Instructions .............9

Operating Instructions, Tips

Controls features ..............................14
Cycle options.....................................15
Cycle status .......................................16
Dryer control panel...........................10
Drying center.....................................18
Drying cycles.....................................12
Drying rack ........................................18
Dryness Levels ..................................13
Loading ..............................................17
One touch selections ........................11
Quick start guide...............................10
Sorting clothes..................................17
Temperature ......................................13
Timed dry cycles ...............................13

Care and Cleaning

Dryer Exhaust....................................20
Exterior ..............................................19
Light Bulb Replacement ...................19
Lint Filter .....................................19, 20

Problem Solver

............ 21, 22, 23

Consumer Services

Camco Service Telephone Numbers ..24
Model and Serial Numbers................2
Repair Service .....................................2
Warranty ............................................25

For service call:

1-800-361-3400

We care about our environment

RECYCLED PAPER

RECYCLABLE

www.geappliancescanada.com

Summary of Contents for Dryer

Page 1: ...nter 18 Drying cycles 12 Drying rack 18 Dryness Levels 13 Loading 17 One touch selections 11 Quick start guide 10 Sorting clothes 17 Temperature 13 Timed dry cycles 13 Care and Cleaning Dryer Exhaust...

Page 2: ...ou have a warranty to protect you against manufacturing problems during the period of your dryer warranty Camco Service Contracts are available to provide the same trouble free service for as long as...

Page 3: ...Book or in published user repair instructions that you understand and have the skills to carry out When disconnecting this appliance pull by the plug rather than the cord to avoid damage to the cord...

Page 4: ...in a locked cabinet Observe all warnings on container labels to avoid personal injury Keep the floor around your appliances clean and dry to reduce the possibility of slipping To minimize the possibil...

Page 5: ...IST HOOD or WALL CAP Terminate in a manner to prevent back drafts or entry of birds or other wildlife Termination should present minimal resistance to the exhaust air flow and should require little or...

Page 6: ...bow and a metal straight duct to exhaust the dryer through the knockout choosen Insert standard elbow and ducts through rear and side or bottom openings Use only 100 mm 4 inch diameter rigid metallic...

Page 7: ...e made for the introduction of outside air into the dryer room The free air opening shall not be less than 160 cm2 25 in2 The exhaust duct material MUST BE METAL Do not connect the exhaust duct with s...

Page 8: ...NG CONVERSION SHALL BE CARRIED OUT IN ACCORDANCE WITH THE REQUIREMENTS OF THE PROVINCIAL AUTHORITIES HAVING JURISDICTION AND OR ACCORDANCE WITH THE REQUIREMENTS OF THE CAN CGA B149 1 AND B149 2 INSTAL...

Page 9: ...attaching each hinge to the dryer front Do not remove the screws located on the door itself 3 Insert these screws about half way into the top holes for each hinge on the opposite side where you remove...

Page 10: ...TOUCH Quick Start Guide Clean lint filter Add clothes Select dry cycle Check dryness level Check TEMPERATURE Close door Push START Your new dryer offers the convenience of starting your dryer loads w...

Page 11: ...or wrinkle free and permanent press items For knits and sweaters with fabric care labels that say Machine Dry For lingerie and special care fabrics For small loads that are needed in a hurry such as s...

Page 12: ...ur favorite combination of settings and save them here for one touch recall These custom settings can be set while a cycle is in progress To store a custom combination of settings 1 Select a ONE TOUCH...

Page 13: ...This is the preferred cycle for energy saving LESS DRY Use for lighter fabrics DAMP For leaving items partially damp HIGH For regular to heavy cottons MEDIUM For synthetics blends and items labeled pe...

Page 14: ...arns what types of loads you dry most often It takes this data and determines the approximate time it will take the load to dry As the cycle begins you will see the approximate total cycle time in the...

Page 15: ...is Certified by NSF International formerly National Sanitation Foundation to NSF Protocol P9 Sanitization Performance of Residential Clothes Dryers NSF NSF Protocol P9 Sanitization Performance of Res...

Page 16: ...ndard machines resulting in shorter dry times and better clothes care The SENSING light will flash and racetrack lights will flash in the display while the dryer is monitoring the amount of moisture r...

Page 17: ...SHOULD BE DRIED ON A FLAT SURFACE green yellow green green yellow The Difference Between Automatic and Timed Drying Automatic Drying Electronic on some models When using the Automatic Cycles the Elec...

Page 18: ...e of the dryer remove the screw at the top of the side panel flange shown in circled illustration 4 Turn the bracket upside down and attach it with the screw you just removed and with the screws that...

Page 19: ...Damage to your dryer caused by pre treatment products is not covered by your warranty To keep your dryer operating at peak performance periodically remove the lint filter and insert the suction hose f...

Page 20: ...ous operation Wiring diagram located in control console ALWAYS VERIFY PROPER OPERATION AFTER SERVICING 2 Disconnect duct from dryer 3 Clean exhaust duct from end where dryer is connected to the exhaus...

Page 21: ...eling legs as necessary until even Inconsistent drying times Type of heat Drying time will vary according to the type of heat used If you recently changed from an electric to a gas natural or LP dryer...

Page 22: ...be seen when the clothes are wet appear after drying Use proper washing procedures before drying Lint on clothes Lint filter is full Clean lint screen before each load Improper sorting Sort lint prod...

Page 23: ...to dry a well sorted washer load is a well sorted dryer load Large loads of heavy fabrics like Large heavy fabrics contain more moisture and take beach towels longer to dry Separate large heavy fabri...

Page 24: ...ve parts or accessories sent directly to their home VISA MasterCard cards and Discover are accepted Instructions contained in this manual cover procedures to be performed by any user Other servicing g...

Page 25: ...al use and alteration or removal or defacing of the serial plate cancels all obligations of this warranty Service during this warranty must be performed by an Authorized Camco Service Agent Neither Ca...

Reviews: