background image

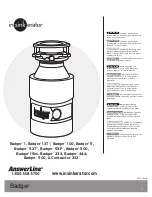
Write the model and serial 
numbers here:

Model # _________________

Serial # _________________

You can find them on a label on 
the bottom of the disposer.

GE is a trademark of the General Electric Company. Manufactured under trademark license.
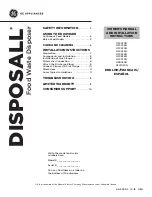
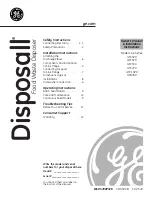
OWNER’S MANUAL 

AND INSTALLATION 

INSTRUCTIONS

DISPOSALL

®

49-5903-3   12-18   GEA

ENGLISH/FRANÇAIS/

ESPAÑOL

SAFETY INFORMATION

 . . . . . . . . . .3

USING THE DISPOSER

Continuous Feed Models . . . . . . . . . . . . . . . .5
Batch Feed Models . . . . . . . . . . . . . . . . . . . . .5

CARE AND CLEANING

  . . . . . . . . . . . . .6

INSTALLATION INSTRUCTIONS

Preparation . . . . . . . . . . . . . . . . . . . . . . . . . . .7
Components and Installation . . . . . . . . . . . .8
Installation of Sink Flange  . . . . . . . . . . . . . .8
Dishwasher Connection . . . . . . . . . . . . . . . . .9
Attach the Discharge Elbow . . . . . . . . . . . . .9
Connect Disposer to Sink Flange  . . . . . . . 10
Dimensions  . . . . . . . . . . . . . . . . . . . . . . . . . . 11
Some Typical Installations  . . . . . . . . . . . . . 11

TROUBLESHOOTING

  . . . . . . . . . . . . 12

LIMITED WARRANTY

  . . . . . . . . . . . 15

CONSUMER SUPPORT

  . . . . . . . . . . 16

F

o

od W

a

st

e Di

spo

ser

GFC320N 

GFC325N

GFC520N 

GFC525N 

GFC530N 

GFC535N

GFC720N
GFB760N

GFC1020N

Summary of Contents for DISPOSALL GFB760N

Page 1: ...NGLISH FRANÇAIS ESPAÑOL SAFETY INFORMATION 3 USING THE DISPOSER Continuous Feed Models 5 Batch Feed Models 5 CARE AND CLEANING 6 INSTALLATION INSTRUCTIONS Preparation 7 Components and Installation 8 Installation of Sink Flange 8 Dishwasher Connection 9 Attach the Discharge Elbow 9 Connect Disposer to Sink Flange 10 Dimensions 11 Some Typical Installations 11 TROUBLESHOOTING 12 LIMITED WARRANTY 15 ...

Page 2: ...nto every GE Appliances product and we think you will too Among other things registration of your appliance ensures that we can deliver important product information and warranty details when you need them Register your GE appliance now online Helpful websites and phone numbers are available in the Consumer Support section of this Owner s Manual You may also mail in the pre printed registration ca...

Page 3: ...sposer a Clam or oyster shells b Caustic drain cleaners or similar products c Glass china or plastic d Large whole bones e Metal such as bottle caps tin cans utensils or aluminum foil f Hot grease or other hot liquids g Whole corn husks Ŷ KHQ QRW RSHUDWLQJ D GLVSRVHU OHDYH WKH GUDLQ VWRSSHU LQ SODFH WR UHGXFH WKH ULVN RI REMHFWV IDOOLQJ into the disposer Ŷ RU SURSHU JURXQGLQJ LQVWUXFWLRQV VHH WKH ...

Page 4: ... connector where power cord enters the disposer To Wire Your Disposer Directly into the House Current GROUNDING INSTRUCTIONS 7KLV GLVSRVHU PXVW be connected to a grounded metal permanent wiring system or an equipment grounding conductor must be run with the circuit conductors and connected to the equipment grounding terminal or lead on the appliance I RX XVH FDEOH 7KHVH SURGXFWV DUH GHVLJQHG IRU K...

Page 5: ...firmly to start D 5XQ WKH GLVSRVHU IRU seconds after shredding VWRSV 7KLV DVVXUHV WKDW DOO waste is thoroughly flushed through the trap and drain Lift the stopper to shut the disposer off E 7R ILOO WKH VLQN LQVHUW WKH VWRSSHU VR WKDW WKH ODUJHVW VORW OLQHV XS ZLWK WKH VZLWFK SOXQJHU 7KH VWRSSHU can now be pushed down to seal the sink without starting the disposer When the medium sized slot in the ...

Page 6: ...s they cause serious corrosion of metal parts Ŷ RXU GLVSRVHU H FHSW IRU WKH DWFK HHG PRGHO LV equipped with a removable splash guard for ease of cleaning or replacement Remove the splash guard by SXOOLQJ LW RXW IURP WKH WRS 7R UHSODFH LQVHUW LQWR WKH sink flange and push down until it is properly seated Ŷ I DQ RGRU GHYHORSV UXQ RUDQJH RU OHPRQ ULQGV through the disposer A dozen ice cubes sprinkled...

Page 7: ...ician or service representative if you are in doubt that the appliance is properly grounded If house wiring is not 2 wire with ground a ground must be provided by the installer When house ZLULQJ LV DOXPLQXP EH VXUH WR XVH 8 LVWHG anti oxidant compound and aluminum to copper connectors PREPARATION LVFRQQHFW HOHFWULFDO SRZHU VXSSO WR GLVSRVHU 2 Remove old disposer or sink flange assembly 3 Inspect d...

Page 8: ...he gasket form a ring around the underside of the sink flange Insert the flange into the sink opening press down hard to VTXHH H RXW H FHVV SXWW RU XQGHU WKH VLQN WULP off excess putty flush with the bottom edge of the sink opening G URP XQGHUQHDWK WKH VLQN slip the fiber gasket onto the exposed sink flange With arrows pointing up screw the support ring onto the sink flange and hand tighten until ...

Page 9: ...GASKET Slide rubber gasket over drain pipe 2 CONNECT HOSE Connect the dishwasher hose using a hose clamp If the hose size is different you will need a stepped rubber adapter 2 CONNECT DISCHARGE ELBOW Slide bracket over discharge elbow and connect to the disposer Make sure all plumbing connections are tight If you are connecting to a dishwasher complete the following step If a dishwasher is not to ...

Page 10: ...KH PRXQW ULQJ WR WKH ULJKW XQWLO LW ORFNV XS WLJKW RSSHU SURMHFWLRQV PXVW EH WR WKH H WUHPH left of the mounting slots If the mount ring is hard to turn you may add a small amount of SHWUROHXP MHOO RU OLTXLG VRDS WR WKH KRSSHU SURMHFWLRQ 5XQ ZDWHU DQG FKHFN IRU OHDNV 2 LINE UP WITH OUTLET PIPE 7XUQ WKH PRXQW ULQJ DQG WKH GLVSRVHU XQWLO WKH disposer discharge elbow lines up with the outlet pipe see...

Page 11: ... 5 9 16 5 9 16 5 9 16 5 3 8 5 3 8 12 11 16 14 1 2 16 5 8 16 1 6 12 11 16 13 7 16 GFC520N GFC525N GFC530N GFC535N GFC720N GFB760N Batch Feed Operation GFC1020N NOTE It is essential for the proper operation of the disposer that this dimension be 9 12 depending upon the models listed above to avoid standing water in disposer motor housing OH LEOH GUDLQ SLSH PD EH QHFHVVDU IRU WKLV application SINGLE ...

Page 12: ...replacement Turntable cannot rotate If the turntable does not turn freely FKHFN IRU DQ REMHFW ORGJHG EHWZHHQ WKH WXUQWDEOH DQG WKH JULQG ULQJ LVORGJH WKH REMHFW E PRYLQJ WKH WXUQWDEOH ZLWK D EURRP KDQGOH 7KHQ UHPRYH WKH REMHFW I QR IRUHLJQ REMHFW LV SUHVHQW WKHUH may be internal problems Disposer leaks If the leak is at the top it may be caused by 1 Improper seating of sink flange gasket choice pu...

Page 13: ...49 5903 3 13 NOTES Notes ...

Page 14: ...14 49 5903 3 Notes NOTES ...

Page 15: ...chase 0RGHO 1 I WKHUH LV D GHIHFW LQ PDWHULDOV RU ZRUNPDQVKLS UHODWLQJ WR IXQFWLRQDO SDUWV RQO DSSHDUDQFH SDUWV DUH H FOXGHG XULQJ WKLV six year extended limited warranty period you will be responsible for all installation charges relating to the replacement disposer 6WDSOH RXU UHFHLSW KHUH 3URRI RI WKH RULJLQDO SXUFKDVH date is needed to obtain service under the warranty What GE Appliances will n...

Page 16: ... OHDUQ DERXW VSHFLDO GLVFRXQWV WKDW DUH DYDLODEOH ZKLOH RXU warranty is still in effect You can purchase it on line anytime GE Appliances Services will still be there after your ZDUUDQW H SLUHV Q WKH 86 GEAppliances com extended warranty or call 800 626 2224 during normal business hours In Canada GEAppliances ca en support purchase extended warranty or call 866 277 9842 Parts and Accessories Indiv...

Page 17: ...5N GFC520N GFC525N GFC530N GFC535N GFC720N GFB760N GFC1020N Broyeur de déchets CONSIGNES DE SÉCURITÉ 3 UTILISATION DU BROYEUR DE DÉCHETS Modèles à chargement continu 5 Modèles à chargement discontinu 5 ENTRETIEN ET NETTOYAGE 6 INSTALLATION INSTRUCTIONS Préparation 7 Pièces et installation 8 Installation du collet d évier 8 raccord au lave vaisselle 9 Fixation du coude de refoulement 9 Raccord du b...

Page 18: ...Appliances et nous pensons que vous le serez aussi Dans cette optique nous vous rappelons que l enregistrement de votre électroménager vous assure la communication de renseignements importants sur le produit et la garantie lorsque vous en avez besoin Enregistrez votre électroménager GE en ligne dès maintenant Des sites Web et des numéros de téléphone utiles figurent dans la section Soutien au cons...

Page 19: ...myes b produits de débouchage caustiques ou similaires c verre porcelaine ou plastique d gros os entiers e métal par exemple boîtes de conserve canettes ustensiles ou papier aluminium f huile chaude ou autres liquides chauds g épis de maïs entiers Ŷ RUVTXH YRXV Q XWLOLVH SDV OH EUR HXU ODLVVH OH bouchon du drain en place pour éviter d y faire tomber des objets Ŷ RQVXOWH OHV LQVWUXFWLRQV GpWDLOOpHV...

Page 20: ...au courant domestique INSTRUCTIONS DE MISE À LA TERRE Ce broyeur doit être connecté à un circuit électrique permanent en métal et mis à la terre ou un conducteur de mise à la terre de l appareil doit être utilisé avec les conducteurs du circuit et connecté à un terminal de mise à la terre ou broche sur l appareil 6L YRXV XWLOLVH XQ FkEOH EOLQGp 1 Ces produits sont conçus pour une utilisation résid...

Page 21: ...ur pendant 25 secondes supplémentaires après l arrêt du broyage Ce laps de temps permet de garantir que tous les déchets sont correctement écoulés via le siphon et le drain Retirez le bouchon pour éteindre le broyeur E 3RXU UHPSOLU O pYLHU LQVpUH OH ERXFKRQ GH IDoRQ j FH que la plus grande encoche s aligne avec le plongeur de O LQWHUUXSWHXU H ERXFKRQ SHXW PDLQWHQDQW rWUH HQIRQFp SRXU ERXFKHU O pYL...

Page 22: ... une corrosion définitive des parties métalliques Ŷ 9RWUH EUR HXU VDXI PRGqOHV j FKDUJHPHQW GLVFRQWLQX HVW équipé d un pare éclaboussures amovible pour un nettoyage et une réinstallation faciles Retirez le pare éclaboussures le WLUDQW YHUV OH KDXW 3RXU OH UHSODFHU LQVpUH OH GDQV OH FROOHW d évier et appuyez jusqu à ce qu il soit correctement installé Ŷ Q FDV GH PDXYDLVHV RGHXUV MHWH GHV SHDX G RUD...

Page 23: ...able 0DVWLF GH SORPEHULH SRXU OHV pYLHUV PRXOpV Adaptateur de drain en caoutchouc à baïonnette Serre fils 5DFFRUG GH FkEOH Drain flexible 7URXVVH GH FkEOH G DOLPHQWDWLRQ UpI 30 OUTILLAGE NÉCESSAIRE INSTRUCTIONS D INSTALLATION Instructions d installation Broyeur ƒ 7RXUQHYLV FUXFLIRUPHV et tournevis plats ƒ 0DUWHDX ƒ 7RXUQHYLV j GRXLOOH ƒ 3LQFH PXOWLSULVH avec articulation à boutonnière AVERTISSEMEN...

Page 24: ...tallé F Si vous utilisez du mastic au lieu du joint formez une bague autour de la base du collet d évier Insérez le collet dans l ouverture de l évier en serrant fermement pour éliminer l excès de mastic En vous positionnant sous l évier supprimez l excès de mastic à la base de l ouverture de l évier G En vous positionnant sous l évier faites glisser le joint en fibre sur le collet d évier exposé ...

Page 25: ...inage 2 RACCORD DU TUYAU Raccordez le tuyau du lave vaisselle à l aide du collier de serrage Si la taille du tuyau est différente utilisez un adaptateur en caoutchouc à baïonnette 2 RACCORDER LE COUDE DE REFOULEMENT Raccordez le coude de refoulement au broyeur Assurez vous de bien serrer tous les raccords de plomberie 3RXU UDFFRUGHU OH EUR HXU j XQ ODYH YDLVVHOOH VXLYH O pWDSH ci dessous Si vous n...

Page 26: ...JH YHUV OD GURLWH HW VHUUH OD IHUPHPHQW HV SDWWHV GH OD WUpPLH GRLYHQW se trouver à l extrême gauche des encoches de montage Si la bague de montage résiste ajoutez une petite quantité de vaseline ou de savon liquide sur les pattes de la trémie Faites couler de l eau et assurez vous de l absence de fuite 2 ALIGNEMENT AVEC LE TUYAU D ÉCOULEMENT 7RXUQH OD EDJXH GH PRQWDJH HW OH EUR HXU MXVTX j FH que...

Page 27: ...mm 13 7 16 po 241 mm GFC520N GFC525N GFC530N GFC535N GFC720N GFB760N Fonctionnement en chargement discontinu GFC1020N 5 3 8 po 136 mm 5 3 8 po 136 mm 5 9 16 po 141 mm 5 9 16 po 141 mm 5 9 16 po 141 mm 4 1 2 po 114 mm 1 1 2 po 38 mm 4 1 2 po 114 mm 1 1 2 po 38 mm 4 1 2 po 114 mm 1 1 2 po 38 mm REMARQUE pour une installation correcte il est indispensable de respecter cette dimension de 228 à 304 mm ...

Page 28: ...ité rencontre peut être des problèmes internes nécessitant une réparation ou un remplacement Le plateau tournant ne peut pas tourner Si le plateau tournant ne tourne pas librement recherchez un possible objet étranger entre le plateau tournant et la bague de broyage Délogez l objet en faisant tourner le plateau tournant à l aide d un manche à balai puis retirez le Si aucun objet étranger n est pré...

Page 29: ...ure elle peut être provoquée par 1 une mauvaise installation du collet d évier choix du joint mastic ou serrage 2 une bague de serrage mal serrée 3 une mousse compressible défectueuse Si la fuite vient du coude de refoulement elle peut être provoquée par un mauvais serrage des vis du collet de refoulement HV PRGqOHV j FKDUJHPHQW GLVFRQWLQX Q LQFOXHQW SDV GH SDUH pFODERXVVXUHV ...

Page 30: ...14 49 5903 3 Notes NOTES ...

Page 31: ...DX RX GH IDEULFDWLRQ OLp DX SLqFHV IRQFWLRQQHOOHV uniquement les pièces esthétiques sont exclues Au cours de cette période de six ans d extension de garantie limitée vous serez responsable de tous les frais d installation liés au remplacement du broyeur 3RXU EpQpILFLHU GX VHUYLFH GH UpSDUDWLRQ VRXV JDUDQWLH une preuve de la date d achat initial est nécessaire GE Appliances ne prend pas en charge Ŷ...

Page 32: ...0 561 3344 Prolongation de garantie 3URFXUH YRXV XQH SURORQJDWLRQ GH JDUDQWLH SSOLDQFHV HW LQIRUPH YRXV GHV UDEDLV VSpFLDX HQ YLJXHXU SHQGDQW OD GXUpH GH YRWUH JDUDQWLH 9RXV SRXYH YRXV OD SURFXUHU HQ OLJQH HQ WRXW WHPSV HV VHUYLFHV SSOLDQFHV VHURQW toujours disponibles après l expiration de la garantie Au Canada electromenagersge ca fr soutien achat d une garantie prolongee ou composez le 866 277 ...

Page 33: ...FC530N GFC535N GFC720N GFB760N GFC1020N INFORMACIÓN DE SEGURIDAD 3 USO DEL TRITURADOR Modelos de Alimentación Continua 5 Modelos de Alimentación por Tandas 5 CUIDADO Y LIMPIEZA 6 INSTRUCCIONES DE INSTALACIÓN Preparación 7 Componentes e Instalación 8 Instalación de la Brida para el Lavabo 8 Conexión del Lavavajillas 9 Adhiera del Codo de Descarga 9 Conexión del Triturador a la Brida del Lavabo 10 D...

Page 34: ...creemos que usted también Entre otras cosas el registro de su electrodoméstico asegura que podamos entregarle información importante del producto y detalles de la garantía cuando los necesite Registre su electrodoméstico GE ahora a través de Internet Sitios Web y números telefónicos útiles están disponibles en la sección de Soporte para el Consumidor de este Manual del Propietario También puede en...

Page 35: ...FRV R SURGXFWRV similares c Vidrio porcelana o plástico d Huesos grandes enteros e Metales tales como tapas de botellas latas utensilios o papel de aluminio f Grasa caliente u otros líquidos calientes g Hojas de maíz enteras Ŷ XDQGR QR XWLOLFH XQ WULWXUDGRU GHMH HO WDSyQ GH drenaje en su posición y reduzca el riesgo de que lo objetos caigan en el triturador Ŷ 3DUD DFFHGHU D LQVWUXFFLRQHV SDUD XQD ...

Page 36: ...rectamente a la Corriente de su Hogar INSTRUCCIONES DE CONEXIÓN A TIERRA Este triturador se debe conectar a un sistema de cableado permanente metálico conectado a tierra o se debe correr un conductor de conexión a tierra para equipos con los conductores del circuito y conectarse al terminal de conexión a tierra para equipos o al conductor en el aparato 6L XWLOL D XQ FDEOH 1 Estos productos están d...

Page 37: ...tapón Presione hacia abajo de manera firme para comenzar D Deje correr el dispensador GXUDQWH VHJXQGRV OXHJR de que la trituración haya finalizado Esto asegurará que todos los desperdicios sean descargados a través del colector y del drenaje Levante el tapón para apagar el triturador E Para llenar el lavabo inserte el tapón de modo que la ranura más grande quede alineada con el émbolo del interrup...

Page 38: ...icas Ŷ 6X WULWXUDGRU H FHSWR HQ ORV PRGHORV GH OLPHQWDFLyQ por Tandas se encuentra equipado con un protector contra salpicaduras extraíble para una fácil limpieza o reemplazo Retire el protector contra salpicaduras empujando el mismo hacia afuera desde la parte superior Para realizar su reemplazo inserte la brida para el lavabo y empuje hacia abajo hasta que quede correctamente insertado Ŷ Si se p...

Page 39: ...avadora de platos ODYH GH WXERV DMXVWDEOH Masilla de plomero para sellado del lavaplatos Adaptador de drenaje de caucho escalonado Tuercas de alambre Cable conectador Tubería de drenaje flexible LW GHO FDEOH HOpFWULFR 3DUWH 1R 30 QUÉ NECESITA INSTRUCCIONES PARA LA INSTALACIÓN Instrucciones para la instalación Triturador Preguntas Ilame al 1 800 GECARES o visite nuestra página en la red www GEAppli...

Page 40: ...sione hacia abajo con fuerza para expulsar el exceso de masilla Desde abajo del lavabo recorte el exceso de masilla descargado en el extremo inferior de la abertura del lavabo G Desde abajo del lavabo deslice la junta de fibra por la brida del lavabo expuesta Con las flechas hacia arriba atornille el anillo de soporte en la brida del lavabo y realice un ajuste manual hasta que la brida del lavabo ...

Page 41: ... de caucho sobre el codo de drenaje 2 CONECTE LA MANGUERA Conecte la manguera del lavavajillas usando una abrazadera de manguera Si el tamaño de la manguera es diferente necesitará un adaptador de goma de doble tamaño 2 CONECTE EL CODO DE DESCARGA Conecte el codo de descarga al triturador Asegúrese de que todas las conexiones de la tubería estén apretadas Si realizará la conexión a un lavavajillas...

Page 42: ...recha KDVWD TXH TXHGH FRPSOHWDPHQWH DMXVWDGR DV proyecciones del tonelero deberán estar hacia el extremo derecho de las ranuras de montaje Si es difícil girar el anillo de montaje usted podrá agregar una pequeña cantidad de vaselina o de jabón líquido a la proyección del tonelero Deje correr agua y controle que no haya pérdidas 2 ALINEAR CON LA TUBERÍA DE SALIDA Gire el anillo de montaje y el trit...

Page 43: ... 11 16 13 7 16 GFC520N GFC525N GFC530N GFC535N GFC720N GFB760N Funcionamiento con Alimentación por Tandas GFC1020N NOTA Para lograr una operación del triturador apropiada es esencial que esta dimensión sea 9 12 dependiendo de los modelos enumerados anteriormente para evitar agua estancada en el alojamiento del motor del triturdaor 8QD WXEHUtD GH GUHQDMH IOH LEOH SRGUtD VHU QHFHVDULD para esta apli...

Page 44: ...mponentes eléctricos están intactos es posible que la unidad presente problemas internos que requieran el servicio técnico o su reemplazo El plato giratorio no puede rotar Si el plato giratorio no gira libremente controle que no haya ningún objeto alojado entre el plato giratorio y el anillo para pulverizar Retire el objeto moviendo el plato giratorio con el PDQJR GH XQD HVFRED XHJR UHWLUH HO obje...

Page 45: ...superior podrá haber sido causada por 1 Colocación incorrecta de la brida del lavabo elección de la junta masilla o ajuste 2 El anillo de soporte no está correctamente ajustado 3 Montaje de Amortiguación defectuoso Si la pérdida se encuentra en el codo de descarga es posible que haya sido causada por un ajuste inadecuado de los tornillos de la brida del codo D OLPHQWDFLyQ SRU 7DQGDV QR LQFOX H HO ...

Page 46: ...14 49 5903 3 Notas NOTAS ...

Page 47: ...partir de la fecha de a compra original RV PRGHORV 1 6L H LVWH DOJ Q GHIHFWR HQ ORV PDWHULDOHV R HQ OD IDEULFDFLyQ UHODFLRQDGR con las partes funcionales solamente excluyendo las partes de apariencia Durante esta garantía extendida limitada de seis años usted será responsable por de todos los cargos de instalación relacionados con el reemplazo del triturador Abroche su recibo aquí Para acceder al ...

Page 48: ...iera una garantía extendida de GE Appliances y conozca los descuentos especiales que están disponibles PLHQWUDV VX JDUDQWtD D Q HVWi YLJHQWH D SXHGH DGTXLULU HQ FXDOTXLHU PRPHQWR D WUDYpV GH QWHUQHW RV VHUYLFLRV de GE Appliances aún estarán allí cuando su garantía caduque GEAppliances com extended warranty o comuníquese al 800 626 2224 durante el horario de atención comercial Piezas y Accesorios A...

Reviews: