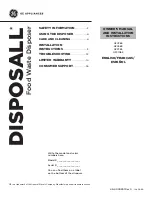
Disposall
®
Food Waste Disposer
www.GEAppliances.com
Owner’s Manual
& Installation
Instructions
165D4700P229
49-5903 01-01 JR
560C460P01 Rev. A
Safety Information
Connecting Electricity . . . . . . 2, 3
Safety Precautions . . . . . . . . . . . 2
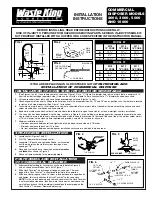
Installation Instructions
Attaching the Discharge
Elbow . . . . . . . . . . . . . . . . . . . . . . 6
Components and Installation
of Sink Flange . . . . . . . . . . . . . . . 5
Connecting Disposer to
Sink Flange . . . . . . . . . . . . . . . . . .7
Dimensions/Typical
Installations . . . . . . . . . . . . . . . . .8
Dishwasher Connection . . . . . . . 6
Operating Instructions
Batch Feed Models . . . . . . . . . . .9
Care and Maintenance . . . . . . .10
Continuous Feed Models . . . . . .9
Troubleshooting Tips
Before You Call for
Service . . . . . . . . . . . . . . . . . . . . .11
Customer Service
Warranty . . . . . . . . . . . . . . . . . . 12
Write the model and serial
numbers for your disposall here:
Model # ______________________
Serial # ______________________
You can find them on a label on
the bottom of the disposer.
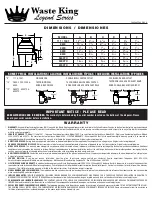
Model Line Series
GFC300F
GFC500F
GFC700F
GFB700F
GFC1000F
GFB1000F