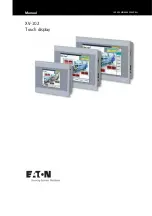
60-924-RF-TS Simon XT Talking Touch Screen
Installation Sheet
Description
The Simon XT Talking Touch Screen (models 60-924-RF-TS and 60-
924-RF-TS-N without power supply) features a color 3.5 inch LCD
screen with a graphical user interface designed to control basic
functionality of the Simon XT (v1.3 or later) control panel. Up to
four touch screens can be learned (programmed) into each Simon
XT panel.
The touch screen provides a convenient option for the following
system operations:
•
Arm the system (doors, windows, and motion sensors).
•
Disarm the system.
•
Activate a panic alarm to call the central monitoring station in
a nonmedical emergency.
•
Check system status.
•
Turn system controlled lights on or off (depending on your
system configuration).
•
Lock and unlock system-controlled door locks (depending on
your system configuration).
•
Hear voice feedback of the status of the Simon XT control
panel.
Installation
Use the following guidelines when adding this touch screen to the
Simon XT system:
•
The touch screen should be the last sensor programmed
(learned) into the panel.
•
Program (learn) the touch screen into the panel as a sensor.
•
Program touch screens using sensor groups 00, 01, 04, 05, 06,
or 07.
•
The touch screen will work best if mounted greater than 3 ft.
(approximately 1 m) from the Simon XT panel.
•
Avoid mounting the touch screen directly behind the Simon
XT panel on the opposite side of the wall.
•
Always do a sensor test before attaching the touch screen to
the wall.
•
Do not wrap the antenna into the backplate. Follow the
instructions to install the antenna into the wall.
Sensor naming
Please use the following as a guide when naming sensors:
•
Sensor names must have the word “window” or “door” from
the text library to interact with the touch screen Doors and
Windows icons on the Main screen.
•
The Motion icon is controlled by sensors that are
programmed into the following groups: 15, 17, 18, 20, 28, 32.
•
The Property icon is controlled by the following sensors:
•
All sensors learned into Group 43.
•
Sensors that are not named “window” or “door”.
•
Sensors not learned into the Motion groups.
•
Sensors that are named keyfob or keychain.
To program (learn) the touch screen into the panel:
1. Press the down arrow button on the panel and scroll to
System Programming.
2. Press OK.
The panel displays
Enter Code
.
3. Enter the installer access code and press OK.
4. Scroll to Sensors and press OK.
5. When the panel displays
Learn Sensor,
press OK.
The panel blinks
Trip Sensor nn
(where nn is the next
available zone number). You can enter a different zone
number if desired.
6. On the touch screen:
A.
Press the Settings button.
B.
Press the Down arrow until the Clear and Enroll button
appears.
C.
Press the Clear and Enroll button. The touch screen
should indicate it is waiting for enrollment.
7. On the panel, you can now program the group number (00,
01, 04, 05, 06, or 07) and press OK.
8. On the panel, press the Up or Down arrow to select a name
for the touch screen and press OK. (Refer to the Simon XT
installation instructions for programming sensor text.)
You can select something simple, such as “Touch Pad”, or use
additional descriptors, such as “Bedroom Touch Pad”.
The touch screen will indicate enrollment success or failure.
© 2011 UTC Fire & Security. All rights reserved.
1 / 4
P/N 466-2400 • REV A • ISS 18JAN11