background image

FUJI

T SU


Super

co

mpute

r


PRI

M EHPC


FX7

00


B

MC


Use

r's


Guide

FUJITSU


Supercomputer

PRIMEHPC


FX700

BMC


User's


Guide

C120-0091-02EN

Summary of Contents for PRIMEHPC FX1000

Page 1: ...FUJI T SUSuper co mpute r PRI M EHPC FX7 00 B MC Use r sGuide FUJITSU Supercomputer PRIMEHPC FX700 BMC User s Guide C120 0091 02EN ...

Page 2: ...ironment for operating the BMC over the Web Chapter 2 Basic Web GUI Operations and Behavior This chapter describes the screen configuration and logging in and out on Web screens for operating the BMC Chapter 3 Web GUI Functions This chapter shows Web GUI categories and screens and describes their functions Chapter 4 Command Support IPMI This chapter describes the requests commands received by the ...

Page 3: ...ompliance to Regulations Updated Table 3 28 Specifying SNMP Trap Setting Information Changed order of display items on screens Revision History 1 The numbers titles of the chapters sections to which changes are made are those used in the latest version However the numbers titles of the chapters sections with an asterisk are those used in the old version Preface C120 0091 02EN ii ...

Page 4: ... to keep this manual in a safe and convenient location for quick reference Fujitsu makes every effort to prevent injury to users and bystanders as well as property damage Be sure to use the product in accordance with the instructions in the manual Notes on This Product This product is designed and manufactured for use in standard applications such as office work personal devices and general indust...

Page 5: ...xchange and Foreign Trade Control Law of Japan North American Free Trade Agreement NAFTA FIPS 140 Federal Information Processing Standardization 140 U S federal standards that specify security requirements for cryptography modules NIST SP800 171 U S security standards Trade Adjustment Assistance TAA Safety Radio and Harmonics Europe Certified Standard Standard Number Safety Radio Harmonics EN IEC ...

Page 6: ...EEC Waste Electrical and Electronic Equipment Directive WEEE Directive European Parliament and Council Directive 94 62 EC of 20 December 1994 on packaging and packaging waste Export Related Europe Standard Number IATA Dangerous Goods Regulations 58th Edition 2017 Regulations on transport of lithium lithium ion batteries and electric double layer capacitors Foreign Exchange and Foreign Trade Contro...

Page 7: ...ansport of lithium lithium ion batteries and electric double layer capacitors Fundamental notices of customs law Safety Radio and Harmonics South Korea Certified Standard Standard Number Safety Radio Harmonics KCC K 60950 1 2 0 2011 12 PSU only KN32 Class A KN35 KN61000 4 2 3 4 5 6 8 11 Recycling and Disposal South Korea Standard Number Energy Saving Environmental Substances Recycling Display rule...

Page 8: ...ich case the user may be required to correct the interference at the user s own expense VCCI A The system complies with the requirements of European regulations This product is a Class A product Operation of this product in a residential area may cause radio frequency interference in which case the user will be required to correct the interference at the user s own expense Australia New Zealand Re...

Page 9: ...hall be responsible for correcting the interference caused by such unauthorized modification substitution or attachment The use of shielded I O cables is required when connecting the equipment to any optional peripheral or host device Failure to use shielded I O cables may violate FCC and ICES regulations Document Manual Code Description FUJITSU Supercomputer PRIMEHPC FX700 Operating Manual C120 0...

Page 10: ...s output by the computer and displayed on screens This font is used to indicate command output examples in boxes Shell showinfo M 2 Slot Device Status PASS Italics Indicates the name of a referenced manual See the FUJITSU Supercomputer PRIMEHPC FX700 BMC User s Guide Indicates the title of a referenced chapter section or subsection See Chapter 4 Operation Never peel off the labels Storage of Acces...

Page 11: ...marks of their respective owners Trademark indications TM R are omitted for some system and product names in this document This document shall not be reproduced or copied without the permission of the publisher All Rights Reserved Copyright FUJITSU LIMITED 2020 Safety Precautions C120 0091 02EN x ...

Page 12: ...or other property Notes on Product Handling Maintenance Modifying or Recycling the Product Disposal or Recycling of Products That Have Completed Their Life Cycle Waste must be disposed of in a professional and responsible way in accordance with environmental regulations For details please contact your nearest environmental authority or our sales representative Handling Lithium Batteries This produ...

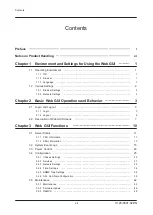
Page 13: ...nd Logout 3 2 1 1 Login 3 2 1 2 Logout 6 2 2 Description of Web GUI Screens 7 Chapter 3 Web GUI Functions 10 3 1 Server Status 11 3 1 1 FRU Information 11 3 1 2 CMU Information 13 3 2 System Event Logs 15 3 3 Power Control 23 3 4 Configuration 25 3 4 1 Chassis Settings 25 3 4 2 Services 27 3 4 3 Network Settings 32 3 4 4 Time Settings 34 3 4 5 SNMP Trap Settings 35 3 4 6 SSL Certificate Configurat...

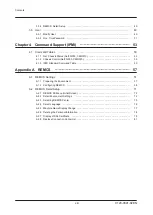
Page 14: ...and Table 55 Appendix A REMCS 57 A 1 REMCS Settings 57 A 1 1 Preparing the Environment 57 A 1 2 Configuring REMCS 58 A 2 REMCS Detail Setup 71 A 2 1 REMCS FE Menu Initial Screen 72 A 2 2 Detail Environment Settings 72 A 2 3 Selecting REMCS Center 75 A 2 4 Select Language 76 A 2 5 Machine Name Display Change 77 A 2 6 Deleting the Personal Information 78 A 2 7 Display of SSL Certificate 79 A 2 8 Rep...

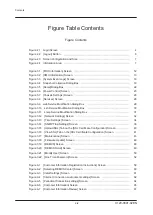
Page 15: ...ettings Screen 32 Figure 3 13 Time Settings Screen 34 Figure 3 14 SNMP Trap Settings Screen 36 Figure 3 15 Upload SSL Tab on the SSL Certificate Configuration Screen 40 Figure 3 16 View SSL Tab on the SSL Certificate Configuration Screen 41 Figure 3 17 Maintenance Screen 43 Figure 3 18 Firmware Update Screen 46 Figure 3 19 REMCS Screen 48 Figure 3 20 REMCS Detail Screen 49 Figure 3 21 Modify User ...

Page 16: ...72 Figure A 13 Detail Environment Settings 73 Figure A 14 Selecting REMCS Center 76 Figure A 15 Select Language Japanese or English 77 Figure A 16 Select to Display Machine ID or Machine Unique Name 78 Figure A 17 Deleting the Personal Information 79 Figure A 18 Display of Certificate 80 Figure A 19 Display When the SSL Certificate Does Not Exist 81 Figure A 20 Replace Connection Center List 82 Co...

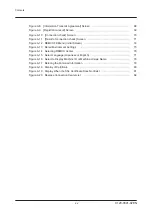
Page 17: ...ation Items on the Chassis Settings Screen 26 Table 3 14 Specifying the FX700 Main Unit Name and Altitude 26 Table 3 15 Display Items on the Chassis Settings Screen 27 Table 3 16 Display Items on the Services Screen 28 Table 3 17 Operation Items on the Services Screen 29 Table 3 18 Specifying the web Service 30 Table 3 19 Specifying the ssh Service 31 Table 3 20 Specifying the snmp Service 32 Tabl...

Page 18: ...able 3 41 Changing Registered User Information Modify User Screen 50 Table 3 42 Display Items on the Modify User Screen 51 Table 3 43 Operation Items on the One Time Password Screen 52 Table 3 44 Issuing a Short Password 52 Table 4 1 Get Chassis Status Format 54 Table 4 2 Chassis Control Format 55 Table 4 3 Chassis Device Commands 55 Table A 1 For Internet Connection 58 Table A 2 Information Speci...

Page 19: ... later 1 1 2 Browser The supported browser is Microsoft Internet Explorer 11 or later The supported protocols are http and https 1 1 3 Language Web GUI screens English REMCS screens English and Japanese Since the following areas appear in the browser their display language depends on the language settings in the OS Dialog box titles Buttons for file selection fields Chapter 1 Environment and Setti...

Page 20: ...wser pop ups disable the pop up blocker in the browser To use cookie based authentication enable Override automatic cookie handling Uncheck to disable Display intranet sites in Compatibility View 1 2 2 Network Settings Energy Efficient Ethernet must be disabled in the settings Chapter 1 Environment and Settings for Using the Web GUI C120 0091 02EN 1 2 Various Settings 2 ...

Page 21: ...okies Enabled 2 1 1 Login 1 Open the browser 2 Enter either the standard address or the SSL address Standard http nodename adminport SSL https nodename adminport nodename Specify the IP address of the BMC BMC Management LAN default value depends on the device or BMC Service LAN default value 172 16 0 1 24 adminport Specify the port number assigned to the management port of the BMC Default value St...

Page 22: ...gging In Figure 2 1 Login Screen You can perform the following operations on this screen Logging In 1 Fill in Username and Password Username hpcmainte Password HPCMAINTE 2 Click the Login button The FRU Information screen appears Remarks If authentication fails the browser returns to the login screen If the user name or password contains an error an error message appears Chapter 2 Basic Web GUI Op...

Page 23: ...ad permission method Click to display help See Help Screen Enable JavaScript for this site Result from a check of whether JavaScript is enabled Enable cookies for this site Result from a check of whether cookies are enabled It is recommended not to use Refresh Back and Forward options of the browser Displays a precaution on using the Web GUI Table 2 3 Icons on the Screen Icon Meaning OK Not accept...

Page 24: ...cessing For the procedure see Logging Out 2 1 2 Logout Disconnect a session and log out Figure 2 2 Logout Button You can perform the following operation Logging Out 1 Click the Logout button to log out Chapter 2 Basic Web GUI Operations and Behavior C120 0091 02EN 2 1 Login and Logout 6 ...

Page 25: ...the chassis 3 Chassis Name Displays the FX700 main unit name that is set for the chassis Always displayed 2 2 Description of Web GUI Screens This section shows the screen configuration and size Figure 2 3 Screen Configuration and Size Information Area This area displays the following content Figure 2 4 Information Area Chapter 2 Basic Web GUI Operations and Behavior C120 0091 02EN 2 2 Description ...

Page 26: ...uterEAlarm Router Emergency Alarm Alarm ReservedAlarm ResetRequest U ResetRequest C Warning Normal Not displayed on the login screen 8 Maintenance Status Displays the maintenance status Cold Maintenance Warm Maintenance Remarks Warm Maintenance or Cold Maintenance is displayed when maintenance mode is set Also the entire Information area is displayed in orange Displayed during maintenance 9 Login ...

Page 27: ...e status as follows Screen Information Updates The status of the Information area is automatically updated every 10 seconds The content area is not automatically updated To manually obtain the latest information perform either of the following operations Click the Refresh button Select the same menu again from the navigation bar Help Screen Click HELP on the navigation bar to display the help scre...

Page 28: ... service Network Settings Display Operate Display Set an IP address and net mask Display Set routing information Time Settings Display Operate Display Set the date and time Display Set time zone information Instruct synchronization with the NTP server Display Set the NTP server SNMP Trap Settings Display Operate Display Set SNMP traps SSL Certificate Configuration Display Operate Upload a signed W...

Page 29: ...r Status This category mainly provides functions to display the hardware information for the device 3 1 1 FRU Information On the FRU Information screen you can check the serial number version number failure status and power supply status of each unit Remarks The screen displays Not Present for parts not yet mounted For details on the status indicated by the Web screen background color see Table 2 ...

Page 30: ...or Status retrieval failed For details on background colors displayed to indicate the status see Table 2 5 Error Status Background and Text Colors Remarks If the FRU is not mounted Not Present or unknown is displayed and grayed out in the columns after Part Number Part Number Displays the part numbers of the FRUs Serial Number Displays the serial numbers of the FRUs Figure 3 1 FRU Information Scre...

Page 31: ...tems on the CMU Information Screen Display Item Details of Display CMU Displays the CMU numbers 3 1 2 CMU Information On the CMU Information screen you can check CMU failure information the maintenance status and the operating status of nodes in the CMU Figure 3 2 CMU Information Screen The CMU Information screen displays the following items Chapter 3 Web GUI Functions C120 0091 02EN 3 1 Server St...

Page 32: ...splayed when Mnt Status retrieval failed Node 0 Err Status Displays the operating status of Node 0 node on the CPU 0 side in the CMU Normal Normal Warning Warning ReservedAlarm Failure ResetRequest C Warning Alarm Failure RouterEAlarm Failure ResetRequest U Failure Unknown Normal Displayed when Error Status retrieval failed For details on background colors displayed to indicate the status see Tabl...

Page 33: ...For details on background colors displayed to indicate the status see Table 2 5 Error Status Background and Text Colors Node 1 Power Status Displays the operating status of Node 1 node on the CPU 1 side in the CMU Stop Reset POST OS Booting OS Running OS Shutdown OS Panic UEFI Shell Unknown Normal Displayed when Error Status retrieval failed 3 2 System Event Logs On the System Event Logs screen yo...

Page 34: ...Figure 3 3 System Event Logs Screen Chapter 3 Web GUI Functions C120 0091 02EN 3 2 System Event Logs 16 ...

Page 35: ...operations on the System Event Logs screen Collecting a Snapshot A snapshot is used to investigate in detail a hardware failure Contact the nearest Fujitsu service center about Table 3 5 Specifying the Snapshot to Collect when collecting a snapshot Note Collecting a snapshot takes time Furthermore while collecting a snapshot you cannot collect a new snapshot Remarks The System Event Logs screen di...

Page 36: ...y be or the following _ Figure 3 4 Snapshot Collection Dialog Box 2 Specify the type of collection whether to use encryption etc and click the OK button The execution result dialog box appears 3 Click the OK button The browser returns to the System Event Logs screen 4 Under File Path in Snapshot Files click the snapshot file to download Downloading an Environment Log 1 In Environment Logs specify ...

Page 37: ...NU BMCU PSU BMCIF and ENVIRONMENT can be selected FRUE Specify filter conditions FRUE All Specified CPU and MEM can be selected 2 Click the Download button A confirmation dialog box appears 3 Click the OK button The environment log is downloaded and the browser returns to the System Event Logs screen Redisplaying a List of Events According to the Specified Filter Conditions Logs on the System Even...

Page 38: ...hh Hour mm Minute ss Second Status Indicates the severity for FRU replacement EAlarm Need to immediately stop using the corresponding suspect part and immediately replace the FRU Alarm Need to stop using the corresponding suspect part after the job completes and then immediately replace the FRU Warning Can use the corresponding suspect part but need to replace the FRU in planned maintenance Normal...

Page 39: ...t and 2nd suspected units CMU 00 Chassis FRUE location of replacement part failure Displays up to two suspected areas per entry in the 1st suspected area 2nd suspected area format hyphen is displayed when there is no error logged and no suspected area Likewise no 2nd suspected area is displayed when there is no 2nd suspected area Example With 1st suspected area only CPU 00 With 1st and 2nd suspect...

Page 40: ...tem Event Logs Screen Status See Table 3 8 Display Items in Logs on the System Event Logs Screen Occurred See Table 3 8 Display Items in Logs on the System Event Logs Screen FRU See Table 3 8 Display Items in Logs on the System Event Logs Screen FRUE See Table 3 8 Display Items in Logs on the System Event Logs Screen Msg See Table 3 8 Display Items in Logs on the System Event Logs Screen Figure 3 ...

Page 41: ...code Appertain Log Detail code 3 3 Power Control On the Power Control screen you can check and control the power supply status of nodes Figure 3 6 Power Control Screen If you want to know the current status click the Refresh button to reload the screen You can perform the following operation on the Power Control screen Chapter 3 Web GUI Functions C120 0091 02EN 3 3 Power Control 23 ...

Page 42: ... Stop Stops the node Reset Restarts the OS on the node Dump Request Issues an instruction to collect an OS dump OS Shutdown Stops the OS on the node Not specified Does nothing Boot Script Number Specify a boot mode for each node 00h Boot node default 01h Not supported 02h Used for OS installation Force boot into EFI Boot Manager Stop at UEFI without boot Auto select Boot Script Number Boot script ...

Page 43: ...Running Status Displays the operating status of nodes Stop Reset POST UEFI Shell OS Booting OS Running OS Panic OS Shutdown Unknown Running Status retrieval failed CMU not mounted Maintenance Status Displays the maintenance status of nodes corresponding CMUs On Warm maintenance in progress Other than the above Unknown Maintenance Status retrieval failed Power Control Displays the power control met...

Page 44: ...c characters the hyphen or the period Neither the hyphen nor period can be specified as the first or last character If the original name is displayed at the input time delete it Altitude Specify an altitude between 0 and 3000 The set value will be a multiple of 100 m If the original altitude is displayed at the input time delete it Figure 3 7 Chassis Settings Screen You can perform the following o...

Page 45: ...n instead of the Apply button 3 Click the OK button The FX700 main unit information is changed and the browser returns to the Chassis Settings screen The Chassis Settings screen displays the following items 3 4 2 Services On the Services screen you can check the enable disable setting and port number of the web ssh and snmp services You can also change the port number of the web service enable dis...

Page 46: ...ive Disabled N A No set value Nonsecure Port Displays the port number of the connection only for the web service Secure Port Displays the port number of the connection only for the web service Figure 3 8 Services Screen The Services screen displays the following items You can perform the following operations on the Services screen Chapter 3 Web GUI Functions C120 0091 02EN 3 4 Configuration 28 ...

Page 47: ...ort number For the procedure see Enabling Disabling the snmp service Changing the Port Number of the web Service 1 Select the row showing web under Service Name and click the Modify button The dialog box for modifying the web service appears Remarks You can also display the dialog box for modifying the web service by double clicking the web row Figure 3 9 web Service Modification Dialog Box 2 Spec...

Page 48: ...tion confirmation dialog box appears 4 Click the OK button The current session is disconnected and you are prompted on the screen to log in again Enabling Disabling the ssh Service 1 Select the row showing ssh under Service Name and click the Modify button The dialog box for modifying the ssh service appears Remarks You can also display the dialog box for modifying the ssh service by double clicki...

Page 49: ...The browser returns to the Services screen Enabling Disabling the snmp service 1 Select the row showing snmp under Service Name and click the Modify button The dialog box for modifying the snmp service appears Remarks You can also display the dialog box for modifying the snmp service by double clicking the snmp row Figure 3 11 snmp Service Modification Dialog Box 2 Specify whether to enable or dis...

Page 50: ...ick the Modify button An execution confirmation dialog box appears 4 Click the OK button The browser returns to the Services screen 3 4 3 Network Settings On the Network Settings screen you can check and change network settings Figure 3 12 Network Settings Screen You can perform the following operations on the Network Settings screen Chapter 3 Web GUI Functions C120 0091 02EN 3 4 Configuration 32 ...

Page 51: ... is enabled or disabled If the port is enabled the Enable check box is checked MAC Address Displays the MAC address IPv4 Address Displays the IP address Subnet Mask Displays the subnet mask Default Gateway Displays the default gateway IP address Changing Network Information 1 Specify each of the items under Control Port Configuration or Maintenance Port Configuration Note Change the items under ei...

Page 52: ...iption Date Specify the date in the order of month day and year Time Specify the time in the order of hour minute and second Timezone Specify the time zone 3 4 4 Time Settings On the Time Settings screen you can check and change the set date and time of the FX700 main unit Figure 3 13 Time Settings Screen You can perform the following operations on the Time Settings screen Changing Date and Time S...

Page 53: ...ond Timezone Displays the time zone Automatically synchronize Date Time with NTP Server Shows a checked check box if automatic synchronization with the NTP server is set Furthermore NTP Server1 to NTP Server3 would be displayed NTP Server1 Displays the IP address of the NTP server NTP Server2 NTP Server3 2 Click the Apply button A confirmation dialog box appears Remarks To restore the currently se...

Page 54: ...P Trap Setting Information Input Item Description IP Address Specify the IP address of an SNMP trap destination in the xxx xxx xxx xxx format xxx is a value between 0 and 255 SNMP Version Specify the SNMP version Figure 3 14 SNMP Trap Settings Screen You can perform the following operations on the SNMP Trap Settings screen Changing SNMP Trap Setting Information 1 To change the setting information ...

Page 55: ...Use the authentication and privacy functions data encryption Auth passphrase If auth or priv is specified in Auth specify an authentication password consisting of 8 to 32 characters which may be alphanumeric or the following _ Auth passphrase confirm Specify the same authentication password as in Auth passphrase Priv passphrase If priv is specified in Auth specify an encryption password consisting...

Page 56: ...l LAN port You can check the MAC address from the BMC webpage at Configuration Network Settings For 05 Specify an arbitrary unique value with a hexadecimal number of up to 20 digits Do not set any alphabetic letter that is not a hexadecimal digit An example of input is shown below When specifying the MAC address 1A 2B 3C 4D 5E 6F for example enter 0x800000d3031a2b3c4d5e6f When specifying the arbit...

Page 57: ...uth Auth passphrase confirm Priv passphrase Displays an encryption password if priv is specified in Auth Priv passphrase confirm Engine ID Displays engine IDs A confirmation dialog box appears 2 Click the OK button A test trap is sent to all of the set trap destinations The SNMP Trap Settings screen displays the following items 3 4 6 SSL Certificate Configuration On the SSL Certificate Configurati...

Page 58: ...te to upload extension pem Current Privacy Key The timestamp of the file with the private key used for the currently applied certificate is displayed New Privacy Key Specify the file of the private key used for the certificate to upload extension pem Figure 3 15 Upload SSL Tab on the SSL Certificate Configuration Screen You can perform the following operations on the Upload SSL tab on the SSL Cert...

Page 59: ...lgorithm Public key algorithm Public Key Public key of the issuance requester A confirmation dialog box appears 3 Click the OK button You are logged out in order to apply the uploaded SSL certificate The View SSL tab on the SSL Certificate Configuration screen displays the following content Figure 3 16 View SSL Tab on the SSL Certificate Configuration Screen Chapter 3 Web GUI Functions C120 0091 0...

Page 60: ...rom Start of the validity period Valid To End of the validity period Issued To Displays information on the issuer Common Name CN Site name Organization O Department name Organization Unit OU Organization name City or Locality L Name of a city town or village State or Province ST Prefecture name Country C Country name Email Address E mail address 3 5 Maintenance This category provides functions rel...

Page 61: ...ing the Maintenance State Power Control Execute the power operation instruction of the CMU or PSU in the maintenance state For the procedure see Executing a Power Operation Figure 3 17 Maintenance Screen You can perform the following operations on the Maintenance screen Entering the Maintenance State 1 To place the FX700 main unit or a FRU in the maintenance state click its radio button Note Chapt...

Page 62: ...ify a power operation in Power Control as required Note If a failure occurs in the FANU maintenance mode cannot be set for the CMU For this reason replace the FANU first For details see 4 1 3 Precaution on Maintenance Mode in the FUJITSU Supercomputer PRIMEHPC FX700 Upgrade and Maintenance Manual 3 Click the Enter Maintenance button Enter the maintenance state Executing a Power Operation 1 Referri...

Page 63: ...peration instruction for the CMU that is set to the maintenance state Table 3 36 Display Items in PSU Maintenance on the Maintenance Screen Display Item Details of Display PSU Displays the PSU numbers Error Status Displays the failure status of the PSU Normal Warning Alarm EAlarm Not Present Unknown Error Status retrieval failed Power Status Displays the power supply status of the PSU On Off Unkno...

Page 64: ...ntenance Status Displays the set status of maintenance On Warm maintenance in progress Other than the above Unknown Maintenance Status retrieval failed Power Control Not used 3 5 2 Firmware Update On the Firmware Update screen you can check the HCP firmware applied to the FX700 main unit and the version applied to each unit You can also apply HCP firmware to the FX700 main unit Figure 3 18 Firmwar...

Page 65: ...re 1 Referring to Registering HCP Firmware register HCP firmware 2 Click the Apply button A confirmation dialog box appears 3 Click the OK button The session is disconnected and you are logged out in order to apply the HCP firmware Note If the uploaded HCP archive is invalid due to file damage etc an error message appears Start the firmware registration procedure again from the beginning For detai...

Page 66: ...umber of the firmware applied to the BMC SBC Displays the version number of the firmware applied to SBC IPF Displays the version number of the firmware applied to IPF Note If firmware application fails start the registration procedure again from the beginning For details see 4 2 3 Precaution During Updates in the FUJITSU Supercomputer PRIMEHPC FX700 Upgrade and Maintenance Manual 3 5 3 REMCS Selec...

Page 67: ...3 6 User This category provides functions to display and change user registration information 3 6 1 Modify User On the Modify User screen you can check and change the registered information on the login user Remarks The Modify User screen appears at the time of login with an Operator User authority account Chapter 3 Web GUI Functions C120 0091 02EN 3 6 User 49 ...

Page 68: ...e user name check the Change Name check box UserName Specify a new user name with 1 to 16 characters If the original user name is displayed at the input time delete it Password Size To change the password specify a password length by clicking 16 Bytes or 20 Bytes If the 20 Bytes radio button is selected Ianplus connection using IPMI communication will be required Figure 3 21 Modify User Screen You...

Page 69: ...rname Displays the user name User Access Displays the user access status as Enabled 1 Click the Modify button A confirmation dialog box appears 2 Click the OK button The browser returns to the Modify User screen Remarks If the user name has been changed the current session is disconnected and you are prompted on the screen to log in again The Modify User screen displays the following items 3 6 2 O...

Page 70: ...ng authority Figure 3 22 One Time Password Screen You can perform the following operations on the One Time Password screen Issuing a Short Password Only the personnel in charge of maintenance use this function Do not allow users with Operator authority to use it 1 In Long Password input area enter the password issued by the person with long password issuing authority and click the Generate button ...

Page 71: ... This section describes the standard commands Remarks A response is always sent to the interface of a received request 4 1 1 Get Chassis Status NetFN 00h CMD 01h When issued to each node Node 0 to Node 7 this command returns the power supply status of each node On the other hand when issued to the chassis BMC the command returns the power supply status of the chassis PSU FAN Chapter 4 Command Supp...

Page 72: ... on 1b System power is on 0b System power is off 3 Last Power Event 7 5 reserved 4 1b Power is on due to IPMI command 3 1b Power down due to power failure 2 1b Power down due to power interlock state 1 1b Power down due to power overload state 0 1b AC failed 4 Misc Chassis State 7 4 reserved 6 1b Chassis Identify command supported 5 4 Chassis LED State 00b Off 01b On definite time 10b On indefinit...

Page 73: ...ted t target 4 1 2 Chassis Control NetFN 00h CMD 02h Use the command to power on off nodes This command only issues power on off instructions and the power on off processing is executed separately If the destination is the chassis Not supported Completion Code C1h is the response 4 1 3 IPMI Standard Command Table This section shows a list of IPMI standard commands 1 Target for the issued command H...

Page 74: ... 0x3c Node 6 0x3e Node 7 Chapter 4 Command Support IPMI C120 0091 02EN 4 1 Command Tables 56 ...

Page 75: ...ns must be met to connect the customer s device to the REMCS center For Internet Connection The customer s device is in an environment that can connect to the Internet E mail can be sent via the Internet Note Permission to send e mails via the Internet may be required depending on the customer s network environment For details check with the customer s network administrator Remarks The customer ne...

Page 76: ...he REMCS agent sends an e mail 3 E mail address for the administrator E mail address used when the center provides the customer with information Other IP address or FQDN of the mail server used E mail address of the sender Permission to send e mails to addresses outside the company is required Remarks Ask the customer to obtain the sender s e mail address A 1 2 Configuring REMCS Start configuring ...

Page 77: ... the model name and serial number matches the contents displayed in MachineID at the bottom left of the Customer Information Registration Instructions screen Then click the Next button The Selecting REMCS Center screen appears Appendix A REMCS C120 0091 02EN A 1 REMCS Settings 59 ...

Page 78: ...Selecting REMCS Center Screen 3 Select from REMCS Center on the Selecting REMCS Center screen and click the Setting button The Initial Settings screen appears Appendix A REMCS C120 0091 02EN A 1 REMCS Settings 60 ...

Page 79: ...ettings Screen 4 Select Internet Connection Mail Only in Connection type and click the Next button The Internet Mail Only connection environment settings screen appears Appendix A REMCS C120 0091 02EN A 1 REMCS Settings 61 ...

Page 80: ...8 single byte alphanumeric characters Authentication type Select an authentication type from the following No Certification POP Before SMTP AUTH SMTP AUTH SMTP type 1 Select the AUTH SMTP type from the following AUTO Default CRAM MD5 PLAIN LOGIN UserID Conditional 2 Specify the user ID for the authentication server with up to 64 single byte alphanumeric characters Figure A 4 Internet Connection en...

Page 81: ...4 KB If Split event is selected in Large data transmission method specify a value between 64 and 512 KB The default is 512 KB Encryption type 4 Select an encryption type from the following S MIME format Default Conventional format Conventionally encryption is performed during REMCS file format creation Instead REMCS supports the generally used S MIME encrypted e mail method 1 Valid only when AUTH ...

Page 82: ...Specify a single byte number between 0 and 23 for the hour of the operation start time Operation time start min Yes Specify a single byte number between 0 and 59 for the minute of the operation start time Operation time end hour Yes Specify a single byte number between 0 and 23 for the hour of the operation end time Operation time end min Yes Specify a single byte number between 0 and 59 for the m...

Page 83: ...o 60 characters Building No Specify the building name of the customer s office with up to 40 characters Administrator Name Yes Specify the name of the customer s server administrator with up to 40 characters E mail Address Yes Specify the e mail address of the customer s server administrator with single byte alphanumeric characters 8 Click the Next button The Customer Information screen appears Fi...

Page 84: ...ry Yes Specify the country name with 2 alphabetic characters If specified with lowercase characters those characters are converted to uppercase characters Specify 99 for an unspecified country Machine Installation Site No Specify the machine installation site with up to 60 characters Machine Installation Building No Specify the building name of the machine installation site with up to 40 character...

Page 85: ...nformation and click the Next button The Information Transmit Agreement screen appears Remarks If the customer information has an error click the Back button to return to the Customer Information screen and correct the customer information Appendix A REMCS C120 0091 02EN A 1 REMCS Settings 67 ...

Page 86: ... Screen 12 Confirm that the environment allows e mail sending before clicking the Agree button The entered information is sent to the REMCS center and the Registration result screen appears Appendix A REMCS C120 0091 02EN A 1 REMCS Settings 68 ...

Page 87: ... Confirm that the registration was successful and click the Next button The Connection check screen appears Remarks If registration fails click the Back button and correct the information Appendix A REMCS C120 0091 02EN A 1 REMCS Settings 69 ...

Page 88: ...cification of E mail address of the administrator is omitted even though Notification is selected for Notification of the result to the administrator the result notification is sent to the e mail address registered with the REMCS center Notification of the result to the connection check operator In case of sending except for administrator please check it Specify whether the person who performed th...

Page 89: ...e Customer Information screen 2 This is displayed only if the personal information has been deleted by Deleting the personal information from the FE operation menu 3 Input is required if Notification is selected for Notification of the result to the connection check operator 15 Click the Check button The Result of connection check screen appears Figure A 11 Result of connection check Screen 16 Cli...

Page 90: ...se and English configure detailed environment settings delete personal information etc A 2 1 REMCS FE Menu Initial Screen Figure A 12 shows the initial screen for the REMCS FE menu screen Figure A 12 REMCS FE Menu Initial Screen A 2 2 Detail Environment Settings Select Detail environment settings from the FE operation menu to display the Environment settings screen shown in Figure A 13 Appendix A ...

Page 91: ...Yes Specify the SMTP server name or IP address with up to 128 single byte alphanumeric characters SMPT Port No Yes Specify the port number of the SMTP server with up to 5 single byte digits You can specify a value between 1 and 65535 The default is to use 25 Well Known Port Type of encrypted connection Select the type of encrypted connection for SMTP over SSL from the following when the definition...

Page 92: ...P Server Conditional 3 Specify the POP server name or IP address with up to 128 single byte alphanumeric characters POP Port No Yes Specify the port number of the POP3 authentication server with up to 5 single byte digits You can specify a value between 1 and 65535 The default is to use 110 Well Known Port Wait Time after POP Authentication Yes Using up to 5 single byte digits specify the wait tim...

Page 93: ...2 Required when anything other than No Certification is selected in Authentication type 3 Required when POP Before SMTP is selected in Authentication type 4 The selectable encryption types change as follows according to the large data transmission method No split Both formats selectable Split large data into multiple E mails Conventional format only Split event Both formats selectable 5 Required w...

Page 94: ...ect Select language from the FE operation menu to display the Select language Japanese or English screen shown in Figure A 15 Specify the display language on the Select language Japanese or English screen Appendix A REMCS C120 0091 02EN A 2 REMCS Detail Setup 76 ...

Page 95: ...ation menu to display the Select to Display Machine ID or Machine Unique Name screen shown in Figure A 16 Specify on the Select to Display Machine ID or Machine Unique Name screen whether the machine name shown in the status display frame is a machine ID or machine unique name Appendix A REMCS C120 0091 02EN A 2 REMCS Detail Setup 77 ...

Page 96: ...ng the personal information from the FE operation menu to display the Deleting the personal information screen shown in Figure A 17 To delete the personal information included in customer information click Delete on the Deleting the personal information screen Appendix A REMCS C120 0091 02EN A 2 REMCS Detail Setup 78 ...

Page 97: ... of SSL Certificate from the FE operation menu to display the Display of certificate screen shown in Figure A 18 and Figure A 19 If the SSL certificate exists Figure A 18 appears If the SSL certificate does not exist Figure A 19 appears Appendix A REMCS C120 0091 02EN A 2 REMCS Detail Setup 79 ...

Page 98: ...Figure A 18 Display of Certificate Appendix A REMCS C120 0091 02EN A 2 REMCS Detail Setup 80 ...

Page 99: ...elect Replace connection center list from the FE operation menu to display the Replace connection center list screen shown in Figure A 20 Specify and register the destination REMCS center list file on the Replace connection center list screen Appendix A REMCS C120 0091 02EN A 2 REMCS Detail Setup 81 ...

Page 100: ...Figure A 20 Replace Connection Center List Appendix A REMCS C120 0091 02EN A 2 REMCS Detail Setup 82 ...

Page 101: ......

Reviews: