Fujitsu MCE3064AP, Product Manual
The Fujitsu MCE3064AP product manual is available for free download on our website. This comprehensive manual provides detailed instructions and guidance on using and optimizing the features of the Fujitsu MCE3064AP. Simply visit manualshive.com to conveniently access and download your copy today.
Share
Download


Reviews:
No comments
Related manuals for MCE3064AP

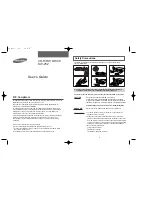
SH-152A
Brand: Samsung Pages: 2

SN-324B
Brand: Samsung Pages: 7

SW-248B
Brand: Samsung Pages: 23

SH-R522C
Brand: Samsung Pages: 23

SW-232
Brand: Samsung Pages: 9

SM-304B
Brand: Samsung Pages: 27

SM-352B
Brand: Samsung Pages: 23

SW-248B
Brand: Samsung Pages: 18

TS-H292A
Brand: Samsung Pages: 24

SM-352B
Brand: Samsung Pages: 38

SW-252S
Brand: Samsung Pages: 35

SW-252S
Brand: Samsung Pages: 24

TS-H552B
Brand: Samsung Pages: 28

SW-248F
Brand: Samsung Pages: 34

SW-248F
Brand: Samsung Pages: 23
SW-252
Brand: Samsung Pages: 8

SM-348B
Brand: Samsung Pages: 38

U2-BRRW-16X
Brand: Kanguru Pages: 2


