
1
Please read ALL instructions before installing. Two people are
recommended to install this product. If a new electrical outlet
is required, have the outlet installed by a qualified electrician
before
installing unit. See#5 in Preliminary Instructions
following.
Preliminary Instructions
Do the following before starting to install unit. See illustrations
below.
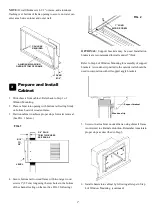
1.
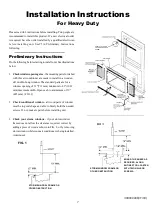
Check window opening size
- the mounting parts furnished
with this air conditioner are made to install in a wooden
sill double-hung window. The standard parts are for a
window opening of 31''(711 mm) minimum to 42''(1067
mm) maximum width. Open sash to a minimum of 19''
(483 mm). (FIG. 1)
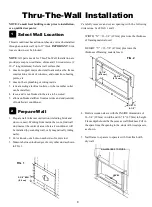
2.
Check condition of window
- all wood parts of window
must be in good shape and able to firmly hold the needed
screws. If not, make repairs before installing unit.
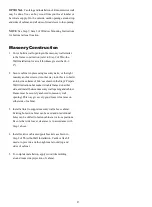
3.
Check your storm windows
- if your storm window
frame does not allow the clearance required, correct by
adding a piece of wood as shown in FIG. 2, or by removing
storm window while room air conditioner is being installed.
(continued)
STORM WINDOW FRAME OR
OTHER OBSTRUCTION
BOARD THICKNESS AS
REQUIRED, ALONG
ENTIRE STOOL. FASTEN
WITH TWO NAILS OR
SCREWS.
Installation Instructions
For Heavy Duty
FIG. 1
STORM WINDOW FRAM E OR
OTHER OBSTRUCTION
309000906(11/03)
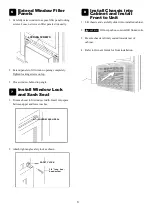
SAFETY LOCK AND
3/4'' LONG HEX HEAD
SCREW


