background image

318201006 (0503) Rev. A
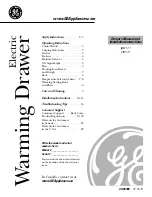
Warm & Serve

Drawer

Warranty .................................. 8

Before You  Call

.................................................. 7

Care & Cleaning ...................... 6

Setting Control ........................ 5

Before Setting
Control ..................................... 4

Important Safety Instructions ...

3-4

Welcome .................................. 2

Solutions to
Common Problems

Summary of Contents for 318201006

Page 1: ...318201006 0503 Rev A Warm Serve Drawer Warranty 8 Before You Call 7 Care Cleaning 6 Setting Control 5 Before Setting Control 4 ImportantSafetyInstructions 3 4 Welcome 2 Solutions to Common Problems ...

Page 2: ...ormation for several models Your product may not have all the described features The graphics shown are representative The graphics on your appliance may not look exactly like those shown These instructions are not meant to cover every possible condition and situation that may occur Common sense and caution must be practiced when installing operating and maintaining any appliance Please record you...

Page 3: ...de out of the opening Refer to the installation instructions for proper locking plate installation All Warm and ServeDrawer can tip Injury to persons could result Install anti tip device packed withwarmer drawer See installation instructions Do not use the warmer drawer for storage Stepping leaning or sitting on the door or drawer can result in serious injuries and may also cause damage to the war...

Page 4: ...llutensilsfromtherackbeforeremoving rack IMPORTANT INSTRUCTIONS FOR CLEANING YOUR WARM SERVE DRAWER Clean the drawer regularly to keep all parts free of grease that could catch fire Do not allow grease to accumulate Greasy deposits could catch fire Kitchen cleaners aerosols Always follow the manufacturer srecommendeddirectionsforuse Beaware that excess residue from cleaners and aerosols may ignite...

Page 5: ...ut 12 minutes the MED setting in about 15 minutes and the HI setting in about 18 minutes 3 When done turn the thermostat control to OFF TemperatureSelection Refertothechartinthesidecolumnforrecommendedsettings Ifaparticularfood is not listed start with the medium setting If more crispness is desired remove the lid or aluminum foil Most foods can be kept at serving temperatures by using the medium ...

Page 6: ...ld abrasivecleanerfollowing manufacturer s instructions Rinse with clean water and dry Surfaces Vinyl Plastic Control Knobs Control Panel StainlessSteel Drawer BodyPartsandDrawer Cavity Porcelain Enamel Drawer Liner Body Parts and DrawerCavity WarmerDrawerRack To Remove and Replace Warmer Drawer ToRemoveWarmerDrawer 1 Turn power off before removing the warmer drawer 2 Open the drawer to the fully ...

Page 7: ...sure bottom is level Be sure cutout bottom is strong and stable enough to adequately support drawer and wall oven if applicable Cabinets not square or are built in too tightly Contact builder or installer to make appliance accessible Make sure cord plug is plugged tightly into outlet Service wiring is not complete Contact your dealer installing agent or authorized servicer Power outage Check house...

Page 8: ...removed or altered and cannot be readily determined Keep your bill of sale delivery slip or some other appropriate payment record The date on the bill establishes the warranty period should service be required If service is performed it is in your best interest to obtain and keep all receipts This written warranty gives you specific legal rights You may also have other rights that vary from state ...

Reviews: