Epson Runsense SF-810, User Manual
The Epson Runsense SF-810 offers advanced tracking capabilities for fitness enthusiasts. Enhance your workouts with precise GPS data, heart rate monitoring, and accurate distance measurements. Get started quickly with the included Quick Start Manual, available for free download from our website, ensuring you can maximize the benefits of your new device.
Share
Download


Reviews:
No comments
Related manuals for Runsense SF-810

Sportiiiis
Brand: 4iiii Pages: 19

UP
Brand: Jawbone Pages: 3

Forerunner 225
Brand: Garmin Pages: 14

vivofit 3
Brand: Garmin Pages: 14

TRAINING MONITOR
Brand: OARTEC Pages: 7

PRO4700
Brand: Octane Fitness Pages: 8

ROX
Brand: A-Champs Pages: 19

G6496FB
Brand: BH FITNESS Pages: 68
G2465
Brand: BH FITNESS Pages: 45
Edge 520
Brand: Garmin Pages: 26

NU-G0018
Brand: NuTech Pages: 18

Run Profiler
Brand: Digitsole Pages: 9

Pulse HR
Brand: Withings Pages: 16
PHRM36
Brand: Pyle Pages: 1
FMPW11.0
Brand: Freemotion Pages: 30
FITness band
Brand: Soul Pages: 2
foot pod
Brand: Suunto Pages: 8
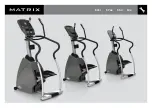
Premium S5x
Brand: Matrix Pages: 12


