Epson Disc Producer PP-100, User Manual
The Epson Disc Producer PP-100 offers high-quality disc production capabilities. To ensure you can effortlessly utilize all its features, we provide a detailed User Manual, available for free download from manualshive.com. Explore this manual to maximize your experience and make the most out of this exceptional product.
Share
Download


Reviews:
No comments
Related manuals for Disc Producer PP-100
CF Series
Brand: U-Reach Pages: 15
CD121
Brand: LaCie Pages: 39
MT Series
Brand: U-Reach Pages: 33
107756 - Dupli Disc DVD121
Brand: LaCie Pages: 2

TD2u
Brand: Tableau Pages: 71
Hybrid Series
Brand: U-Reach Pages: 32
Carry Flash Series
Brand: U-Reach Pages: 23
RZ2xx Series
Brand: Riso Pages: 374
PF-2 PrintFactory
Brand: MicroBoards Technology Pages: 41
Desktop 360i
Brand: Rimage Pages: 5

V8000 Series
Brand: Riso Pages: 362
DGBRC1
Brand: Addonics Technologies Pages: 2
MantraJet 1050
Brand: Yurex Pages: 21
T-3000
Brand: Tascam Pages: 8
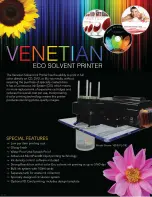
VENSOLPTR
Brand: Vinpower Pages: 2

NexStar NST-DP100S3
Brand: Vantec Pages: 29
Disk Jockey PRO IT
Brand: Diskology Pages: 3
CD-D1X4
Brand: Tascam Pages: 22


