background image

Summary of Contents for 20020, 20040

Page 1: ......

Page 2: ...llowing Excellent Good n Organization of this manual Technical accuracy Completeness of instructions Clarity of concepts and wording Quality of examples and pictures n Quantity of examples and pictures Fair Poor Comments Please list the software and any hardware you are using with your computer Name Title Company Address City State Please cut out and mail in Thank you EPSON Zip ...

Page 3: ...PLACE STAMP HERE EPSON America Inc 2780 Lomita Blvd Torrance CA 90505 M S 4 1 Fold Here ...
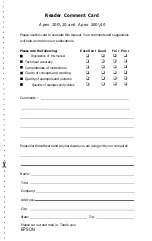
Page 4: ......

Page 5: ...t liability is assumed with respect to the use of information contained herein While every precaution has been taken in the preparation of this publication Epson America assumes no responsibility for errors or omissions Nor is any liability assumed for damages resulting from the use of the information contained herein Further this publication and the features described herein are subject to change...

Page 6: ...he interference stops it was probably caused by the computer or its peripheral devices To further isolate the problem Disconnect the peripheral devices and their input output cables one at a time If the interference stops it is caused by either the peripheral device or its I O cable These devices usually require shielded I O cables For Epson peripheral devices you can obtain the proper shielded ca...

Page 7: ...ng the Serial Interface 1 9 5 Connecting the Power Cord 1 11 6 Connecting the Keyboard 1 12 Adjusting the Keyboard Angle 1 14 7 Setting the Front Monitor Switch 1 14 8 Turning On the Computer 1 15 The Command Prompt 1 18 9 Copying System Diskettes 1 18 Chapter 2 Running the Setup Program Changing the Amount of Memory 2 3 Setting the Type of Display 2 4 Adding an 80287 Coprocessor 2 6 Changing the ...

Page 8: ... protecting Diskettes 3 14 Making Backup Copies 3 15 Using a Single Diskette Drive 3 16 Using the Hard Disk Drive 3 17 Chapter 4 Using MS DOS With Your Computer Starting and Exiting MS DOS 4 2 Loading MS DOS From a Diskette 4 2 Starting an Application Program 4 3 Using Drive Designators 4 3 The Default Drive 4 4 Changing the Default Drive 4 4 Specifying the Drive Designator 4 5 Types of MS DOS Com...

Page 9: ... 4 28 Backing Up Data 4 29 Using the DISKCOPY Command 4 29 Using the BACKUP Command 4 33 Using HELP 4 34 Using MENU 4 36 MENU Program Options 4 36 Using the XTREE Utility 4 37 Running XTREE 4 38 Using an AUTOEXEC BAT File 4 41 Creating an AUTOEXEC BAT File 4 42 Using HDCACHE for the Hard Disk 4 44 Chapter 5 Installing Option Cards Removing the Cover 5 1 Inserting the Option Card 5 4 Jumper Setting...

Page 10: ...trollers A 1 Interfaces A 2 Power Supply A 2 Mass Storage A 2 Keyboard A 3 Environmental Requirements A 4 Physical Characteristics CPU only A 4 Power Requirements A 4 Video and Display Options A 4 Other Apex Options A 5 Monitors A 5 ActionPrinters by Epson A 5 ActionPrinter Accessories A 6 Computer Accessories A 7 Parallel Port Pin Assignments A 7 Serial Port Pin Assignments A 8 Keyboard Connector...

Page 11: ... Error C 6 System Board Check C 7 Memory Check C 8 Keyboard Check C 8 Monochrome Display Adapter and CRT Check C 10 Monochrome Adapter Check C 11 Attribute Check C 11 Character Set Check C 12 Video Check C 12 Sync Check C 13 Run All Above Checks C 13 Color Graphics Display Adapter and CRT Check C 13 Color Graphics Adapter Check C 14 Attribute Check C 15 Character Set Check C 15 40 column Character...

Page 12: ...k C 28 Dot matrix Printer Check C 28 Hard Disk Drives and Controller Check C 30 Seek Check C 30 Write Read Check C 31 Head Select Check C 32 Error Detection and Correction Check C 32 Read Verify Check C 33 Run All Above Checks C 33 Error Codes and Messages C 34 Appendix D Physically Formatting a Hard Disk Formatting and Checking Options D 1 Reformatting a Used Disk D 3 Formatting a New Disk D 4 St...

Page 13: ...Partition E 3 Creating the Extended Partition E 4 Formatting the Primary Partition E 6 Formatting the Extended Partition E 8 Copying the Remaining Files to the Hard Disk E 9 Creating the AUTOEXEC BAT File E 10 Appendix F Types of Hard Disk Drives Disk Type Table F 1 Glossary Index Contents xi ...

Page 14: ......

Page 15: ...rd in the computer Your computer comes with version 3 3 of MS DOS the operating system by Microsoft In addition to the introduction to MS DOS provided in this manual you ll find a complete reference manual for the operating system packed in the box with the computer As a supplement to MS DOS Epson has included several time saving utilities that make MS DOS easier to use HELP MENU and XTREE The HEL...

Page 16: ... simple step by step instructions for setting up your computer On the back cover foldout are illustrations identifying the different parts of the computer you may want to refer to this while you are setting up your system Chapter 2 describes how to run the Setup program to set up your computer s configuration Chapter 3 covers some general operating procedures including how to use and care for your...

Page 17: ...led a new hard disk in your computer or if you need to repartition or reformat the one you have been using Appendix F lists the types of hard disks you can use in your computer You need to enter information from this table when you run the Setup program after installing an additional hard disk At the back of the manual you ll find a glossary of the computer terms used in this manual and an index W...

Page 18: ......

Page 19: ...ve any questions and for instructions on copying your system any questions and for instructions on copying your system diskettes diskettes When you finish setting up your computer go on to Chapter 2 and follow the instructions there to run the Setup program The Setup program updates the list of equipment installed in the computer You need to run this program the first time you use your computer an...

Page 20: ...ter With the MGA multi graphics adapter card in the computer you can use a monochrome or color graphics monitor You ll find warranty and registration cards with the computer Fill out the registration card and mail it to Epson With this card on file Epson can send you update information You also should retain the computer s receipt from the place of purchase The receipt is all that is required for ...

Page 21: ... the drive Be sure to remove the card from the diskette drive before you turn on the computer Turn the diskette drive latch up until it is horizontal and carefully pull out the card Save the protector card and reinsert it whenever you move the computer If you don t plan to use your computer for a week or more reinsert the card to help prevent dust from entering the disk drive Setting Up Your Syste...

Page 22: ...ur computer from extremes in temperature direct sunlight or any other source of heat High humidity also hinders operation so select a cool dry area Avoid dust and smoke which can damage disks and disk drives and cause you to lose valuable data Appropriate power sources To prevent static charges connect all your equipment to three prong 120 volt AC grounded outlets You need one outlet for the compu...

Page 23: ...le display adapter card to control it If the optional card is nut already installed in the computer you need to install it before you can connect the monitor See Chapter 5 for instructions on adding option cards in this case the video card The procedure you use to connect your monitor to the computer depends on the type of monitor you have See your monitor manual for detailed instructions or follo...

Page 24: ...ord into an electrical outlet Note Note If the monitor has the proper type of plug you can plug If the monitor has the proper type of plug you can plug it into the auxiliary AC outlet next to the AC inlet on it into the auxiliary AC outlet next to the AC inlet on the back of the computer the back of the computer 6 If you connected the monitor to the MGA card in the computer set the color mono moni...

Page 25: ...em The computer has a parallel interface and a serial interface on the back panel so you can easily connect a printer or other type of device with either type of interface For example you can use the parallel port to connect a parallel printer most printers have a parallel interface You can use the serial port to connect a serial printer a serial mouse or an external modem Follow the steps in this...

Page 26: ...r whether you have the right one check with the store where you purchased the printer Once you have the correct printer cable follow these steps to connect the printer to the parallel interface on the computer 1 Place the printer next to your computer 2 One end of the printer cable has a 25 pin male connector Connect this end to the parallel port on the back panel of the computer as shown below If...

Page 27: ...tlet Using the Serial Interface If you have a serial printer modem mouse or any other peripheral with a serial interface you can connect it to the serial RS 232C port on the back of the computer Your computer uses an IBM compatible 9 pin male connector so be sure you have the proper cable If you are not sure which one you need or whether you have the right one check with the store where you bought...

Page 28: ...the data transmission parameters for the serial port Tell the computer to redirect printer data from the parallel port to the serial port The MS DOS MODE command lets you define the baud rate parity data length and number of stop bits for a primary and a secondary serial port MODE also lets you redirect output from the parallel port to the serial port The MENU program offers an easy way to use MOD...

Page 29: ...r cord into the AC inlet on the computer s back panel as shown below To avoid an electric shock be sure to plug the cord into the computer before plugging it into the wall socket 2 Plug the other end of the power cord into a three prong grounded electrical outlet Setting Up Your System 1 11 ...

Page 30: ... Facing the front of the computer open the cover on the lower left comer Push the top of the cover inward and then release it 2 Plug the keyboard cable into the socket as shown in the following illustration Do not force the connector but be sure to insert it all the way ...

Page 31: ...3 Push the cable into the notch at the left side of the computer as shown below so the cable leads away to the left side of the computer 4 Close the keyboard cable cover SettingUpYourSystem 1 13 ...

Page 32: ...You can lock the legs into a low or high position or leave them flat 7Setting the Front Monitor Switch Set the monitor switch on the front panel of the computer to match the type of monitor you are using The monitor switch is located behind the cover to the right of the keyboard socket cover as shown in the following figure To open this cover push the top of the cover inward and then release it ...

Page 33: ...ccidentally damaging the computer or injuring yourself Never turn the computer on with a protector card in the diskette drive Do not unplug cables from the computer when the power switch is on Never turn off or reset your computer while a disk drive light is on This can destroy data stored on disk or make an entire disk unusable Similarly never remove a diskette from a diskette drive while the dri...

Page 34: ... reading the appropriate section in Chapter 6 contact your Epson Customer Care Center Always turn off the power disconnect all cables and wait five seconds before you remove the computer s cover Follow these steps to turn on your system 1 Turn on the monitor printer and any other peripheral devices connected to the computer 2 To turn on the computer press the power switch The power indicator on th...

Page 35: ... to adjust the brightness and contrast until characters on the screen are clear and bright The computer then loads MS DOS the operating system from the hard disk into memory MS DOS must be in the computer s memory before you can run any application program such as a word processing program or a spreadsheet program Note Alternatively you can load MS DOS from the Startup Alternatively you can load M...

Page 36: ...e an optional second diskette drive MS DOS identifies it as B 9Copying System Diskettes Now that you have started your system and loaded MS DOS it is important that you make copies of your MS DOS and Reference diskettes right away Use the copies called working copies as they are needed and store the originals in a safe place Note If you have only a single diskette drive and no hard disk drive see ...

Page 37: ...Follow these steps 1 The C prompt should be on the screen If not type C and press Enter 2 Type the following and press Enter DISKCOPY A A The screen displays this message Insert SOURCE diskette in drive A Press any key when ready 3 Insert the Startup diskette in drive A as shown below Hold the diskette with the label facing up and the read write slot leading into the drive Setting Up Your System 1...

Page 38: ...e data from the computer s memory to the formatted diskette When the copy is complete you see this prompt Copy another diskette Y N Press Y so you can make a copy of the Operating 1 diskette Again you see the prompt to insert the source diskette Remove the copy of the Startup diskette which you just made and insert the Operating 1 diskette into drive A Then press any key Follow the prompts on the ...

Page 39: ... which Write on the labels before you attach them to the diskettes in order to prevent damaging the diskettes Store the originals in a safe place and use the copies as they are needed You are now ready to run the Setup program which is described in the following chapter Setting Up Your System 1 21 ...

Page 40: ......

Page 41: ...nt and have a color graphics monitor you would use the Setup program to set the internal clock s time and date Your computer stores the information you enter with the Setup program in a special memory area called CMOS RAM which is backed up by a battery When you turn off the computer the computer stores the Setup information in this memory When you turn the computer on it searches the CMOS RAM to ...

Page 42: ... the E x i t option See Leaving the Setup Program below for instructions Note Another way to start the Setup program is to turn on or reset the computer with the Reference diskette in the drive If you do this you see the following Operation menu OPERATION MENU 1 Setup 2 Format hard disk 3 Format diskette 4 System diagnostics 5 Prepare hard disk for moving 0 Exit to DOS for more utilities Enter sel...

Page 43: ...d memory depends on the total amount of memory available in your computer above the 1MB of main memory This amount consists of any additional RAM on an expansion card that you may have installed Note Certain MS DOS applications and other operating systems may require extended memory You can also use extended memory to set up RAM disks for temparary storage using the VDISK SYS driver See your MS DO...

Page 44: ... KB Main 256 KB Expansion SAVE SETTINGS 4 When you finish setting the amount of memory highlight SAVE SETTINGS and press Enter to return to the main menu Setting the Type of Display Select the Display option in the main menu if you are not using a color graphics monitor or if you change the video card in your computer If you are using the MGA card that came with your computer make sure that both m...

Page 45: ...u have as follows If you have a monochrome monitor choose Monochrome 80 col regardless of the type of video card installed If you have a color graphics monitor select Color graph 80 c o l If you have an EGA or VGA monitor and have already installed the correct video card select Special Options You may also need to set a DIP switch on the video card which overrides the display setting in CMOS RAM S...

Page 46: ... later remove the coprocessor use this option to delete it from the list of equipment that the computer maintains this prevents software from trying to use the 80287 commands Follow these steps 1 Highlight Coprocessor and press Enter You see this menu 80287 not installed SAVE SETTINGS 2 The 80287 not installed line is highlighted Press Enter to change the setting This line alternates between 80287...

Page 47: ...ter A second menu appears Not installed 360 KB drive 720 KB drive 3 5 1 2 MB drive 1 44 MB drive 3 5 3 Highlight the type of drive that matches the second diskette drive installed in your computer then press Enter to select it The second menu disappears and the Mass storage menu shows the new setting 4 To change the value for drive C the hard disk highlight that option Then use the or key to incre...

Page 48: ...d date for your computer after you set it up You may need to use it again later to adjust the time for daylight savings time The computer automatically changes the date for leap years Note Another way to change the real time clock s time and date is with the MS DOS version 3 3 or later TIME and DATE commands See your MS DOS Reference Manual for instructions Follow these steps to set the real time ...

Page 49: ...s When the time is correct press Enter 4 To set the date highlight D at e and press Enter You see this box mm dd yyyy 5 Enter the date in the exact format shown in the box using two digits for the month and day and four digits for the year the program automatically inserts the dashes For example to set the date for August 30 1989 you would type the following 0 8 3 0 1 9 8 9 If you enter an invalid...

Page 50: ...enu highlight the Exit option and press Enter You see a summary such as this Memory size Display type Coprocessor Mass storage Real time clock Main 640KB Expansion 0 KB Color graph 80 col 80287 not installed Drive A Drive B Drive C Drive D Time 13 30 00 Date 08 30 1989 1 2 MB None Type 11 None C h a n g e S e t t i n g s E x i t w i t h o u t s a v i n g EXIT AND SAVE Check the list to see if all ...

Page 51: ...u changed the time or date the new setting will be in effect even if you exit the Setup program without saving your changes If you want to save the settings you made follow these steps 1 Remove the Reference diskette from drive A 2 Highlight EXIT AND SAVE and press Enter The program stores the new settings and resets the computer using the new configuration The C prompt appears on the screen If th...

Page 52: ......

Page 53: ...ating Speed Your computer can operate at two speeds 8 MHz or 12 MHz At 12 MHz the computer performs all tasks faster and almost all programs may be run at 12 MHz However some option cards and application programs require the lower speed See your option card or application program manual to make sure that you can use the higher speed before selecting it Use the CPU SPEED switch on the front panel t...

Page 54: ...rd and the table that follows describes the special keys Key Purpose F1 F12 Perform special functions within application programs Some keys also function with MS DOS See your MS DOS Reference Manual for more information Tab Moves the cursor one tab to the right in normal mode and one tab to the left in shift mode when using some application programs Ctrl Shift Works with other keys to perform spec...

Page 55: ...current command line or operation in MS DOS Esc can also have special uses in application programs Changes the function of the keys on the numeric cursor keypad from numeric entry to cursor positioning changes back when pressed again Controls scrolling in some application programs When pressed with the Ctrl key hold down Ctrl and press Break sends a break signal to the computer to terminate the cu...

Page 56: ...tion If you have entered an MS DOS command that you want to stop try one of the following commands Hold down the Ctrl key and press C Hold down the Ctrl key and press Break These methods may also work in your application programs If you cannot stop a particular operation however you may need to reset the computer as described in the following section Caution It is best not to turn off the computer...

Page 57: ... computer without properly exiting the program you may lose data There are three ways to reset Because each is more powerful than the last try them in the order listed here 1 If you are using MS DOS hold down Ctrl and Alt and press the Del key The screen should go blank for a moment and then the computer reloads MS DOS If this does not correct the problem try the second method 2 Press the RESET bu...

Page 58: ...B hard disk The Apex 200 40 has one 1 2MB diskette drive and one 40MB hard disk This section explains how disks work and tells you how to do the following Choose diskettes Care for your diskettes and diskette drives Insert and remove diskettes Write protect diskettes Make backup copies of your diskettes Use a single diskette drive Use a hard disk drive How Disks Store Data The diskette you insert ...

Page 59: ...which a disk can store data Double density diskettes such as 360KB diskettes have 40 tracks and high density diskettes such as 1 2MB diskettes have 80 tracks A hard disk consists of two or more magnetically coated platters stacked on top of one another so it has four or more sides with many more tracks than a diskette A disk is further divided by sectors To understand what a sector is picture the ...

Page 60: ...kette drive With this drive use 5 inch double sided high density 96 TPI 1 2MB diskettes These diskettes contain 80 tracks per side 15 sectors per track and hold up to 1 2MB of information which is approximately 500 pages of text You can also format these diskettes for 360KB see your MS DOS Reference Manual for more information In addition you may have a diskette drive of a different type The follo...

Page 61: ...format new diskettes before you can use them with an operating system Formatting erases all the data on a diskette and prepares it to receive new data so be sure to format only new blank diskettes or diskettes that contains data you want to erase See Chapter 4 for instructions on data you want to erase See Chapter 4 for instructions on formatting diskettes Drive and diskette incompatibilities Beca...

Page 62: ...long as the correct diskette type is in each drive You can use these commands to copy files between the hard disk and any type of diskette You cannot use DISKCOPY to copy from one drive to another if the two drives are not the same type Caring for Diskettes and Diskette Drives Follow these basic precautions to protect your diskettes and avoid losing data Do not remove a diskette from the diskette ...

Page 63: ...exposes the diskette s surface Do not place anything on top of your diskettes and be sure they do not get bent A diskette does not rotate properly in the drive if it has been damaged Carefully label your diskettes Attach labels firmly but gently and only along the top of a diskette next to the manufacturer s label Do not stick several labels on top of one another too many labels can make it diffic...

Page 64: ...ocess you can lose data Never attempt to open the hard disk drive The disk itself is enclosed in a sealed container to protect it from dust If you are going to move your computer run the HDSIT program before turning it off See Preparing the Hard Disk for Moving at the end of this chapter Inserting and Removing Diskettes To insert a diskette into the drive hold it with the label facing up and the r...

Page 65: ...ve and displays an error message such as Not ready error reading drive A Abort fail retry Close the latch and press R To remove the diskette turn the drive latch up until it is horizontal and the edge of the diskette pops out Carefully pull out the diskette place it in its protective envelope and store it in a proper location such as a diskette container If you have an optional 3 inch diskette dri...

Page 66: ...n write protect a diskette to prevent its data from being altered When a diskette is write protected you can read it and copy data from it but you cannot store new data on the diskette or delete any files it contains If you try to change data stored on a write protected diskette MS DOS displays an error message To write protect a 5 inch diskette cover the small rectangular notch shown below with a...

Page 67: ...tion exposing a hole in the corner To remove the write protection slide the switch toward the center of the diskette so the hole is covered Making Backup Copies It is important to make copies of all your data and system diskettes Copy all diskettes that contain programs such as the original MS DOS diskettes that come with your computer and use only the copies Store your original MS DOS diskettes i...

Page 68: ...reats the one drive like two logical drives This helps you perform operations that normally require two diskette drives Usually MS DOS recognizes the first diskette drive the top drive as drive A and the second diskette drive as drive B If you have only one diskette drive MS DOS recognizes it as both A and B For example if you give a command to copy from A to B MS DOS copies data from the diskette...

Page 69: ...ides several advantages The 20MB hard disk can store more data than 16 1 2MB diskettes and the 40MB hard disk can store twice as much Your computer can perform all disk related operations faster You can store all your frequently used programs and data files on the hard disk eliminating the inconvenience of inserting and removing diskettes to access different files The added storage capacity makes ...

Page 70: ...y reliable it is essential to back up your hard disk files to diskettes in case you lose some data accidentally Make copies of all your system and application program diskettes before copying the programs to the hard disk After you create data files on the hard disk be sure to copy them to diskettes whenever you revise them to keep your backup diskettes up to date You can use the MENU utility or t...

Page 71: ...erence diskette in drive A 3 Type the following and press Enter A HDSIT You see a message on the screen that tells you the disk drive s read write heads will remain locked until you reset the computer or turn the power off and on again The computer locks the heads and disables the keyboard You can now turn off the computer and prepare to move it to the new location Using Your Computer 3 19 ...

Page 72: ......

Page 73: ... plan to use your computer If you plan to use it just to run application programs the few MS DOS commands you ll need are introduced in this chapter If you need more information see your MS DOS Reference Manual for a complete description of MS DOS This chapter covers the following topics Starting and exiting MS DOS Using drive designators Types of MS DOS commands Entering an MS DOS command Creatin...

Page 74: ...t use this method if your computer does not have a hard disk Follow the instructions in the next section Loading MS DOS From a Diskette Follow these steps to load MS DOS from a diskette in drive A 1 When your computer is off insert the Startup diskette into drive A For detailed instructions on inserting diskettes see Inserting and Removing Diskettes in Chapter 3 2 Turn on any peripheral equipment ...

Page 75: ... drive C and the appropriate directory if necessary Then just enter the necessary command to start the application program as described in the program s manual From this point on until you return to the MS DOS command prompt refer to the application program manual for any instructions on using the program Using Drive Designators MS DOS uses letters to identify the disk drives in your computer If y...

Page 76: ...r than symbol Depending on how your system has been set up the command prompt may also include additional information Thus when you see A displayed on your screen you know that the default drive is A The command prompt also lets you know that MS DOS is ready to receive a command from you If you need to access a file or program on another drive you can either change the default drive or specify the...

Page 77: ... external Internal commands are commands that are built into MS DOS and can be used at any time once MS DOS is loaded into memory External commands are separate program files stored on your hard disk and MS DOS diskettes If you display a directory of the files on your MS DOS diskettes you see the names of the external commands but not the internal ones The following lists show which external comma...

Page 78: ...ORE COM SHARE EXE SORT EXE SUBST EXE TREE COM XTREE EXE XTREEINS DAT XTREEINS EXE TESTBUG COM GRAPH24 COM EPSON TXT HELP COM HELP TXT MEMTST DIG MONOTST DIG MPRTTST DIG PARATST DIG ROMBIOS COM SERITST DIG SETUP EXE SYSTAT COM VDOPTST DIG To run an external command MS DOS must be able to locate the file containing the command s instructions If it cannot find the file MS DOS gives you an error messa...

Page 79: ... on drive A for FORMAT COM Entering an MS DOS Command To enter an MS DOS command you need to type the command in the correct format The command format provides MS DOS with the information needed to perform a task The MS DOS command format consists of the command name parameters and delimiters The command name tells MS DOS the task you want the computer to perform Parameters specify details such as...

Page 80: ...re preceded by a forward slash 1 See your MS DOS Reference Manual for more information on the command format Also see your MS DOS manual for command descriptions that tell you which parameters and delimiters are required for each command and which optional parameters and switches you can use You can enter an MS DOS command whenever you see the MS DOS command prompt Type the command name and any ne...

Page 81: ...te it In general a data file that you create using an application program is stored in a special format If you use a different application program to read that file you may encounter problems When you create a file you need to give it a name You must name your files in a certain format required by MS DOS Naming Files Each file must have a unique filename so you can retrieve it when you need to The...

Page 82: ... DOS does not recognize the difference and displays all filenames in uppercase Certain extensions are reserved for program files and you must not use them for your data files The reserved extensions are COM EXE and BAT Files with these extensions are also sometimes called executable files The BAT extension denotes a particular kind of executable file called a batch file Batch files can be used to ...

Page 83: ...he diskette in drive A to the hard disk using the same name for the copy as for the original file type the following and press Enter COPY A REPORT C You now have two files named REPORT one on the diskette in drive A and one on the hard disk drive C If you want to copy the file named REPORT from the diskette in drive A to drive C using a new name FACTS for the copy type the following and press Ente...

Page 84: ...following and press Enter COPY A C To copy all files with names that begin with the four letters MEMO and end with any single character such as MEMO1 type the following and press Enter COPY A MEMO C You can also use the COPY command to combine several files into one For example to create a new file called DATA that consists of the files REPORT FACTS and MEMO type the following and press Enter COPY...

Page 85: ...t accidentally erase a file you want to keep If you are copying to a diskette that diskette must have been previously formatted Note You can also use the XCOPY command to copy individual files or groups of files XCOPY an external command offers an efficient way to copy certain groups of files For details about XCOPY see your MS DOS Reference Manual Renaming Files You can use the RENAME command to ...

Page 86: ...LD to all files that begin with the same five characters MEMOS but end with one varying character type the following and press Enter REN MEMOS MEMOS OLD This command would rename files such as MEMOS1 and MEMOS2 to MEMOS1 OLD and MEMOS2 OLD See your MS DOS Reference Manual for more information on the RENAME command Deleting Files You can delete files you no longer need with the DEL delete command F...

Page 87: ... Printing Files If you have a printer attached to your computer you can print files with the PRINT command You will probably be printing files with the application programs you use with MS DOS but if you need to print a file from the MS DOS command prompt follow the steps below To print a file named STATS NBA from the diskette in drive A 1 Make sure your printer is on and ready to print 2 At the c...

Page 88: ...large files directories are essential for organizing files on a hard disk Whenever you format a disk MS DOS creates one main directory for you This directory is called the root directory Any subsequent directories you create are logically subordinate to the root directory that is they are subdirectories of the root directory A simple directory structure might look like this This arrangement would ...

Page 89: ...ete old directories and create new ones as your needs change Here are some additional points to note about directories In the root directory the total number of files and subdirectories must not exceed 512 on a hard disk and 224 on a 1 2MB diskette All directories other than the root directory can have any number of files and subdirectories as long as there is space on the disk Subdirectories are ...

Page 90: ...you tell it to do otherwise If you want to run a program or access a data file that is not stored in the default directory you can either change directories making a different directory the default or include a pathname in your command Changing the Default Directory To change from one directory to another use the CHDIR command or its shorthand equivalent CD For example to change to the root direct...

Page 91: ...AL The backslash at the beginning of this pathname tells MS DOS to start at the root directory proceed down the directory tree to WORDPROC then continue down the tree to PERSONAL Here is an example of a relative pathname SALES Because this pathname does not begin with a backslash MS DOS assumes that the starting point of the path is the current default directory This pathname thus tells MS DOS to ...

Page 92: ... on screen TYPE the contents of the file JEAN1204 DOC which is stored in the directory WORDPROC PERSONAL Note that the filename is connected to the pathname by a backslash character the same character used to separate the various directories in the pathname itself Including Drive Letters With Pathnames and Filenames As explained earlier if you want to access a file stored on a drive other than the...

Page 93: ...4 DOC MS DOS tries to find the file you want in the root directory of drive C but the file is not there and an error message appears on the screen For this case you would need to enter the complete pathname as in the previous example If you do not know what the default directory on another drive is it is a good idea to include the full pathname whether you need it or not You can never give MS DOS ...

Page 94: ...ou frequently type long pathnames See your MS DOS Reference Manual for information on these helpful commands Creating Directories You use the MKDIR command to create directories in MS DOS For example to create a LEDGER directory under your root directory type the following and press Enter MKDIR LEDGER You can abbreviate the name of this command to MD For example to create a SALES directory under t...

Page 95: ...rectory listing includes the following information about each file the name and extension the size in bytes and the date and time the file was created or last modified whichever is later Any subdirectories in the directory are listed along with the files they are identified by the letters DIR At the bottom of the listing MS DOS reports the total number of files including directories and the number...

Page 96: ...ive or a different directory include the appropriate drive designator and or pathname in the command For example to see what is in the root directory of the diskette in drive A type the following and press Enter DIR A To display the contents of the WORDPROC PERSONAL directory on drive C type the following and press Enter DIR C WORDPROC PERSONAL Displaying a List of Directories The TREE command let...

Page 97: ...irectory for example Path C LEDGER SALES Sub directories None Files DECSALES FORECAST 90 OCTSALES NOVSALES To see the list of directories on another drive include the drive designator TREE A Removing Directories You may sometimes want to remove directories you no longer need A directory must be empty however before you can delete it If it contains any files or subdirectories MS DOS displays an err...

Page 98: ...e for the first time You can reformat previously used diskettes This process erases all data on the diskette however so be sure you do not want to save any of the data on a used diskette before you format it If you plan to use a new diskette to make a backup copy of another diskette you do not need to format it first the DISKCOPY program automatically formats a blank diskette if it has never been ...

Page 99: ...and press Enter to start formatting When the diskette is formatted you see a message similar to this Format complete 1213952 bytes total disk space 1213952 bytes available on disk Format another Y N 4 At this point you can either format another diskette by pressing Y and Enter or return to the MS DOS command prompt by pressing N and Enter The formatted diskette is now ready to store data Note You ...

Page 100: ...skette and insert the diskette you want to format into the drive Press Enter to start formatting When the diskette is formatted you see a message similar to this Format complete 1213952 bytes total disk space 1213952 bytes available on disk Format another Y N 4 At this point you can either format another diskette by pressing Y and Enter or return to the MS DOS command prompt by pressing N and Ente...

Page 101: ...SKCOPY and BACKUP are described below The COPY command is described in the previous section Copying Files See your MS DOS manual for information on XCOPY Note Alternative ways to perform the functions listed above are through the MENU and XTREE programs See the sections on MENU and XTREE later in this chapter Using the DISKCOPY Command The DISKCOPY command lets you make an exact copy of a diskette...

Page 102: ...ry type C and press Enter to log onto drive C 3 At the C prompt type the following and press Enter DISKCOPY A A MS DOS displays this message Insert SOURCE diskette in drive A Press any key when ready 4 Insert the diskette you want to copy from the source into the diskette drive and press any key DISKCOPY copies the contents of the diskette to the computer s memory Then the screen displays this mes...

Page 103: ...s write protected See Write protecting Diskettes in Chapter 3 for instructions 2 If necessary type C and press Enter to log onto drive C 3 At the C prompt type the following and press Enter DISKCOPY A B MS DOS displays this message Insert SOURCE diskette in drive A Press any key when ready 4 Insert the diskette you want to copy from the source into the diskette drive and press any key DISKCOPY cop...

Page 104: ... these steps to copy a diskette 1 Make sure the diskette you want to copy is write protected See Write protecting Diskettes in Chapter 3 for instructions 2 Insert the Operating 1 diskette in the diskette drive 3 At the A prompt type the following and press Enter DISKCOPY A A MS DOS displays this message Insert SOURCE diskette in drive A Press any key when ready 4 Remove the Operating 1 diskette an...

Page 105: ...and efficient way to copy the files on your hard disk BACKUP allows you to do the following Split large files across two or more diskettes Copy only those files that have been modified since the most recent backup Copy only those files that have been created or modified after a specified date Copy files in the current directory together with files in all subdirectories of the current directory For...

Page 106: ...at the command prompt and press Enter to display the HELP menu You can bypass the menu by typing HELP plus the name of the command you want information about To use the HELP menu follow these steps 1 Type HELP at the MS DOS command prompt and press Enter 2 The screen displays a menu of MS DOS commands Use the cursor keys to highlight the command you want information about and press Enter 3 If ther...

Page 107: ... information for more than one command Follow these steps 1 At the command prompt type HELP followed by the names of the commands you want information about Then press Enter Separate each command name with a space For example to see help information for the DISKCOPY FORMAT and COPY commands type the following and press Enter HELP DISKCOPY FORMAT COPY 2 The help information for the first command is...

Page 108: ...X I T F i l e U t i l i t i e s D i s k U t i l i t i e s M o d e S e t t i n g s H e l p E n t e r D O S C o m m a n d To select an option use the arrow keys to highlight your selection and then press Enter Most options contain submenus keep highlighting your selection and pressing Enter until you have selected the desired operation MENU Program Options Following are descriptions of each option F...

Page 109: ... the MENU program For step by step instructions on using each MENU option see your MS DOS Reference Manual Using the XTREE Utility Epson has included the XTREE program with MS DOS to make it easier for you to manage files and run other MS DOS programs XTREE is especially useful for managing the data on a hard disk where you may have hundreds of files XTREE lets you do the work of many MS DOS comma...

Page 110: ...y to another Display data in both ASCII and hexadecimal format Execute programs without leaving the XTREE program Display how much space is available on your disks Running XTREE To run XTREE log onto drive C Type XTREE and press Enter When XTREE is loaded you see a menu similar to the following ...

Page 111: ...ay This window shows that XTREE is set to display all files matching the DOS specification which is all files DISK Shows the name or letter of the disk being displayed and the number of bytes still available for data DISK Statistics Summarizes information about the files on the disk Files window Lists the names of all the files in the current directory DIR COMMANDS Displays all the key commands yo...

Page 112: ... hold down the Ctrl key as you press the highlighted letter of the command name Pressing Ctrl D for example deletes all tagged files Alt key commands execute additional XTREE commands Press the Alt key to display the ALT DIR COMMANDS or ALT FILE COMMANDS These commands appear on the line where the DIR COMMANDS or FILE COMMANDS normally appear To execute an Alt key command hold down the Alt key and...

Page 113: ...XTREE and store your infrequently used files on diskettes or reorganize and delete some directories If you use XTREE when you have more files or directories than it can handle you may accidentally erase or alter files XTREE offers too many commands to demonstrate all the various combinations in this introduction just remember that everything you can do is shown on the screen display See your MS DO...

Page 114: ...mes with an AUTOEXEC BAT file that sets a path to all the MS DOS commands and changes the command prompt to show the current directory See your MS DOS Reference Manual for instructions on using the PATH command the PROMPT command and any other commands you want to include in your AUTOEXEC BAT file Also see the chapter on batch processing commands in the MS DOS manual for detailed information about...

Page 115: ...eating an AUTOEXEC BAT file on the working copy of your MS DOS Startup disk insert the diskette in drive A 2 At the MS DOS command prompt type the following and press Enter COPY CON d AUTOEXEC BAT where d is the drive that is to contain the AUTOEXEC BAT file you are creating 3 Now enter the commands you want to include in the file Type them exactly as you want MS DOS to execute them and in the ord...

Page 116: ...our MS DOS Reference Manual for instructions Using HDCACHE for the Hard Disk You can use the MS DOS program HDCACHE to enhance the performance of your hard disk This program makes the hard disk work more efficiently by storing data requests in a reserved part of memory See your MS DOS Reference Manual for more information ...

Page 117: ... card that operates your monitor Option cards are made by Epson as well as other vendors In addition multifunction boards allow you to add more than one feature per slot This chapter describes how to Remove and replace the computer s cover Install and remove an option card Set the jumpers in your computer Removing the Cover Before you install an option card in your computer you need to remove the ...

Page 118: ...el faces you 2 As shown below the top cover is secured by five screws on the back panel and four screws on the side panels two on each side Remove the screws and put them all safely to one side 3 Turn the computer around so the front panel faces you Hold on to the two sides of the cover and carefully pull it straight toward you away from the back of the computer as shown in the following illustrat...

Page 119: ...om the bottom ledge of the computer by pulling them outward slightly as shown below 4 When the back edge of the cover is a few inches away from the back panel you can lift the cover off Set the cover aside carefully Installing Option Cards 5 3 ...

Page 120: ... go in a specific slot If you are installing a new video card you may remove the MGA card that comes installed in your computer The option slots are located in the back of your computer as shown below Slots 1 5 and 6 are designed for 8 bit option cards and the other three slots 2 through 4 are designed for 16 bit option cards Option cards designed for 16 bit slots have a second connector as shown ...

Page 121: ...s 1 Decide which option slot you want to use then remove the retaining screw from the metal cover plate at the back of the slot Hold onto the screw as you remove it so that it doesn t fall into the computer Lift out the metal cover as shown below Put the option slot cover in a safe place in case you later remove the option card Keep the screw and washer You use them to secure the option card to th...

Page 122: ...on top of the original packing Keep the card s original packing materials in case you remove the card later 3 Hold the card by the top comers so the connector pins are pointing down and the components are facing the side of the computer as shown below 4 Insert the card straight down into the slot Once the connector pins are in the connector slot push down firmly but carefully to fully insert the c...

Page 123: ...low There are many system components that can be damaged accidentally The jumpers you may need to change are on the Main circuit board Memory card and Multi function card parallel port serial port and floppy disk controller The location of these cards is shown below WARNING The jumpers on these cards are preset at the factory in default positions Do not change any of them unless you are sure the o...

Page 124: ...mper from one position to the other use needle nose pliers or tweezers to lift it off the board and gently move it to the other position Be careful not to lose the jumper or leave it out of the computer Memory Card Jumpers The jumpers on the memory card control the following functions Amount of RAM main memory If you install a memory card that needs to use part of the main memory you may need to c...

Page 125: ...A 640KB B A 512KB disable upper 128KB B B 256KB disable upper 384KB A Select EPROM size 27128 B Select EPROM size 27256 l Default setting To access the memory card jumpers you need to remove the card from the computer first 1 Remove the retaining screw from the bracket on the memory card as shown below Installing Option Cards 5 9 ...

Page 126: ...rcuit board control the following Number of wait states for EPROM If necessary you can change the number of wait states 1 or 2 used by the EPROM Selectable wait states are available only when your computer is running at 12 MHz Please consult your Epson Customer Care Center for assistance Number of wait states for 16 bit device access If necessary you can change the number of wait states 1 2 3 or 4...

Page 127: ...le below shows the functions for the jumpers on the main circuit board Main circuit board jumper settings Jumper number Function 1 2 3 4 5 A B A A B A A B B B A B Default setting 1 wait state for EPROM access 2 wait states for EPROM access 1 wait state for 16 bit option card 2 wait states for 16 bit option card 3 wait states for 16 bit option card 4 wait states for 16 bit option card A Set coproce...

Page 128: ...the serial port address You normally address the parallel and serial ports in the computer as the primary ports LPT1 and COM1 However if you install an additional parallel or serial port and want it to be the primary port you need to change the jumpers on the multi function card so the built in port becomes secondary LPT2 and COM2 The following table shows the jumpers on the multi function card th...

Page 129: ...BM monochrome display printer adapter B B Disable built in port Default Setting The table below shows the jumpers on the multi function card that control the serial port Multi function card jumper settings for serial port Jumper number Function 5 6 9 A A A Enable built in port as primary A B B Enable built in port as secondary B Disable built in port Default setting Installing Option Cards 5 13 ...

Page 130: ...o remove the card from the computer 1 Unplug the disk drive cable from the card as shown below Pull it straight up and out then lay it to one side 2 Remove the retaining screw from the multi function card at the back panel of the computer as shown below ...

Page 131: ...If you need to remove an option card simply reverse the steps you followed to install it Remove the screw securing the card to the back of the computer and pull the card straight up and out of the slot Then carefully wrap the card preferably in the original packing materials and place it inside its box for safe storage Cover the end of the empty option slot with the original metal cover and secure...

Page 132: ...acing the Cover With the option card properly installed or removed the last step is to replace the cover of the computer 1 Facing the front of the computer position the cover on the computer as shown below ...

Page 133: ...drive Make sure the power switch fits properly through the opening on the front panel 4 To secure the cover replace the screws on the back and side panels 5 Return the computer to its original position and reconnect it to the monitor the keyboard the printer and any other peripherals you have 6 Check to make sure the power switch is off Reconnect the power cable to the back of the computer and to ...

Page 134: ...files on your system disk as well See the description of CONFIG SYS in your MS DOS Reference Manual for instructions When you finish installing an option card and reconfiguring the system you should test the card if possible Some option cards come with their own diagnostics programs and you can test others with the diagnostics programs on your Reference diskette The options you can test with the d...

Page 135: ...onfiguration including the type and number of disk drives monitor and option cards as well as the names and version numbers of any application programs you are using This information helps the customer care representative diagnose the problem The Computer Won t Start If your computer does not start when you turn on the power switch check the following 1 Is the power light on the computer s front p...

Page 136: ...lems The Computer Does Not Respond If your computer locks up and does not respond when you type on the keyboard follow these steps 1 Some computer operations take longer than others to complete For example the computer needs more time to sort a database than to accept a single typed character If your computer is still locked after a reasonable length of time proceed to the next step 2 If you are r...

Page 137: ...ving trouble with the keyboard check the following 1 If a keyboard error is displayed on the screen when you turn on or reset the computer make sure the keyboard is securely connected to the computer See Connecting the Keyboard in Chapter 1 for instructions 2 If nothing happens when you type on the keyboard see the previous section The Computer Does Not Respond 3 If the arrow keys are not working ...

Page 138: ...l outlet Plug a lamp into the wall outlet and turn it on to see if the outlet supplies power 4 If you still do not see anything on the screen make sure your monitor is connected to the computer properly See Connecting the Monitor in Chapter 1 for more details Also check the monitor manual for directions on connecting it to the computer 5 If you are using the MGA card in your computer make sure the...

Page 139: ...m indicates an error contact the place where you bought the monitor If you are using an Apex monitor call your Epson Customer Care Center for assistance Diskette Problems If you have trouble accessing data on a diskette try the following steps 1 Remove the diskette from the diskette drive and reinsert it Repeat the operation that gave you trouble This usually solves the problem if the diskette was...

Page 140: ...r application program manual 5 If MS DOS displays errors when you try to access data your diskette may be defective MS DOS error messages that may indicate a defective diskette include these Disk Drive Error Abort Ignore Retry Disk error reading drive d Disk error writing drive d If you see one of these messages make sure the diskette is properly placed in the diskette drive and the diskette drive...

Page 141: ...mmand 6 If you see no error messages but there is something wrong with the data in a file MS DOS or an application program may have updated file storage information on the diskette incorrectly This is probably the case if you have one of these problems Part of a file is missing A file includes parts of other files An expected output file is missing To make the necessary repairs use the MS DOS prog...

Page 142: ...not attempt any further examination of it Instead contact your Epson Customer Care Center Note Diskette drives may make different sounds with different diskettes 2 If your diskette drive read write heads are dirty you may occasionally see this MS DOS error message Error Reading Drive d Abort Retry or Fail To clean the read write heads use a diskette head cleaning kit Such kits are available in mos...

Page 143: ...ts Type C and press Enter to log onto the hard disk If this works the next step is to make sure the file COMMAND COM is in the root directory of the hard disk Type DIR and press Enter If COMMAND COM exists in the root directory use the MS DOS COMPARE command to compare the COMMAND COM file on your diskette with the COMMAND COM file on the hard disk See your MS DOS Reference Manual for instructions...

Page 144: ...ition See your MS DOS Reference Manual for instructions on using FDISK If your hard disk does have an active DOS partition back up all your files and then try reformatting your hard disk using SELECT See Appendix E Preparing a Hard Disk for Use for instructions WARNING Reformatting destroys all the data on the hard disk so do this only after careful consideration and after trying the preceding ste...

Page 145: ...artitioned and formatted If this is the case see Appendix E for instructions If it needs a low level physical format do that before you partition the disk See Appendix D for instructions Software Problems If you are having trouble with an application program try the following solutions 1 If the application program does not start check that you are following the correct procedure for starting the p...

Page 146: ...d down Ctrl and press Break 4 An application program can occasionally lock the computer making it unresponsive to the keyboard If your computer does not respond when you type on the keyboard you can reset it Follow the instructions under Resetting the Computer in Chapter 3 Printer Problems Below are some general steps to follow if you are having difficulty with your printer If the problem persists...

Page 147: ...cation programs such as word processors must be set up properly before they can use a printer Check your application program manual to see what customization is required 5 Try running the Parallel Port Printer Interface Check if you have a parallel printer or the Serial Port RS 232C Check if you have a serial printer These diagnostics checks are described in Appendix C of this manual If the diagno...

Page 148: ...cessary see your software manual for instructions on running the software setup procedure 5 Some option cards work at only one speed Your computer can run at either 8 MHz or 12 MHz Check your option card manual to see if your card must run at the slower speed and change the CPU operating speed if necessary See Changing the Operating Speed in Chapter 3 for instructions 6 If you changed the configur...

Page 149: ...t data bus 640KB RAM on memory card expandable to 15 5MB maximum with expansion cards 32KB expandable to 64KB selectable alternate ROM for custom use 80287 8 MHz support optional Supports up to two drives available in any of four formats double density 360KB double density 720KB high density 1 2MB or high density 1 44MB controller on multi function card Supports up to two drives available in multi...

Page 150: ... 8 bit slot occupied by multi graphics adapter card one 16 bit slot occupied by the hard disk controller card three available Internal programmable Real time clock calendar and 64 byte CMOS RAM for configuration battery backup Switching type fan cooled 115 230 VAC 50 60 Hz 140 W peak 5 VDC 12 VDC 5 VDC 12 VDC externally switch selectable Mass Storage Three drives maximum configurable using three h...

Page 151: ...ptional Optional Optional Keyboard Layout 3 inch half height diskette drive double sided high density 1 44MB storage capacity 3 inch half height diskette drive double sided double density 720KB storage capacity 3 inch or 5 inch half height internal hard disk drive Detachable 101 sculpted keys 58 key QWERTY main keyboard 17 key numeric cursor pad 10 cursor keys 12 function keys user definable 4 ded...

Page 152: ...10 to 90 non condensing Physical Characteristics CPU only Width 15 7 400 mm Depth 16 5 420 mm Height 6 1 155 mm Weight Apex 200 20 27 5 lbs 12 5 kg Apex 200 40 28 lbs 12 8 kg Power Requirements 115 230 VAC 20 50 60 Hz 5 amps 140W output capacity peak Video and Display Options Standard Multi graphics adapter card color or monochrome switch selectable installed in option slot ...

Page 153: ...x Options Check with the store where you purchased your Apex computer for the following options Monitors 13 inch CGA compatible color monitor with tilt swivel stand High contrast screen 16 colors etched surface to reduce glare 18 MHz video bandwidth AP1020B 12 inch monochrome TTL monitor with tilt swivel stand High persistence P 39 green phosphor screen etched surface to reduce glare 22 MHz video ...

Page 154: ...k ribbon 7753 Single bin cut sheet feeder 7341A Optional letter quality font modules Courier 7400A Prestige 7401A Script 7402A 24 pin 136 column dot matrix printer 216 cps draft 72 cps letter quality C006021 Black ribbon 7754 Single bin cut sheet feeder 8348 ActionPrinter L 1000 L 750 Replacement ribbon accessories 7753 T 1000 T 750 Replacement ribbon 8758 Universal printer stand CPD 552 B Printer...

Page 155: ...tion Description 1 STROBE 2 DATA 0 3 DATA 1 4 DATA 2 5 DATA 3 6 DATA 4 7 DATA 5 8 DATA 6 9 DATA 7 10 ACK 11 BUSY 12 PE 13 SLCT 14 AUTO FD 15 ERROR 16 INIT 17 SELECTIN 18 25 GND I I I Input O Output O O O O O O O O O I I I O O O STROBE Data Bit 0 Data Bit 1 Data Bit 2 Data Bit 3 Data Bit 4 Data Bit 5 Data Bit 6 Data Bit 7 Acknowledge Busy Paper empty Printer selected Auto paper feed Error Initializ...

Page 156: ...l ready 5 GND Signal ground 6 DSR I Data set ready 7 RTS O Request to send 8 CTS I Clear to send 9 RI I Ring indicator I Input O output Keyboard Connector Pin Assignments Pin no Signal name Direction Description 1 KBD CLK I O Keyboard clock 2 KBD DATA I O Keyboard data 3 KBD RESET O Keyboard reset 4 GND Ground 5 5V Power 6 8 NC No connection I Input O output ...

Page 157: ...o feed 14 12 P END out of paper Init printer 16 10 Acknowledge Select input 17 11 Busy Serial Port Loop back Connector Pin Assignments Output signal name Pin no Pin no Input signal name Transmit data 3 2 Receive data 1 Data carrier detect Data terminal ready 4 6 Data set ready 9 Ring indicator Request to send 7 8 Clear to send Specifications A 9 ...

Page 158: ......

Page 159: ...alts system initialization The error message remains on the screen and the computer no longer responds to your commands If this happens contact your Customer Care Center as soon as possible Report both the error message and code number If the error is not serious the computer waits for you to resume further checking You see this prompt Resume F1 key Write down the error message and code number and...

Page 160: ...tion card Give the error message and number to your Customer Care Center Timer and CMOS RAM Check After the computer successfully completes the system device check it checks the timer and CMOS RAM If the information contained in the RAM does not match the actual system installation it displays this message 161 System options not set Run SETUP in DIAGNOSTICS If the system clock has not been set you...

Page 161: ...aulty RAM chips in your system you see this message nnnn0 201 Memory error Give the error message and number to your Customer Care Center Keyboard Controller and Keyboard Check Next the computer checks the keyboard controller and keyboard for problems such as failure of one of the keys to release If there are any errors in the connection between the keyboard and the computer you see this error mes...

Page 162: ...ptional RAM Check If any additional memory expansion RAM is installed the computer then checks that RAM for any malfunction Diskette Drive Seek Check The computer checks its diskette drives by searching the read write heads for any malfunction If any seek errors are found you see this message 601 Diskette error If this message appears run the System diagnostics described in Appendix C and select t...

Page 163: ...controller card you see this error number and message 1782 Disk controller failure If an error is found in the hard disk drive unit the screen displays one of these error messages 178n Disk n error 179n Disk n error where n is 0 or 1 and represents the drive number of the hard disk Drive C is number 0 and drive D is number 1 Power On Diagnostics B 5 ...

Page 164: ......

Page 165: ... location of the nearest Customer Care Center You can test the following devices each of which is identified by a specific reference number 1 System 2 Memory 3 Keyboard 4 Monochrome display adapter and CRT 5 Color graphics adapter and CRT 6 Floppy disk drives and controller 7 Math coprocessor 9 Parallel port printer interface 11 Serial port RS 232C port 12 Alternate serial port 14 Dot matrix print...

Page 166: ...the devices available for testing This list includes only the devices that are installed in your system and looks something like this The following devices have been installed DEVICE LIST 1 System board 2 Memory 3 Keyboard 5 Color graphics adapter and CRT 6 Floppy disk drives and controller 9 Parallel port printer interface 11 Serial port RS 232C port 14 Dot matrix printer 17 Hard disk drives and ...

Page 167: ...ly In response to this prompt Is the DEVICE LIST correct Y N press N followed by Enter You then see a new menu Modify DEVICE LIST 1 Add devices 2 Delete devices 0 Exit Enter selection number To add a device to the list press 1 and then Enter The program displays a list of other devices that are not currently included in the DEVICE LIST You see a menu similar to this Additional DEVICE LIST 4 Monoch...

Page 168: ... press 2 and Enter The screen displays the current DEVICE LIST and the prompt Enter the number of the item to delete Type the number of the item you wish to delete and press Enter That item then disappears from the DEVICE LIST on the screen You can delete as many devices as necessary When the DEVICE LIST is correct press 0 and then Enter The program returns to the Modify DEVICE LIST menu When you ...

Page 169: ... is sufficient Running a test multiple times is for reliability testing of specialized functions only To perform the test once press 1 and Enter The program then may display a submenu of more detailed tests for the device you are checking To perform the test multiple times press 2 and Enter You see this prompt Terminate checking if an error detected Y N Press Y and Enter to terminate checking if t...

Page 170: ...led correctly Then press Y and Enter If the printer is not ready the following message and prompt appear Printer is not installed correctly Install correctly and enter Y or Enter N to cancel printing Correct the problem and press Y and Enter to continue printing or press N and Enter to cancel printing After printing the error message the program displays this prompt Printout is finished Press ENTE...

Page 171: ...s option to check the operation of each major component on the system board including The 80286 CPU chip The system ROM The rea1 time clock CMOS RAM and battery The main integrated circuits The checks made on the 80286 CPU chip are extremely comprehensive They ensure that the CPU instruction set is functioning correctly If an error is reported write down the error code and message or print them ou...

Page 172: ...n the error code and message or print them out and contact your Customer Care Center Attempting to correct memory errors yourself may violate your warranty agreement Keyboard Check Use this option to check the operation of the keyboard The program first checks the keyboard controller during this check you see the green indicator lights on the keyboard flash If no errors are detected you can then c...

Page 173: ...ponding character is displayed on the screen If the character displayed on the screen does not match the key you pressed there is a problem with your keyboard Test each key The status of the Num Lock Caps Lock and Scroll Lock indicators is shown on the upper right side of the keyboard layout These messages appear on the screen KEYBOARD CHECK Press Y followed by ENTER to exit Press N followed by EN...

Page 174: ...se this option to check the operation of a monochrome display adapter and monitor This test includes several checks that allow you to identify particular problems related to the monochrome display To run this check the color mono switches on the front and back panels must be set correctly for a monochrome monitor You can select the individual checks from this menu MONOCHROME ADAPTER AND CRT CHECK ...

Page 175: ...bute Check To check the display attributes of the adapter card press 2 and then Enter A series of messages are displayed showing examples of all the possible display attributes normal intensity high intensity blinking reversed characters and underlining Check the information displayed on your screen and then respond to the prompt Is the display correct Y N Press Y and then Enter if the display is ...

Page 176: ...rompt Is the display correct Y N If the characters displayed match the illustration press Y and Enter If they do not match the illustration press N and then Enter to display the error message Video Check To check the video output of your monochrome adapter press 4 followed by Enter This check displays two different screens black and intensified white First you see the black screen press any key to...

Page 177: ...are performed automatically in sequential order Although you do not start each test you must still supply the appropriate responses to progress from one test to the next Color Graphics Adapter and CRT Check Use this option to check the operation of a color graphics display adapter and monitor This test includes several checks that allow you to identify particular problems related to the color disp...

Page 178: ...r and only the first test Color graphics adapter check is performed If an error occurs during any of these tests record the error code and message or print them out Then contact your Customer Care Center When you finish running the color adapter check press 0 and Enter to return to the DEVICE LIST Color Graphics Adapter Check To check the color graphics adapter press 1 and then Enter The computer ...

Page 179: ...Press Y and then Enter if the display is correct If the colors are not correct adjust the controls on your display monitor If they are still incorrect press N and Enter Contact your Customer Care Center if you have any monitor problems Character Set Check To check your 80 column character set press 3 and Enter The characters that are included in the internal character generator are displayed Check...

Page 180: ...To check your 40 column character set press 4 and then Enter The character fonts that are included in the internal character generator are displayed Check the characters displayed on your screen against this illustration After checking the characters respond to the prompt Is the display correct Y N If the characters displayed match the illustration press Y and Enter If they do not match the illust...

Page 181: ...hese colors are called Color Set 1 If these are also correct press Y and then Enter to end the test If any colors are displayed incorrectly check the adjustment of your monitor and make sure that both ends of the cable are plugged in firmly If a problem still exists press N and Enter to display the error message 640x200 Graphics Mode Check To check your 640x200 graphics mode press 6 and Enter The ...

Page 182: ... your monitor press 7 and Enter The video RAM on the color graphics adapter is divided into eight independent display pages This test checks the eight pages by first filling all eight with a number corresponding to the page and then displaying each page in turn You see this pattern for screen 0 When you have examined this screen press any key to display the next page The eight display pages number...

Page 183: ...rn to the menu If you do not have a light pen attached press N and Enter To begin the test press Y and Enter You see this prompt PLACE LIGHT PEN ON CENTER OF WHITE BLOCK Touch the center of the white block on the screen with the light pen When the light pen is correctly positioned the block moves to another part of the screen for a second test After three successful tests the check ends An error o...

Page 184: ...lay correct Y N If all the colors are correct press Y and Enter to end the test If any color is displayed incorrectly check the adjustment of your monitor and make sure that both ends of the cable are plugged in firmly If a problem still exists press N and Enter to display the error message Sync Check This test is provided for service purposes only If you accidentally select this option press any ...

Page 185: ...e in a 1 44MB drive you can use a 1 44MB or a 720KB diskette but a 1 44MB diskette is best to test the full capacity of the drive In a 360KB drive you can use only a 360KB diskette and in a 720KB drive you can use only a 720KB disk Note The Format diskette option on the OPERATION MENU cannot format a 1 2MB disk Therefore to test a 1 2MB drive use the MS DOS FORMAT command to format a high density ...

Page 186: ...eks sequentially from the innermost track to the outermost track The innermost track is track 39 for 36OKB diskettes and track 79 for 720KB 1 2MB and 1 44MB diskettes Select option 1 from the menu to start this test The program displays the number of each track it finds For example with a 360KB diskette the first message you see is Current track is 39 The program counts the track numbers from 79 o...

Page 187: ...Use only a formatted blank diskette for this test Any data present may be erased If using drive A remove your Diagnostics Disk Enter Y to start this check Enter N to return to the menu Make sure the blank diskette you prepared is in drive A then press Y and Enter The program displays the current track number as each cylinder is tested For example with a 1 2MB diskette the first message you see is ...

Page 188: ...Press ENTER to return to the menu Disk Change Check This check tests the ability of a drive to detect that a diskette has been inserted or removed Disk changes cannot be detected by a 360KB diskette drive Select option 5 from the menu to start this test First the program checks the selected drive type if the drive is a 360KB drive you see these messages Drive d is a 360KB drive DISK CHANGE is not ...

Page 189: ... have one installed in your computer To check the math coprocessor select option 7 from the DEVICE LIST Before running any tests the computer checks the settings in CMOS RAM to ensure that a coprocessor is installed If the coprocessor is missing or if you have not changed the setting in CMOS RAM with the Setup option an error occurs and the test ends If the coprocessor is installed the program the...

Page 190: ...omputer checks the port by writing and reading dam and control information and reports errors for any pins that are faulty Note that if you connect a printer cable instead of a loop back connector you get errors Parallel Port on Video Adapter Check Use the Parallel port on video adapter check to test the functions of the primary port This tests either the built in port if it is set up to act as th...

Page 191: ...turn to the menu Insert the loop back connector Then press Y and Enter to start the check First the computer checks the serial port control lines to see that they are able to change from high to low and vice versa No messages are displayed during this part of the test unless an error occurs The second test is an echo back check during which the port sends data to itself in a fixed data format at a...

Page 192: ... Check Use this option to test the functions of an additional serial communications RS 232C port To perform the test you must insert a special loop back connector into the alternate serial port so that the computer can check the individual pins of the port This test is identical to the check for the primary serial port For more details see the description of the Serial port RS 232C check above Dot...

Page 193: ...and bit image data to the printer until you press any key The pattern looks like this The text data includes all the characters commonly used by programs that require foreign languages or graphic characters If your printer prints different characters than you see in the illustration some printed characters may not be what you expect with certain software The bit image data is sent to the printer u...

Page 194: ... Exit Enter selection number If you specify to run the hard disk drive check multiple times this menu does not appear and only the first three tests are performed When you select a check from this menu the program determines the number of hard disk drives installed in your computer If you have more than one drive each time you select a test you see this prompt Check which drive C D Press C or D an...

Page 195: ...ver used for storage by MS DOS Therefore data created by MS DOS is not destroyed Select option 2 from the menu to start this test You see these messages The data on the highest physical cylinder may be destroyed by this check Enter Y to start this check Enter N to return to the menu Press Y and then Enter to continue with the test You do not see a cylinder count during the test If no errors occur ...

Page 196: ...or Detection and Correction Check This test checks the ability of the hard disk drive to detect a read write error and to correct the data accordingly Select option 3 from the menu to start this test You see these messages The data on the highest physical cylinder may be destroyed by this check Enter Y to start this check Enter N to return to the menu Press Y and then Enter to continue with the te...

Page 197: ...EAD ERROR TRACKS 0 GOOD TRACKS 2 4 6 0 Press ENTER to return to the menu Press Enter when you have viewed the table If the results show BAD TRACKS on your disk it is all right because those tracks will not be used If however the results show any READ ERROR TRACKS run the Destructive surface analysis described in Appendix D Run All Above Checks To run all the tests on the menu in sequence press 5 a...

Page 198: ...ard 101 102 103 104 105 105 106 107 108 108 109 110 111 112 113 114 115 80286 CPU ERROR 27256 ROM CHECKSUM ERROR 8254 TIMER COUNTER REGISTER ERROR 8254 TIMER COUNTER ERROR 8237 DMA CONTROLLER REGISTER ERROR 8237 DMA REFRESH ERROR 612 DMA PAGE REGISTER ERROR 8042 TIMEOUT ERROR 8042 SELF DIAGNOSTIC ERROR 8042 WRITE COMMAND ERROR 8259 INTERRUPT CONTROLLER ERROR 146818 CMOS SHUTDOWN BYTE ERROR 146818 ...

Page 199: ...ROR 509 LIGHT PEN ERROR 510 COLOR VIDEO ERROR Floppy disk drives and controller 601 FLOPPY DISK CONTROLLER ERROR 602 SEQUENTIAL SEEK ERROR 603 RANDOM SEEK ERROR 604 WRITE ERROR 605 READ ERROR 606 DISK CHANGE CHECK REMOVE ERROR 607 DISK CHANGE CHECK INSERT ERROR Math coprocessor 80287 701 NOT INSTALLED 702 COPROCESSOR INITIALIZE ERROR 703 COPROCESSOR INVALID OPERATION MASK ERROR 704 COPROCESSOR ST ...

Page 200: ...VERIFY ERROR Alternate serial port 1201 control signal ALWAYS LOW 1201 control signal ALWAYS HIGH 1202 TIMEOUT ERROR 1203 VERIFY ERROR Dot matrix printer 1401 status Hard disk drives and controller 1701 SEEK ERROR 1702 WRITE ERROR 1703 READ ERROR 1704 HEAD ERROR 1705 ERROR DETECTION ERROR 1706 ERROR CORRECTION ERROR Alternate parallel port 2101 ERROR PIN p ...

Page 201: ...serious problems with the disk Sometimes after a hard disk has been used for a long time the magnetic signals on the surface of the disk begin to weaken and this causes the disk to frequently produce errors You may need to reformat the disk in this case You have installed a different hard disk in your computer that has never received the low level format WARNING Physically formatting the hard disk...

Page 202: ...menu of formatting and checking options appears HARD DISK FORMAT MENU 1 Conditional format Normal 2 Unconditional format 3 Destructive surface analysis 4 Non destructive surface analysis 0 Exit Enter selection number These options work as follows Conditional format Normal scans the disk for bad tracks that have been flagged formats the disk and then reflags the bad tracks so they are never used to...

Page 203: ...ructive surface analysis on a disk that has never been formatted The type of format you choose depends on whether you are reformatting a disk that has been used or formatting a new disk for the first time See the recommendations below Reformatting a Used Disk If you are reformatting a disk you have been using that appears to be damaged follow these steps 1 Use the Non destructive surface analysis ...

Page 204: ...hese messages do not appear and you see a count of the flagged tracks and good tracks do the following If the count of flagged bad tracks matches the number of bad tracks on the list that came with the disk the disk has been formatted properly and you do not need to do anything else You can cancel formatting at this point If the list of bad tracks provided with the disk contains bad tracks but the...

Page 205: ... tracks flagged as bad starting from the innermost cylinder of the disk During the scan you see the number of the cylinder the program is currently checking For example if you have a hard disk the first messages you see are Format Hard Disk Scanning for flagged bad tracks Current cylinder is nnn When the scan is complete the program displays information about the condition of the disk like this Sc...

Page 206: ...ou see this message and prompt DOUBLE CHECK THAT YOU HAVE BACKUP DISKETTE COPIES OF ALL YOUR FILES Do you want to exit and check your file copies Y N When you are certain no valuable data will be destroyed press N and Enter If you cancel formatting at either stage you see these messages Format cancelled Press ENTER to return to the menu If you continue with formatting you see Now formatting When f...

Page 207: ...Format below 2 Run the Destructive surface analysis Option 3 to flag any remaining bad tracks See Destructive Surface Analysis which appears later in this appendix 3 Run the Conditional format again No errors should occur if one does contact the dealer who sold you the disk Unconditional Format Use this option to format your hard disk when you want to enter the list of bad tracks before formatting...

Page 208: ...ree Only do this if the documentation with your hard disk recommends a different value You see this prompt Do you want default interleave of 3 Y N To accept the default press Y and Enter To change the value press N and Enter You see this prompt Enter interleave factor 1 16 Type the recommended value and press Enter The next screen allows you to edit the table of bad tracks Bad Track Table Cylinder...

Page 209: ...You see this message Table unchanged If you enter an invalid cylinder or head number a reminder of the range of values appears and the program asks you to enter the value again When you complete a valid entry it appears in the table and you can select another command If you make a mistake move the cursor block to the incorrect track and press C to alter the track data Or you can press D to remove ...

Page 210: ...track of the hard disk except for tracks that are already flagged as bad tracks To start the test press 3 and then Enter You see these messages Analyze Hard Disk Read Save Write Read Restore Read check for all tracks Current cylinder is nnn As each track is checked the cylinder number nnn counts down to zero When the analysis is complete the program displays a complete report on the status of the ...

Page 211: ...lagged and then these messages Flagging bad tracks Cylinder is 237 head is 2 Press ENTER to return to the menu Press Enter to return to the HARD DISK FORMAT MENU Non destructive Surface Analysis The Non destructive surface analysis does not destroy any data and can safely be used to check the condition of your hard disk drive However this test does not flag any bad tracks it detects To start the t...

Page 212: ...fy errors Good tracks If no errors occur you see this message No read verify error was detected If errors are found the program displays a table of the tracks that gave errors similar to the one displayed by the destructive analysis After the status reports you see this message Press ENTER to return to the menu Check the information displayed then press Enter ...

Page 213: ...OS partition on the Apex 200 40 Use SELECT to format the partition for MS DOS and install MS DOS on the disk Use COPY to copy the remaining MS DOS files to the hard disk Create an AUTOEXEC BAT file Before you can use FDISK and SELECT your hard disk must have received a low level format This type of formatting is usually done by the manufacturer and you should not need to do this yourself If you ar...

Page 214: ...itioning process divides the single physical disk into one or more logical drives You can access each logical drive as though it were a separate physical device The first logical drive is drive C the second is drive D and so on Note If you install a second hard disk MS DOS refers to that disk automatically as drive D In this case the second logical drive on your first disk is referred to as drive ...

Page 215: ...pex 200 20 the primary partition created is 20MB On the Apex 200 40 the primary partition created is 32MB 1 2 3 4 5 6 Insert the working copy of your MS DOS Startup diskette in drive A Turn on or reset the computer After MS DOS is loaded press Enter twice to accept the time and date prompts At the A prompt type FDISK and press Enter The screen displays the FDISK options menu Press 1 to select the ...

Page 216: ...date and then the time The system now recognizes the primary MS DOS partition and you can access it as drive C You still need to install MS DOS on this drive with the SELECT command before you can use it For instructions see Formatting the Primary Partition below Creating the Extended Partition If you have the Apex 200 40 you still have 8MB of disk space left over after creating the primary MS DOS...

Page 217: ...created 5 Press ESC to return to the FDISK Options menu FDISK automatically displays the Create Logical DOS Drive s option and a message similar to this No logical drives defined Total partition size is 252 cylinders Maximum space for logical drive is 252 cylinders Enter logical drive size 252 6 Press Enter to accept the logical drive size FDISK creates a logical drive for the extended partition a...

Page 218: ...on Use the MS DOS SELECT command to format the primary partition drive C SELECT automatically does the following Formats the partition Labels the partition Copies the MS DOS system files to the hard disk After you have done this MS DOS boots automatically from this partition on the hard disk every time you turn on or reset your computer as long as there is no diskette in drive A Follow these steps...

Page 219: ... ON NON REMOVABLE DISK DRIVE C WILL BE LOST Proceed with Format Y N 4 Press Y and Enter to begin formatting the partition The screen continuously displays the changing head and cylinder numbers Besides formatting the hard disk partition SELECT copies the operating system files to the hard disk When the procedure is complete the screen displays the following Format Complete System Transferred Volum...

Page 220: ...ry it created on drive C named DOS This enables you to start MS DOS from the hard disk However you should copy all the MS DOS files to your hard disk as described below So Copying the Remaining Files to the Hard Disk Formatting the Extended Partition Follow this procedure to format the extended partition 1 Insert the working copy of your MS DOS Startup diskette in drive A if it is not already ther...

Page 221: ...k space available on drive D The A prompt reappears 6 If you have created additional logical drives on your hard disk repeat steps 1 through 5 above for each additional logical drive Substitute the appropriate drive letter in the FORMAT command For example to format drive E type the following and press Enter FORMAT E V Copying the Remaining Files to the Hard Disk Follow the instructions below to c...

Page 222: ... to more time of these commands in other subdirectories For information on creating subdirectories ice Chapter 4 of net year MS DOS Reference Manual The file COMMAND COM which is included on the Startup and Operating 1 diskettes must remain in the root directory of drive C Creating the AUTOEXEC BAT File The following procedure creates an AUTOEXEC BAT file in the root directory of the hard disk Onc...

Page 223: ...ollowing and press Enter COPY CON AUTOEXEC BAT 3 Type the following pressing Enter after each line ECHO OFF CLS PROMPT P G PATH C DOS 4 Hold down the Ctrl key and press Z Then press Enter Now you can load MS DOS from drive C on your hard disk Be sure there is no diskette in drive A when you turn on or reset your computer Otherwise the computer tries to load MS DOS from the diskette in drive A If d...

Page 224: ......

Page 225: ...ify a hard disk drive Refer to this table and the documentation supplied with your hard disk to find the correct number for the type of drive you are installing You use this drive type number when you run the Setup program after installing a hard disk drive Types of Hard Disk Drives F 1 ...

Page 226: ......

Page 227: ...coding system for representing characters such as numbers letters and graphic symbols An ASCII character occupies one byte of storage Files transmitted in ASCII code can be used by many different computers printers and programs Asynchronous A method of data transmission in which one machine sends data one character at a time to another without either machine preparing for the transmission AUTOEXEC...

Page 228: ... storage The value of a bit represents the presence 1 or absence 0 of an electric charge Boot To load the operating system or a program into the computer s memory Byte A sequence or group of eight bits that represents one character CGA Color Graphics Adapter A type of circuit board that is installed in one of the computer s I O slots that can generate up to 25 lines of text with 80 characters on e...

Page 229: ...The particular setup of a group of components For example a typical system configuration consists of a computer with one diskette drive and one hard disk drive and a monitor connected to a printer Control code A command generated when you hold down Ctrl and press another key on the keyboard that instructs your computer to perform a specific function Coprocessor An optional device that enables the ...

Page 230: ...store data files as opposed to program files Data length The number of bits per character in serial transmissions Default Values or settings that take effect when the computer is turned on or reset A default value stays in effect unless you override it temporarily by changing a setting or you reset the default value itself Default directory The directory where MS DOS executes your next command unl...

Page 231: ...nitor or a printer Diagnostics The tests and procedures the computer performs to check its internal circuitry and set up its configuration DIP switch A small switch on a computer option card or printer that controls a particular function DIP stands for Dual In line Package Directory A list of files stored in a particular area on a disk part of a structure for organizing files into groups A directo...

Page 232: ...s text and graphics Also known as video card DOS The Disk Operating System that controls the computer s input and output functions See Oprating system Double density A type of diskette format that allows you to store twice as much data as the standard density format A 5 inch double density diskette can store 360KB of data A 3 inch double density diskette can store 720KB of data Drive designator Th...

Page 233: ...CHE in your MS DOS Reference Manual Extended partition An additional MS DOS partition you can create one primary MS DOS partition and one extended partition Extension A suffix of up to three characters that can be added to a file name to better identify it External command An MS DOS command stored in a program file with the extension COM or EXE MS DOS must be able to find the program file to execu...

Page 234: ...ta permanently Unlike a diskette it is fixed in place It can process data more rapidly and store many more files than a diskette Hardware Any physical component of a computer system such as a monitor printer keyboard or CPU Hexadecimal A base 16 numbering system frequently used by programmers Any decimal number between 0 and 255 can be represented by a two digit hexadecimal number High density A t...

Page 235: ...nds internal commands can be executed from any drive or directory Jumper A small device that fits over two small pins on a circuit board to activate a particular function Keyboard A device resembling a typewriter keyboard to enter letters and numbers to the computer Kilobyte KB A unit used to measure storage space in a computer s memory or on a disk One kilobyte equals 1024 bytes Logical disk driv...

Page 236: ...equency of a computer s internal timing clock A megahertz is one million cycles per second The Apex operates at 8 MHz or 12 MHz Memory The area where your computer stores data Memory contents can be permanent and inalterable ROM or temporary RAM MGA Multi graphics Adapter The type of display adapter that can display monochrome or color text and graphics on the screen Microprocessor A small version...

Page 237: ...rating System The operating system that comes with your computer See Operating system Numeric keypad The number keys grouped to the right of the keyboard Operating speed The speed at which the central processing unit can execute commands Also called execution speed The Apex can run at 8 MHz or 12 MHz Operating system A collection of programs such as MS DOS that manages a computer s operations The ...

Page 238: ...errors in transmitting or receiving data Partition The area defined on a hard disk for use by an operating system to divide a hard disk into separate sections or logical drives Pathname The list of directories and subdirectories you need to specify to locate a file For example the pathname for the file SALES which is located in the subdirectory BUSINESS of the root directory is BUSINESS SALES Peri...

Page 239: ...of the computer s memory used to run programs and store data while you work All data stored in RAM is erased when you turn off the computer so you must store any data you want to keep on a diskette or hard disk Read To move data from one area to another For example when you open a text file stored on disk the computer reads the data from the disk and displays it on the screen Read write head The p...

Page 240: ...ly Memory A portion of memory that can only be read and cannot be used for temporary storage ROM retains its contents even when you turn off the power Root directory The top level directory in MS DOS designated by a backslash All other directories are subdirectories of the root directory or of other subdirectories RS 232C A widely used standard type of serial interface You can easily connect an RS...

Page 241: ...directory A directory or group of files that branches down from another subdirectory or from the root directory Switch An option added to an MS DOS command that modifies the way the command works Switches are usually preceded by a forward slash For example if you add the S switch to a FORMAT command MS DOS installs the operating system on a diskette as it formats it See Parameters System diagnosti...

Page 242: ...esolution color display adapter that can display monochrome text and graphics at up to 720 x 400 resolution 16 color graphics at up to 640 x 480 resolution or 256 color graphics at 320 x 200 resolution Video card The display adapter card that is installed in one of the computer s option slots The video card provides the interface to which you connect the monitor and it controls the way the monitor...

Page 243: ...m being changed by placing a write protect tab over the notch on the side of a 5 inch diskette or by setting the write protect switch on a 3 inch diskette When a diskette is write protected you cannot erase change or record over its contents Glossary 17 ...

Page 244: ......

Page 245: ...and CRT check C 13 20 Command format 4 7 8 Command prompt 1 18 Command switches 4 8 COMMAND COM 6 9 Conditional format D S 7 Configuring the system 2 1 11 Consumer Information Center number Intro 3 Control codes CTRL ALT DEL 3 5 CTRL BREAK 3 4 CTRL c 3 4 Controllers A 1 COPY 4 10 13 Copying diskettes 4 29 33 files 4 10 13 system diskettes 1 18 2 1 Cover removing 5 1 3 replacing 5 16 17 CPU speed 3...

Page 246: ...te slot 3 8 removing 3 12 14 storing 3 11 system 1 18 21 4 56 types 3 8 0 write protecting 3 14 15 Display adapters see Video cards Display screen see Monitors Dot matrix printer check C 28 29 Double density diskettes 3 8 10 Double sided diskettes 3 8 10 Drive assignments 4 3 Drive designators 4 3 Drives see Diskette drives see Hard disks E EGA card see Video cards Enhanced graphics adapter see Vi...

Page 247: ...anging setting 5 8 main circuit board 5 10 12 memory card 5 8 10 multi function card 5 12 15 settings 5 7 15 K Keyboard adjusting angle 1 14 cable 1 12 13 cable socket 1 12 check C 8 10 connecting 1 12 13 connector pin assignments A 8 controller and keyboard check B 3 layout A 3 locking 6 3 problems 6 3 special keys 3 2 3 L Loading MS DOS 1 17 4 2 3 Loop back connectors A 9 M Main memory A 1 Mass ...

Page 248: ...lots 5 7 A 2 Options installing 5 1 18 P Parallel cable 1 8 9 Parallel interface 1 8 9 A 2 port 1 8 port check C 25 26 port loop back connector pin assignments A 9 port pin assignments A 7 port on video card check C 26 Partitioning E 2 3 PATH 4 22 Pathnames 4 18 21 absolute 4 19 20 including drive letters in 4 20 21 including filenames in 4 20 relative 4 19 20 Physical characteristics A 4 Physical...

Page 249: ...eaker A 2 Special keys 3 2 3 Specifications A 1 9 Speed changing 3 1 Subdirectories see Directories SUBST 4 22 Switches command 4 8 SYS 6 10 System board check C 7 device check B 1 2 diskettes 1 18 21 4 5 6 T TIME 2 9 Time setting 2 8 10 Timer and CMOS RAM Check B 2 Tracks 3 7 TREE 4 24 25 Troubleshooting 6 1 14 Turning off computer 3 6 Turning on computer 1 15 16 U Unconditional format D 7 10 Unp...

Page 250: ...Write protecting diskettes 3 14 15 X XCOPY 4 29 XTREE 4 37 41 ...

Page 251: ......

Reviews: