background image

WATCHING TV

INTRODUCTION

PREPARATION

INITIAL SETTING

OPTIONAL SETTING

INFORMATION

TROUBLESHOOTING

Owner’s Manual

 LC320EM9 

B

 LC320EM9 

3

 LC320EM9

TO RECEIVE DIGITAL/ANALOG SIGNAL, 

YOU MUST CONNECT ANTENNA.

© 2008 Funai Electric Co., Ltd.

HIGH

-DEFINITION TELEVISION

NEED HELP?

PLEASE C

ALL TOLL FREE!

1-800-256-2487

OR VISIT 

OUR WEB 

SITE AT

www.EmersonA

udioVideo

.com

TM

EMERSON AND THE G-CLEF LOGO ARE REGISTERED TRADEMARKS

OF EMERSON RADIO CORP., PARSIPPANY, NEW JERSEY, U.S.A.

Summary of Contents for LC320EM9 3

Page 1: ...EM9 3 LC320EM9 TO RECEIVE DIGITAL ANALOG SIGNAL YOU MUST CONNECT ANTENNA 2008 Funai Electric Co Ltd HIGH DEFINITION TELEVISION NEED HELP PLEASE CALL TOLL FREE 1 800 256 2487 OR VISIT OUR WEB SITE AT www EmersonAudioVideo com TM EMERSON AND THE G CLEF LOGO ARE REGISTERED TRADEMARKS OF EMERSON RADIO CORP PARSIPPANY NEW JERSEY U S A ...

Page 2: ...s and receiver 3 Connect the apparatus into an outlet on a circuit different from that to which the receiver is connected 4 Consult the dealer or an experienced radio TV technician for help This Class B digital apparatus complies with Canadian ICES 003 Cet appareil numérique de la classe B est conforme à la norme NMB 003 du Canada The model and serial numbers of this unit may be found on the cabin...

Page 3: ...etic fields or in a place subject to dust or strong vibration Avoid a place with drastic temperature changes Install the unit in a horizontal and stable position Do not place anything directly on top or bottom of the unit Depending on your external devices noise or disturbance of the picture and or sound may be generated if the unit is placed too close to them In this case please ensure enough spa...

Page 4: ...r energy efficiency 5 Note When attaching the stand ensure that all screws are tightly fastened If the stand is not properly attached it could cause the unit to fall resulting in injuries as well as damage to the unit Make sure to use a table which can support the weight of this unit and is larger than this unit Make sure the table is in a stable location 1 Spread a thick and soft cloth over a tab...

Page 5: ...teries 6 ControlPanel 7 RearPanel 7 PREPARATION BasicConnection 8 ExternalDeviceConnection 9 INITIAL SETTING InitialSetup 12 MainMenu 13 AutoChannelScan 13 LanguageSelection 14 WATCHING TV ChannelSelection 15 VolumeAdjustment 15 SleepTimer 15 StillMode 16 SwitchingEachInputMode 16 SwitchingAudioMode 16 ScreenInformation 17 TVScreenDisplayMode 18 OPTIONAL SETTING ChannelList 19 ManualRegister 19 An...

Page 6: ...ILL p16 Press to pause screen image 14 SCREEN MODE p18 Press to select aspect ratio available for the TV screen 15 INFO p17 Digital Mode DTV Press to display the channel information signal type and TV setting Analog Mode TV Press to display the channel number signal type and TV setting External Input Mode Press to display the external input modes signal type and TV setting 16 CH K L p15 Press to s...

Page 7: ...MI input jack p9 HDMI connection for HDMI devices 2 antenna input jack p8 RF coaxial cable connection for your antenna or cable satellite box 3 AC power cord Connect to a standard AC outlet to supply power to this unit 4 coaxial digital audio output jack p11 Coaxial digital audio connection for a decoder or an audio receiver 5 S video input jack p10 S video connection for external devices 6 video ...

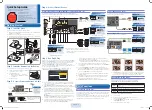
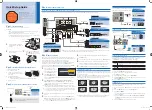
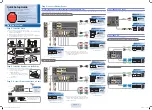
Page 8: ...tenna to receive analog TV it should also work for DTV reception Outdoor or attic antennas will be more effective than settop versions To switch your reception source easily between antenna and cable install an antenna selector If you connect to the cable system directly contact the CATV installer Connection to Cable Box or Satellite Box Use an RF coaxial cable to connect the antenna input jack of...

Page 9: ...tput of the device connected or check the HDMI audio setting There may be no audio output if you select Bitstream etc This unit only accepts signals compliant with EIA861 HDMI DVI Connection Use an HDMI DVI conversion cable to connect the unit to external video devices equipped with DVI output jack e g AUDIO R L HDMI IN STEREO PCM DVI OUT AUDIO OUT R L Note This unit accepts 480i 480p 720p 1080i v...

Page 10: ... the VGA cable may reduce it S video Connection S video connection offers good picture quality for video devices connected to the unit Use an S video cable to connect the unit to external video devices equipped with S video output jack If you connect to the unit s VIDEO1 S video or VIDEO2 S video input jack connect an RCA audio cable to the audio L R jacks of VIDEO1 or VIDEO2 accordingly e g CHAPT...

Page 11: ...UT COAXIAL HDMI IN VIDEO 2 S VIDEO VIDEO AUDIO R L AUDIO OUT R L VIDEO OUT STEREO STAND BY Note If you connect to the S video input jack and the video input jack at the same time the S video connection will have priority Audio Output Connection À Digital for digital broadcasting only If you connect this unit to an external digital audio device you can enjoy multi channel audio like 5 1ch digital b...

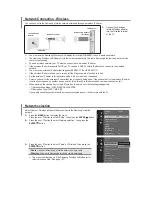
Page 12: ...cally Initial Setup Initial Setup Now the system is scanning for channels please wait Exit SETUP 5 Analog channels 1ch Digital channels 0ch When the scanning and memorizing of channels are completed the lowest memorized channel will be displayed 5 Note If you connect the cable system directly contact the CATV installer If you press POWER or SETUP during auto channel scan this setting will be cance...

Page 13: ...e 30 LANGUAGE You can change the language English Spanish French displayed on the main menu Refer to Language Selection on page 14 5 Auto Channel Scan If you switch wires e g between antenna and CATV or if you move the unit to a different area after the initial setting or if you restore the DTV channel you deleted you will need to perform auto channel scan Beforeyoubegin Make sure if the unit is c...

Page 14: ...ENTER Use Cursor K L to select English then press ENTER Press SETUP to exit the main menu With regard only to the digital channel even after the scanning is completed if you unplug the AC power cord before turning off the unit by pressing POWER the channel setting may be lost Language Selection You can choose English Spanish or French as your on screen language 1 Press SETUP to display the main me...

Page 15: ... to adjust the volume The mute function which turns the sound off and on is also described Use VOL X Y to adjust the audio volume Volume 20 The volume bar will be displayed at the bottom of the TV screen when adjusting the volume The volume bar will automatically disappear in a few seconds Press MUTE to turn off and on the sound Mute Mute is displayed on the TV screen for a few seconds Press MUTE ...

Page 16: ... use the HDMI1 input jack on the unit select HDMI1 To use the HDMI2 input jack on the unit select HDMI2 5 5 Switching Audio Mode This section describes how to switch the audio in the analog mode and how to switch the audio language in the digital mode TV 1 Press AUDIO to display the currently selected audio mode While receiving an MTS broadcast press repeatedly to cycle through the available audio...

Page 17: ...on 3 program guide The program guide added to broadcasting information is displayed Maximum display of 4 lines 4 channel number 5 audio language Refer to Switching Audio Mode on page 16 6 effective scanning lines and scan mode 7 program format 8 program aspect ratio 9 program rating 10CC not available if CC is set to Off 6 1 English 1 2 TV PG DLSV 1080i 1080i 16 9 16 9 HD HD CC CC A Day of Memorie...

Page 18: ...4 3 picture at a 16 9 size the picture is stretched horizontally and vertically to fill the screen This crops out the top and bottom of the picture Wide Display the picture with its center at the original size and the edges stretched horizontally 5 For 16 9 video signal Full Display a 16 9 picture at its original size Zoom Display a 16 9 picture at its maximum size without changing its horizontal ...

Page 19: ... highlighted When you remove a major channel its minor channels are removed as well Note The channel with the DTV indicated on the display is ATSC Otherwise the channel is NTSC 5 Press SETUP to exit 5 Manual Register The manual register function lets you add the channels that were not added by the auto channel scan due to the reception condition at the initial setting 1 Press SETUP to display the ...

Page 20: ...en press ENTER Channel Channel Autoscan Channel List Manual Register Antenna 4 Use the Number buttons or CH K L to select the channel for which you want to check the digital signal strength Antenna Antenna Back Ch Change 11 1 CH Now 70 80 Peak If the channel is set to analog channel or external input you cannot confirm the antenna condition Antenna Antenna Back Ch Change CH Indicator is available ...

Page 21: ...ove Enter ENTER to decrease brightness to increase brightness Contrast Adjust Move Enter ENTER Contrast 30 to decrease contrast to increase contrast Color Adjust Move Enter ENTER Color 30 to decrease color to brighten color Tint Adjust Move Enter ENTER Tint 0 to add red to add green Sharpness Adjust Move Enter ENTER 0 Sharpness to make soft to make clear Reset Settings Use Cursor K L to select Res...

Page 22: ...Cursor s B to adjust Cursor s Cursor B Treble ENTER Adjust Treble Move Enter 0 to decrease higher pitched sounds to increase higher pitched sounds Bass ENTER Adjust Bass Move Enter 0 to decrease lower pitched sounds to increase lower pitched sounds 5 Reset Settings Use Cursor K L to select Reset then press ENTER to restore the sound settings to the default Reset Settings Reset Settings This functi...

Page 23: ...e TV screen immediately Pop on mode Once characters are stored in memory they are displayed all at once Roll up mode Displays the characters continuously by scrolling max 4 lines 6 Press SETUP to exit Note To show the closed caption on your TV screen broadcast signal must contain the closed caption data Not all TV programs and commercials have the closed caption or all types of the closed caption ...

Page 24: ...se Cursor K L to select DTV CC then press ENTER Closed Caption Closed Caption Off Off Conventional CC DTV CC CC Style 5 5 Use Cursor K L to select the desired DTV closed caption then press ENTER Closed Caption Closed Caption Off Conventional CC Service1 Service2 Service3 Service4 Service5 Service6 DTV CC CC Style DTV CC Off Select if you do not want DTV CC This is the default Service1 6 Select one...

Page 25: ...ursor K L to select On then press ENTER CC Style CC Style Font Style Font Size Font Color Font Opacity Back Color Back Opacity Edge Color Edge Type User Setting Off Closed Caption On 7 Use Cursor K L to select an item then press ENTER Then use Cursor K L to select the desired setting and press ENTER ABCDEFGHIJKL ABCDEFGHIJKL The setting description for each item is shown below Font Style Closed Ca...

Page 26: ...ser Setting Font Style Font Size Font Color Font Opacity Back Opacity Edge Color Edge Type Back Color Back Opacity Background opacity of the displayed caption can be switched as below CC Style CC Style Flash Translucent Transparent Solid Closed Caption User Setting Font Style Font Color Font Opacity Back Color Edge Color Edge Type Font Size Back Opacity Edge Color Edge color of the displayed capti...

Page 27: ...sword D page 28 D page 28 D page 29 Note When you select a rating and set it to Block the higher ratings will be blocked automatically The lower ratings will be available for viewing When you set the highest rating to View all ratings turn to View automatically To block any inappropriate programming set your limits in MPAA Rating TV Rating and Downloadable Rating The V chip setting will be retaine...

Page 28: ...al guidance suggested G General audience NR No rating 7 Press SETUP to exit B TV Rating B TV Rating 5 Use Cursor K L to select TV Rating then press ENTER MPAA Rating TV Rating Canadian English Rating Canadian French Rating Downloadable Rating Clear Downloadable Rating New Password V chip V chip 6 Use Cursor K L s B to select the desired rating then press ENTER repeatedly to switch between View and...

Page 29: ...atically changes all its sub ratings to the same Block or View C New Password C New Password Although the default code 0000 is supplied with the unit you can set your own password 5 Use Cursor K L to select New Password then press ENTER MPAA Rating TV Rating Canadian English Rating Canadian French Rating Downloadable Rating Clear Downloadable Rating New Password V chip V chip 6 Press the Number bu...

Page 30: ...tail Detail Closed Caption V chip HDMI1 Audio Auto Digital Analog HDMI1 Audio Auto Select if you have connected both digital device to the HDMI1 input jack and analog device to the audio sources Digital audio input signal will have priority Digital Select if you have connected a digital device to the HDMI1 input jack for digital audio input signal Analog Select if you have connected an analog devi...

Page 31: ...roadcasting station Different color marks on TV screen Move your TV away from nearby electric appliances Turn off the power and wait 30 minutes before turning it back on View other TV channels The problem might be limited to the broadcasting station Picture OK sound poor View other TV channels The problem might be limited to the broadcasting station Check if the audio cable is plugged in correctly...

Page 32: ...ble channels are broadcast The selected channel may not be broadcasting When auto channel scan is interrupted and not completed some channels will not be received Make sure to complete Refer to Auto Channel Scan on page 13 The selected channel cannot be viewed by the V chip setting Refer to V chip on page 27 The unit requires some kind of antenna input An indoor antenna rabbit ears an external ant...

Page 33: ...ontrol is working Maintenance 5 ATSC Acronym that stands for Advanced Television Systems Committee and the name of the digital broadcasting standards Aspect Ratio The width of a TV screen relative to its height Conventional TVs are 4 3 in other words the TV screen is almost square widescreen models are 16 9 the TV screen is almost twice as wide as its height Component Video This is a video signal ...

Page 34: ... 562mm W 30 6 inches 776mm D 10 7 inches 272mm Weight 24 3 lbs 11kg 5 If you subscribe to cableTV the channels are displayed as 1 135 Cable companies often designate channels with letters or letter number combinations Please check with your local cable company The following is a chart of common cable channel designations 5A 1 2 2 3 3 4 4 5 5 6 6 7 7 8 8 9 9 10 10 11 11 12 12 13 13 A 14 B 15 C 16 D...

Page 35: ...35 EN MEMO ...

Page 36: ...CONTROL ANY COSMETIC PARTS COMPLETE ASSEMBLY PARTS DEMO OR FLOOR MODELS FUNAI CORP AND ITS REPRESENTATIVES OR AGENTS SHALL IN NO EVENT BE LIABLE FOR ANY GENERAL INDIRECT OR CONSEQUENTIAL DAMAGES ARISING OUT OF OR OCCASIONED BY THE USE OF OR THE INABILITY TO USE THIS PRODUCT THIS WARRANTY IS MADE IN LIEU OF ALL OTHER WARRANTIES EXPRESS OR IMPLIED AND OF ALL OTHER LIABILITIES ON THE PART OF FUNAI AL...

Page 37: ...C320EM9 3 LC320EM9 PARA RECIBIR LA SEÑAL DIGITAL ANALÓGICA DEBE CONECTAR LA ANTENA 2008 Funai Electric Co Ltd AYUDA LLAME AL TELEFONO GRATUTITO 1 800 256 2487 Ó VISITE NUESTRO SITIO WEB EN www EmersonAudioVideo com HIGH DEFINITION TELEVISION TM EMERSON Y EL LOGOTIPO G CLEF SON MARCAS REGISTRADAS DE EMERSON RADIO CORP PARSIPPANY NEW JERSEY EE UU ...

Page 38: ...aparato para evitar causar heridas o que el aparato se caiga 13 Desenchufe este aparato durante las tormentas eléctricas o cuando no se vaya a utilizar durante mucho tiempo 14 Solicite todas las reparaciones al personal de servicio cualificado Las reparaciones serán necesarias cuando el aparato se haya estropeado de cualquier forma como por ejemplo cuando el cable o la clavija de alimentación se h...

Page 39: ...uesta a la luz solar directa cerca de campos magnéticos o en lugares expuestos al polvo o a vibraciones fuertes Evite colocar la unidad donde se produzcan cambios extremos de temperatura Instale la unidad en una posición horizontal y estable No ponga nada directamente encima o debajo de la unidad Dependiendo de los dispositivos externos es posible que se produzcan ruidos y alteraciones en la image...

Page 40: ...Al poner el soporte compruebe que todos los tornillos están bien apretados Si el soporte no está bien puesto podría hacer que se caiga la unidad con el resultado de heridas así como daños a la unidad Asegúrese de utilizar una mesa que pueda soportar el peso de la unidad y que sea más grande que la unidad Asegúrese de que la mesa se encuentra en posición estable 1 Extienda un paño grueso y suave so...

Page 41: ...forma alguna o con fin alguno sin la autorización expresa y previa por escrito de Funai Además toda distribución comercial no autorizada de este manual o toda revisión del mismo queda estrictamente prohibida La información contenida en este documento puede ser objeto de cambios sin previo aviso Funai se reserva el derecho de cambiar el contenido de este documento sin la obligación de notificar dic...

Page 42: ...a detener momentáneamente la imagen 14 SCREEN MODE p 18 Presione para seleccionar las relaciones de aspecto disponibles para la pantalla del televisor 15 INFO p 17 Modo Digital DTV Presione para mostrar la información de canal el tipo de señal y el ajuste de TV Modo Analógico TV Presione para mostrar el número de canal el tipo de señal y el ajuste de TV Modo de Entrada Externa Presione para mostra...

Page 43: ...e entrada HDMI p 9 Conexión HDMI para dispositivos HDMI 2 toma de entrada de antena p 8 Conexión de cable coaxial RF para su antena o caja de cable satélite 3 cable de alimentación de CA Conéctelo a una toma estándar de CA para suministrar alimentación eléctrica a esta unidad 4 toma de salida de audio digital y coaxial p 11 Conexión de audio digital y coaxial para decodificador o receptor de audio...

Page 44: ...evisión analógica ésta debería funcionar también para recepción de DTV Las antenas de exterior tejado serán más eficaces que las de versiones de sobremesa Para cambiar fácilmente su fuente de recepción entre antena y cable instale un selector de antena Si se conecta directamente al sistema de cable póngase en contacto con el instalador de CATV Conexión a Caja de Cable o Caja de Satélite Utilice un...

Page 45: ... del dispositivo conectado o revisar la configuración de audio HDMI Puede que no haya señal de audio si selecciona Bitstream Secuencia de bits etc Esta unidad solamente acepta señales compatibles con la norma EIA861 Conexión HDMI DVI Si su dispositivo de vídeo tiene una toma de salida DVI utilice un cable conversor HDMI DVI para esta conexión p ej AUDIO R L HDMI IN STEREO PCM DVI OUT AUDIO OUT R L...

Page 46: ...onexión de S video La conexión S video ofrece una buena calidad de imagen para dispositivos de vídeo conectados a la unidad Utilice un cable S video para conectar la unidad a dispositivos de vídeo externos equipados con toma de salida de S video Si lo conecta a las tomas de entrada de vídeo S video1 VIDEO1 ó S video2 VIDEO2 de la unidad conecte el cable de audio RCA a las tomas de audio L R de S v...

Page 47: ...AL HDMI IN VIDEO 2 S VIDEO VIDEO AUDIO R L AUDIO OUT R L VIDEO OUT STEREO STAND BY Nota Si se conecta a la toma de entrada de S video y a la toma de entrada de vídeo al mismo tiempo tendrá prioridad la conexión S video Conexión de Salida de Audio À Digital solamente para la emisión digital Si conecta esta unidad a un dispositivo de audio digital externo podrá disfrutar de audio multicanal como el ...

Page 48: ...al Ajuste Inicial Sistema escanea canales espere Salir SETUP 5 Canales analógicos 1ca Canales digitales 0ca Cuando la exploración y la memorización de los canales han finalizado se muestra el canal memorizado más bajo de la emisión 5 Nota Si se conecta directamente al sistema de cable póngase en contacto con el instalador de CATV Si presiona POWER o SETUP durante la exploración automática de canal...

Page 49: ...entrada HDMI1 Consulte la sección Audio HDMI en la página 30 IDIOMA Puede cambiar el idioma Inglés Español Francés visualizado en el menú principal Consulte la sección Selección de Idioma en la página 14 5 Exploración Automática de Canales Si cambia los cables por ejemplo entre antena y CATV o si mueve la unidad a otro lugar después del ajuste inicial o si recupera un canal DTV eliminado tendrá qu...

Page 50: ...sione ENTER Utilice Cursor K L para seleccionar Español y luego presione ENTER Presione SETUP para eliminar el menú principal Solamente con respecto al canal digital incluso después de finalizar la exploración si desenchufa el cable de alimentación de CA antes de apagar la unidad presionando POWER el ajuste del canal puede perderse Selección de Idioma Puede elegir Inglés Español Francés como idiom...

Page 51: ...onido Utilice VOL X Y para ajustar el volumen de audio Volumen 20 La barra de volumen se mostrará en la parte inferior de la pantalla del televisor cuando ajuste el volumen La barra de volumen automáticamente dentro de unos segundos Presione MUTE para activar y desactivar el sonido Mudo Mudo silencio aparece en la pantalla del televisor durante unos segundos Presione nuevamente MUTE o utilice VOL ...

Page 52: ...t2 Para utilizar la toma de entrada HDMI1 en la unidad seleccione HDMI1 Para utilizar la toma de entrada HDMI2 en la unidad seleccione HDMI2 5 5 Para Cambiar el Modo de Audio En esta sección se describe cómo cambiar el audio en el modo analógico y cómo cambiar el idioma de audio en el modo digital TV 1 Presione AUDIO para mostrar por pantalla el modo de audio actualmente seleccionado Durante la re...

Page 53: ...de programas Se muestra la guía de programas añadida a la información de emisión Se muestra un máximo de 4 líneas 4 número de canal 5 idioma de audio Consulte la sección Para Cambiar el Modo de Audio en la página 16 6 líneas de exploración efectivas y modo de exploración 7 formato de programa 8 relación de aspecto del programa 9 clasificación del programa 10CC opción no disponible cuando el CC est...

Page 54: ...ine Visualización de una imagen 4 3 en un tamaño a escala 16 9 la imagen se extiende horizontal y verticalmente para llenar la pantalla Esto recorta las partes superior e inferior de la imagen Ancha La imagen se muestra con su centro en tamaño original y los extremos se extienden horizontalmente 5 Para señal de vídeo 16 9 Total Visualización de una imagen 16 9 en su tamaño original Zoom Visualizac...

Page 55: ...elimina un canal principal se eliminan también sus canales menores conexos Nota El canal con la indicación DTV en la pantalla es ATSC En caso contrario el canal es NTSC 5 Presione SETUP para salir 5 Registro Manual La función de registro manual permite agregar los canales que no se agregaron mediante la exploración automática de canales debido al estado de la recepción en el ajuste inicial 1 Presi...

Page 56: ... Antena y luego presione ENTER Canal Canal Autoscan Lista Canales Registro Manual Antena 4 Utilice los botones numéricos o CH K L para seleccionar el canal respecto del cual desea comprobar la intensidad de la señal Antena Antena Atrás Cambia Ca 11 1 CH Ahora Pico 70 80 Si el canal está ajustado a canal analógico o una entrada externa no puede confirmar el estado de la antena Antena Antena Atrás C...

Page 57: ...o para aumentar el brillo Contraste Ajuste Mover Entre ENTER Contraste 30 para reducir el contraste para aumentar el contraste Color Ajuste Color 30 Mover Entre ENTER para reducir el color para dar más brillo al color Matiz ENTER Ajuste Mover Entre Matiz 0 para agregar rojo para agregar verde Nitidez Ajuste Mover Entre ENTER Nitidez 0 para suavizar para aclarar Restablecer Ajustes Utilice Cursor K...

Page 58: ...r B Agudo ENTER Ajuste Agudo 0 Mover Entre para reducir los sonidos con más altura tonal para aumentar los sonidos con más altura tonal Grave ENTER Ajuste Grave 0 Mover Entre para reducir los sonidos con menos altura tonal para aumentar los sonidos con menos altura tonal 5 Restablecer Ajustes Utilice Cursor K L para seleccionar Restablecer y luego presione ENTER para cambiar el ajustes sonido al a...

Page 59: ...cidos Modo Pop on Una vez que los caracteres son almacenados en memoria se muestran todos a la vez Modo Roll up Muestra los caracteres continuadamente mediante desplazamiento de líneas máximo 4 líneas 6 Presione SETUP para salir Nota Para mostrar los subtítulos en la pantalla de su televisor la señal de emisión debe contener los datos de los subtítulos No todos los programas y anuncios de TV conti...

Page 60: ...ursor K L para seleccionar S C DTV y luego presione ENTER Subtítulo Cerrado Subtítulo Cerrado Off Off S C Convencional S C DTV Estilo S C 5 5 Utilice Cursor K L para seleccionar los subtítulos DTV deseados y luego presione ENTER Subtítulo Cerrado Subtítulo Cerrado Off S C Convencional Servicio1 Servicio2 Servicio3 Servicio4 Servicio5 Servicio6 S C DTV Estilo S C S C DTV Off Selecciónelo si no dese...

Page 61: ... L para seleccionar On y luego presione ENTER Estilo S C Estilo S C Subtítulo Cerrado On Off Estilo Fuente Tamaño Fuente Color Fuente Opaco Fuente Color Fondo Opaco Atrás Color Borde Tipo Borde Config Usuarid 7 Utilice Cursor K L para seleccionar un elemento luego presione ENTER Utilice Cursor K L para seleccionar el ajuste deseado y presione ENTER ABCDEFGHIJKL ABCDEFGHIJKL A continuación se muest...

Page 62: ...nte Opaco Fuente Color Borde Tipo Borde Tamaño Fuente Estilo S C Estilo S C Opaco Atrás Color Fondo Opaco Atrás La opacidad de fondo del subtítulo mostrado puede cambiarse como sigue Estilo S C Estilo S C Destello Translucida Transparente Rellena Subtítulo Cerrado Config Usuarid Estilo Fuente Color Fuente Opaco Fuente Color Fondo Color Borde Tipo Borde Tamaño Fuente Opaco Atrás Color Borde El colo...

Page 63: ...página 28 D página 29 Nota Cuando seleccione una clasificación y la ajuste en Bloque las clasificaciones más altas quedarán bloqueadas automáticamente Las clasificaciones más bajas estarán disponibles para su visión Cuando seleccione la clasificación más alta en Mirar todas las clases cambian automáticamente a Mirar Para bloquear cualquier programa inadecuado ajuste los límites en Clase de MPAA Cl...

Page 64: ... los padres G Todos los públicos NR Sin clasificación 7 Presione SETUP para salir B Clase de TV B Clase de TV 5 Utilice Cursor K L para seleccionar Clase de TV y luego presione ENTER Clase de MPAA Clase de TV Clasif inglés canad Clasif francés canad Clase descargada Eliminar clase descargada Nuevo Código de Acceso V chip V chip 6 Utilice Cursor K L s B para seleccionar la clasificación deseada y l...

Page 65: ...Bloque o Mirar C Nuevo Código de Acceso C Nuevo Código de Acceso Aunque el código predeterminado 0000 viene incorporado con la unidad usted puede ajustar su propia contraseña 5 Utilice Cursor K L para seleccionar Nuevo Código de Acceso y luego presione ENTER Clase de MPAA Clase de TV Clasif inglés canad Clasif francés canad Clase descargada Eliminar clase descargada Nuevo Código de Acceso V chip V...

Page 66: ...ticamente la posición Horizontal Vertical el reloj y la fase de la pantalla del ordenador Posición Horizontal Posición Vertical Utilice Cursor s B para ajustar Cursor s Cursor B Posición Horizontal ENTER Posición H 0 Ajuste Mover Entre para mover la pantalla del ordenador hacia la izquierda para mover la pantalla del ordenador hacia la derecha Posición Vertical Posición V 0 Ajuste Mover Entre ENTE...

Page 67: ...erente color en la pantalla del televisor Separe la unidad de los aparatos eléctricos cercanos Apague la unidad y espere aproximadamente 30 minutos para volver a encenderla Vea otros canales de televisión El problema podría limitarse a una emisora Imagen correcto sonido deficiente Vea otros canales de televisión El problema podría limitarse a una emisora Verifique que el cable de audio esté enchuf...

Page 68: ...eriormente no disponibles Es posible que el canal seleccionado no se esté emitiendo Cuando la exploración automática de canales se interrumpe y no se finaliza algunos canales no se recibirán Asegúrese de finalizar Consulte Exploración Automática de Canales en la página 13 El canal seleccionado no puede visualizarse debido a la configuración V chip Consulte V chip en la página 27 La unidad necesita...

Page 69: ...TSC Acrónimo de Advanced Television Systems Committee Comité de sistemas avanzados de televisión y el nombre de unas normas de emisión digital Contraseña Un número almacenado de 4 dígitos que permite el acceso a las funciones de control parental Dolby Digital El sistema desarrollado por Dolby Laboratories para comprimir el sonido digital Ofrece un sonido estéreo 2 canales o audio multicanal HDMI i...

Page 70: ... 30 pulg 776mm Profundidad 4 3 pulg 108mm Con soporte Altura 22 2 pulg 562mm Ancho 30 6 pulg 776mm Profundidad 10 7 pulg 272mm Peso 24 3 lbs 11 0kg 5 Si se suscribe a la televisión por cable los canales se muestran como 1 135 Las empresas de cable a menudo denominan los canales con letras o combinaciones de letra número Compruebe este detalle con su empresa local de cable La tabla siguiente incluy...

Page 71: ...35 ES MEMO ...

Page 72: ...IÓN O DE TALLER FUNAI CORP Y SUS REPRESENTANTES O AGENTES NO SERÁN EN NINGÚN CASO CONSIDERADOS RESPONSABLES DE DAÑOS GENERALES INDIRECTOS O CONSECUENCIALES RESULTANTES DE O PROVOCADOS POR EL USO O LA IMPOSIBILIDAD DE USO DE ESTE PRODUCTO ESTA GARANTÍA SUSTITUYE A CUALQUIER OTRA GARANTÍA EXPRESA O IMPLÍCITA Y CUALQUIER OTRA RESPONSABILIDAD CIVIL POR PARTE DE FUNAI CUALQUIER OTRA GARANTÍA QUE INCLUY...

Reviews: