background image

www.Fisher.com

D103198X012

Type i2P-100 Electro-Pneumatic Transducers

Contents

Introduction

1

. . . . . . . . . . . . . . . . . . . . . . . . . . . . . . . 

Scope of Manual

1

. . . . . . . . . . . . . . . . . . . . . . . . . . . 

Description

1

. . . . . . . . . . . . . . . . . . . . . . . . . . . . . . . . 

Specifications

3

. . . . . . . . . . . . . . . . . . . . . . . . . . . . . 

Educational Services

4

. . . . . . . . . . . . . . . . . . . . . . . 

Installation

4

. . . . . . . . . . . . . . . . . . . . . . . . . . . . . . . . 

Mounting

5

. . . . . . . . . . . . . . . . . . . . . . . . . . . . . . . . 

Pneumatic Connections

6

. . . . . . . . . . . . . . . . . . . . 

Supply Pressure Requirements

6

. . . . . . . . . . . . 

Diagnostic Connections

7

. . . . . . . . . . . . . . . . . . . 

Vent

8

. . . . . . . . . . . . . . . . . . . . . . . . . . . . . . . . . . . 

Electrical Connections

8

. . . . . . . . . . . . . . . . . . . . . 

Operating Information

8

. . . . . . . . . . . . . . . . . . . . . . . 

Calibration

8

. . . . . . . . . . . . . . . . . . . . . . . . . . . . . . . 

Equipment Required

9

. . . . . . . . . . . . . . . . . . . . . 

Calibration Procedure

9

. . . . . . . . . . . . . . . . . . . . 

Principle of Operation

10

. . . . . . . . . . . . . . . . . . . . . . 

Maintenance

10

. . . . . . . . . . . . . . . . . . . . . . . . . . . . . 

Troubleshooting

11

. . . . . . . . . . . . . . . . . . . . . . . . . 

Converter Module Replacement

11

. . . . . . . . . . . . 

Electronics Module Replacement

11

. . . . . . . . . . . 

Relay Maintenance

12

. . . . . . . . . . . . . . . . . . . . . . . 

Parts Ordering

13

. . . . . . . . . . . . . . . . . . . . . . . . . . . . 

Parts List

13

. . . . . . . . . . . . . . . . . . . . . . . . . . . . . . . . 

Introduction

Scope of Manual

This instruction manual provides installation,
operation, maintenance, and parts ordering
information for the Type i2P-100 transducer (see
figure 1). Refer to separate manuals for instructions
covering equipment used with the transducer.

No person may install, operate or maintain a Type
i2P-100 electro-pneumatic transducer without 
first

D

 being fully trained and qualified in valve,

actuator and accessory installation, operation and
maintenance, and 

D

 carefully reading and

understanding the contents of this manual. If you
have any questions about these instructions, contact
your Fisher sales office.

W8710

REPLACEABLE
FILTER WITH 
REMOVABLE
ORIFICE

INTEGRAL
PNEUMATIC
RELAY

VENT

Figure 1. Type i2P-100 Electro-Pneumatic Transducer

Description

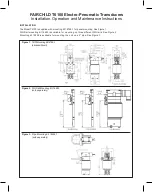
The transducer, shown in figure 3, receives a 4 to 20
milliampere dc input signal and transmits a
proportional user field-configurable pneumatic output
pressure to a final control element. The pneumatic
output ranges are typically 0.2 to 1.0 bar (3 to 15
psig) and 0.4 to 2.0 bar (6 to 30 psig). A typical
application is in electronic control loops where the
final control element is a control valve assembly that
is pneumatically operated. The input signal and
output pressure range of the transducer is indicated
on the nameplate, attached to the housing.

CAUTION

Dropping or rough handling of the
transducer can cause damage to the
converter module resulting in a shifted
output or a minimum output.

Instruction Manual

Form 5777
September 2004

i2P-100 Transducer

Summary of Contents for i2P-100

Page 1: ...trained and qualified in valve actuator and accessory installation operation and maintenance and D carefully reading and understanding the contents of this manual If you have any questions about these instructions contact your Fisher sales office W8710 REPLACEABLE FILTER WITH REMOVABLE ORIFICE INTEGRAL PNEUMATIC RELAY VENT Figure 1 Type i2P 100 Electro Pneumatic Transducer Description The transduc...
Page 2: ...2 Maximum Output Air Capacity 2 8 0 m3 hr 5 0 scfm at 1 4 bar 20 psig supply pressure Performance 3 Reference Accuracy 1 0 of full scale output span includes combined effects of hysteresis linearity and deadband Independent Linearity 1 0 75 of full scale output span Hysteresis 1 0 4 of full scale output span Frequency Response 1 Gain is attenuated 3 dB at 6 Hz with transducer output signal piped t...
Page 3: ...product is approved for use with Natural Gas Natural gas to contain no more than 20 ppm of hydrogen sulphide 5 The pressure and temperature limits in this manual and any applicable standard or code limitation should not be exceeded 6 Approvals are pending 7 For other ranges zero and span adjustments are needed Table 2 Immunity Performance Port Phenomenon Basic Standard Performance Criteria Electro...

Page 4: ...ner and V300B Rotary Valve Installation The i2P 100 transducer has been designed and approved for use with either air or natural gas as the supply medium In normal operation the unit will vent the supply medium into the surrounding atmosphere unless it is remotely vented When using natural gas as the supply medium in a non hazardous location remote venting of the unit is required Failure to do so ...
Page 5: ...ea classification and as specified by the requirements of local regional and federal codes rules and regulations Failure to do so when necessary could result in personal injury or property damage from fire or explosion and area re classification Vent line piping should comply with local and regional codes and should be as short as possible with adequate inside diameter and few bends to reduce case...

Page 6: ...ent subsection below for remote vent connections Supply Pressure Requirements WARNING Severe personal injury or property damage could result from an unstable process if the instrument supply medium is not clean dry oil free and non corrosive While use and regular maintenance of a filter that removes particles larger than 40 microns in diameter will suffice in most applications check with a Fisher ...

Page 7: ... SUPPLY connection on the transducer case if the filter regulator is not attached Diagnostic Connections To support diagnostic testing of valve actuator positioner packages special connectors and hardware are available Typical connector installations are shown in figure 7 The hardware used includes a 0 25 inch NPT pipe nipple and pipe tee with a 0 125 inch NPT pipe bushing for the connector The co...

Page 8: ...nal injury or property damage from fire or explosion may result if power is not disconnected before removing the cap For intrinsically safe installations refer to the nameplate or to instructions provided by the barrier manufacturer for proper wiring and installation 4 20 mA 6 8V 6 8V 4V 40 Ohm Figure 9 Equivalent Circuit Use the 0 5 inch NPT conduit connection shown in figure 5 for installation o...

Page 9: ...gured unit The same procedure is used for other configurations 1 Remove electronics module cover cover adjacent to conduit entry see figure 3 and 4 2 Input and output ranges are selectable by dip switch selection Refer to figure 10 for dip switch settings Adjust dip switch settings and zero and span as necessary to achieve the desired input output range 3 If a current source other than the control...

Page 10: ...l wear or damage from external sources such as debris in the supply medium periodic maintenance or repair of the transducer may be necessary Maintenance of the transducer consists of troubleshooting removal for inspection and replacement of component parts as well as removal and inspection of the external removable filter restriction and cleaning or replacing as necessary see figure 1 WARNING To a...
Page 11: ...sed ensure that it is working correctly If not ensure the dripwell is not plugged because of excessive moisture accumulation If necessary drain off any moisture and clean or replace the filter element 4 Force the converter module to maximum output pressure with a 30 milliampere dc signal Output pressure should build up to the approximate value of the supply pressure maximum of 3 4 bar 50 psi 5 Whe...

Page 12: ... supply seat is an insert in the relay body key 41 If this insert is bad replace the relay body 5 Make sure all parts of the relay are clean and that all passages are clear of foreign matter Assembly 1 Assemble the inner valve spring key 35 onto the body plug key 32 and fit the valve plug key 39 onto the inner valve spring as shown in figure 12 To assure best alignment between the valve plug inner...

Page 13: ...s Components that are not supplied by Fisher should not under any circumstances be used in any Fisher instrument Use of components not supplied by Fisher will void your warranty might adversely affect the performance of the instrument and might jeopardize worker and workplace safety Note Fisher does not assume responsibility for the selection use and maintenance of any product Responsibility for t...

Page 14: ...5477X0062 36 Machine Screw fill hd 4 req d 1H1581X0012 32 Body Plug 11B2363X012 33 Exhaust Port Assembly 11B2364X012 34 Spring 11B2369X012 35 Spring 11B6843X012 38 Upper Diaphragm 21B2362X012 39 Valve Plug 21B2370X012 40 Body Block 31B2356X012 I P Converter Assembly 43 I P Converter Assembly 30C2218X012 Gauge Pipe Plug 23 Pipe plug use when gauge is not specified not shown Alloy steel pl 1C3335289...

Page 15: ... the positioner Side Output For units with gauges SST fittings 12B8040X052 Brass fittings 12B8040X062 For units without gauges SST fittings 12B8040X072 Brass fittings 12B8040X082 Key Description Part Number Mounting Parts Yoke Mounting Type 470 size 23 through 64 80 Mounting Bracket steel 3P426825022 81 Washer steel pl 4 req d 1B865928982 82 Cap Screw steel pl 4 req d 1A381624052 480 Series actuat...

Page 16: ...ex Nut req d 19A4838X012 Pipestand Mounting 80 Mounting Bracket steel 3P426825022 81 Washer steel pl 4 req d 1B865928982 82 Cap Screw steel pl 2 req d 1A381624052 88 Pipe Clamp steel pl 1P427028982 Surface Mounting 80 Mounting Bracket Steel GE07077X012 82 Cap Screw 1B6098X0012 Fisher Marshalltown Iowa 50158 USA Cernay 68700 France Sao Paulo 05424 Brazil Singapore 128461 Emerson Process Management ...

Reviews: