background image

www.Fisher.com

Fisher

r

 646 Electro‐Pneumatic Transducer

Contents

Introduction

1

. . . . . . . . . . . . . . . . . . . . . . . . . . . . . . . . .

Scope of Manual

1

. . . . . . . . . . . . . . . . . . . . . . . . . . . . .

Description

3

. . . . . . . . . . . . . . . . . . . . . . . . . . . . . . . . .

Specifications

4

. . . . . . . . . . . . . . . . . . . . . . . . . . . . . . .

Educational Services

4

. . . . . . . . . . . . . . . . . . . . . . . . .

Installation

4

. . . . . . . . . . . . . . . . . . . . . . . . . . . . . . . . . .

Hazardous Area Classifications and 

Special Instructions for “Safe Use” and
Installation in Hazardous Locations

5

. . . . . . . . . . .

CSA

5

. . . . . . . . . . . . . . . . . . . . . . . . . . . . . . . . . . . .

FM

6

. . . . . . . . . . . . . . . . . . . . . . . . . . . . . . . . . . . . .

ATEX

6

. . . . . . . . . . . . . . . . . . . . . . . . . . . . . . . . . . .

IECEx

7

. . . . . . . . . . . . . . . . . . . . . . . . . . . . . . . . . . .

Mounting

8

. . . . . . . . . . . . . . . . . . . . . . . . . . . . . . . . . .

Pneumatic Connections

9

. . . . . . . . . . . . . . . . . . . . . .

Supply Pressure Requirements

9

. . . . . . . . . . . . .

Diagnostic Connections

10

. . . . . . . . . . . . . . . . . .

Vent

10

. . . . . . . . . . . . . . . . . . . . . . . . . . . . . . . . . .

Electrical Connections

10

. . . . . . . . . . . . . . . . . . . . . . .

Operating Information

12

. . . . . . . . . . . . . . . . . . . . . . . .

Calibration

12

. . . . . . . . . . . . . . . . . . . . . . . . . . . . . . . .

Equipment Required

12

. . . . . . . . . . . . . . . . . . . . .

Calibration Procedure

12

. . . . . . . . . . . . . . . . . . . .

Principle of Operation

13

. . . . . . . . . . . . . . . . . . . . . . . .

Maintenance

14

. . . . . . . . . . . . . . . . . . . . . . . . . . . . . . . .

Troubleshooting

14

. . . . . . . . . . . . . . . . . . . . . . . . . . . .

Converter Module Replacement

15

. . . . . . . . . . . . . .

Relay Maintenance

16

. . . . . . . . . . . . . . . . . . . . . . . . . .

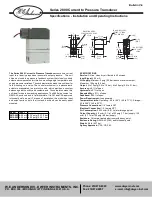
Figure 1. Fisher 646 Electro‐Pneumatic Transducer
Mounted on a Sliding‐Stem Actuator

W6783‐1/IL

Parts Ordering

18

. . . . . . . . . . . . . . . . . . . . . . . . . . . . . . .

Parts Kits

18

. . . . . . . . . . . . . . . . . . . . . . . . . . . . . . . . . . .

Parts List

18

. . . . . . . . . . . . . . . . . . . . . . . . . . . . . . . . . . .

Loop Schematics

22

. . . . . . . . . . . . . . . . . . . . . . . . . . . . .

Introduction

Scope of Manual

This instruction manual provides installation, operation, maintenance, and parts ordering information for the Fisher
646 transducer. Refer to separate manuals for instructions covering equipment used with the transducer.

Do not install, operate or maintain a 646 electro‐pneumatic transducer without being fully trained and qualified in
valve, actuator and accessory installation, operation and maintenance. 

To avoid personal injury or property damage it

is important to carefully read, understand, and follow all of the contents of this manual, including all safety cautions
and warnings.

 If you have any questions about these instructions, contact your Emerson Process Management sales

office before proceeding.

Instruction Manual

D101351X012

646 Transducer

January 2015

Summary of Contents for Fisher 646

Page 1: ...on a Sliding Stem Actuator W6783 1 IL Parts Ordering 18 Parts Kits 18 Parts List 18 Loop Schematics 22 Introduction Scope of Manual This instruction manual provides installation operation maintenance and parts ordering information for the Fisher 646 transducer Refer to separate manuals for instructions covering equipment used with the transducer Do not install operate or maintain a 646 electro pne...

Page 2: ...e output span when tested to SAMA PMC 31 1 Condition 3 Electromagnetic Compatibility Meets EN 61326 1 First Edition Immunity Industrial locations per Table 2 of the EN 61326 1 standard Performance is shown in table 2 below Emissions Class A ISM equipment rating Group 1 Class A Operating Ambient Temperature Limits 1 40 to 71_C 40 to 160_F Electrical Classification CSA Intrinsically Safe Explosion p...

Page 3: ...tained using a transducer with a 4 to 20 mA DC input signal and a 0 2 to 1 0 ba r3 to 15 psig output signal at an ambient temperature of 24_C 75_F Table 2 EMC Summary Results Immunity Port Phenomenon Basic Standard Test Level Performance Criteria 1 Enclosure Electrostatic discharge ESD IEC 61000 4 2 4 kV contact 8 kV air A Radiated EM field IEC 61000 4 3 80 to 1000 MHz 10V m with 1 kHz AM at 80 14...

Page 4: ... Emerson Process Management sales office for information on these products Specifications Specifications for the 646 transducer are listed in table 1 Educational Services For information on available courses for the 646 electro pneumatic transducer as well as a variety of other products contact Emerson Process Management Educational Services Registration Phone 1 641 754 3771 or 1 800 338 8158 e ma...

Page 5: ...ation not listed here WARNING Failure to follow these conditions of safe use could result in personal injury or property damage from fire or explosion and area re classification CSA Intrinsically Safe Explosion proof Type n Dust Ignition proof DIV 2 No special conditions for safe use Refer to table 3 for additional information Table 3 Hazardous Area Classifications CSA Canada Certification Body Ce...

Page 6: ...T6 Tamb 71 C ATEX Standards Used for Certification EN 60079 0 2012 EN 60079 31 2009 EN 60079 1 2007 EN 61241 0 2006 EN 60079 11 2012 EN 61241 1 2004 EN 60079 15 2010 EN 61241 11 2006 Special Conditions for Safe Use Intrinsically Safe This equipment is intrinsically safe and can be used in potentially explosive atmospheres The electrical parameters of certified equipment which can be connected to t...

Page 7: ...ificate Certification Obtained Entity Rating Temperature Code ATEX II 1 G D Intrinsically Safe Gas Ex ia IIC T4 T5 Ga Ui 30 VDC Ii 150 mA Pi 1 0 W Ci 0 nF Li 0 mH T4 Tamb 71 C T5 Tamb 40 C Dust Ex ia IIIC Da T155 C Tamb 71 C T124 C Tamb 40 C II 2 G D Flameproof Gas Ex d IIC T6 Gb T6 Tamb 71 C Dust Ex tb IIIC T74 C Db Tamb 71 C II 3 G D Type n Gas Ex nA IIC T6 Gc T6 Tamb 71 C Dust Ex tc IIIC T74 C ...

Page 8: ...bing then adjusts the transducer as specified on the order Transducers also can be ordered separately for mounting on a control valve assembly already in service or for mounting on a 2 inch diameter pipestand a flat surface or a bulkhead The transducer may be ordered either with or without mounting parts Mounting parts include a mounting plate and bolts and if ordered for pipestand mounting a pipe...

Page 9: ... property damage may occur if the instrument air supply is not clean dry and oil free While use and regular maintenance of a filter that removes particles larger than 40 micrometers in diameter will suffice in most applications check with an Emerson Process Management field office and industry instrument air quality standards for use with corrosive air or if you are unsure about the proper amount ...

Page 10: ... PROVIDED WHEN GAUGE IS SPECIFIED SIDE OUTPUT FRONT OUTPUT 12B8040 A B2395 1 IL Note If the 646 transducer is used in a valve assembly with a positioner no hook up for diagnostic testing is required for the 646 The hook up for diagnostic testing should be installed at the positioner Install the connectors and hardware between the 646 transducer and the actuator 1 Before assembling the pipe nipple ...

Page 11: ... regional and national codes could result in personal injury or property damage from fire or explosion Use the 1 2 14 NPT conduit connection shown in figure 3 for installation of field wiring For Class I Division I explosion proof applications install rigid metal conduit and a seal no more than 457 mm 18 inches from the transducer Also install conduit using local and national electrical codes whic...

Page 12: ...applied to the transducer with the cap removed in a hazardous area For intrinsically safe areas current monitoring during operation must be with a meter approved for use in hazardous areas Equipment Required Choose a current or voltage source that is capable without switching ranges of driving the transducer through its entire input range Switching ranges on a current or voltage source will produc...

Page 13: ...Adjust the input current to 20 00 milliamperes DC 6 The output pressure should be 1 0 bar 15 psig If not adjust the SPAN potentiometer until the output pressure is 0 8 bar 15 psig 7 Repeat steps 2 through 6 until the output pressure is within the referenced accuracy requirements without further adjustment 8 If a current source other than the control device was used disconnect the current source an...

Page 14: ...pen when an explosive dust atmosphere is present D Check with your process or safety engineer for any additional measures that must be taken to protect against process media WARNING For explosion proof applications disconnect power before removing the housing cap Personal injury or property damage may result if power is not disconnected WARNING The presence of Emerson Process Management personnel ...

Page 15: ...pply pressure 4 When the input current is removed the transducer output pressure should drop to less than 0 14 bar 2 psig If it does not check to ensure the vent and exhaust air passageway is free from foreign material 5 To inspect the relay assembly refer to the relay maintenance procedures Converter Module Replacement Removal Refer to figure 10 for key number locations 1 Remove the housing cap k...

Page 16: ... insert in the relay body key 1 If this insert is bad replace the relay body 6 Ensure that the fixed restriction in the transducer housing is clear of foreign matter 7 Make sure all parts of the relay are clean and that all passages are clear of foreign matter Assembly 1 Assemble the inner valve spring key 12 onto the body plug key 5 and fit the valve plug key 14 onto the inner valve spring as sho...

Page 17: ...embly on the relay body key 1 Hold assembled parts in place 5 Make sure the tabs on the body block key 2 align with the tabs on the relay body key 1 and that the side with 5 holes faces the relay body Place the body block on the assembled parts Hold assembled parts in place 6 When replacing the input diaphragm key 9 make sure all passages and screw holes are aligned Place the input diaphragm on th...

Page 18: ...d in the kit R646X000012 Parts List Note Part numbers are shown for recommended spares only For part numbers not shown contact your Emerson Process Management sales office Key Description 1 Relay body assembly 2 Body block aluminum 3 Housing assembly 1 2 NPT conduit connection 4 Housing Cap aluminum 5 Body plug aluminum Key Description Part Number 6 O ring nitrile 1E5477X0062 7 Machine screw stain...

Page 19: ...Instruction Manual D101351X012 646 Transducer January 2015 19 Figure 10 Fisher 646 Transducer Assembly CONVERTER MODULE NOTE KEY NUMBER 49 IS NOT SHOWN APPLY LUB SEALANT 41B2373 E DOC ...

Page 20: ...657 667 sizes 30 100 1051 1052 sizes 30 60 061 sizes 30 100 1066 all sizes 23 Cap screw steel pl 4 req d 24 Washer carbon steel pl 6 req d 25 Hex nut steel pl 4 req d 26 Mounting plate steel 27 Cap screw steel pl 2 req d Not req d for 585C 28 Washer carbon steel pl 6 req d 585C only 36 Elbow brass for 3 8 inch copper tubing 4 req d 657 1051 1052 1061 1066 and 1066SR only 37 Connector brass for 3 8...

Page 21: ...inch copper tubing With 67CFR 2 req d Without 67CFR 1 req d Pipestand and Panel Mounting 23 Cap screw steel pl Pipestand with 67CFR 4 req d Pipestand without 67CFR panel 2 req d 45_ multiple panel 1 2 req d Key Description 24 Washer carbon steel pl Pipestand with 67CFR 4 req d without 67CFR 2 req d Panel 2 req d 45_ multiple panel 1 4 req d 26 Mounting plate steel Pipestand with 67CFR Pipestand wi...

Page 22: ... WITH THE MANUFACTURER S I S INSTALLATION INSTRUCTIONS 2 EQUIPMENT SHALL BE INSTALLED IN ACCORDANCE WITH THE CANADIAN ELECTRICAL CODE PART I 3 FOR ENTITY INSTALLATION I S AND N I Vmax Voc Imax Isc Ci Ccable Ca Li Lcable La HAZARDOUS LOCATION NON HAZARDOUS LOCATION INTRINSIC SAFETY CLASS I II III DIV 1 GROUPS A B C D E F G NON INCENDIVE CLASS I DIV 2 GROUPS A B C D CSA APPROVED BARRIER FISHER TYPE ...

Page 23: ...NOT EXCEED 250 Vrms 5 RESISTANCE BETWEEN BARRIER GROUND AND EARTH GROUND MUST BE LESS THAN ONE OHM 6 NORMAL OPERATING CONDITIONS 30 VDC 20 mADC 7 FOR ENTITY INSTALLATION I S AND N I Vmax Voc or Vt Ci Ccable Ca Imax Isc or It Li Lcable La Pi Po or Pt FOR INTRINSICALLY SAFE APPLICATIONS THE APPARATUS ENCLOSURE CONTAINS ALUMINUM AND IS CONSIDERED TO CONSTITUTE A POTENTIAL RISK OF IGNTION BY IMPACT AN...

Page 24: ... are available upon request We reserve the right to modify or improve the designs or specifications of such products at any time without notice E 1987 2015 Fisher Controls International LLC All rights reserved Fisher and FlowScanner are marks owned by one of the companies in the Emerson Process Management business unit of Emerson Electric Co Emerson Process Management Emerson and the Emerson logo ...
Reviews: