background image

EMDVD75795

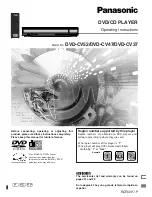
Instruction


manual

DVD


PLAYER


WITH


KARAOKE

EM

DV

D7

57

95

Ins

tru

ctio

n


man

ual

DVD


PLAYER


WITH


KARAOKE

DVD PLAYER WITH KARAOKE

instruction manual

REPRODUCTOR DVD CON KARAOKE

manual de instrucciones

Summary of Contents for EMDVD75795

Page 1: ...EMDVD75795 Instruction manual DVD PLAYER WITH KARAOKE EMDVD75795 Instruction manual DVD PLAYER WITH KARAOKE DVD PLAYER WITH KARAOKE instruction manual REPRODUCTOR DVD CON KARAOKE manual de instrucciones ...

Page 2: ... ELÉCTRICA NO EX PONGA ESTE APARATO A LA LLUIVA O HUMEDAD NO LO EXPONGA A GOTERAS O SALPICADURAS NO COLOQUE OBJETOS CON AGUA TALES COMO UN FLORERO ENCIMA DEL APARATO PRECAUCIÓN CON EL FIN DE PREVENIR UNA DESCARGA ELÉCTRICA EN CAJE LA EXTREMIDAD MÁS ANCHA DEL ENCHUFE EN LA RANURA CORRE SPONDIENTE DEL TOMACORRIENTE INSERTÁNDOLO TOTALMENTE PRECAUCIÓN CON EL RAYO LÁSER Este aparato utiliza un rayo lás...

Page 3: ...as recomendaciones del fabricante 12 Protección del Cordó n Los cables de alimentación deben colocarse de forma tal para que no se pisen ni se aprieten con objetos que puedan ser colocados encima de éstos prestando mucha atención a la parte del cable cerca del enchufe a los puntos de entrada y a los puntos de salida del aparato 13 Periodos sin Uso Debe desconectarse el aparato del tomacorriente si...

Page 4: ...etos reales con el fin de ofrecer una mejor visibilidad ÍNDICE DE CONTENIDOS PRECAUCIONES DE SEGURIDAD 1 2 ADVERTENCIA DE DESCARGA ELÉCTRICA 1 INSTRUCCIONES DE SEGURIDAD IMPORTANTES 2 ÍNDICE DE CONTENIDOS 3 INTRODUCCIÓN 4 5 CARACTERÍSTICAS 4 ACERCA DEL MANUAL 5 PREPARACIÓN ANTES DEL FUNCIONAMIENTO 6 PRECAUCIONES PARA LOS DISCOS 6 CONTROL REMOTO 6 UBICACIÓN DE LOS CONTROLES 7 9 PANEL FRONTAL 7 PANE...

Page 5: ...ancha 16 9 5 COMPATIBILIDAD Este aparato puede reproducir los formatos de DVD CD MP3 JPEG VCD SVCD DVD R DVD RW etc 6 BÚSQUEDA DE TIEMPO Puede buscar un punto específico en el disco 7 MULTI FUNCIONES Avance rápido retroceso rápido reproducción lenta reproducción por cuadros repetición y reproducción de programa 8 REANUDACIÓN DE REPRODUCCIÓN Puede memorizar la posición donde el disco se detuvo y re...

Page 6: ...os que se encuentran en el control remoto con nomenclaturas similares o iguales Las marcas usadas en el cuadro de la derecha son aquel las usadas en este manual MARCA INDICACIÓN Funciones de DVD Funciones de CD Funciones de VCD Funciones de JPEG Funciones de MP3 Funciones de MP4 Una figura de una mano puede aparecer en la pantalla del TV durante el funcionamiento Este icono significa que la funció...

Page 7: ...el exterior el panel y los controles Nunca use papel lija polvo pulidor o solventes como alcohol o gasolina CÓMO MANIPULAR EL DISCO Para mantener el disco limpio no toque el lado de reproduc ción del disco No adhiera o pegue papel ni cinta adhesiva sobre el disco Mantenga el disco lejos de la luz solar directa o de fuentes de calor Guarde el disco en su estuche después de usarlo LIMPIEZA DEL DISCO...

Page 8: ...UTTON 2 OPEN CLOSE 3 PLAY PAUSE 4 PREV 5 NEXT 6 STOP 7 MICROPHONE 2 8 MICROPHONE 1 9 MMC MS SD jack 10 DISC DOOR 11 SENSOR 12 DISPLAY WINDOW 9 8 11 10 12 UBICACIÓN DE LOS CONTROLES PANEL FRONTAL 1 BOTÓN DE ENCENDIDO 2 ABRIR CERRAR 3 REPRODUCIR PAUSA 4 ANTERIOR 5 SIGUIENTE 6 DETENER 7 MICRÓFONO 1 8 MICRÓFONO 2 9 ENTRADA MMC MS SD 10 PUERTA DEL DISCO 11 SENSOR 12 PANTALLA 7 ...

Page 9: ...Digital Signal Coaxial output jack 5 S Video output jack 6 Video output jack 7 Digital Signal Optical output jack 8 5 1CH FR output jack 9 5 1CH FL output jack 10 5 1CH SUB output jack 11 5 1CH CEN output jack 12 5 1CH SR output jack 13 5 1CH SL output jack 14 USB jack 14 PANEL POSTERIOR 1 Salida izquierda de 2 canales 2 Salida derecha de 2 canales 3 Salida Compuesta Y Pb Cb Pr Cr 4 Salida de Seña...

Page 10: ...0 RETROCEDER 11 ANTERIOR 12 PBC 13 RETORNAR 14 ECO 15 INGRESAR 16 VIDEO 17 OSD 18 LENTO 19 DVD TARJETA 20 RAN 21 N P NTSC PAL 22 ABRIR CERRAR 23 BOTONES NUMÉRICOS 24 MENÚ 25 A B 26 DETENER 27 AVANCE 28 SIGUIENTE 29 ACERCAMIENTO 30 REPETIR 31 ECO 32 ARRIBA ABAJO IZQUIERDA DERECHA 33 PASO 34 VOLUMEN 35 SILENCIO 36 VOLUMEN 37 DER IZQ 38 PROGRAMA LANGUAGE OSD STEP TIME UP DOWN LEFT RIGHT DVD CARD 37 3...

Page 11: ...salida VIDEO OUT en la parte posterior del reproductor DVD Conecte el otro extremo del cable a la entrada de Video de su TV 2 Conecte los cables de color rojo y blanco RCA a las salidas AUDIO OUT en la parte pos terior del reproductor DVD Conecte el otro extremo de los cables a las entradas de audio en la parte posterior de su TV NOTA Si su televisor cuenta con una entrada para S Video puede usars...

Page 12: ...ificador CONEXIÓN A UN AMPLIFICADOR CON ENTRADA DE SEÑAL DIGITAL 1 Conecte el cable RCA de color amarillo a la salida VIDEO OUT en la parte posterior del reproductor DVD Conecte el otro extremo del cable a la entrada de video de su TV 2 Conecte un cable coaxial a la salida coaxial en la parte posterior del reproductor DVD Conecte el otro extremo del cable a la en trada Digital Coaxial de su amplif...

Page 13: ...iones a la derecha Uti lice el botón para regresar a la opción del menú de la izquierda 1 Presione el botón SETUP en el control remoto Aparecerá en la pantalla el menú de instalación actual SET UP SISTEMA DE TV Presione ENTER en el control remoto para seleccionar la opción TV SYSTEM 2 Seleccione la opción deseada del menú principal utilizando el botón Luego presione el botón ENTER y la opción sele...

Page 14: ...to the screen Note The password is 1234 when the unit is turned on Choose this setting you will see the movie fills the entire screen of your TV But you won t see part of the picture particularly the right and left edge 13 VIDEO INTERLACE YUV La salida de vídeo es YUV cuando se utiliza el cable YUV para ver la imagen en pantalla P SCAN YPbPr Salida progresiva de Video a través de Y Pb Cb Pr Cr sol...

Page 15: ... mentioned is recorded on the disc you can select Audio language If not the language recorded on the disc is shown AUDIO LANG INGLÉS La información en pantalla se mostrará en inglés CHINO La información en pantalla se mostrará en chino ALEMÁN La información en pantalla se mostrará en alemán ESPAÑOL La información en pantalla se mostrará en español FRANCÉS La información en pantalla se mostrará en ...

Page 16: ...igital output OPTICAL or COAXIAL jack or DTS MIC SETUP ON Turn on the microphone OFF Turn off the microphone IDIOMA DE LOS SUBTÍTULOS Si el idioma mencionado se encuentra grabado en un disco se puede seleccionar el idioma de los subtítulos De lo contrario se mostrará el idioma grabado en el disco IDIOMA DEL MENÚ Si el idioma mencionado se encuentra grabado en un disco se puede seleccionar el idiom...

Page 17: ...SETUP the screen will show Press button to select BRIGHTNESS and use button to adjust the BRIGHTNESS of your TV You can set different brightness Press button to select CONTRAST and use button to adjust the CONTRAST of your TV then press ENTER button to confirm ECO Presione el botón para seleccionar la función ECHO y utilice el botón para regular el nivel de eco Luego presione el botón ENTER para c...

Page 18: ... STEREO output mode VSS VSS output mode 5 1CH 5 1CH output mode ALL LG SPK ALL LG SPK output mode ALL SM SPK ALL SM SPK output mode MIXED SPK MIXED SPK output mode BASS MODE from SUBWOOFER 17 INSTALACIÓN DE TONO Presione el botón para seleccionar la función HUE y utilice el botón para regular el nivel de tono de su televisor Luego presione el botón ENTER para confirmar INSTALACIÓN DE SATURACIÓN Pr...

Page 19: ... show OP MODE Output mode LINE OUT LINE OUT output mode RF REMOD RF REMOD output mode DYNAMIC RANGE DUAL MONO This setting L R audio output this includes four models STEREO MONO L MONO R and the MIX MONO Press button to select DYNAMIC RANGE and use button to adjust the DYNAMIC RANGE output then press ENTER button to confirm DEMORA CENTRAL Presione el botón para seleccionar la función CENTER DELAY ...

Page 20: ...emplo conecte la salida de audio del DVD a la entrada de audio del amplifica dor Notas Este paso puede obviarse si no se conecta a un amplificador REPRODUCCIÓN BÁSICA Preparación para reproducir un DVD Encienda el televisor y seleccione AV como entrada del televisor Encienda el sistema estéreo si el reproduc tor ha sido conectado a un sistema de este tipo 1 Presione el botón POWER en el reproduc t...

Page 21: ...lla dependiendo de la película 1 Presione el botón ANGLE ángulo para seleccionar el ÁNGULO 1 PANTALLA 2 Presione el botón ÁNGULO de nuevo para seleccio nar otros ángulos La pantalla los mostrará respectiva mente 3 Mientras el disco se encuentre reproduciéndose presione ÁNGULO en el control remoto aparecerá en pantalla la información de Ángulo 4 Presione ÁNGULO de nuevo En la parte superior derecha...

Page 22: ... current track playing When you press the OSD button third the screen shows the total time of the whole disc playing When you press the OSD button fourth the screen shows the left time of the disc When you press the OSD button once the screen shows the time of current track playing When you press the OSD button twice the screen shows the left time of current track playing When you press the OSD bu...

Page 23: ...e The screen shows the left time of current chapter playing Press the OSD button fourth time The screen shows the time of current title playing press SUBTITLE the screen will show NO SUBTITLE Presione el botón OSD una tercera vez La pantalla mostrará el tiempo restante del capítulo actual en reproducción Presione el botón OSD una cuarta vez La pantalla mostrará el tiempo del título actual en repro...

Page 24: ...sione el botón MUTE de nuevo REPRODUCCIÓN DE DISCOS DE VARIAS MANERAS FUNCIÓN AUDIO Se puede seleccionar el idioma deseado de un DVD con idiomas múltiples REPRODUCCIÓN DE UN DVD Presione el botón LANGUAGE idioma La pantalla mostrará Cada tipo de disco puede contener diferen tes idiomas REPRODUCCIÓN DE UN CD Se puede seleccionar el canal izquierdo o derecho o estéreo de un disco con canales múltipl...

Page 25: ... FORWARD X 2 FORWARD X 4 FORWARD X 8 FORWARD X 20 PLAY BACK WARD X 2 BACK WARD X 4 BACK WARD X 8 BACK WARD X 20 PLAY 2 Press and number buttons to program the tracks you want 3 Press PLAY to start playing When playing a disc you may play by FAST FORWARD or FAST BACKWARD to find what you want 1 Press to play fast forward Each time you press the button and the screen shows time you press the button ...

Page 26: ...ss button and move the cursor to illuminate the track number press button 3 the screen shows TRK 03 18 PBC 00 09 58 VCD 3 Press ENTER button the unit goes to track 3 1 Press TIME the screen shows Example 2 Play from 00 15 38 TRK 02 18 PBC 00 09 58 VCD 2 Press button and move the cursor to illuminate the time number press button 1 5 3 8 the screen shows TRK 02 18 PBC 00 15 38 VCD 3 Press ENTER butt...

Page 27: ...3 Press ENTER button the unit plays from 00 01 38 after setting TRK 08 12 00 00 10 CD TRK 03 12 00 00 10 CD TRK 08 12 00 01 38 CD TRK 08 12 00 00 10 CD Mp4 Mp3 PLAY DVD CD MP4 MP3 VCD A B CANCEL 7 SB 8 SB 9 SB 10 SB 11 SB 12 SB PLAY REPRODUCCIÓN DE CD MP3 MP4 Para ir a una pista o tiempo específicos utilice el botón TIME SEARCH para determinar el tiempo de reubicación deseada Ejemplo 1 Ir a la pis...

Page 28: ...EAT button The screen shows REPEAT ONE The player plays the current track REPETICIÓN DE LA REPRODUC CIÓN Esta función puede ser usada para repetir un título capítulo pista disco o una porción del disco REPRODUCCIÓN de UN DVD Se puede repetir un título o capítulo 1 Repetición de un capítulo Presione REPEAT La pantalla mostrara 2 Repetición de un título Presione REPEAT La pantalla mostrará 3 Repetic...

Page 29: ... The player begins to search disc information 1 Insert a MP3 disc It will start to search the information on the disc and show REPRODUCCIÓN DE JPEG El reproductor de DVD puede leer un disco con formato de imágenes JPEG 1 Coloque el disco correctamente El reproductor comenzará a buscar la información 2 Presione los botones numéricos para seleccionar la imagen Se puede presionar o en el control remo...

Page 30: ... a built in MMC MS SD card reader and USB 2 0 digital jack which can read the audio and video files in the flash memory cards and USB disk 1 Insert a flash memory card Press the DVD CARD button and the screen will show READ CARD 2 Wait a moment the screen will show Press button to select track you desired and press ENTER button to play Insert a flash memory card Insert an USB disk 1 Insert an USB ...

Page 31: ...agen se Enrolla y No hay Color El sistema de color de este aparato no concuerda con el del TV Presione el botón SETUP en el control remoto y seleccione la opción apropiada en la página de PREFERENCIAS Asegúrese de seleccionar la salida YUV si se hace una conexión YUV y la salida de S Video si se hace una conexión S Video Si no hay imagen presione el botón VIDEO en el control remoto No se puede rep...

Page 32: ...udio out nivel de salida 0 5Vp p Salida señal digital impedancia de carga 75 Ohmios Video out nivel de salida 1Vp p Impedancia de carga 75 Ohmios no balanceado polaridad negativa S Video out nivel de salida brillo Y 1Vp p Color c 0 286Vp p Impedancia de carga 75 Ohmios Energía AC 100V 240V 50Hz 60Hz Consumo de energía 12W Dimensiones 430mm x 270mm x 38mm Peso Aprox 2 5 Kgs Este manual es solo un m...

Reviews: