background image

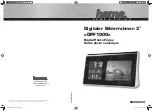
BAR598

OWNER'S MANUAL

B-View   Digital Photo Frame

with Remote Control

TM

Barbie and associated trademarks and trade dress are owned by, and used 
under license from, Mattel, Inc. ©2007 Mattel, Inc. All Rights Reserved.

Summary of Contents for Barbie B-View BAR598

Page 1: ...598 OWNER S MANUAL B View Digital Photo Frame with Remote Control TM Barbie and associated trademarks and trade dress are owned by and used under license from Mattel Inc 2007 Mattel Inc All Rights Reserved ...

Page 2: ... NOT USE THIS AC ADAPTER WITH AN EXTENSION CORD RECEPTACLE OR OTHER OUTLET UNLESS THE BLADES CAN BE FULLY INSERTED TO PREVENT BLADE EXPOSURE TO PREVENT FIRE OR SHOCK HAZARD DO NOT EXPOSE THIS APPLIANCE TO RAIN OR MOISTURE 1 Read and understand all instructions 2 Follow all warnings and instructions marked on this product 3 Keep this product out of strong sunlight direct sunlight may damage this pr...

Page 3: ...ck Never spill or spray any type of liquid on this product 14 To reduce the risk of electric shock do not disassemble this product but take it to a qual ified service person when some service or repair work is required Opening or removing covers may expose you to dangerous voltages or other risks Incorrect reassembly can cause electric shock when the appliance is subsequently used 15 Unplug this p...

Page 4: ...l interference to radio or television reception which can be determined by turning the equipment off and on the user is encouraged to try to correct the interference by one or more of the following measures Reorient or relocate the receiving antenna Increase the separation between the equipment and receiver Connect the equipment into an outlet on a circuit different from that to which the receiver...

Page 5: ... at 1 800 898 9020 Retain this manual for future reference WARNING Choking Hazard Small Parts and Packaging Materials Not for children under 5 years All materials for fastening or packing purposes are not part of the unit and should be discarded for children s safety Please keep all information for future reference This is not a toy 0 5 NOTES Please avoid using this unit in places of high temperat...

Page 6: ...Power On Off Button Press to turn this unit on or off 8 Stand 9 Menu Button Press to enter display mode menu 10 Rotate Button Press to rotate the picture 11 Speed Button Press to choose Slow Normal or Fast picture playback speed 12 USB Card Button Press to choose USB or Card 13 USB Port 14 SD MMC Card Slot Insert the card along the arrow s direction IMPORTANT NOTE Make sure to insert the SD MMC ca...

Page 7: ... to choose between 4 3 standard 16 9 wide mode 8 Rotate Button Press to rotate the picture 9 Remote Transmitter Top of Unit 10 Power On Off Button Press to turn this unit on or off 11 Down Button Press to move down 12 Menu Button Press to enter display mode menu 13 Slow Button Press to select Slow pic ture playback speed 14 Play Pause Button Press to start or pause playback 15 Prev Button Press to...

Page 8: ...de the compartment out 2 Install a CR2025 battery paying attention to the polarity diagram in the Battery Compartment positive side up 3 Replace the Battery Compartment 6 5 ft 20 20 TM TM TM TM TM TM EFFECTIVE DISTANCE OF THE REMOTE CONTROL TRANSMITTER NOTES When there is an obstacle between the frame and the transmitter the transmitter may not operate When direct sunlight an incandes cent lamp fl...

Page 9: ...ottom of the unit Insert the other end with the 2 blades into a conveniently locat ed AC outlet having 120V AC 60Hz AC ADAPTER SPECIFICATIONS DC 5V Z NOTES To disconnect the AC adapter remove it from the DC 5V IN jack on the bottom of the unit as well as from the AC outlet Use the enclosed AC adapter for this product only To DC 5V IN ...

Page 10: ... drive contents and show the pictures in the display If both a SD MMC card and a flash drive are inserted this unit will display the con tents of the the flash drive first and then the SD MMC card 2 1 2 Press the MENU button to access the main menu TM TM 1 1 3 Picture Management Use the Up 1 and or Down 2 button to select Picture Management and then press the ENTER button 3 to confirm Use the Up 1...

Page 11: ... the main unit to select between the two options TM TM 4 1 3 2 6 Press the MENU button to access the main menu again TM TM 1 1 7 System Setup Picture Display Mode Use the Up 1 and or Down 2 button to select System Setup and then press the ENTER button 3 to confirm Use the Up 1 and or Down 2 button to select Picture Display Mode and then press the ENTER button 3 to confirm Use the Up 1 and or Down ...

Page 12: ... NOTE You can also use the Slow Normal and Fast buttons on the remote or the Speed button on the main unit to select between the options TM TM 4 1 3 2 10 Press the MENU button to access the main menu again TM TM 1 1 11 System Setup Brightness Use the Up 1 and or Down 2 button to select System Setup and then press the ENTER button 3 to confirm Use the Up 1 and or Down 2 button to select Brightness ...

Page 13: ...entation of the picture pictures will rotate clockwise as shown above 1 ROTATING THE PICTURE During picture playback press the Play Pause button on the remote shown or on the main unit to pause playback Press again to resume playback TM TM 1 During picture playback press the Prev 1 or Next 2 button on the remote shown or on the main unit to skip to the previous or next picture TM TM 2 1 1 ...

Page 14: ... work with the unit off disconnect the AC adapter and reconnect as shown on page 8 Picture is distorted The picture may be distorted while using the Prev Next buttons This is normal and not a malfunction of the unit The remote control does not work Make sure that a fresh battery is inserted as shown on page 7 Also refer to the effective distance of the remote control transmitter and the notes rega...

Page 15: ...cover shipping and handling costs and enclose a copy of your proof of purchase Send your unit to Emerson Radio Corp 5101 Statesman Drive Irving TX 75063 This warranty does not cover damage from negligence misuse abuse accident failure to follow operating instructions commercial use rental repairs by an unauthorized facility or products pur chased used serviced or damaged outside of the United Stat...

Page 16: ...wer line voltage or liquid spillage g Any product received without appropriate model serial number and CSA cUL cULus cETL cETLus markings h Any products used for rental or commercial purposes i Any installation setup and or programming charges Should this EMERSON product fail to operate during the warranty period warranty service may be obtained upon delivery of the EMERSON product together with p...

Page 17: ...BAR598 081207 02A Printed in China ...

Reviews: