background image


user manual

Induction wok

EHD36400U

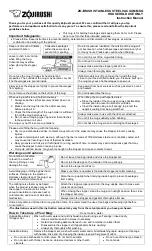
Summary of Contents for EHD36400U

Page 1: ...user manual Induction wok EHD36400U ...

Page 2: ...We were thinking of you when we made this product ...

Page 3: ...ure The Electrolux ambition is to offer a wide variety of quality products that make your life more comfortable You will find some examples on the cov er in this manual Please take a few min utes to study this manual so that you can take advantage of the benefits of your new machine We promise that it will provide a superior User Experience delivering Ease of Mind Good luck ...

Page 4: ...ion Instructions 23 Assembly 24 Installing more than one Frontline hob 28 Guarantee Customer Service 34 Service and Spare Parts 38 The following symbols are used in this user information 1 Warning This must be read Important advice for the safety of persons and information on avoiding damage to the appliance 3 General information and advice 2 Information on environmental protection z Dangerous vol...

Page 5: ...device General safety The appliance may only be installed and connected by trained registered service engineers Built in appliances may only be used after they have built in to suitable built in units and work surfaces that meet standards In the event of faults with the appli ance or damage to the glass ceramic cracks scratches or splits the ap pliance must be switched off and disconnected from th...

Page 6: ...oid damage to the appli ance The glass ceramic can be damaged by objects falling onto it The edge of the glass ceramic can be damaged by being knocked by the cookware Objects that melt and things that boil over can burn onto the glass ceramic and should be removed straighta way Do not use cooking zone with empty cookware or without cookware The ventilation gap of 5mm between the worktop and front ...

Page 7: ...Control panel layout 300 mm Wok niche 2300W with power function 3200W Frontline strip Control panel Child lock pilot light Heat setting indicator Heat setting indicator Child lock Heat setting 6 power function Heat setting selection Timer indicator Timer selection On Off pilot light On Off Timer ...

Page 8: ...thout covering other sensor fields Sensor field Function On Off To switch the appliance on and off Increase settings To increase heat settings Reduce settings To reduce heat settings Timer Timer selection Increase settings To increase Timer time Reduce settings To reduce Timer time Child lock Locking control panel for children Power Switching the power function on and off Heat setting 6 Set heat s...

Page 9: ...supplied 390 mm 6 litres With 2 handles WOK P 6 0 stainless steel Display Description Cooking zone is switched off u Keep warm setting Keep warm setting is set Ç Heat settings Heat setting is set e Fault Malfunction has occurred f Pan detection Cookware is unsuitable or too small or no cookware has been placed on the cooking zone h Residual heat Cooking zone is still hot l Child safety device Chil...

Page 10: ...kes more power available to the induction cooking zones e g to bring a large quantity of water to the boil quickly The power function is activated for 10 minutes After that the induction cooking zone automatically switches back to heat setting 9 Control panel Display Pilot light To switch on touch for 2 seconds h lights up To switch off touch for 2 seconds h none goes out Control panel Indicator T...

Page 11: ... it remains activated afterwards Step Control panel Display Signal 1 Switch on appliance Do not set a heat setting 2 Touch for 4 seconds l Appliance switches off The child safety device is switched on Step Control panel Display Signal 1 Switch appliance on l 2 Touch for 4 seconds 0 lights up Appliance switches off The child safety device is switched off Step Control panel Display Signal 1 Switch o...

Page 12: ...hat is set the countdown timer becomes a safety cut out The cooking zone is switched off after the time set has elapsed Function Condition Outcome after time has elapsed Safety cut out When a heat setting is set acoustic signal 0 lights up Cooking zone switches off Countdown timer When cooking zones are not used acoustic signal 0 lights up ...

Page 13: ...time is set The time counts down to 0 Step Control panel Display 1 Touch Pilot light flashes 2 Touch The remaining time counts down to 0 The pilot light goes out The timer function is switched off Step Control panel Display 1 Touch Pilot light flashes 2 Touch or 01 to 99 minutes The pilot light lights up The time is set The time counts down to 0 Step Control panel field Acoustic signal 1 Touch Aco...

Page 14: ...saucepan boils dry the cooking zone automatically switches itself off _ is displayed Before being used again the cooking zone must be set to 0 and cooled down If cookware that is not suitable is used f lights up in the display and after 2 minutes the indicator for the cooking zone switches itself off If the cooking zone is not switched off after a certain time or if the heat setting is not modifie...

Page 15: ...ng with fat or oil do not leave the appliance unattended The frying temperature can be esti mated by testing with a wooden spoon Hold the handle of a wooden spoon in the hot fat If small bubbles rise to the surface the frying temperature has been reached If there are no bubbles the frying temperature has not yet been reached Information on acrylamides According to the latest scientific knowledge i...

Page 16: ... setting 9 is heat ed very quickly a magnet sticks to the bottom of the cookware The cookware can make noises while working on induction cooking zones These noises are not a fault in the appliance and do not affect operation in any way Safe operation of the appliance in accordance with EN60335 can only be guaranteed with the wok pan supplied with it Cookware with a flat bottom must not be used ...

Page 17: ...b much fat Meat fish potatoes vegetables etc retain an even colour and crust and therefore the typical taste Only use fats that are specially in tended for deep frying Poaching Whipping Special cooking process Induction wok is very suitable Curved shape of the wok is extreme ly suitable for whipping up custards sabayons butter sauces fatless sponge or parfait mixtures without a bain marie at 65 C ...

Page 18: ... materials will damage the appliance Clean with water and washing up liquid Warning Residues from cleaning agents will damage the appliance Remove residues with water and washing up liquid Cleaning the appliance after each use 1 Wipe the appliance with a damp cloth and a little washing up liquid 2 Rub the appliance dry using a clean cloth ...

Page 19: ...steel Scratches or dark stains on the glass ceramic that cannot be re moved do not however affect the functioning of the appliance Removable Frontline strip The aluminium Frontline strip fastens on by means of magnets It is easy to re move by hand and can be cleaned with detergent Please do not use any scour ing agents or sponges that scratch Do not clean the strip in the dishwasher Remove Type of...

Page 20: ...one was only on for a short time and is therefore not hot If the cooking zone is sup posed to be hot call the Cus tomer Service Department Power function cannot be switched on The Power function function has already been activated several times quickly one after the other Let cooking surface cool down f lights up Unsuitable cookware Use suitable cookware No cookware on the cooking zone Put cookwar...

Page 21: ...tact your local Service Force Centre Warning Repairs to the appliance are only to be carried out by quali fied service engineers Considera ble danger to the user may result from improper repairs If the appliance has been operated incorrectly the engineer s visit will be chargeable even during the war ranty period ...

Page 22: ...this product may not be treated as household waste Instead it shall be handed over to the applicable col lection point for the recycling of electrical and electronic equipment By ensuring this product is dis posed of correctly you will help pre vent potential negative consequences for the environment and human health which could oth erwise be caused by inappropriate waste handling of this product ...

Page 23: ...t age when installing and uninstalling Observe connection schematic Observe electrical safety rules Ensure anti shock protection through correct installation by a qualified installer The appliance must be connected to the electrical supply by a qualified electrician z Risk of injury from electrical current Loose and inappropriate plug and sock et connections can make the terminal overheat Have the...

Page 24: ...24 electrolux assembly Assembly ...

Page 25: ...assembly electrolux 25 ...

Page 26: ...26 electrolux assembly ...

Page 27: ...assembly electrolux 27 ...

Page 28: ...e wall at least 50 mm Depth 490 mm Width The widths of all appliances to be built in are added together minus 20 mm see also Overview of all appli ance widths Example Installing more than one appliance 1 Work out the size of the cut out sec tion and saw it out 2 Remove Frontline strip from the ap pliances by hand magnetic fasten ing 3 Lay the appliances one at a time on something soft for example ...

Page 29: ...ng grips into the appropriate holes in the protective boxes 5 Place first appliance in the cut out Lay connecting cross bar in the cut out and push up halfway against the appliance 6 Put silicon on the appliance corners that will touch one another Put sili con on the end of the cross bar ...

Page 30: ... on the worktop and on the connecting cross bar 8 Place Frontline strips on the appli ances Check that the Frontline strips are in line with one another 9 Tighten the fixing plate retaining grip screws 10 Inject a line of silicon into the gap be tween the appliances 11 Dampen silicon line with a little soapy water ...

Page 31: ... 12 Press rubber block hard against the glass ceramic and draw it slowly along the gap 13 Leave silicon until the next day to harden 14 Carefully remove projecting silicon with a shaving blade 15 Clean glass ceramic thoroughly 16 Replace Frontline strips ...

Page 32: ...s ceramic cooking surface with 2 induction cooking zones Gas hob with 2 burners Grill Grill Deep fat fryer Wok Induction Teppanyaki 580 mm Glass ceramic cooking surface with 4 radiation cooking zones Gas hob with 4 burners Induction Teppanyaki 720 mm Glass ceramic cooking surface with 4 radiation cooking zones Glass ceramic cooking surface with 4 induction cooking zones Gas hob with 4 burners ...

Page 33: ...electrolux 33 Rating Plate 941 177 712 220 240 V 3 2 kW 59 WOK 02 AG EHD36400U 50 60 ELECTROLUX ...

Page 34: ...tructions The appliance has not been serv iced maintained repaired taken apart or tampered with by any per son not authorised by us Electrolux Service Force Centre must undertake all service work under this guarantee Any appliance or defective part re placed shall become the Company s property This guarantee is in addition to your statutory and other legal rights Exclusions Damage or calls resulti...

Page 35: ... chase document issued by the seller of the appliance The appliance guarantee is for the same pe riod and to the same extent for labour and parts as exists in your new country of resi dence for this particular model or range of appliances The appliance guarantee is personal to the original purchaser of the appliance and can not be transferred to another user The appliance is installed and used in ...

Page 36: ...avenija 3 10000 Zagreb Ireland 353 1 40 90 753 Long Mile Road Dublin 12 Italia 39 0 434 558500 C so Lino Zanussi 26 33080 Porcia PN Latvija 37 17 84 59 34 Kr Barona iela 130 2 LV 1012 Riga Lithuania 3702780607 Žirmūnų 67 LT 09001 Vilnius Luxembourg 352 42 431 301 Rue de Bitbourg 7 L 1273 Hamm Magyarország 36 1 252 1773 H 1142 Budapest XIV Erzsébet királyné útja 87 Nederland 31 17 24 68 300 Vennoot...

Page 37: ...o 1 821 03 Bratislava Suomi www electrolux fi Sverige 46 0 771 76 76 76 Electrolux Service S t Göransgatan 143 S 105 45 Stockholm Türkiye 90 21 22 93 10 25 Tarlabaþý caddesi no 35 Taksim Istanbul Ðîññèÿ 7 495 937 7837 129090 Ìîñêâà Îëèìïèéñêèé ïðîñïåêò 16 ÁÖ Îëèìïèê Óêðà íà 380 44 586 20 60 04074 Êè â âóë Àâòîçàâîäñüêà 2a ÁÖ Àëêîí p t b ...

Page 38: ...ne number 3 Clear and concise details of the fault 4 The model and serial number of the appliance found on the rating plate 5 The purchase date Please note that a valid purchase receipt or guarantee documentation is required for in guarantee service calls Customer Care For general enquiries concerning your AEG appliance or for further information on AEG products please contact our Customer Care De...

Page 39: ......

Page 40: ...www electrolux com 315 917 813 A 080508 01 ...

Reviews: