1
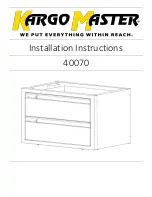
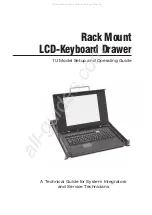
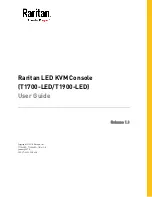
Pedestal with drawer /
Поставка с чекмедже
/
Podstavec se zásuvkou / Sokkel med skuffe /
Unterbausockel mit Schublade /
Βάζε κε ζπξηάξη
/
Pedestal con cajón / Sahtliga alus / Vetolaatikolla
varustettu jalusta / Socle avec tiroir /
Podnožje
s ladicom / Fiókos talapzat / Piedistallo con
cassetto /
Pagrindas su stalčiumi
/ Pamatne ar
atvilktni / Sokkel med skuff / Voetstuk met
lade /
Podstawa z szufladą
/ Pedestal com
gaveta / Suport cu sertar /
Тумба с ящиком
/
Podstavec so zásuvkou / Podstavek s predalom /
Постоље са фиоком
/ Piedestal med låda /
Çekmeceli kaide /
Підставка з висувним ящиком
EN
Accessories
BG
Аксесоари
CZ
Příslušenství
DA
Tilbehør
DE
Zubehör
EL
Δμαξηήκαηα
ES
Accesorios
ET
Tarvikud
FI
Tarvikkeet
FR
Accessoires
HR
Dodaci
HU
Tartozékok
IT
Accessori
LT
Priedai
LV
Piederumi
NL
Accessoires
NO
Tilbehør
PL
Akcesoria
PT
Acessórios
RO
Accesorii
RU
Аксессуары
SI
Pripomočki
SK
Príslušenstvo
SR
Прибор
SV
Tillbehör
TR
Aksesuarlar
UA
Аксесуари
Installation Instruction
2
Инструкция за монтаж
8
Pokyny k instalaci
14
Installationsvejledning
20
Montageanleitung
26
Οδεγίεο Δγθαηάζηαζεο
32
Instrucciones de instalación
38
Paigaldusjuhend
44
Asennusohjeet
50
Instructions d'installation
56
Upute za montažu
62
Szerelési utasítások
68
Istruzioni di installazione
74
Montavimo instrukcija
80
Uzstādīšanas norādījumi
86
Montage-instructies
92
Monteringsanvisning
98
Instrukcja instalacji
104
Instruções de instalação
110
Instruc
ț
iuni de instalare
116
Инструкции по установке
122
Navodila za namestitev
128
Návod na použitie
134
Упутство за постављање
140
Installationsinstruktion
146
Montaj Talimatı
152
Інструкція з установки
158
Model E6WHPED3
2
7
12
17
22
27
32
37
42
47
52
57
62
67
72
77
82
87
92
97
102
107
112
117
122
127
132
Model
E6WHPED3
E6WHPED2
Pedestal with drawer /
Поставка с чекмедже
/
Podstavec se zásuvkou / Sokkel med skuffe /
Unterbausockel mit Schublade /
Βάζε κε ζπξηάξη
/
Pedestal con cajón / Sahtliga alus / Vetolaatikolla
varustettu jalusta / Socle avec tiroir /
Podnožje
s ladicom / Fiókos talapzat / Piedistallo con
cassetto /
Pagrindas su stalčiumi
/ Pamatne ar
atvilktni / Sokkel med skuff / Voetstuk met
lade /
Podstawa z szufladą
/ Pedestal com
gaveta / Suport cu sertar /
Тумба с ящиком
/
Podstavec so zásuvkou / Podstavek s predalom /
Постоље са фиоком
/ Piedestal med låda /
Çekmeceli kaide /
Підставка з висувним ящиком
EN
Accessories
BG
Аксесоари
CZ
Příslušenství
DA
Tilbehør
DE
Zubehör
EL
Δμαξηήκαηα
ES
Accesorios
ET
Tarvikud
FI
Tarvikkeet
FR
Accessoires
HR
Dodaci
HU
Tartozékok
IT
Accessori
LT
Priedai
LV
Piederumi
NL
Accessoires
NO
Tilbehør
PL
Akcesoria
PT
Acessórios
RO
Accesorii
RU
Аксессуары
SI
Pripomočki
SK
Príslušenstvo
SR
Прибор
SV
Tillbehör
TR
Aksesuarlar
UA
Аксесуари
Installation Instruction
2
Инструкция за монтаж
8
Pokyny k instalaci
14
Installationsvejledning
20
Montageanleitung
26
Οδεγίεο Δγθαηάζηαζεο
32
Instrucciones de instalación
38
Paigaldusjuhend
44
Asennusohjeet
50
Instructions d'installation
56
Upute za montažu
62
Szerelési utasítások
68
Istruzioni di installazione
74
Montavimo instrukcija
80
Uzstādīšanas norādījumi
86
Montage-instructies
92
Monteringsanvisning
98
Instrukcja instalacji
104
Instruções de instalação
110
Instruc
ț
iuni de instalare
116
Инструкции по установке
122
Navodila za namestitev
128
Návod na použitie
134
Упутство за постављање
140
Installationsinstruktion
146
Montaj Talimatı
152
Інструкція з установки
158
Model E6WHPED3
Summary of Contents for E6WHPED2
Page 6: ...6 Note ...
Page 11: ...11 Забележка ...
Page 16: ...16 Poznámka ...
Page 21: ...21 Note ...
Page 26: ...26 Hinweis ...
Page 31: ...31 Σεκείσζε ...
Page 36: ...36 Nota ...
Page 41: ...41 Märkus ...
Page 46: ...46 Huomaa ...
Page 51: ...51 Remarque ...
Page 56: ...56 Napomena ...
Page 61: ...61 Jegyzetek ...
Page 66: ...66 Nota ...
Page 71: ...71 Pastaba ...
Page 76: ...76 Piezīme ...
Page 81: ...81 Opmerking ...
Page 86: ...86 Notater ...
Page 91: ...91 Uwaga ...
Page 96: ...96 Nota ...
Page 101: ...101 Notă ...
Page 106: ...106 Примечание ...
Page 111: ...111 Opomba ...
Page 116: ...116 Poznámka ...
Page 121: ...121 Напомена ...
Page 126: ...126 OBS ...
Page 131: ...131 Not ...
Page 136: ...136 Примітка ...
Page 137: ......
Page 138: ...G0013222 001 A07155701 ...