background image

DXAEPS2

Power Station
Fuente de energía

INSTRUCTION MANUAL

MANUAL DE INSTRUCCIONES

If you have questions or comments, contact us.

Si tiene dudas o comentarios, contáctenos.

1-888-394-3392

BC

RD101216

DXAEPS2_ManualENSP_101216.indd   1

10/19/2016   3:56:32 PM

Summary of Contents for DXAEJ14

Page 1: ...ente de energía INSTRUCTION MANUAL MANUAL DE INSTRUCCIONES If you have questions or comments contact us Si tiene dudas o comentarios contáctenos 1 888 394 3392 BC RD101216 DXAEPS2_ManualENSP_101216 indd 1 10 19 2016 3 56 32 PM ...

Page 2: ...DXAEPS2_ManualENSP_101216 indd 2 10 19 2016 3 56 32 PM ...

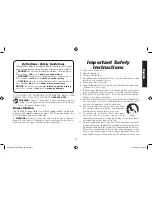
Page 3: ...structions 1 Keep these instructions 2 Heed all warnings 3 Follow all instructions 4 Avoid dangerous environments Don t use this unit in damp or wet locations or in the rain or snow 5 Clean only with a dry cloth 6 Keep children away from the work area Keep this unit away from children This is not a toy 7 Store indoors When not in use this unit should be stored indoors in a dry and high or locked u...

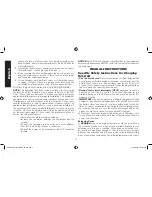
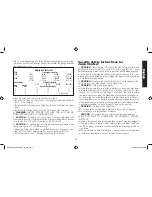
Page 4: ... connected Consult the dealer or an experienced radio TV technician for help NOTICE Per FCC Part 15 changes or modifications to this equipment not expressly approved by DEWALT could void your authority to operate this equipment READ ALL INSTRUCTIONS Specific Safety Instructions for Charging this Unit Don t abuse the cord Protect the extension cord from being walked on or pinched particularly at pl...

Page 5: ...e the unit for charging dry cell batteries that are commonly used with home appliances These batteries may burst and cause injury to persons and damage property Use the unit for charging boosting a lead acid battery only It is not intended to supply power to a low voltage electrical system other than in a starter motor application WARNING To reduce the risk of electric shock never immerse this uni...

Page 6: ...ble surface and be sure to keep all clamps cords clothing and body parts away from moving vehicle parts Never allow red and black clamps to touch each other or another common metal conductor this could cause damage to the unit and or create a sparking explosion hazard Make sure to connect the clamps with correct polarity Damage caused by improper connection is not covered by the Warranty Do not ex...

Page 7: ...mpting any repairs to the appliance Observe all Safety Instructions in the Specific Safety Instructions for Power Cords section of this Instruction Manual when using the inverter outlets When an appliance plugged into this unit is used outdoors use only extension cords intended for use outdoors and so marked Do not attempt to connect the inverter while operating your vehicle Not paying attention t...

Page 8: ... medical attention LCD Liquid Crystal Display If liquid crystal comes in contact with your skin Wash area off completely with plenty of water Remove contaminated clothing If liquid crystal gets into your eye Flush the affected eye with clean water and then seek medical attention If liquid crystal is swallowed Flush your mouth thoroughly with water Drink large quantities of water and induce vomitin...

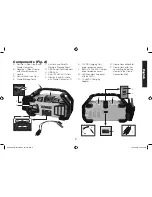
Page 9: ... USB Ports I Dual 120 Volt AC Outlets J Clamps A and B shown with Clamp Connector P C D E A B F H G I J K 12V DC Charging Port under protective cover L Built in 120 Volt AC Charger under protective cover M LED Area Light two banks of three LEDs N 12 Volt DC Charging Adapter O Clamp Connection Slot P Clamp Connector for connecting the battery clamps to the Clamp Connection Slot M M O P N K L DXAEPS...

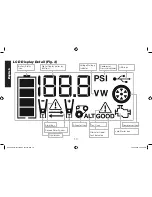
Page 10: ...ies by function Alarm Icon Reverse Polarity Icons Clamp Icons Voltage Wattage Indicator Compressor Pressure Indicator USB Icon Compressor Icon Jump Starter Icon Alternator Icon Alternator Good Fault Indicators Fault Icon DXAEPS2_ManualENSP_101216 indd 10 10 19 2016 3 56 34 PM ...

Page 11: ...o use The unit remains on until the AC Power Button is pressed again to turn it off Press the USB Power Button Refer to the USB Ports section A beep will sound and the backlit LCD screen will display the Battery Status Icon Battery Voltage Indicator and the USB Icon and the USB Power Fault Indicators will light solid blue indicating the two USB Ports are active The unit remains on until the USB Po...

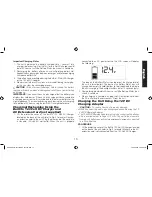
Page 12: ...he Battery Status Icon and Battery Voltage Indicator The bars on the Battery Status Icon will change from empty to solid bottom to top repeatedly NOTE The unit will automatically power off once ALL the functions and the charging process are turned off Viewing Battery Status The Battery Status Icon and Battery Voltage Indicator indicate the battery charge level as follows If the battery charge leve...

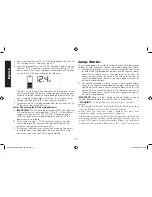
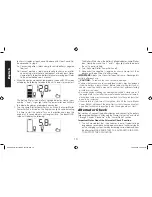
Page 13: ...0 Volt AC Charger located on the back of the unit refer to Fig 2 to locate Connect an extension cord to the unit Plug the other end of the cord into a standard 120 volt AC wall outlet When the unit is properly connected to an AC power source the LCD screen will display the following The bars on the Battery Status Icon represent the charge level of the unit s internal battery The bars on the Batter...

Page 14: ...2 volt DC charging method Jump Starter This unit is equipped with a jump starter power switch that allows energy to flow only when proper connections are made to battery and frame A For negative grounded systems connect the positive red clamp to the positive ungrounded battery post and the negative black clamp to the vehicle chassis or engine block away from the battery Do not connect the clamp to...

Page 15: ...he Clamp Connection Slot is located on the back of the unit Refer to Fig 2 to locate all parts 1 Remove the Clamps from the storage pouch 2 Attach the Clamp Connector to the Clamp Connection Slot 3 When the unit is not in use detach the Clamp Connector from the Clamp Connection Slot Store the clamps in the storage pouch PROCEDURE Take the following steps observing all cautions and warnings in the ...

Page 16: ...st then disconnect the positive battery clamp IMPORTANT Always turn the unit off when not in use Recharge this unit fully after each use CAUTION To reduce the risk of property damage Vehicles that have on board computerized systems may be damaged if vehicle battery is jump started Before jump starting this type of vehicle read the vehicle manual to confirm that external starting assistance is advi...

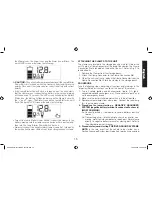
Page 17: ...klit LCD screen will display the following The Battery Status Icon Alternator Icon and ALT GOOD will light solid 3 If the unit detects that the alternator is out of typical voltage range the backlit LCD screen will display the following The Battery Status Icon Alternator Icon and ALT will light solid The Fault Icon will flash 4 Press the Alternator Check Button again to stop the test and turn off ...

Page 18: ...bar the unit MUST be recharged before use or the unit s built in low voltage protection will activate The empty Battery Status Icon will flash for a short period of time before automatic shut down The compressor is capable of inflating up to 120 pounds per square inch psi pressure The compressor can operate long enough to fill up to 3 average sized tires before the battery must be recharged Return...

Page 19: ...r is activated Monitor the pressure on the LCD screen IMPORTANT NOTE To interrupt during inflation press the Compressor Power Button again 5 When desired pre set pressure is reached the compressor will automatically stop 6 Press the Compressor Power Button again to turn off the unit 7 Unscrew and remove the SureFit nozzle from the valve stem 8 Allow the unit to cool then recharge before storing aw...

Page 20: ...ltage is too high as this can harm the unit Thermal shutdown protection The unit will automatically shut down when the unit becomes overheated Overload short circuit protection The unit will automatically shut down when an overload or short circuit occurs Important Notes Concerning the AC Power Outlets 1 The two AC Power Outlets provide a combined total power draw of 1000W 2 When the AC Power Outl...

Page 21: ... the battery level is nearly empty with only one solid bar the unit MUST be recharged at this time Make sure the AC Power Outlets are turned off when the unit is being recharged or stored USB Ports The USB Power Button and the two USB Ports are located on the front of the unit the USB Power Fault Indicator is a translucent ring around each of the USB Ports Refer to Fig 2 to locate Important Notes ...

Page 22: ...only one solid bar or completely empty with 4 empty bars the unit must be recharged at this time or the unit s built in low voltage protection will activate The empty Battery Status Icon will flash for a short period of time before automatic shut down IMPORTANT Make sure the USB Ports are turned off when the unit is being recharged or stored LED Area Light The built in LED Area Light consists of t...

Page 23: ...of recharge cycles and proper care and maintenance of the battery by the end user Contact manufacturer for any information you may need SAFE BATTERY DISPOSAL Contains a maintenance free sealed non spillable lead acid battery which must be disposed of properly Recycling is required Failure to comply with local state and federal regulations can result in fines or imprisonment Please recycle WARNING ...

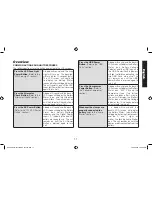
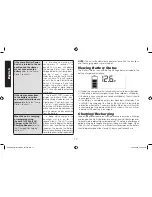
Page 24: ...stablished Make sure the Clamp Connector is securely connected to the Clamp Connection Slot Problem Possible Solution Unit fails to jump start continued Make sure the unit is not being operated in the Compressor mode Check that the unit has a full charge Recharge the unit if necessary Portable Compressor will not inflate Make sure the Compressor Power Button has been pressed to turn the compressor...

Page 25: ...ort will not power device continued Some USB powered household electronics will not operate with this USB charging power port Check the manual of the corresponding electronic device to confirm that it can be used with this type of USB charging power port Check that the unit has a full charge Recharge the unit if necessary LED Area Light does not come on Make sure the Area Light Power Button is in ...

Page 26: ...abuse and failure to follow instructions for care and maintenance for the product This warranty gives you the original retail purchaser specific legal rights and you may have other rights which vary in certain states or provinces This product is not intended for commercial use 90 DAY REFUND POLICY If you are not completely satisfied with the performance of this product for any reason you can retur...

Page 27: ...cto o su cable de alimentación contiene plomo una sustancia química reconocida por el Estado de California como causante de cáncer defectos de nacimiento u otros problemas reproductivos Lávese las manos después de utilizarlo Instrucciones importantes sobre seguridad 1 Conserve estas instrucciones 2 Heed all warnings 3 Obedezca todas las advertencias 4 Evite las condiciones ambientales peligrosas N...

Page 28: ...alaciones residenciales Este equipo genera utiliza y puede emitir energía de radiofrecuencia y si no se instala y utiliza de acuerdo a las instrucciones proporcionadas puede producir una interferencia dañina para la comunicación radial Sin embargo no existen garantías de que no ocurra interferencia alguna en una instalación en particular Si este equipo produce interferencia dañina para su recepció...

Page 29: ...la placa En caso de duda utilice el calibre inmediatamente superior Cuanto menor es el número de calibre más grueso es el cable CALIBRE MÍNIMO PARA LOS JUEGOS DE CABLES Voltios Largo total del cable en pies 120V 0 25 26 50 51 100 101 150 0 7 6m 7 6 15 2m 15 2 30 4m 30 4 45 7m 240V 0 50 51 100 101 200 201 300 0 15 2m 15 2 30 4m 30 4 60 9m 60 9 91 4m Grado del amperio Longitud de la cable de extensi...

Page 30: ...a del vehículo se arranca mediante puente Antes de arrancar mediante puente lea el manual del cliente del vehículo para confirmar que la ayuda externa para arrancar es adecuada Cuando trabaje con baterías de plomo ácido asegúrese de que siempre haya ayuda inmediata disponible en caso de accidente o emergencia Utilice siempre protección para los ojos al emplear este producto el contacto con el ácid...

Page 31: ...o lo conecte a un sistema de batería de 6 o 24 voltios Este sistema no está diseñado para ser utilizado en reemplazo de una batería de vehículo No intente hacer funcionar un vehículo que no tenga la batería instalada El exceso de revoluciones del motor puede dañar el mecanismo de arranque de un vehículo Si el motor no arranca después de la cantidad recomendada de intentos abandone los procedimient...

Page 32: ...tivos médicos No se ha comprobado su funcionamiento en aplicaciones médicas Opere la unidad solamente como se describe en este manual de instrucciones PRECAUCIÓN Dispositivos recargables Algunos dispositivos recargables están diseñados para cargarse al ser enchufados directamente en un tomacorriente de CA Estos dispositivos pueden dañar el inversor o el circuito que se está cargando Al utilizar un...

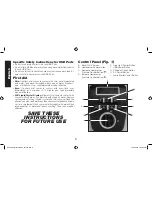
Page 33: ...ención médica Si es líquido se traga el cristal Limpie su boca con un chorro de agua a fondo con agua Beba las cantidades grandes de agua e induzca vomitar Entonces busque la atención médica GUARDA ESTAS INSTRUCCIONES PARA USO FUTURO Panel de control Fig 1 A Pantalla del LCD retroiluminada B Botón de alimentación del compresor C Botón para disminuir la presión del compresor D Botón para aumentar l...

Page 34: ...a fallo H Puertos USB I Tomas de corriente 120V CA dobles J Pinzas A y B mostrada con conector de pinzas P C D E A B F H G I J K Puerto de carga de 12V CC bajo cubierta protectora L Cargador de 120V CA incorporado bajo cubierta protectora M Luz de área LED dos bancos de tres LED N Adaptador de carga 12V CC O Ranura de conexión de pinzas P Conector de pinzas para la conexión de las pinzas a la ranu...

Page 35: ...no de alarma Iconos de polaridad inversa Iconos de pinzas Indicador del voltaje vatiaje Indicador de presión del compresor Icono de USB Icono del compresor Icono del puente auxiliar de arranque Icono del alternador Indicadores alternador de bueno fallo Icono del falla DXAEPS2_ManualENSP_101216 indd 35 10 19 2016 3 56 37 PM ...

Page 36: ...activan La unidad permanece encendida hasta se presiona el botón de alimentación de CA de nuevo para desactivarla Presione el botón de alimentación USB Consulte la sección Puertos USB Sonará un bip y la pantalla retroiluminada LCD mostrará el icono de estado de la batería y el indicador del voltaje de la batería y los Indicadores de USB potencia fallo se iluminará sólidamente azul indicando que lo...

Page 37: ...encia continua hasta que las pinzas estén desconectados de la batería Cuando la unidad se está cargando o recarga mediante el cargador de 120V CA incorporado o el adaptador de carga 12V CC consulte la sección Cargar Recargar s o n a r á u n b i p y l a retroiluminación se encenderá durante 10 segundos sólo La pantalla LCD continuará mostrando el icono de estado de la batería y el indicador del vol...

Page 38: ... ésta puede retardar el proceso de recarga PRECAUCIÓN Para reducir el riesgo de daño a la propiedad Si no se mantiene la batería cargada puede causar daños permanentes y resultar en un pobre rendimiento de arranque IMPORTANTE Si usted sabe que la unidad se descarga pero el icono de la batería muestra cuatro barras sólidas como si la unidad está totalmente cargada cuando se conecta a una fuente de ...

Page 39: ... de abajo a arriba varias veces para indicar que la unidad se está cargando La luz de fondo se encenderá durante 10 segundos solamente 4 Carga hasta que el icono de la batería demuestra 4 barras sólidas 5 Desconecte el adaptador de carga de CC de la unidad y la fuente de alimentación de CC de 12 voltios cuando no esté en uso Notas relativas al método de carga de CC A IMPORTANTE El método de recarg...

Page 40: ... LCD retroiluminada mostrará siguiento PRECAUCIÓN La unidad sufrirá daños permanentes si el Interruptor del puente auxiliar de arranque se enciende mientras que las pinzas conectadas con la polaridad inversa Desconecte y vuelva a conectar las pinzas a la batería con la polaridad correcta Si el interruptor del puente auxiliar de arranque se encuentre encendido y la unidad detecta que las pinzas no ...

Page 41: ... pinza directamente al terminal del negativo de la batería o a una pieza móvil Refiera al manual del dueño del automóvil 5 Procedimiento para arrancar SISTEMAS CON POSITIVO A TIERRA NOTA En el caso poco habitual de que el vehículo que se debe arrancar tenga un sistema de positivo a tierra el terminal positivo de la batería está conectado al bastidor reemplace los pasos 4a y 4b anteriores con los p...

Page 42: ...e el interruptor de encendido del puente auxiliar de arranque en la posición de apagado desconecte los conductores del puente auxiliar de arranque y comuníquese con un técnico calificado para investigar por qué no arrancó el motor Cheque del alternador Configurar la unidad y conecte a la batería siguiendo los pasos 1 a 5 en la sección Puente auxiliar de arranque Notas importantes relativos al func...

Page 43: ...ndido Después cargue el alternador girando tantos accesorios como sea posible a excepción del aire acondicionado y descongele 1 Presione el botón del cheque del alternador para comenzar el cheque La pantalla del LCD retroiluminada exhibirá el siguiente para indicar que la unidad está analizando el alternador El icono de estado de la batería se iluminará sólido y el icono del alternador parpadeará ...

Page 44: ...or es capaz de inflar hasta 120 libras por la presión de la pulgada cuadrada PSI El compresor puede funcionar lo suficiente para llenar hasta 3 neumáticos de medida promedio antes de tener que recargar la batería Vuelva a colocar la manguera en el compartimiento de almacenamiento después del uso IMPORTANTE Asegúrese de que el interruptor del puente auxiliar de arranque se ha apagado antes de inten...

Page 45: ...sólido para indicar que el compresor se activa Supervise la presión sobre la pantalla del LCD NOTA IMPORTANTE Para interrumpir durante el inflado pulse el botón de alimentación del compresor una vez más 5 Cuando se alcance la presión predefinido deseada el compresor parará automáticamente 6 Pulse el botón de alimentación del compresor para apagar la unidad 7 Desatornille y retire el conector de la...

Page 46: ...rma de onda senoidal de la electricidad Este tipo de forma de onda es adecuado para la mayoría de las cargas CA incluidas las fuentes de energía por conmutación y lineales utilizadas en equipos electrónicos transformadores y motores pequeños CARACTERÍSTICAS DE PROTECCIÓN La unidad supervisa para las siguientas condiciones Baja voltaje de la batería interna La unidad cerrará automáticamente cuando ...

Page 47: ...lido y la pantalla digital muestra 0 indicando las tomas de corriente de CA dobles están listos para usar 2 Inserte el enchufe de la CA de 120 voltios de la aplicación en una de las tomas de corriente de CA 3 Encender el aparato y operar como de costumbre La pantalla LCD mostrará la siguiente El icono de estado de la batería el indicador indicador de vatiaje iluminan sólido y la pantalla digital m...

Page 48: ...o total de todos los dispositivos USB conectados a los puertos USB no excede 3 1A e Si un dispositivo USB individuo está dentro de las especificaciones y se produce el fallo tener el dispositivo USB comprobado para funcionamiento defectuoso y no seguir utilizándolo con estos puertos USB 3 Los puertos USB de esta unidad no soportan la comunicación de datos Sólo proporcionan alimentación a dispositi...

Page 49: ...o de tiempo antes de apagado automático IMPORTANTE Cerciórese de que la luz de área y la unidad estén dadas vuelta de cuando se está recargando o se está almacenando la unidad Cuidado y mantenimiento ADVERTENCIA Para reducir el riesgo de lesiones apague la unidad y desconecte de cualquier fuente de alimentación antes de instalar o retirar accesorios antes de ajustar o al realizar el mantenimiento ...

Page 50: ...rnille la tapa trasera del enchufe de CC en sentido contrario a las manecillas del reloj 2 Retire el resorte central de contacto y el fusible 3 Inspeccione el fusible con un control de continuidad 4 En caso de estar quemado busque un fusible de reemplazo de 2 amperios 5 Coloque el fusible el resorte de contacto y el cobertor posterior 6 Atornille la tapa trasera en sentido de las manecillas del re...

Page 51: ... El compresor portátil no inflará continuado Asegúrese de que la boquilla SureFit está firmemente atornillada al vástago de válvula cuando se intenta inflar los neumáticos o que el adaptador de la boquilla se atornilla firmemente en la boquilla SureFit y está insertado correctamente en el elemento a ser inflado en todos los otros objetos inflables Compruebe que la unidad tiene una carga completa R...

Page 52: ...ajo Compruebe que la unidad tiene una carga completa Recargue la unidad en caso de necesidad Accessories ADVERTENCIA Debido a que no se han probado con este producto otros accesorios que no sean los que ofrece DeWALT el uso de dichos accesorios con esta herramienta podría ser peligroso Para reducir el riesgo de lesiones con este producto deben usarse sólo los accesorios recomendados por DeWALT Si ...

Page 53: ...so comercial POLÍTICA DE DEVOLUCIÓN DE 90 DÍAS Si usted no está completamente satisfecho con el rendimiento de este producto por cualquier razón puede devolverlo en un plazo de noventa 90 días desde la fecha de compra con un recibo para un reembolso complete Por favor completar la tarjeta de registro del producto dentro de un plazo de 30 días a partir de la fecha de compra y remitir a Baccus Globa...

Page 54: ...DXAEPS2_ManualENSP_101216 indd 54 10 19 2016 3 56 38 PM ...

Page 55: ...DXAEPS2_ManualENSP_101216 indd 55 10 19 2016 3 56 38 PM ...

Reviews: