background image

SETUP GUIDE

Summary of Contents for XPS L702X

Page 1: ...SETUP GUIDE ...

Page 2: ......

Page 3: ...SETUP GUIDE Regulatory model P09E Regulatory type P09E002 ...

Page 4: ...c All rights reserved Reproduction of these materials in any manner whatsoever without the written permission of Dell Inc is strictly forbidden Trademarks used in this text Dell the DELL logo XPS and DellConnect are trademarks of Dell Inc Intel and Centrino are registered trademarks and Core is a trademark of Intel Corporation in the U S and other countries Microsoft Windows and the Windows start ...

Page 5: ...p the TV Tuner Optional 19 Set Up Stereoscopic 3D Optional 20 Set Up 3D TV Optional 21 Connect to the Internet Optional 23 Using Your XPS Laptop 26 Right View Features 26 Left View Features 30 Back View Features 32 Computer Base and Keyboard Features 34 Status Lights and Indicators 38 Disabling Battery Charging 39 Touch Pad Gestures 40 Multimedia Control Keys 42 Control Strip Features 44 Using the...

Page 6: ...blems 70 Using Support Tools 72 Dell Support Center 72 My Dell Downloads 73 Hardware Troubleshooter 74 Dell Diagnostics 74 Restoring Your Operating System 79 System Restore 80 Dell DataSafe Local Backup 81 System Recovery Media 83 Dell Factory Image Restore 84 Getting Help 86 Technical Support and Customer Service 87 DellConnect 87 Online Services 88 Automated Order Status Service 89 Product Infor...

Page 7: ...5 Contents Finding More Information and Resources 94 Specifications 96 Appendix 103 Information for NOM or Official Mexican Standard Only for Mexico 103 Index 104 ...

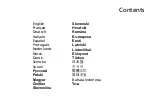
Page 8: ...6 Contents ...

Page 9: ...ace such as a cabinet or drawer while it is powered on WARNING Do not block push objects into or allow dust to accumulate in the air vents Do not place your Dell computer in a low airflow environment such as a closed briefcase or on fabric surfaces such as carpets or rugs while it is powered on Restricting the airflow can damage the computer deteriorate the computer performance or cause a fire The...

Page 10: ... electrical outlet or surge protector WARNING The AC adapter works with electrical outlets worldwide However power connectors and power strips vary among countries Using an incompatible cable or improperly connecting the cable to a power strip or electrical outlet may cause fire or permanent damage to your computer ...

Page 11: ...9 Setting Up Your XPS Laptop Connect the Network Cable Optional To use a wired network connection connect the network cable ...

Page 12: ...10 Setting Up Your XPS Laptop Press the Power Button ...

Page 13: ...rocedures including accepting license agreements setting preferences and setting up an Internet connection CAUTION Do not interrupt the operating system s setup process Doing so may render your computer unusable and you will need to reinstall the operating system NOTE For optimal performance of your computer it is recommended that you download and install the latest BIOS and drivers for your compu...

Page 14: ...hased the computer while preserving data files without the need of the Operating System disc You can use the system recovery media if changes to the hardware software drivers or other system settings have left the computer in an undesirable operating state You will require the following to create the system recovery media Dell DataSafe Local Backup USB key with a minimum capacity of 8 GB or DVD R ...

Page 15: ...he AC Adapter on page 1 8 Insert the disc or USB key in the computer 2 Click 3 Start All Programs Dell DataSafe Local Backup Click 4 Create Recovery Media Follow the instructions on the screen 5 NOTE For information on restoring your operating system using the system recovery media see System Recovery Media on page 83 ...

Page 16: ...dentity Module SIM card on your computer allows you to connect to the Internet To access the Internet you must be within the network of your cellular service provider To install the SIM card Turn off your computer 1 Remove the battery see Removing and Replacing the Battery on page 2 52 In the battery bay slide the SIM card into the SIM card slot 3 Replace the battery see Removing and Replacing the...

Page 17: ...15 Setting Up Your XPS Laptop 1 SIM card 2 battery bay 3 SIM card slot 1 2 3 ...

Page 18: ...16 Setting Up Your XPS Laptop Enable or Disable Wireless Optional ...

Page 19: ...t status of the wireless radios appears on the screen Wireless enabled Wireless disabled Press the Fn F2 keys again to switch between the wireless enabled or disabled states 3 NOTE Pressing the Fn F2 keys allows you to quickly turn off wireless radios Wi Fi and Bluetooth such as when you are asked to disable all wireless radios on an airplane flight ...

Page 20: ...puter and must be purchased separately If your computer supports the wireless display feature the Intel Wireless Display icon will be available on the Windows desktop To set up wireless display Turn on your computer 1 Ensure that wireless is enabled see Enable 2 or Disable Wireless on page 16 Connect the wireless display adapter to 3 the TV Turn on the TV 4 Select the appropriate video source 5 fo...

Page 21: ...on about wireless display see the wireless display adapter documentation Set Up the TV Tuner Optional NOTE Availability of the TV tuner may vary by region To set up the TV tuner If not already inserted turn off the 1 computer and insert the mini B CAS card into the SIM card slot on your computer Japan only Connect the TV digital antenna cable 2 or the cable adapter to the antenna in connector on y...

Page 22: ...display type drop down menu select Dell 3D Vision Laptop NOTE If the Stereoscopic 3D display type section displays 3D TV Play your computer display will not support Stereoscopic 3D You can view content in Stereoscopic 3D by connecting your computer to a 3DTV For more information see Set Up 3D TV on page 21 From the c Test stereoscopic 3D drop down menu select Run Setup Wizard The Set up NVIDIA 3D ...

Page 23: ...settings when using NVIDIA 3DTV Play as the application controls the timing of the glasses NOTE If you are unable to view the entire Windows desktop on your TV use the 3D TV s settings to reduce the display resolution NOTE For more information about configuring the 3D settings see the documentation that shipped with your TV Set your TV as the primary display 3 Right click the desktop and select a ...

Page 24: ...d and then click Change resolution For 3D gaming set the resolution to b 720p 1280x720 and refresh rate to 60 59 Hz in HD 3D mode For Blu ray 3D playback set the c resolution to 1080p 1920x1080 and refresh rate to 24 23 Hz in HD 3D mode NOTE For TVs using PAL system with refresh rates of 50 Hz or 100 Hz or NTSC system with refresh rates of 60 Hz or 120 Hz set the resolution to 720p and refresh rat...

Page 25: ...ellular telephone service for setup instructions To complete setting up your wired Internet connection follow the instructions in Setting Up Your Internet Connection on page 24 Setting Up a Wireless Connection NOTE To set up your wireless router see the documentation that shipped with your router Before you can use your wireless Internet connection you need to connect to your wireless router To se...

Page 26: ... you do not have an ISP the Connect to the Internet wizard can help you get one To set up your Internet connection Save and close any open files and exit any 1 open programs Click 2 Start Control Panel In the search box type 3 network and then click Network and Sharing Center Set up a new connection or network Connect to the Internet The Connect to the Internet window appears NOTE If you do not kn...

Page 27: ...25 Setting Up Your XPS Laptop ...

Page 28: ...26 Using Your XPS Laptop This section provides information about the features available on your Dell XPS laptop Right View Features 1 2 5 6 7 3 4 ...

Page 29: ... Emergency Eject Hole on page 46 5 Audio out Headphone connector Connects to a pair of headphones or to a powered speaker or sound system 6 Headphone digital S PDIF combo connector Connects to amplifiers speakers or TVs for digital audio output Can also be used to connect to a pair of headphones NOTE You must use a S PDIF mini TOSLINK adapter to connect a S PDIF cable The S PDIF mini TOSLINK adapt...

Page 30: ...28 Using Your XPS Laptop 8 ...

Page 31: ...o charge USB devices when the computer is powered on off or in sleep state NOTE Certain USB devices may not charge when the computer is powered off or in sleep state In such cases turn on the computer to charge the device NOTE If you turn off your computer while charging a USB device the device stops charging To continue charging disconnect the USB device and connect it again NOTE The USB PowerSha...

Page 32: ...30 Using Your XPS Laptop Left View Features 1 2 ...

Page 33: ...view and share digital photos music videos and documents stored on memory cards For the supported memory cards see Specifications on page 98 NOTE Your computer ships with a plastic blank installed in the media card slot Blanks protect unused slots from dust and other particles Save the blank for use when no media card is installed in the slot blanks from other computers may not fit your computer ...

Page 34: ...32 Using Your XPS Laptop Back View Features 1 2 3 5 7 6 4 ...

Page 35: ...a monitor only the video signal is read 4 Network connector Connects your computer to a network or a broadband device if you are using a wired network 5 Security cable slot Attaches a commercially available security cable to the computer NOTE Before you buy a security cable ensure that it fits into the security cable slot on your computer 6 AC adapter connector Connects to the AC adapter to power ...

Page 36: ...34 Using Your XPS Laptop Computer Base and Keyboard Features 3 2 1 4 5 ...

Page 37: ...strip The power button status lights and touch sensitive controls are located in this strip For more information on the control strip see Control Strip Features on page 44 4 XPS logo light The light on the XPS logo indicates the power states For more information on the logo light see Status Lights and Indicators on page 38 5 Function key row The dual display enable or disable key wireless enable o...

Page 38: ...36 Using Your XPS Laptop 9 8 7 6 ...

Page 39: ...rightness no lighting 7 Touch pad buttons 2 Provide left click and right click functions like those on a mouse 8 Touch pad status light Turns on if the touch pad is disabled 9 Touch pad Provides the functionality of a mouse to move the cursor drag or move selected items and left click by tapping the surface The touch pad supports the Scroll Flick Zoom and Rotate features To change the touch pad se...

Page 40: ...standby off hibernate charging off on standby off hibernate fully charged Battery solid amber on standby low battery 10 off on standby off hibernate not charging Power Button Light or XPS Logo Light Indicator light status Computer state s solid white breathing white off on standby off hibernate NOTE For information on power problems see Power Problems on page 68 ...

Page 41: ...ble the battery charging feature Ensure that your computer is turned on 1 Click 2 Start In the search box type 3 Power Options and press Enter In the 4 Power Options window click Dell Battery Meter In the 5 Battery Settings window click Turn off Battery Charging and then click OK NOTE Battery charging can also be disabled in the System Setup BIOS utility ...

Page 42: ...ical auto scrolling Tap on the touch pad to stop auto scrolling Scroll Horizontal Allows you to scroll left or right on the active window Move two fingers left or right to scroll the selected object Move two fingers left or right at a fast pace to activate horizontal auto scrolling Tap on the touch pad to stop auto scrolling Flick Allows you to flip content forward or backward based on the directi...

Page 43: ... apart to enlarge the view of the active window To zoom out Move two fingers close together to reduce the view of the active window Rotate Allows you to rotate the active content on the screen The rotate feature includes Twist Allows you to rotate the active content using two fingers where one finger is anchored and the other rotates Keeping the thumb in place move the index finger in an arced dir...

Page 44: ...Multimedia Key First or Function Key First Function Key First This is the default option Press any function key to perform the associated function For multimedia action press Fn the required multimedia key Multimedia Key First Press any multimedia key to perform the associated multimedia action For function press Fn the required function key NOTE The Multimedia Key First option is active only in t...

Page 45: ...43 Using Your XPS Laptop Play the previous track or chapter Decrease the volume level Play or pause Increase the volume level Play the next track or chapter Mute the sound ...

Page 46: ...44 Using Your XPS Laptop Control Strip Features 1 2 3 4 5 6 ...

Page 47: ...charge status For more information on the battery status light see Status Lights and Indicators on page 38 NOTE The battery is charging when the computer is powered using the AC adapter 4 Windows Mobility Center control Touch to launch the Windows Mobility Center 5 Instant launch control Touch to launch a predefined application of your choice 6 Audio control panel control Touch to launch the Dell ...

Page 48: ...ray To place a disc in the optical drive Press the eject button on the optical drive 1 Pull out the optical drive tray 2 Place the disc label side up in the center of the optical drive tray and snap the disc onto 3 the spindle Push the optical drive tray back into the drive 4 Using the Emergency Eject Hole If the optical drive tray does not eject when you press the eject button you can use the eme...

Page 49: ...47 Using Your XPS Laptop 1 disc 2 spindle 3 optical drive tray 4 emergency eject hole 5 eject button 1 3 5 2 4 ...

Page 50: ...48 Using Your XPS Laptop Display Features 1 2 3 4 ...

Page 51: ...ferencing and chat The camera supports the H 264 video compression codec which provides high quality video at low data transmission rates 4 Display Your display can vary based on selections you made when purchasing your computer The display may support the touch screen feature if you selected the option at the time of purchase For information on the touch screen features see Touch Screen Gestures ...

Page 52: ...rt to enlarge the view of the active window To zoom out Move two fingers close together to reduce the view of the active window Dwell Allows you to access additional information by simulating a right click Press and hold a finger on the touch screen to open context sensitive menus Flick Allows you to flip content forward or backward based on the direction of the flick Move a finger quickly in the ...

Page 53: ...on the active window Move a finger up or down to activate vertical scrolling Scroll Horizontal Allows you to scroll right or left on the active window Move a finger to the right or left to activate horizontal scrolling Rotate Allows you to rotate the active content on the screen Twist Allows you to rotate the active content using two fingers Keeping a finger or thumb in place move the other finger...

Page 54: ...ry purchased from Dell Do not use batteries from other computers WARNING Before removing the battery shut down the computer and remove external cables including the AC adapter To remove the battery Turn off the computer and turn it over 1 Slide the battery release latch to the side 2 Lift the battery up at an angle and remove 3 it from the battery bay To replace the battery Align the tabs on the b...

Page 55: ...53 Using Your XPS Laptop 1 battery release latch 2 battery 3 tabs 3 1 2 3 ...

Page 56: ...uld normally enter this information yourself such as for logging on to a Windows account or secure websites For more information click Start All Programs FastAccess Productivity and Communication You can use your computer to create presentations brochures greeting cards fliers and spreadsheets You can also edit and view digital photographs and images Check your purchase order for software installe...

Page 57: ... viewed directly on connected TVs projectors and home theater equipment Dell DataSafe Online Backup NOTE Dell DataSafe Online is supported only on Windows operating systems NOTE A broadband connection is recommended for fast upload download speeds Dell DataSafe Online is an automated backup and recovery service that helps protect your data and other important files from catastrophic incidents like...

Page 58: ...nabled through an application profile When an application is launched the video drivers check if the application has an associated application profile If an application profile exists the NVIDIA GPU is enabled and the application runs in performance mode The NVIDIA GPU is disabled automatically when the application is closed If an application profile does not exist only the integrated Intel GPU is...

Page 59: ...select the application in the Select a program to customize list and make the desired changes NOTE For more information on the NVIDIA control panel s options and settings click Help NVIDIA 3DTV Play The NVIDIA 3DTV Play application installed on your computer allows you to play 3D games watch Blu ray 3D videos and browse 3D photos 3D Games The NVIDIA 3DTV Play application supports the same games as...

Page 60: ...e performance select HD or SD mode when 3DTV Play is disabled Ctrl F4 Increases 3D depth Increases the 3D depth real time in the current game Ctrl F3 Decreases 3D depth Decreases the 3D depth real time in the current game Ctrl F11 Captures a 3D screenshot of the current game and saves the file in the My Documents NVSteroscopic3D IMG folder To view the file use the NVIDIA 3D Photo Viewer Ctrl Alt I...

Page 61: ...laces all objects behind the scene in your space also used to place the laser sight Customizing Shortcut Keys To customize the keyboard shortcuts Right click the desktop and select 1 NVIDIA Control Panel In the 2 NVIDIA Control Panel window click Stereoscopic 3D to expand the selection if not already expanded and then click Set keyboard shortcuts Click the box displaying the shortcut you want to c...

Page 62: ...ray 3D videos at 1080p resolution For 3D Blu ray playback set the resolution to 1080p 1920x1080 and refresh rate to 24 23 Hz in HD 3D mode To watch Blu ray 3D videos use the CyberLink Power DVD application installed on your computer The CyberLink PowerDVD application detects your 3D TV automatically NOTE For more information on the CyberLink PowerDVD s configuration options and settings click Help...

Page 63: ...ight click the Dock click 1 Add Category The Add Edit Category window appears Enter a title for the category in the 2 Title field Select an icon for the category from the 3 Select an image box Click 4 Save Add an Icon Drag and drop the icon to the Dock or a category Remove a Category or Icon Right click the category or icon on the 1 Dock and click Delete shortcut or Delete category Follow the inst...

Page 64: ... Dell Stage Minimize Drag the Dell Stage window to the bottom of the screen Personalize Select the settings icon and then choose the desired option The following are the applications available on Dell Stage NOTE Some of the applications may not be available based on the selections you made while purchasing your computer Music Play music or browse through your music files by album artist or song ti...

Page 65: ...u to purchase or rent movies and TV shows when connected to the Internet Shortcuts Provides quick access to your frequently used programs StickyNotes Create notes or reminders using the keyboard or touch screen These notes will appear on the bulletin board the next time you access STICKYNOTES You can also save notes on your desktop Web Tile Provides a preview of up to four of your favorite web pag...

Page 66: ... by detecting a free fall state caused by accidentally dropping the computer When a free fall state is detected the hard drive is placed in a safe state to protect against damage to the read write head and possible data loss Your hard drive returns to normal operation when the free fall state is no longer detected ...

Page 67: ...or problems This series of beeps called a beep code identifies a problem If this occurs write down the beep code and contact Dell see Contacting Dell on page 93 for assistance NOTE To replace parts see the Service Manual at support dell com Beep Code Possible Problem One Possible system board failure BIOS ROM checksum failure Two No RAM detected NOTE If you installed or replaced the memory module ...

Page 68: ...re re calibration If you choose to calibrate the touch screen click Start Control panel Hardware and Sound Tablet PC Settings Calibrate NOTE Improper calibration may lead to inaccurate touch sensitivity If the touch screen starts losing its sensitivity The touch screen may have foreign particles such as sticky notes that are blocking the touch sensors To remove these particles Turn off the compute...

Page 69: ...twork hub Check if wireless is enabled on the computer see Enable or Disable Wireless on page 16 Re establish your connection to the wireless router see Setting Up a Wireless Connection on page 23 Interference may be blocking or interrupting your wireless connection Try moving the computer closer to your wireless router Wired Connections If the wired network connection is lost The network cable is...

Page 70: ...utlet is working by testing it with another device such as a lamp Check the AC adapter cable connections If the AC adapter has a light ensure that the light on the AC adapter is on If the power light is solid white and the computer is not responding The display may not be responding Press the power button until the computer turns off and then turn it back on If the problem persists contact Dell se...

Page 71: ...ent memory message Save and close any open files and exit any open programs you are not using to see if that resolves the problem See the software documentation for minimum memory requirements If necessary install additional memory see the Service Manual at support dell com manuals Reseat the memory module s into the connector s see the Service Manual at support dell com manuals If the problem per...

Page 72: ...on If necessary uninstall and then reinstall the program NOTE Software usually includes installation instructions in its documentation or on the CD If a program is designed for an earlier Microsoft Windows operating system Run the Program Compatibility Wizard The Program Compatibility Wizard configures a program so that it runs in an environment similar to an earlier version of Microsoft Windows o...

Page 73: ...Ds Save and close any open files or programs and shut down your computer through the Start menu Check the software documentation or contact the software manufacturer for troubleshooting information Ensure that the program is compatible with the operating system installed on your computer Ensure that your computer meets the minimum hardware requirements needed to run the software See the software d...

Page 74: ...arranty status and alerts on improving the performance of your computer The home page also provides links to access PC Checkup Run hardware diagnostics see which program occupies the maximum memory on your hard drive and track the changes made to your computer each day PC Checkup Utilities Drive Space Manager Manage your hard drive using a visual representation of the space consumed by each type o...

Page 75: ... that will help improve your system performance For more information about Dell Support Center and to download and install the available support tools go to DellSupportCenter com My Dell Downloads NOTE My Dell Downloads may not be available in all regions Some of the software pre installed on your new Dell computer do not include a backup CD or DVD This software is available on the My Dell Downloa...

Page 76: ...bes the problem and follow the remaining troubleshooting steps Dell Diagnostics If you experience a problem with your computer perform the checks in Lockups and Software Problems on page 70 and run Dell Diagnostics before you contact Dell for technical assistance NOTE Dell Diagnostics works only on Dell computers NOTE The Drivers and Utilities disc may not ship with your computer Ensure that the d...

Page 77: ...enu and press Enter This may invoke the Pre Boot System Assessment PSA on your computer NOTE If you wait too long and the operating system logo appears continue to wait until you see the Microsoft Windows desktop then shut down your computer and try again NOTE If you see a message stating that no diagnostics utility partition has been found run Dell Diagnostics from the Drivers and Utilities disc ...

Page 78: ...on window Select the test you want to run 4 If a problem is encountered during a 5 test a message with an error code and a description of the problem appears on your screen Write down the error code and problem description and contact Dell see Contacting Dell on page 93 for assistance NOTE The Service Tag for your computer is displayed at the top of each test screen The Service Tag helps you ident...

Page 79: ...op then shut down your computer and try again NOTE The next steps change the boot sequence for one time only On the next start up the computer boots according to the devices specified in the system setup program When the boot device list appears 3 highlight CD DVD CD RW and press Enter Select the 4 Boot from CD ROM option from the menu that appears and press Enter Type 1 to start the CD menu and p...

Page 80: ... contact Dell see Contacting Dell on page 93 for assistance NOTE The Service Tag for your computer is displayed at the top of each test screen The Service Tag helps you identify your computer when you contact Dell When the tests complete close the test 9 screen to return to the Choose An Option window To exit Dell Diagnostics and restart the 10 computer click Exit Remove the 11 Drivers and Utiliti...

Page 81: ...ll DataSafe Local Backup when System Restore does not resolve your problem System recovery media when operating system failure prevents the use of System Restore and DataSafe Local Backup when installing the Dell factory installed software on a newly installed hard drive Dell Factory Image Restore to restore your computer to the operating state it was in when you received your computer Operating S...

Page 82: ...m Restore Click 1 Start In the search box type 2 System Restore and press Enter NOTE The User Account Control window may appear If you are an administrator on the computer click Continue otherwise contact your administrator to continue the desired action Click 3 Next and follow the instructions on the screen In the event that System Restore did not resolve the issue you may undo the last system re...

Page 83: ... DataSafe Local Backup is not available on your computer use Dell Factory Image Restore see Dell Factory Image Restore on page 84 to restore your operating system You can use Dell DataSafe Local Backup to restore your hard drive to the operating state it was in when you purchased your computer while preserving the data files Dell DataSafe Local Backup allows you to Backup and restore your computer...

Page 84: ...hour or more depending on the size of the data to be restored NOTE For more information see knowledge base article 353560 at support dell com Upgrading to Dell DataSafe Local Backup Professional NOTE Dell DataSafe Local Backup Professional may be installed on your computer if you ordered it at the time of purchase Dell DataSafe Local Backup Professional provides additional features that allow you ...

Page 85: ...y media in case of Operating system failure that prevents the use of the recovery options installed on your computer Hard drive failure that prevents data from being recovered To restore the operating system and Dell factory installed software on your computer using the system recovery media Insert the system recovery disc or USB key 1 and restart the computer When the DELL 2 logo appears press F1...

Page 86: ... on page 81 to restore your operating system Use Dell Factory Image Restore only as the last method to restore your operating system This option restores your hard drive to the operating state it was in when you purchased the computer Any programs or files added since you received your computer including data files are permanently deleted from the hard drive Data files include documents spreadshee...

Page 87: ...nfiguration you may need to select Dell Factory Tools then Dell Factory Image Restore Click 7 Next The Confirm Data Deletion screen appears NOTE If you do not want to proceed with the Factory Image Restore click Cancel Select the check box to confirm that you 8 want to continue to reformat the hard drive and restore the system software to the factory condition then click Next The restore process b...

Page 88: ...of Dell Support online If the preceding steps have not resolved the 5 problem see Before You Call on page 91 NOTE Call Dell Support from a telephone near or at the computer so that the support staff can assist you with any necessary procedures NOTE Dell s Express Service Code system may not be available in all countries When prompted by Dell s automated telephone system enter your Express Service ...

Page 89: ...rs To contact Dell s support service see Before You Call on page 91 and then see the contact information for your region or go to support dell com DellConnect DellConnect is a simple online access tool that allows a Dell service and support associate to access your computer through a broadband connection diagnose your problem and repair it all under your supervision For more information go to dell...

Page 90: ...t Websites support dell com support jp dell com Japan only support euro dell com Europe only supportapj dell com Asia Pacific only Dell Support E mail Addresses mobile_support us dell com support us dell com la techsupport dell com Latin America and Caribbean countries only apsupport dell com Asian Pacific countries only Dell Marketing and Sales E mail Addresses apmarketing dell com Asian Pacific ...

Page 91: ...ur order such as missing parts wrong parts or incorrect billing contact Dell for customer assistance Have your invoice or packing slip handy when you call For the telephone number to call for your region see Contacting Dell on page 93 Product Information If you need information about additional products available from Dell or if you would like to place an order go to the Dell website at dell com F...

Page 92: ... telephone number to call for your region see Contacting Dell on page 93 Include a copy of the invoice and a letter 2 describing the reason for the return Include a copy of the Diagnostics Checklist 3 see Diagnostic Checklist on page 92 indicating the tests that you have run and any error messages reported by Dell Diagnostics see Dell Diagnostics on page 74 Include any accessories that belong with...

Page 93: ...hen you call The code helps Dell s automated support telephone system direct your call more efficiently You may also be asked for your Service Tag Locating Your Service Tag The Service Tag for your computer can be found on a label at the bottom of your computer 1 1 Service Tag ...

Page 94: ...operations or try other troubleshooting steps possible only at the computer itself Ensure that the computer documentation is available Diagnostic Checklist Name Date Address Phone number Service Tag bar code on the bottom of the computer Express Service Code Return Material Authorization Number if provided by Dell support technician Operating system and version Devices Expansion cards Are you conn...

Page 95: ...LL 800 999 3355 NOTE If you do not have an active Internet connection you can find contact information on your purchase invoice packing slip bill or Dell product catalog Dell provides several online and telephone based support and service options Availability varies by country and product and some services may not be available in your area To contact Dell for sales technical support or customer se...

Page 96: ...m find your Service Tag Express Service Code You must use the service tag to identify your computer on support dell com or to contact technical support the bottom of your computer Dell Support Center on page 72 upgrade your computer with new or additional components like a new hard drive reinstall or replace a worn or defective part the Service Manual at support dell com manuals NOTE In some count...

Page 97: ... regulatory documents that shipped with your computer and also see the Regulatory Compliance Homepage at dell com regulatory_compliance find drivers and downloads readme files access technical support and product help check on your order status for new purchases find solutions and answers to common questions locate information for last minute updates about technical changes to your computer or adv...

Page 98: ...in the Dell Support Center To launch the Dell Support Center click Start All Programs Dell Dell Support Center Launch Dell Support Center Specifications Computer Model Dell XPS L702X Computer Information System chipset Mobile Intel 6 series express chipset HM67 Processor type Intel Core i5 Intel Core i7 Memory Memory module connector two or four user accessible SODIMM connectors Memory module capa...

Page 99: ...PDIF one headphone digital S PDIF combo connector Mini Card one full Mini Card slot one half Mini Card slot HDMI connector one 19 pin connector Connectors Network adapter one RJ45 connector USB two 4 pin USB 3 0 compliant connectors one 4 pin USB 2 0 compliant connector Mini DisplayPort one 20 pin connector eSATA one 7 pin 4 pin eSATA USB combo connector with PowerShare Media Card Reader one 9 in ...

Page 100: ...Camera Type 2 0 megapixel HD with H 264 support Video resolution 1280 x 720 Communications Modem optional external V 92 56 K USB modem Network adapter 10 100 1000 Ethernet LAN on system board Wireless WLAN WWAN optional WiMAX Wi Fi abgn agn and Bluetooth wireless technology optional WiDi optional TV TV tuner card optional Audio Audio controller Realtek ALC665 Speakers 2 x 5 Watt main speakers 12 W...

Page 101: ...17 3 inch Full HD WLED TrueLife Multi touch 17 3 inch HD WLED TrueLife Optional Display Dimensions Height 214 81 mm 8 46 inches Width 381 89 mm 15 04 inches Diagonal 439 42 mm 17 30 inches Maximum resolution HD 1600 x 900 FHD 1920 x 1080 Refresh rate HD 60 Hz FHD 120 Hz Operating angle 0 closed to 135 Horizontal viewing angle HD 40 40 FHD 60 60 Vertical viewing angle HD 15 30 H L FHD 50 50 H L Pix...

Page 102: ... Weight 0 34 kg 0 74 lb Voltage 11 1 V 6 9 cell Charge time approximate 4 hours when the computer is turned off Battery Operating time battery operating time varies depending on operating conditions Coin cell battery CR 2032 AC Adapter NOTE Use only AC adapters specified for use with your computer See the safety information that shipped with your computer Input voltage 100 240 VAC Input current ma...

Page 103: ... 70 C 40 to 158 F Keyboard Number of keys 102 U S and Canada 103 Europe 105 Brazil 106 Japan Layout QWERTY AZERTY Kanji Touch Pad X Y position resolution graphics table mode 240 cpi Size Width 100 mm 3 94 inches Height 56 mm 2 2 inches Physical Height 32 9 mm to 38 5 mm 1 29 inches to 1 51 inches Width 414 9 mm 16 33 inches Depth 287 3 mm 11 31 inches Weight with 6 cell battery 3 5 kg 7 7 lb ...

Page 104: ...ronment Operating 0 66 GRMS Non Operating 1 30 GRMS Computer Environment Maximum shock for operating measured with Dell Diagnostics running on the hard drive and a 2 ms half sine pulse for non operating measured with the hard drive in head parked position and a 2 ms half sine pulse Operating 110 G Non Operating 160 G Altitude maximum Operating 15 2 to 3048 m 50 to 10 000 ft Storage 15 2 to 10 668 ...

Page 105: ...Dell México S A de C V Paseo de la Reforma 2620 Flat 11 Col Lomas Altas 11950 México D F Regulatory model number Voltage Frequency Electricity consumption Output voltage Output intensity P09E 100 240 VAC 50 60 Hz 1 80 A 2 10 A 19 5 VDC 6 70 A 7 70 A For details read the safety information that shipped with your computer For additional safety best practices information see the Regulatory Compliance...

Page 106: ...mputer capabilities 54 computer setting up 7 connect ing to the Internet 23 Contacting Dell online 93 Control strip 35 customer service 87 D DataSafe Local Backup 81 DellConnect 87 Dell Diagnostics 74 Dell Factory Image Restore 84 Dell Stage 62 Diagnostic Checklist 92 drivers and downloads 95 DVDs playing and creating 55 E email addresses for technical support 88 Index ...

Page 107: ...bleshooter 74 help getting assistance and support 86 I Internet connection 23 ISP Internet Service Provider 23 M memory problems solving 69 mini DisplayPort connector 33 Multimedia Control Keys 42 N network connection fixing 67 NVIDIA Optimus Technology 56 O Optical Drive Using 46 P power problems solving 68 power strips using 8 problems solving 65 ...

Page 108: ... or repair 90 SIM card 14 software features 54 software problems 70 solving problems 65 specifications 96 support email addresses 88 support sites worldwide 88 System Recovery Media 83 system reinstall options 79 System Restore 80 System Setup entering 42 function key behavior 42 T Touch Pad Gestures 40 Touch screen Gestures 50 TV tuner 19 U USB PowerShare 29 ...

Page 109: ...107 Index W warranty returns 90 Windows Program Compatibility Wizard 70 Windows Mobility Center 42 wired network network cable connecting 9 wireless network connection 67 ...

Page 110: ......

Page 111: ......

Page 112: ...0C4XC4A00 www dell com support dell com www dell com support dell com Printed in the U S A ...

Reviews: