Dell UltraSharp U2417H, User Manual
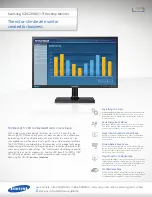
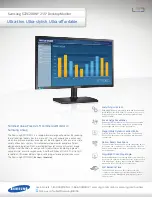
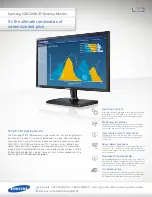
The Dell UltraSharp U2417H is a high-quality monitor that delivers stunning visuals and a seamless user experience. For detailed instructions on setup, operation, and troubleshooting, download the user manual for free at manualshive.com. Enhance your product knowledge and maximize your viewing pleasure with this comprehensive manual.
Share
Download

Reviews:
No comments