

ENGLISH
Quick Install Guide
Pan & Tilt Network Camera with Night Vision
Thank you for purchasing the Pan & Tilt Network Camera with Night Vision. Follow the easy steps
in this guide to set up your camera.
DCS-5010L
Technical Support
Having trouble installing your new product? D-Link’s website
contains the latest user documentation and software updates
for D-Link products. You can also can contact D-Link Technical
Support through our website or by phone.
Canada
Telephone:
(800) 361-5265
Internet:
http://support.dlink.ca/dcs-5010l
Copyright ©2014 All rights reserved. D-Link and the D-Link logo are registered trademarks of D-Link Corporation or its subsidiaries. Other trademarks
are the property of their respective owners. Product specifications, size and shape are subject to change without notice, and actual product appearance
may differ from that depicted on the packaging. Visit dlink.ca (Canada) for more details.
Version 1.10 | March, 04 2014
• Computer with Microsoft Windows® 8/7, Vista®, or XP SP2, Mac OS X 10.5 or above
• PC with 1.3GHz or above; at least 128MB RAM
• Internet Explorer 7 or above , Firefox 13 or above, Safari 4 or above, Chrome 19 or above
• Wired 10/100 Ethernet-based network or wireless (802.11g or 802.11n) network
Note:
If you see any security prompts from Windows, it is safe to proceed by selecting the
appropriate option.
System Requirements
Installation
Step 1:
Power the camera on by connecting the power cable to an electrical outlet.
Step 2:
Download the latest setup wizard and manual
from
https://ca.mydlink.com/support.
Scroll to the right on the product navigation
menu to find the DCS-5010L camera. Under
the
Setup Wizard
heading, download the
Setup Wizard for your operating system (OS).
Step 3:
Run the file once it is downloaded.
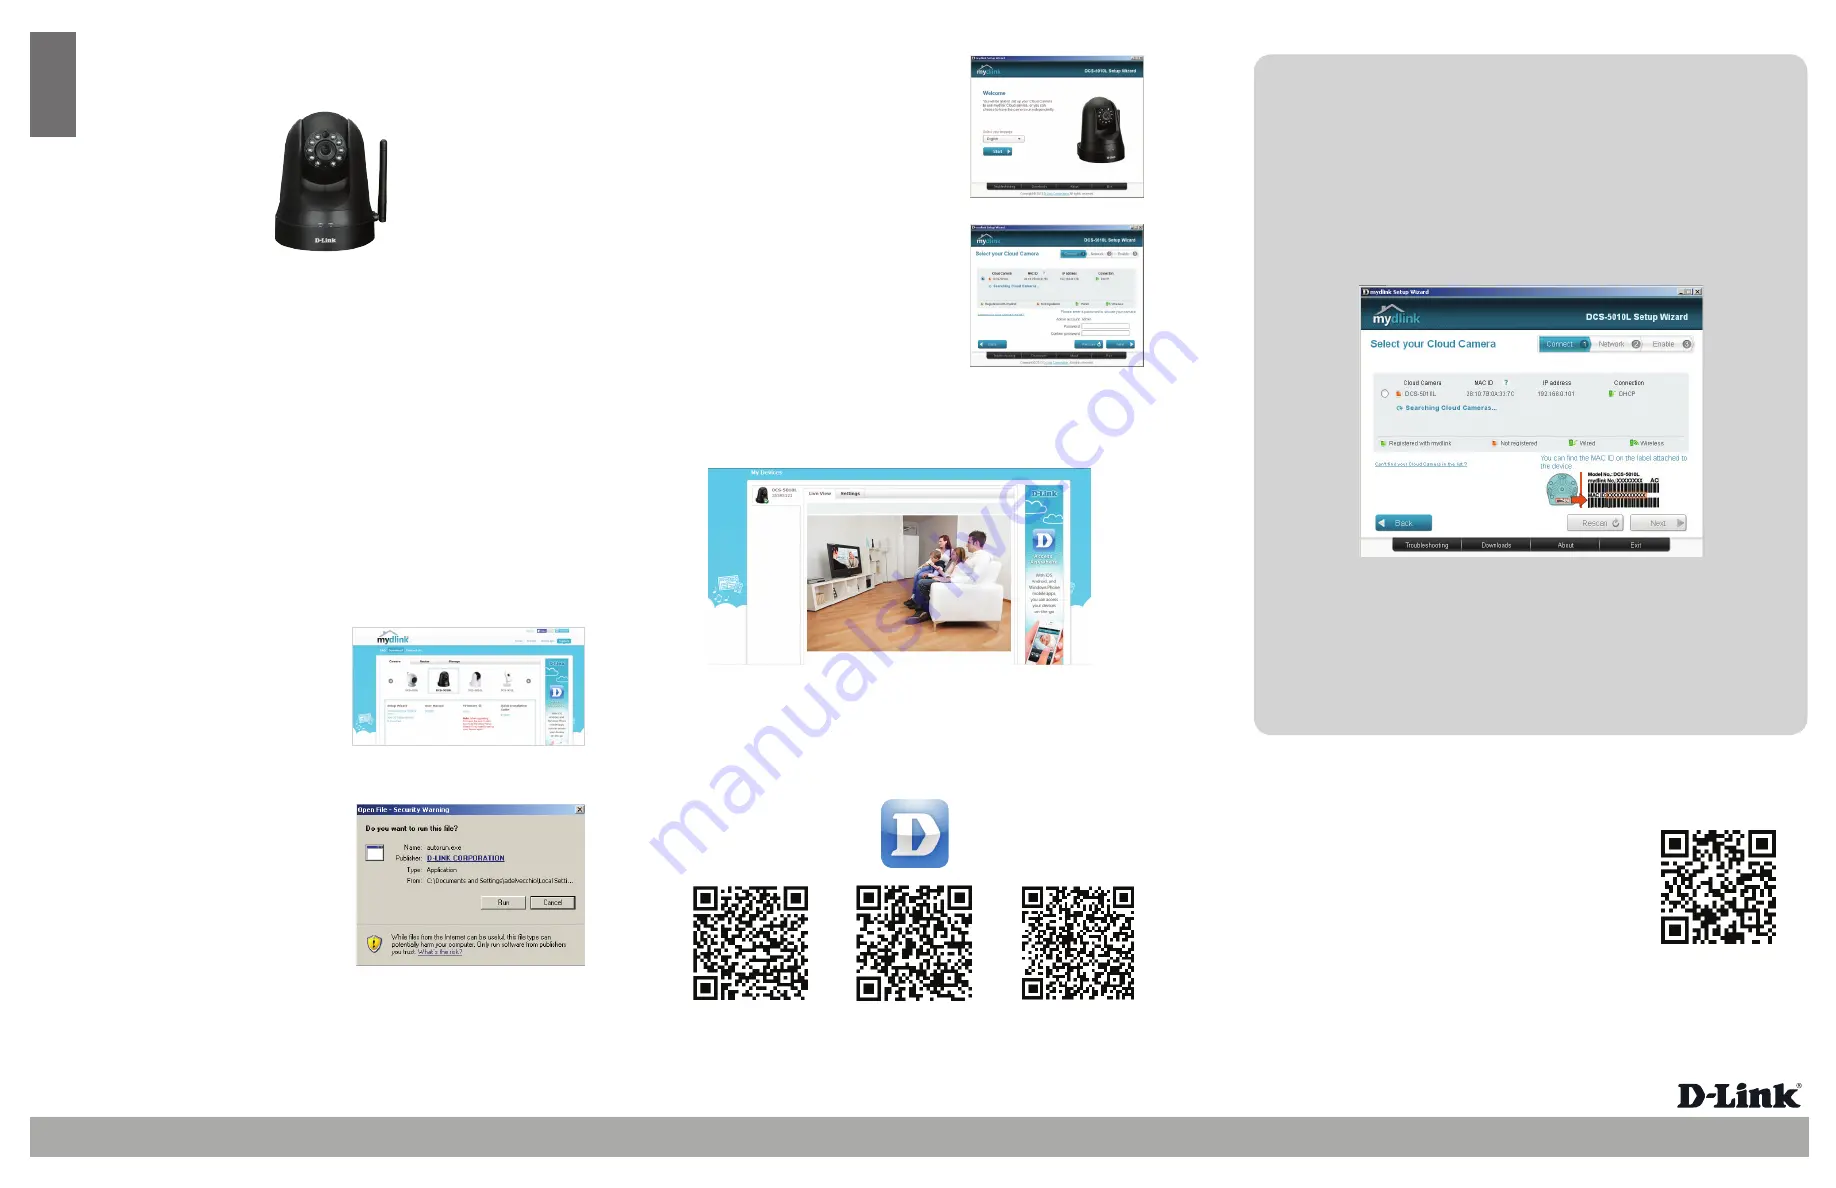
Step 4:
Click the
Start
button to start the wizard, and follow
the instructions from the Setup Wizard to finish
setting up your camera. If you are requested to
download ActiveX, click
Yes.
Step 5:
After completing the Setup Wizard, open your web browser and go to
http://www.mydlink.com
and log into your account to view your camera.
Step 6:
To remotely view your camera on your iOS, Android, or Windows Phone, use the QR codes
below or go to the App Store, Google Play or Windows App Store and download the mydlink
Lite app.
mydlink™ Lite for
Android™
Technical Support
mydlink™ Lite for iOS®
mydlink™ Lite for
Windows Phone
Troubleshooting
mydlink™
Lite App
Cannot view the camera from the mydlink app or portal
• If you have not done so already, run the setup wizard and add the DCS-5010L to
your mydlink account or create a new account.
• If your camera has been added to your mydlink account and it still does not work,
power off the camera for 10 seconds and power it back on. Wait until the PWR LED is
green and try again.
Setup Wizard cannot find your camera
• Make sure the camera is connected to your router either through a wired (LAN port)
or wireless connection.
• Check that the (PWR) LED on the front of the camera is GREEN.
• If you are setting up the camera over a wireless connection, try the setup using a
wired connection.
• Disable your computer’s firewall during the setup process.
Note:
During the Setup Wizard you will be prompted to give
your camera an admin password. Be sure to keep your
password in a secure place for future reference.


