background image

CRAFTSMAN® is a registered trademark of Stanley Black & Decker, Inc., used under license.
CRAFTSMAN® es una marca registrada de Stanley Black & Decker, Inc., utilizada bajo licencia.
© 2018 CRAFTSMAN U.S. & Canada Only 
CRAFTSMAN.com

Form No. 769-16711A

(November 27, 2018)

INSTRUCTION MANUAL   |   MANUAL DE INSTRUCTIONES
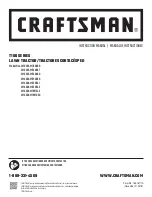
T100 SERIES

LAWN TRACTOR/TRACTORES CORTACÉSPED

Model Nos. CMXGRAM1130036

                       CMXGRAM1130037

                       CMXGRAM1130038 

                       CMXGRAM1130039 

                       CMXGRAM1130041 

                       CMXGRAM1130042

                       CMXGRAM7821242

                       CMXGRAM7831829


IF YOU HAVE QUESTIONS OR COMMENTS, CONTACT US. 

SI TIENE DUDAS O COMENTARIOS, CONTÁCTENOS.

1-888-331-4569

WWW.CRAFTSMAN.COM

Summary of Contents for T100 Series

Page 1: ...nly CRAFTSMAN com Form No 769 16711A November 27 2018 INSTRUCTIONMANUAL MANUALDEINSTRUCTIONES T100 SERIES LAWN TRACTOR TRACTORES CORTACÉSPED ModelNos CMXGRAM1130036 CMXGRAM1130037 CMXGRAM1130038 CMXGRAM1130039 CMXGRAM1130041 CMXGRAM1130042 CMXGRAM7821242 CMXGRAM7831829 IFYOUHAVEQUESTIONSORCOMMENTS CONTACTUS SITIENEDUDASOCOMENTARIOS CONTÁCTENOS 1 888 331 4569 WWW CRAFTSMAN COM ...

Page 2: ...ne Oil Capacity See Separate Engine Manual Fuel Unleaded Gasoline Model Number _________________________________ Serial Number __________________________________ Date of Purchase ________________________________ Record the model number serial number and date of purchase above WARNING Beforeusingthisequipment readthemanualandfollowallsafetyrulesandoperatinginstructions SAVETHESEINSTRUCTIONS NOTE Th...

Page 3: ...e is not intended for use on any public roadway Do not operate the machine while under the influence of alcohol or drugs Mow only in daylight or good artificial light Never carry passengers Disengage blade s before shifting into reverse Back up slowly Always look down and behind before and while backing to avoid a back over accident Slow down before turning Operate the machine smoothly Avoid errat...

Page 4: ...he front of the machine to lift and rapidly flip over backwards which could cause serious injury Avoid starting or stopping on a slope If tires lose traction disengage the blade s and proceed slowly straight down the slope Do Not Do not turn on slopes unless necessary then turn slowly and gradually downhill if possible Do not mow near drop offs ditches or embankments The mower could suddenly turn ...

Page 5: ...plug wire and ground against the engine to prevent unintended starting Periodically check to make sure the blades come to complete stop within approximately 5 five seconds after operating the blade disengagement control If the blades do not stop within the this time frame your machine should be serviced professionally by a qualified service dealer Check brake operation frequently as it is subjecte...

Page 6: ...ng applicable local or state laws if any If a spark arrestor is used it should be maintained in effective working order by the operator In the State of California the above is required by law Section 4442 of the California Public Resources Code Other states may have similar laws Federal laws apply on federal lands A spark arrestor for the muffler is available through your nearest authorized Servic...

Page 7: ...remely hot during operation Allow engine and muffler to cool before touching DANGER ROTATING BLADES To reduce the risk of injury keep hands and feet away Do not operate unless discharge cover or grass catcher is in its proper place If damaged replace immediately WARNING FIRE HAZARD Allow machine to cool before fueling or storing max10 WARNING FIRE HAZARD Do not drive through piles of dry leaves or...

Page 8: ...until the left corner touches the slope See Figure 1 and Figure 2 5 If there is a gap below the gauge the slope is too steep for safe operation See Figure 2 above 1 5 d a s h e d l i n e Figure 2 Figure 1 15 Slope 15 Slope WARNING Slopes are a major factor related to tip over and roll over accidents which can result in severe injury or death Do not operate machine on slopes in excess of 15 degrees...

Page 9: ...art Guide 1 Oil Drain Hose 1 Deck Wash Nozzle 1 Parts Warranty Document 1 Hood Scoop 1 Hose Coupler 1 Product Registration Card 1 If Equipped NOTE ThisOperator sManualcoversseveralmodels Featuresmayvarybymodel Notallfeaturesinthismanualareapplicabletoallmodelsandthemodeldepictedmay differfromyours RefertoFigure2 1tomatchyourtransmissionstyle FootControlCVT ContinuouslyVariableTransmission orCVT Co...

Page 10: ...egative battery terminal with the bolt a and hex nut b See Figure 3 5 Position the red rubber boot c over the positive battery terminal to help protect it from corrosion NOTE If the battery is put into service after the date shown on top side of battery charge the battery as instructed in the Service section your Operator s Manual on page 24 prior to operating the tractor 1 Locate the hydrostatic ...

Page 11: ...position could result in serious personal injury and or property damage Attaching the Steering Wheel 1 If the steering wheel a for your tractor did not come attached the hardware for attaching it has been packed within the steering wheel a beneath the steering wheel cap b Carefully pry OFF the steering wheel cap b and remove the cupped washer c and hex bolt d See Figure 5 d b a e c Figure 5 2 With...

Page 12: ...ure 7 Dash Shroud If Equipped 1 If the dash shroud a was shipped loose the hardware for attaching the dash shroud a is shipped installed in the dash shroud a Remove the two bolts b from the dash shroud a See Figure 8 b a c a b Figure 8 2 Mount the dash shroud a and align the mounting holes See Figure 8 3 Securethedashshroud a tothedash c withthebolts b removedinStep1 SeeFigure8 Tire Pressure WARNI...

Page 13: ...hood Remove the fuel cap by turning it counter clockwise 2 Fill the fuel tank with gasoline Use only clean fresh no more than 30 days old unleaded gasoline Fill tank to the base of the filler neck to allow space for fuel expansion DO NOT TOP OFF THE TANK WITH FUEL See Figure 9 Figure 9 3 Reinstall the fuel cap STOP STOP Continue to Setting the Deck Gauge Wheels If Equipped on page 12 Foot Control ...

Page 14: ... on page 26 of this manual for more detailed instructions regarding various deck adjustments Attaching the Hood Scoop If Necessary If Equipped 1 On some tractors a hood scoop may be included If the hood scoop was not installed on the hood of your tractor at the factory refer to the following steps to install the hood scoop 2 Cut the cable ties securing the hood scoop to the tractor 3 Remove the fo...

Page 15: ...he engine s choke control Activating the choke control closes the choke plate on the carburetor and aids in starting the engine Refer to Starting the engine on page 18 for detailed starting instructions Speed Control Lever Hydrostatic Models The speed control lever located on the left rear fender controls the ground speed of the lawn tractor as well as the direction of travel To drive forward or i...

Page 16: ...gage the disc brake and bring the tractor to a complete stop NOTE The pedal must be depressed to start the engine Refer to Safety Interlock Switches later in this section of this manual Shift Lever CVT Foot Control CVT Models Theshiftleverislocatedontheleftside ofthefenderandhasthreepositions FORWARD F NEUTRAL N andREVERSE R Thebrakepedalmustbedepressed andthelawntractormustnotbeinmotion whenmovin...

Page 17: ... system is malfunctioning This system was designed for your safety and protection Reverse Caution Mode WARNING Use extreme caution while operating the lawn tractor in the REVERSE CAUTION MODE Always look down and behind before and during lawn tractor backing Do not operate the lawn tractor when children or others are around Stop the lawn tractor immediately if someone enters the area The REVERSE C...

Page 18: ... from the ignition switch to prevent unintended starting Driving the Lawn Tractor IMPORTANT First time operators should become completely familiar with the lawn tractor s operation and controls before operating the lawn tractor in higher speed positions WARNING Always look down and behind before and while traveling in reverse to avoid a back over accident WARNING Beforeleavingtheoperator sposition...

Page 19: ... lawn tractor will travel in the desired direction based on the position of the shift lever 5 The lawn tractor is brought to a stop by releasing the drive pedal and then depressing the brake pedal WARNING Before leaving the operator s position for any reason disengage the blades place the shift lever in NEUTRAL N engage the parking brake shut engine OFF and remove the key Parking the Lawn Tractor ...

Page 20: ...ck toward the operator Do not mow at high ground speed especially if a mulch kit or grass collector is installed For best results it is recommended that the first two laps be cut with the discharge thrown towards the center After the first two laps reverse the direction to throw the discharge to the outside for the balance of cutting This will give a better appearance to the lawn Do not cut the gr...

Page 21: ...ck Clean 4 Check Clean 5 Check Clean 6 Check Clean After First Five Hours 1 Engine Oil 1 Change See engine manual Every 10 Hours 1 Hood Dash air vents 2 Battery terminals 3 Pedal pivot points 1 Clean 2 Clean 3 Lubricate Every 25 hours 1 Axles and Rims 2 Engine Cooling fans 3 Air filter s prefilter 4 Air filter 1 Lubricate 2 Lubricate 3 Clean See engine manual 4 Clean See engine manual Every 50 hou...

Page 22: ...tting deck Doing so can cause damage to the rider s spindle bearings electrical system and engine leading to premature failures The use of compressed air and or leaf blower will help keep the rider clean Maintenance WARNING Before performing any maintenance or repairs disengage PTO move shift lever into neutral position set parking brake stop engine and remove key to prevent unintended starting WA...

Page 23: ...NG If the engine has been recently run the engine muffler and surrounding metal surfaces will be hot and can cause burns to the skin Exercise caution to avoid burns NOTE The oil filter if equipped should be changed at every oil change interval To complete the oil change proceed as follows 1 Run the engine for a few minutes to allow the oil in the crankcase to warm Warm oil will flow more freely an...

Page 24: ...a 1 4 turn to align the socket tab with the reflector housing notch then withdraw the bulb and socket assembly from the reflector housing See Figure 7 Figure 7 4 Remove the oil fill cap dipstick from the oil fill tube 5 Push the oil drain hose provided onto the oil drain port Route the opposite end of the hose into an appropriate oil collection container with at least a 2 5 quart capacity to colle...

Page 25: ...e bulb inward and turn clockwise to lock See Figure 7 6 Align the socket tab with the notch of the reflector housing then push the socket inward and turn as necessary to lock the socket in the housing 7 Connect the wire harness leads to the appropriate socket terminals Cleaning the Engine Any fuel or oil spilled on the machine should be wiped off promptly Do NOT allow debris to accumulate around t...

Page 26: ...the second to the top notch second highest position and rotate the blade as close to the discharge channel that is parallel to the tractor 2 Measure the distance from the front of the blade tip to the ground and the rear of the blade tip to the ground The first measurement taken should be between and 3 8 less than the second measurement Determine the approximate distance necessary for proper adjus...

Page 27: ...r if the tractor s rear wheels can roll with the parking brake applied the brake is in need of adjustment See an authorized service dealer to have your brakes properly adjusted Cutting Deck Removal To remove the cutting deck proceed as follows 1 Place the PTO lever in the disengaged OFF position and engage the parking brake 2 Lower the deck by moving the deck lift lever into the bottom notch on th...

Page 28: ... cracks or damage especially if you strike a foreign object Replace immediately if damaged The blades may be removed as follows 1 Remove the deck from beneath the tractor refer to Cutting Deck Removal on page 27 then gently flip the deck over to expose its underside 2 Place a block of wood between the center deck housing baffle and the cutting blade to act as a stabilizer See Figure 15 Figure 15 7...

Page 29: ...ove the key disconnect the spark plug wire s and ground against the engine to prevent unintended starting before removing the belt WARNING All belts on your lawn tractor are subject to wear and should be replaced if any signs of wear are present IMPORTANT The V belt found on your tractor are specially designed to engage and disengage safely A substitute non OEM V belt can be dangerous by not disen...

Page 30: ...l into the carburetor 2 If emptying the fuel system a Do not drain fuel when the engine is hot Allow the engine adequate time to cool Drain fuel into an approved container outdoors away from open flame b Drain any large volume of fuel from the tank by disconnecting the fuel line from the in line fuel filter near the engine See the complete instructions for Draining The Fuel later in this section W...

Page 31: ... activated 2 Spark plug wire s loose 3 Blocked fuel line or stale fuel 4 Vent in gas cap plugged 5 Water or dirt in fuel system 6 Dirty air cleaner 1 Deactivate the CHOKE 2 Connect spark plug wire s 3 Replace the fuel line fill tank with clean fresh gasoline and replace fuel filter 4 Clear vent or replace cap if damaged 5 Drain fuel tank Refill with clean fresh gasoline 6 Replace air cleaner paper...

Reviews: