Craftsman 486.24320, Owner'S Manual
The Craftsman 486.24320 Owner's Manual is a comprehensive guide that provides step-by-step instructions for using this exceptional product. Easily downloadable and completely free, ensure a seamless user experience by visiting our website and accessing the manual at any time.
Share
Download


Reviews:
No comments
Related manuals for 486.24320
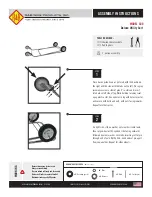
500
Brand: R&B Wire Products Pages: 2
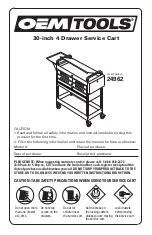
24962
Brand: OEM Tools Pages: 8

Y Series
Brand: d&b audiotechnik Pages: 8

620
Brand: J&M Pages: 38
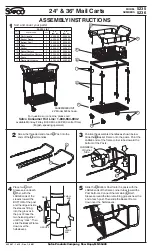
5235
Brand: Safco Pages: 3

Ventura
Brand: Waldbeck Pages: 24
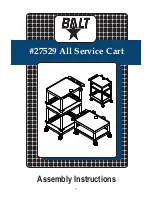
27529
Brand: Balt Pages: 8

60600
Brand: EarthWay Pages: 5
232
Brand: Gardena Pages: 3
006428
Brand: Hard Head Pages: 11
51200
Brand: CALICO DESIGNS Pages: 11

GEMINI XL
Brand: Magliner Pages: 4
100T
Brand: R&B Wire Products Pages: 2
Crazy Cart
Brand: Razor Pages: 42
H-1364
Brand: U-Line Pages: 6
H-1199
Brand: U-Line Pages: 6

H-1200
Brand: U-Line Pages: 6

90722
Brand: U.S. General Pages: 6


