Craftsman 320.48251, Owner'S Manual
The Craftsman 320.48251 is an exceptional tool that requires proper understanding for optimal use. Enhance your experience with the convenient free download of the comprehensive Owner's Manual from manualshive.com, providing vital instructions and maintenance tips. Maximize your tool's potential and ensure its longevity with this essential manual.
Share
Download


Reviews:
No comments
Related manuals for 320.48251
LLT100
Brand: ABB Pages: 32
40-6640
Brand: AccuLine Pages: 26
40-6537
Brand: AccuLine Pages: 18
G80
Brand: LaserLiner Pages: 52
Prolaser 862
Brand: Kapro Pages: 12
Prolaser Vector 873
Brand: Kapro Pages: 14
DigiLevel Compact
Brand: LaserLine Pages: 8
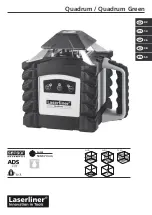
Quadrum
Brand: LaserLiner Pages: 16
LaserCube
Brand: LaserLiner Pages: 52

SmartVision-Laser
Brand: LaserLiner Pages: 60
ActiveFinder XP
Brand: LaserLiner Pages: 64

VEGAPULS WL 61
Brand: Vega Pages: 60
Revolution
Brand: LaserLiner Pages: 20
PROLASER 896G
Brand: Kapro Pages: 16
ADA CUBE
Brand: ADA INSTRUMENTS Pages: 34
VISUAL
Brand: Apollo Pages: 2
UNG641
Brand: Unilevel Pages: 2
VISION 1N
Brand: THEIS Pages: 64


