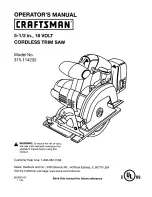
background image

Summary of Contents for 315.114232

Page 1: ...the risk of injury the user must read and understand the operator s manual before using this product Customer Help Line 1 800 932 3188 Sears Roebuck and Co 3333 Beverly Rd Hoffman Estates IL 60179 USA Visit the Craftsman web page www sears com craftsman 983000 507 11 04 Save this manual for future reference ...

Page 2: ...HE NEAREST SEARS STORE OR SEARS SERVICE CENTER IN THE UNITED STATES and Sears will replace it free of charge If this CRAFTSMAN tool is used for commercial or rental purposes this warranty applies for only 90 days from the date of purchase This warranty gives you specific legal rights and you may also have other rights which vary from state to state Sears Roebuck and Co Dept 817WA Hoffman Estates I...

Page 3: ...ter control of the tool in unexpected situations Use safety equipment Always wear eye protection Dust mask non skid safety shoes hard hat or hearing protection must be used for appropriate conditions Do not wear loose clothing or jewelry Contain long hair Loose clothes jewelry or long hair can be drawn into air vents Do not use on a ladder or unstable support Stable footing on a solid surface enab...

Page 4: ...tantto support the work properlyto minimize body exposure blade binding or loss of control Hold tool by insulating gripping surfaces when performing an operation where the cutting tool may contact hidden wiring Contact with a live wire will also make exposed metal parts of the tool live and shock the operator When ripping always use a rip fence or an edge guide This improves the accuracy of cut an...

Page 5: ...ct your hearing Wear hearing protection dur ing extended periods of operation Following this rule will reduce the risk of serious personal injury Battery tools do not have to be plugged into an electrical outlet therefore they are always in operating condition Be aware of possible hazards when not using the battery tool or when changing accessories Following this rule will reduce the risk of elect...

Page 6: ... cord are the same number size and shape as those of plug on charger b That extension cord is properly wired and in good electrical condition and c That wire size is large enough for AC ampere rating of charger as specified below Cord Length Feet 25 50 100 Cord Size AWG 16 16 16 NOTE AWG American Wire Gauge Do not operate charger with a damaged cord or plug which could cause shorting and electric ...

Page 7: ...Rotational speed at no load Double insulated construction Revolutions strokes surface speed orbits etc per minute Do not expose to rain or use in damp locations To reduce the risk of injury user must read and understand operator s manual before using this product Always wear safety goggles or safety glasses with side shields and a full face shield when operating this product Precautions that invol...

Page 8: ...e suggest you return the product to your nearest AUTHORIZED SERVICE CENTER for repair When servicing use only identical replacement parts _1 WARNING To avoid serious personal injury do not attempt to use this product until you read thoroughly and understand completely the operator s manual Save this operator s manual and review frequently for continuing safe opera tion and instructingothers who ma...

Page 9: ...500 min Charger Input 120 V 60 Hz AC only Charge Rate 3 6 Hours BLADE WRENCH STORAGEAREA BLADE WRENCH 5 mmHEXKEY LOCK OFF BUTTON BATTERY PACK SPINDLE LOCK BUTTON SWITCH TRIGGER DEPTHOF CUTADJUSTMENT DEPTH ADJUSTMENTKNOB EDGE GUIDESCREW WINGSCREW UPPER LOWER BLADE GUARDHANDLE BEVEL CUTADJUSTMENT BEVEL ADJUSTMENT KNOB LOWER BLADEGUARD BLADE BASE ASSEMBLY Fig 1 ...

Page 10: ...f the way to install or replace the saw blade it is also used when making a pocket cut to expose the saw blade UNPACKING This product requires assembly Carefully remove the tool and any accessories from the box Make sure that all items listed in the packing list are included Inspect the tool carefully to make sure no breakage or damage occurred during shipping Do not discard the packing material u...

Page 11: ...ADE SCREW Fig 3 Fit saw blade inside lower blade guard and onto spindle NOTE The saw teeth point upward at the front of saw as shown in figure 3 Replace outer blade washer Depress spindle lock button then replace blade screw Tighten blade screw securely NOTE Turn blade screw counterclockwise to tighten Return blade wrench to storage area REMEMBER Never use a blade that is too thick to allow the ou...

Page 12: ...attery pack in charging stand Align raised rib on battery pack with groove in charging stand Press down on battery pack to be sure contacts on battery pack engage properly with contacts in charging stand The charge indicator light LED located on the charg ing stand will light up red and glow when the charger is properly connected to power supply This light indicates the charger is operating proper...

Page 13: ...n not in use or carrying at your side DEPRESSSPINDLE LOCK BuI rON TO LOOSEN TO TIGHTEN BLADE GUARD SYSTEM See Figure 7 BLADE SCREW BLADE WRENCH Fig 6 The lower blade guard attached to the trim saw is there for your protectionand safety It should never be altered for any reason If it becomes damaged or begins to return slow or sluggish do not operate the saw until the damage has been repaired or re...

Page 14: ...ool misuse or incorrect operating procedures Fig 9 TO LESSEN THE CHANCE OF KICKBACK See Figure 1I Always keep the correct blade depth setting the correct blade depth setting for all cuts should not exceed 1 4 in below the material to be cut One blade tooth below the material to be cut works best for most efficient cutting action CORRECT BLADE DEPTH SE mNG BLADE EXPOSED ONEBLADE TOOTH BELOW THEMATE...

Page 15: ...ough One blade tooth below the material to be cut works best for most efficient cutting action TO ADJUST BLADE DEPTH See Figurel_ Remove battery pack from saw Loosen depth adjustment knob Hold base flat against the workpiece and raise or lower saw until the required depth is reached Tighten depth adjustment knob securely TO RAISE SAW TO LOWER SAW BASE ASSEMBLY TIGHTEN DEPTH TO ADJUSTMENT LOOSEN KN...

Page 16: ... Fig 15 RIGHT Fig 16 _i WARNING The blade coming incontact with the workpiece before it reaches full speed could cause the saw to kickback towards you resulting inserious injury When making a cut use steady even pressure Forcing causes rough cuts could shorten the life of the saw and could cause kickback REMEMBER When sawing through work the lower blade guard does not cover the blade exposing it o...

Page 17: ...he right side of the blade It can be used to measure up to one inch to the left side of the blade EDGE GUIDE See Figure 19 Use the optional edge guide with the saw when making wide rip cuts A five inch scale has been provided on the edge guide When using the width of cut scale on the base in combination with the edge guide cuts can be made up to 6 in to the left of the edge guide or 8 7 8 in to th...

Page 18: ...there is a notch in the saw base to help you line up the blade with the line of cut BEVEL I ADJUSTMENT KNOB II I II BEVEL_ _ J_P hl_ _ _ J d ll ll_ _ l rGU DEL NE F I1_ V_ I t7 _ _ J vvlr vh ALIGNINNERBLADE GUIDENOTCH ONSAWBASE WITH LINEOFCUTASSHOWNWHENMAKING 45 BEVEL CUTS Fig 21 LOWER BLADE GUARD Fig 22 Rest the front edge of the base on the workpiece Depress the lock off button and squeeze the s...

Page 19: ...However misalignment can occur during shipping TO CHECK Remove battery pack from saw Place the saw in an upside down position on workbench Using a combination square check squareness of saw blade to the base of the saw TO ADJUST Remove battery pack fromsaw Loosen bevel adjustment knob Loosen hex nut securing adjustment screw Turn screw and adjust base until square with saw blade Tighten hex nut an...

Page 20: ... batteries they will eventually wear out Do not disassemble battery pack and attempt to replace the batteries Handling of these batteries especially when wearing rings and jewelry could result in a serious burn To obtain the longest possible battery life we suggest the following Remove the battery pack from the charger once it is fully charged and ready for use For battery pack storage longer than...

Page 21: ...CRAFTSMAN 18 VOLT CORDLESS TRIM SAW MODEL NUMBER 315 114232 29 I L 28 11 12 27 15 16 6 30 5 4 32 3 2 13 14 17 18 19 20 21 22 23 21 ...

Page 22: ...M6 x 13 mm 1 Upper Blade Guard 1 Screw M4 x 22 mm Pan Hd 4 Bumper 1 Bumper Screw M5 x 15 5 ram 1 Torsion Spring 1 Lower Blade Guard 1 Ball Bearing NTN 6000ZZ 1 Key Part No Number Description 18 6850303 19 6620104 20 6112004 21 22 6112101 23 6614401 24 Item No 11379 25 Item No 911378 26 6800201 27 670957001 28 9427205 29 940271024 30 680027001 31 9429817 32 5228001 3009102145 983000507 Quan Bearing...

Reviews: