background image

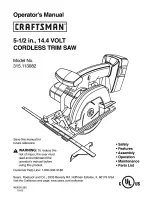
Summary of Contents for 315.113082

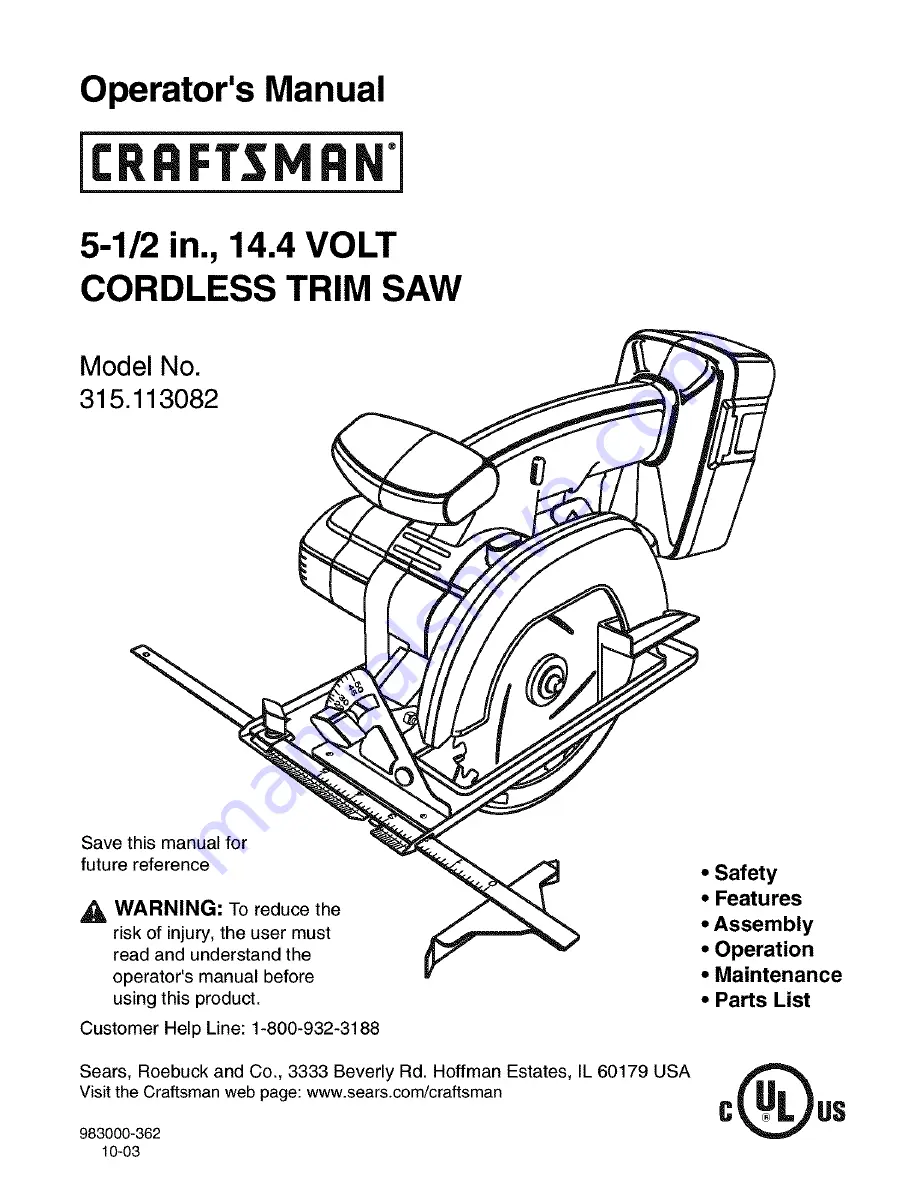
Page 1: ... reduce the risk of injury the user must read and understand the operator s manual before using this product Customer Help Line 1 800 932 3188 Sears Roebuck and Co 3333 Beverly Rd Hoffman Estates IL 60179 USA Visit the Craftsman web page www sears com craftsman 983000 362 10 03 Safety Features Assembly Operation Maintenance Parts List ...

Page 2: ...0179 Your trim saw has many features for making cutting operations more pleasant and enjoyable Safety performance and dependability have been given top priority in the design of this trim saw making it easy to maintain and operate _i CAUTION Carefully read through this entire operator s manual before using your new trim saw Pay close attention to the Rules For Safe Operation Warnings and Cautions ...

Page 3: ...y result in personal injury Do not overreach Keep proper footing and balance at all times Proper footing and balance enable better control of the tool in unexpected situations Use safety equipment Always wear eye protec tion Dust mask non skid safety shoes hard hat or hearing protection must be used for appropriate conditions TOOL USE AND CARE Use clamps or other practical way to secure and suppor...

Page 4: ... to stop after switch is released NEVER hold piece being cut in your hands or across your leg It is important to support the work properly to minimize body exposure blade binding or loss of control Hold tool by insulated gripping surfaces when performing an operation where the cutting tool may contact hidden wiring or its own cord Contact with a live wire will also make exposed metal parts of the ...

Page 5: ...or wet location Following this rule will reduce the risk of electric shock For best results your battery tool should be charged in a location where the temperature is more than 50 F but less than 100 F Do not store outside or in vehicles Under extreme usage or temperature condi tions battery leakage may occur If liquid comes in contact with your skin wash immedi ately with soap and water then neut...

Page 6: ...sult in a risk of electric shock or fire Following this rule will reduce the risk of electric shock fire or serious personal injury To reduce the risk of electric shock unplug charger from outlet before attempting any maintenance or cleaning Turning off controls will not reduce this risk Following this rule wilt reduce the risk of electric shock fire or serious personal injury Disconnect charger f...

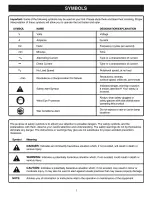
Page 7: ...de shields when operating this product Do not expose to rain or use in damp locations The purpose of safety symbols is to attract your attention to possible dangers The safety symbols and the explanations with them deserve your careful attention and understanding The safety warnings do not by themselves eliminate any danger The instructions or warnings they give are not substitutes for proper acci...

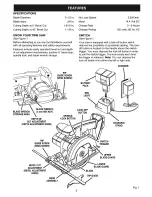
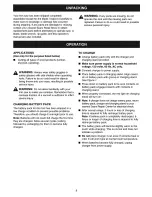
Page 8: ... Figure 1 Your saw is equipped with a lock off button which reduces the possibility of accidental starting The lock off button is located on the handle above the switch trigger You must depress the lock off button in order to pull the switch trigger The lock resets each time the trigger is released Note You can depress the lock off button from either the left or right side _ RIP GU DEsSC BLADEWREN...

Page 9: ... you should charge it overnight prior to use Note Batteries will not reach full charge the first time they are charged Allow several cycles cutting followed by recharging for them to become fully charged TO CHARGE Charge battery pack only with the charger and charging stand provided Make sure power supply is normal household voltage 120 volts 60 Hz AC only Connect charger to power supply Place bat...

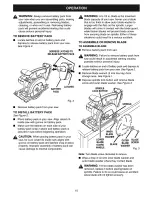
Page 10: ...sible serious personal injury Locate latches on end of battery pack and depress to release battery pack from your saw See Figure 2 Remove blade wrench 5 mm hex key from storage area See Figure 1 Depress spindle lock button and remove blade screw and outer blade washer See Figure 3 SPINDLE LOCKBUTTON Remove battery pack from your saw TO INSTALL BATTERY PACK See Figure 2 Place battery pack in your s...

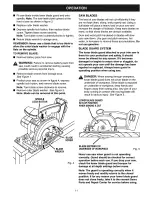
Page 11: ...always available Gum and wood pitch hardened on blades will slow your saw down Use gum and pitch remover hot water or kerosene to remove these accumulations Do not use gasoline BLADE GUARD SYSTEM The lower blade guard attached to your trim saw is there for your protection and safety It should never be altered for any reason If it becomes damaged or begins to return slow or sluggish do not operate ...

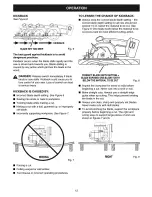
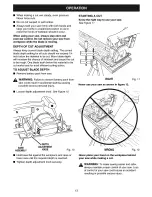
Page 12: ...us injury KICKBACK IS CAUSED BY Incorrect blade depth setting See Figure 6 Sawing into knots or nails in workpiece Twisting blade while making a cut Making a cut with a dull gummed up or improperly set blade Incorrectly supporting workpiece See Figure 7 CORRECTBLADEDEPTHSETTING BLADEEXPOSEDONEBLADETOOTH BELOWTHEMATERIALTO BE CUT Fig 8 Inspect the workpiece for knots or nails before beginning a cut...

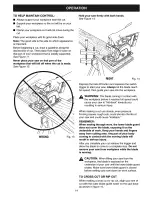
Page 13: ... works best for most efficient cutting action TO ADJUST BLADE DEPTH Remove battery pack from saw STARTING A CUT Know the right way to use your saw See Figure 11 _ WARNING Failure to remove battery pack from saw could result in accidental starting causing possible serious personal injury RIGHT Never use your saw as shown in figure 12 Fig 11 Loosen depth adjustment knob See Figure 10 DEPT BASE ADJUS...

Page 14: ...e before it reaches full speed could cause your saw to kickback towards you resulting in serious injury WRONG Fig 13 When making a cut use steady even pressure Forcing causes rough cuts could shorten the life of your saw and could cause kickback REMEMBER When sawing through work the lower blade guard does not cover the blade exposing it on the underside of work Keep your hands and fingers away fro...

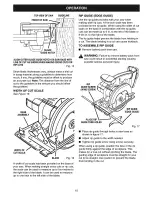
Page 15: ...ide provided with your saw when making wide rip cuts A five inch scale has been provided on the rip guide When using the width of cut scale on the base in combination with the rip guide cuts can be made up to 6 in to the left of the blade or 8 3 4 in to the right of the blade The rip guide helps prevent the blade from twisting in a cut The blade twisting in a cut can cause kickback TO ASSEMBLE RIP...

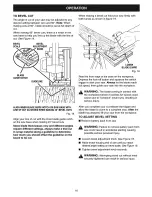
Page 16: ...as shown in figure 19 LOWER BLADEGUARD Fig 19 Rest the front edge of the base on the workpiece Depress the lock off button and squeeze the switch trigger to start your saw Always let the blade reach full speed then guide your saw into the workpiece _ WARNING The blade coming in contact with the workpiece before it reaches full speed could cause saw to kickback toward you resulting in serious injur...

Page 17: ...ry adjusted to assure 0 angle of your saw blade when making 90 cuts However misalignment can occur during shipping TO CHECK Remove battery pack from saw _1 WARNING Failure to remove battery pack from saw could result in accidental starting causing possible serious personal injury Place your saw in an upside down position on workbench See Figure 20 Using a combination square check squareness of saw...

Page 18: ...s especially when wearing rings and jewelry could result in a serious burn To obtain the longest possible battery life we suggest the following Store and charge your batteries in a cool area Temperatures above normal room temperature wilt shorten battery life Never store batteries in a discharged condition Recharge them immediately after they are discharged All batteries gradually lose their charg...

Page 19: ...19 ...

Page 20: ......

Page 21: ...Screw 1 Hex Nut 1 Screw 1 Carriage Bolt M6 x 13 mm 1 Data Plate 1 Warning Label 1 Upper Blade Guard 1 Upper Blade Guard Screw 3 Bumper 1 Bumper Screw 1 Key Part No Number Description Quan 17 6867201 18 5599001 19 6807001 20 6850303 21 6600506 22 6112004 23 982296 001 24 975533 000 25 975532 000 26 Item No 9 11013 27 Item No 9 11012 28 975554 000 29 975553 000 30 520280 001 31 300912 034 983000 362...

Page 22: ... and electronics call or go on line for the location of your nearest Sears Parts Repair Center 1 800 488 1222 Call anytime day or night U S A only www sears com To purchase a protection agreement U S A or maintenance agreement Canada on a product serviced by Sears 1 800 827 6655 U S A 1 800 361 6665 Canada Para pedir servicio de reparaci6n a domicilio y para ordenar piezas 1 888 SU HOGAR sM 1 888 ...

Reviews: