background image

1 ― English

OPERATOR

S MANUAL

MANUAL DEL USUARIO

Model No. 151.98835

Modelo n

o

 151.98835

NOTE: BAR & CHAIN OIL NOT INCLUDED.  

BAR & CHAIN OIL MUST BE ADDED PRIOR TO USE. 
NOTA: ACEITE PARA BARRA Y CADENA NO INCLUIDO.  

SE DEBE AÑADIR ACEITE PARA BARRA Y CADENA ANTES DE USAR.

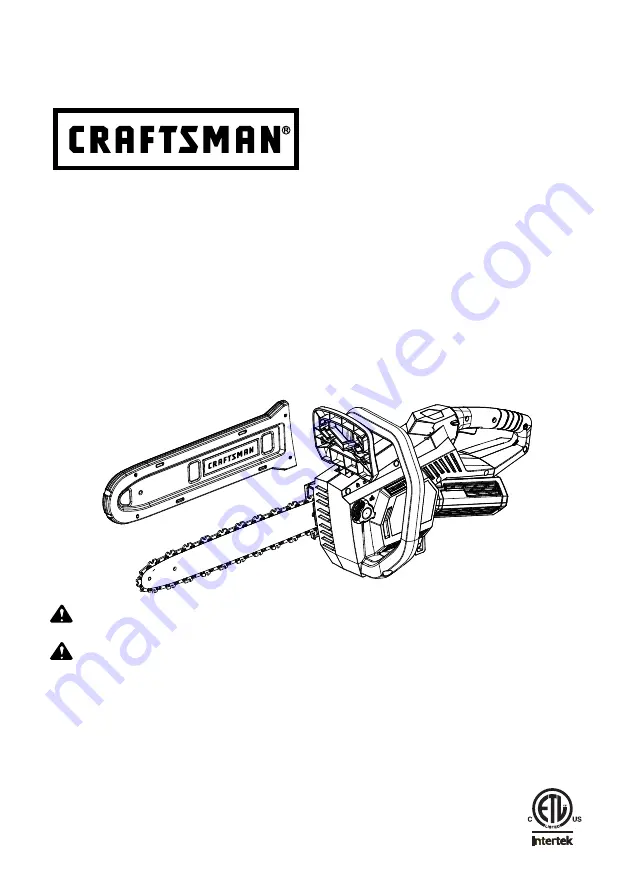
MOTOSIERRA SIN CUERDA, CON BATERÍA 

DE IONES DE LITIO DE 60V MÁX.*

60V MAX* LITHIUM-ION CORDLESS CHAINSAW

Sears Brands Management Corporation, Hoffman Estates, IL 60179 USA

Visit the Craftsman web page: www.craftsman.com

Visite el sitio Web de Craftsman: www.craftsman.com

Used under license         Usado bajo licencia

Save this manual for future reference

Conserve este manual para futura referencia.

* Maximum initial battery voltage (measured without workload) is 60 volts.  

  Nominal working voltage is 54 volts.

* La tensión inicial máxima de la batería (medida sin carga) es 60 voltios.  

  La tensión de trabajo nominal es 54 volts.

CAUTION: 

To reduce the risk of injury, the user must read and understand the 

operator's manual before using this product.

PRECAUCIÓN: 

Para reducir el riesgo de lesiones, el usuario debe leer y 

comprender el manual antes de utilizar este producto.

Summary of Contents for 151.98835

Page 1: ...ge www craftsman com Visite el sitio Web de Craftsman www craftsman com Used under license Usado bajo licencia Save this manual for future reference Conserve este manual para futura referencia Maximum initial battery voltage measured without workload is 60 volts Nominal working voltage is 54 volts La tensión inicial máxima de la batería medida sin carga es 60 voltios La tensión de trabajo nominal ...

Page 2: ...s warranty does not cover the bar and chain which are expendable parts that can wear out from normal use within the warranty period This warranty is void if this product is ever used while providing commercial services or if rented to another person This warranty gives you specific legal rights and you may also have other rights which vary from state to state Sears Brands Management Corporation Ho...

Page 3: ... the trigger switch Maintain the unit with care Keep the cutting edge sharp and clean for best performance and to reduce the risk of injury Follow instructions for lubricating and changing accessories Do not operate charger with a damaged cord or plug which could cause shorting and electric shock If damaged immediately discontinue use Replace the charger with the identical unit as listed in the Pa...

Page 4: ...balance at all times Do not cut above shoulder height or overreach when cutting Follow the sharpening and maintenance instructions for the saw chain Push and Pull This reaction force is always opposite to the direction the chain is moving where wood contact is made Consequently the operator must be ready to control the PULL of the log backward when cutting on the bottom edge of the bar overbucking...

Page 5: ...uilding materials Do not use the chainsaw for purposes not intended Store idle chainsaw when not in use Chainsaw should be stored in a dry and high or locked area out of the reach of children When storing chainsaw remove battery and place the chain cover on the bar and chain Remove the battery pack from the chainsaw before cleaning servicing storing transporting removing material from the unit cha...

Page 6: ... immediately Batteries can explode in the presence of a source of ignition such as a pilot light To reduce the risk of serious personal injury never use any cordless product in the presence of open flame An exploded battery pack can propel debris and chemicals If exposed flush with water immediately Do not charge unit in a damp or wet location Following this rule will reduce the risk of electric s...

Page 7: ...alled and used in accordance with the instructions may cause harmful interference to radio communications However there is no guarantee that interference will not occur in a particular installation If this equipment does cause harmful interference to radio or television reception which can be determined by turning the equipment off and on the user is encouraged to try to correct the interference b...

Page 8: ... operator s manual before using this product Gloves Wear non slip heavy duty protective gloves when handling this product Safety Footwear Wear non slip safety footwear when using this product Wet Conditions Alert Do not expose to rain or use in damp locations Risk of Electrocution DANGER Risk of electrocution Electric Shock Failure to use in dry conditions and to observe safe practices can result ...

Page 9: ...l This product uses lithium ion batteries Local state or federal laws may prohibit disposal of batteries in ordinary trash Consult your local waste authority for information regarding available recycling and or disposal options SYMBOL SIGNAL MEANING DANGER Indicates an imminently hazardous situation which if not avoided will result in death or serious injury WARNING Indicates a potentially hazardo...

Page 10: ...o 71 98838 Ah Amp hours Bar and Saw Chain Oregon Bar 602168 Oregon Chain 91PX056X KNOW YOUR CHAINSAW See Figure 4 page ii The safe use of this product requires an understanding of the information on the product and in this operator s manual as well as a knowledge of the project you are attempting Before use of this product familiarize yourself with all operating features and safety instructions NO...

Page 11: ... 2 0 Ah Lithium Ion Battery 1 60V Max Battery Charger Operator s Manual WARNING Do not use this product if any parts on the Packing List are already assembled to your product when you unpack it Parts on this list are not assembled to the product by the manufacturer and require customer installation Use of a product that may have been improperly assembled could result in serious personal injury Ins...

Page 12: ...eady for use Technical Issue a flashing red LED light on the charger indicates that battery pack has a charging problem or might be defective One possible condition is the battery temperature is not within the charging temperature range of 35 6 F 109 4 F or the charging current is too high As soon as the permitted temperature and the charging current ranges are reached the battery charger will aut...

Page 13: ...nect the charger from the power supply Press the release button on the battery pack and remove it from the charger NOTE It is normal for the battery pack and charger to become warm but not hot during charging process If the battery does not charge properly check to make sure the electrical outlet is operational Always charge the battery before storage CHARGING BATTERY PACK See Figure 4 page ii and...

Page 14: ...s NOTE For complete charging instructions refer to the OPERATOR S MANUAL for your battery pack and charger TO INSTALL REMOVE BATTERY PACK See Figure 4 page ii and 7 page iii NOTE To avoid serious personal injury always remove the battery pack and keep hands clear of the safety switch when carrying or transporting the tool To Install Battery Pack Grasp the chainsaw firmly by the Trigger Handle Alig...

Page 15: ...o SAW CHAIN TENSIONING in the CARE AND MAINTENANCE section of this manual Make sure no objects or obstructions are in immediate vicinity which could come into contact with the bar and chain Press and hold the safety switch This makes the trigger switch operational Press and hold the trigger switch release the safety switch and continue to squeeze the trigger switch for continued operation STOPPING...

Page 16: ...ERATOR S MANUAL or received adequate instructions for the safe and proper use of this chainsaw Keep everyone helpers bystanders children and animals a SAFE DISTANCE from the cutting area During felling operations the safe distance should be at least twice the height of the largest trees in the felling area During bucking operations keep a minimum distance of 15 ft 4 6 m between workers Always cut ...

Page 17: ...ree does make contact with any utility line the utility company should be notified immediately Operator should keep on the uphill side of terrain as the tree is likely to roll or slide after it is felled Plan and clear an escape path before starting to cut The escape path should extend back and diagonally to the rear of the expected line of fall See Fig 15a Make sure there are no obstructions in y...

Page 18: ...o objects can contact the guide bar nose and chain during cutting because this can cause kickback When bucking on a slope always stand on the uphill side of the log To maintain complete control of the chainsaw when cutting through the log release the cutting pressure near the end of the cut without relaxing your grip on the chainsaw handles Do not let the chain contact the ground After completing ...

Page 19: ...om the work area often to help keep the work area clean and safe Support limbs are under tension Underbuck cut from bottom up support limbs to avoid binding the saw blade WARNING While limbing stand on the other side of the tree from the limb you are cutting Fig 23 to stay out of the way of the falling cut limb PRUNING See Figure 22 page vii Pruning is trimming limbs from a live tree Work slowly k...

Page 20: ... the battery pack to become completely discharged Once the battery pack is fully charged remove the battery from the charger and disconnect the charger from the outlet Do not store the battery pack on the tool or in the charger Recharge the battery at a temperature between 39 6 F and 109 4 F If the battery pack is hot allow it to cool down before recharging CHARGER MAINTENANCE Keep the charger cle...

Page 21: ...r will wear rapidly To help minimize bar wear maintenance of the guide bar as well as the saw chain is recommended REMOVING THE GUIDE BAR AND CHAIN See Figure 26 page viii Figure 33 page ix WARNING To avoid serious personal injury read and understand all the safety instructions in this section WARNING Before performing any maintenance remove the battery pack from the tool Failure to heed this warn...

Page 22: ...l these parts in place the clutch can fly off or explode exposing the user to possible serious injury REPLACING THE GUIDE BAR AND CHAIN See Figures 26 39 page viii x saw body so that the support bolt protrudes through the hole in the guide bar tension disc Figs 33 34 Replace the chain cover and slightly tighten the red lock knob by rotating it clockwise Fig 35 Do not tighten the lock knob complete...

Page 23: ...n reassembled Fig 45a CAUTION A chain tensioned while warm may be too tight upon cooling Check the cold tension before next use CHECKING OIL LEVEL Check the oil level at the window of the oil tank Quick View Oil Indicator prior to switching on and regularly during operation Refill oil when the oil level is lower than the MIN marking Fig 42 Do not overfill Leave approximately 1 5 inch of space to t...

Page 24: ...in and the guide bar as described in Replacing the Guide Bar and Chain section NOTE If you do not fully understand the correct procedure for sharpening the chain after reading the instructions that follow have the saw chain sharpened by a qualified chainsaw service center or replaced with a recommended low kickback chain SAW CHAIN SHARPENING Have your chain sharpened professionally at a qualified ...

Page 25: ...duct in a place that is inaccessible to children The ideal storage temperature is between 50o F and 80o F We recommend using the original package for storage or covering the product with a suitable cloth or enclosure to protect it against dust TRANSPORTATION Switch the product off and remove the battery pack before transporting it anywhere Attach the blade cover to the saw blade Attach other trans...

Page 26: ...e or destroy any of the battery pack components DO NOT attempt to open the battery pack If a leak develops the released electrolytes are corrosive and toxic DO NOT get the solution in the eyes or on skin and do not swallow it DO NOT place these batteries in your regular household trash DO NOT incinerate DO NOT place batteries where they will become part of any waste landfill or municipal solid was...

Page 27: ...7 English CRAFTSMAN 60V MAX LITHIUM ION CORDLESS CHAINSAW MODEL NUMBER 151 98835 TO PURCHASE REPLACEMENT PARTS CALL 1 888 331 4569 The model number will be found on a label attached to the motor housing ...

Page 28: ...Guide Bar with Tensioning Sprocket 1 16 261018116 Scabbard 1 17 261018117 Oil Reservoir Cap 1 18 261018118 Oil Reservoir 1 19 261018119 Chain Guard Assembly 1 20 261018120 Assist Handle 1 21 261018121 Left Motor Housing Assembly 1 22 151 98833 60V 2 0Ah Battery 1 23 60LFC01 ETL 60V OPP Charger 1 CRAFTSMAN 60V MAX LITHIUM ION CORDLESS CHAINSAW MODEL NUMBER 151 98835 TO PURCHASE REPLACEMENT PARTS CA...

Page 29: ... the operator s manual Consulte esta sección para ver todas las figuras mencionadas en el manual del usuario Fig 1 Fig 3 Fig 2 Rotational Kickback Retroceso Rotacional Kickback Danger Zone Zona De Peligro De Etroceso Pushes Empuja Underbuckingham Trozado Desde Abajo Pulls Jala i English ...

Page 30: ...ra sierra de bajo retroceso I Guide Bar arra guía J Motor Housing Cover Cubierta de la carcasa del motor K Chain Cover Cubierta de la cadena L Chain Tensioning Ring Aro tensor de la cadena M Chain Cover Lock Knob Perilla de bloqueo de la cubierta de la cadena N Oil Port Boquilla de aceite O Battery Charger Cargador de la batería P 60V max 2 0 Ah Lithium Ion Battery Batería de iones de litio de 60 ...

Page 31: ...eite B Bar Chain Oil Aceite para barra y cadena A T rail Riel en T B Trigger Handle Guard Protector de la manilla del gatillo A Trigger Switch Gatillo B Safety Switch Interruptor de seguridad Fig 9 A B A Power Cord with Plug Cable de corriente con enchufe B Charger T rail Riel en T del cargador C Indicator Lights Luces indicadoras iii English ...

Page 32: ...LINE LÍNEA DE LA CADENA WRONG OPERATION POSITION POSICIÓN DE USO INCORRECTA PROPER HAND GRIP POSITION POSICIÓN DE AGARRE CORRECTA CON LA MANO PULGAR SOBRE LA PARTE INFERIOR DE LA MANILLA LÍNEA DE LA CADENA BRAZO RECTO iv English ...

Page 33: ...LL LÍNEA DE CAÍDA PLANIFICADA 135 FROM PLANNED LINE OF FALL 135 DESDE LA LÍNEA DE CAÍDA PLANIFICADA PATH OF SAFE RETREAT RUTA DE ESCAPE SEGURA PLANNDE LINE OF FALL LÍNEA DE CAÍDA PLANIFICADA PATH OF SAFE RETREAT RUTA DE ESCAPE SEGURA v English ...

Page 34: ...Log Supported At Both Ends TroncoApoyado EnAmbos Extremos Finishing Cut Corte Final A Lower Horizontal Notch Cut Corte de muesca horizontal inferior B Upper Angled Notch Cut Corte de muesca angulado superior C Felling Back Cut Corte posterior de tala D Hinge Bisagra Vertical Cut Corte Vertical Loose Section Sección Suelta Horizontal Cut Corte Horizontal Finishing Cut Corte Final 1St Cut 1 3 Dia 1E...

Page 35: ...ga First Cut 1 3 Dia Primer Corte 1 3 Del Diá Finishing Cut Corte Final Second Cut Segundo Corte Fig 21 Fig 22 Fig 23 Cut Limbs One At A Time Leave Support Limbs Under Tree To Raise Off Ground Cut Top Limbs First Underbuck Support Limbs Corte Solo Una Rama A La Vez Deje Que Las Ramas De Apoyo Bajo El Tronco Se Eleven Sobre El Suelo Corte Primero Las Ramas Superiores Troce Las Ramas De Apoyo vii En...

Page 36: ...e la sierra B Guide Bar Barra guía A Tension Disc Disco de Tensión B Guide Bar Barra Guía A Chain Tensioning Ring Aro tensor de la cadena B Tie Strap Unión C Guide Bar Barra guía Fig 27 Fig 30 Fig 31 Fig 28 A B B B A A Saw Chain Cadena de la Sierra B Guide Bar Barra Guía A 3 32 5 32 in 2 4 mm viii English Fig 32 ...

Page 37: ...na A Cutters Cortadores B Chain Drive Links Eslabones motrices de la cadena A Bar Groove Ranura de la Barra B Chain Drive Links Eslabones Motrices de la Cadena B A CHAIN ROTATION ROTACIÓN DE LA CADENA A B A Saw Chain Cadena de la Sierra B Guide Bar Barra Guía C Support Bolt Perno de Soporte D Drive Sprocket Rueda de Cadena Motriz E Chain Cover Cubierta de la Cadena ix English ...

Page 38: ... B A A Quick View Oil Indicator Indicador de aceite de revisión rápida B Oil Reservoir Cap Tapón del depósito de aceite B A C A Lock Knob Perilla de bloqueo B Chain Cover Cubierta de la Cadena C Chain Tensioning Ring Aro Tensor de la Cadena x English ...

Page 39: ...in Ajuste del medidor de profundidad 0 025 in Sharpening Angle Ángulo de Afilado FILE DIRECTION DIRECCIÓN DE LALIMA Outside Afuera Inside Adentro B A A Tension Disc Disco de Tensión B Guide Bar Barra Guía C Screw Tornillo D Rubber Washer Arandela de Goma A Right hand Cutter Cortador de la Derecha B Left hand Cutter Cortador de la Izquierda C Bumper Drive Link Eslabón motriz de Defensa D Tie Strap ...

Page 40: ...interruptor Realice mantenimientos cuidadosos a la unidad Mantenga las superficies cortantes afiladas y limpias para obtener el mejor rendimiento posible y para reducir riesgos de lesiones Siga las instrucciones de lubricación y cambio de accesorios No utilice el cargador con un cable o enchufe dañado ya que podría provocar cortocircuitos y descargas eléctricas En caso de presentar daños descontin...

Page 41: ...ed debe seguir varios pasos para mantener sus trabajos de corte libres de accidentes o lesiones Para minimizar el retroceso se deben seguir las siguientes precauciones Agarre siempre la motosierra con firmeza utilizando ambas manos Sostenga la sierra firmemente con ambas manos mientras el motor esté andando Ponga su mano derecha en la manilla trasera y su mano izquierda en la manilla delantera con...

Page 42: ...ecesidad La motosierra debe utilizarse solo para cortar madera Jamás utilice la motosierra para cortar plástico mampostería o materiales de construcción que no sean madera No utilice la motosierra para propósitos para los cuales no se construyó Almacene la motosierra cuando no la esté utilizando La motosierra se debe almacenar en una zona alta y cerrada fuera del alcance de los niños Al almacenar ...

Page 43: ...den explotar en presencia de una fuente de ignición como por ejemplo una luz piloto Para reducir el riesgo de lesiones severas jamás utilice un producto inalámbrico en presencia de llamas abiertas Una batería explotada puede expulsar materiales químicos y sedimentos Si se expone lávese con agua inmediatamente No cargue la unidad en condiciones húmedas o en un lugar mojado Siga esta regla y reducir...

Page 44: ...y de no instalarse y usarse según las instrucciones puede provocar interferencia dañina sobre las comunicaciones por radio Sin embargo no hay garantía alguna de que no pueda ocurrir interferencia en una instalación en particular Si este equipo provoca una interferencia dañina a la recepción de radio o televisión lo cual puede determinar con tan solo apagar y encender el equipo se recomienda correg...

Page 45: ...ucto Guantes Al utilizar este producto utilice guantes de protección antideslizantes y de alta resistencia Calzado de seguridad Al utilizar este producto use zapatos de seguridad antideslizantes Alerta de condiciones húmedas No exponer a la lluvia ni usar en lugares húmedos Riesgo de electrocución PELIGRO Riesgo de electrocución Descarga eléctrica Utilizar el producto en condiciones húmedas y no s...

Page 46: ... C Símbolo de reciclaje Este producto utiliza baterías de iones de litio Las leyes locales estatales o federales podrían prohibir la eliminación de baterías junto con la basura común Consulte a su autoridad de eliminación local para obtener información sobre la disponibilidad de opciones de reciclaje o eliminación SÍMBOLO SEÑAL SIGNIFICADO PELIGRO Indica una situación peligrosa inminente la cual d...

Page 47: ...º 71 98838 Ah Amperes por hora Barra y cadena de la sierra Barra Oregon 602168 Cadena Oregon 91PX056X CONOZCA SU MOTOSIERRA Consulte la Figura 4 página ii El uso seguro de este producto requiere que conozca la información de la herramienta y la que aparece en este manual así como también el proyecto en el que está trabajando Antes de usar este producto familiarícese con todas las funciones operati...

Page 48: ...sin cuerda de 60 V con barra cadena y funda 1 Batería de iones de litio de 60 V Máx y 2 0 Ah 1 Cargador de batería de 60 V Máx Manual del usuario ADVERTENCIA No utilice este producto si alguna de las piezas mencionadas en la lista de componentes del empaque ya está ensamblada en el producto al desempacarlo Las piezas mencionadas en esta lista no vienen ensambladas al producto y requiere que el cli...

Page 49: ... usarse Problema técnico una luz LED roja parpadeante en el cargador indica que la batería tiene un problema de carga o que podría estar defectuosa Un posible problema es que la temperatura de la batería no esté dentro del rango de temperatura de 35 6 F 109 4 F 2 y 43 C o que la corriente de carga sea demasiado alta Apenas se alcance la temperatura permitida y se logren los rangos de corriente de ...

Page 50: ...l producto y desconecte el cargador de la toma de energía Presione el botón de liberación de la batería y sáquela del cargador NOTA Es normal que la batería y el cargador se calienten pero no demasiado durante el proceso de carga Si la batería no carga adecuadamente revise que la toma eléctrica esté operativa Siempre cargue la batería antes de almacenarla CÓMO CARGAR LA BATERÍA Consulte la Figura ...

Page 51: ...TA Para conocer las instrucciones de carga completas consulte el MANUAL DEL USUARIO de su batería y cargador PARA INSTALAR EXTRAER LA BATERÍA Consulte la Figura 4 página ii y 7 página iii personales graves NOTA Para evitar lesiones personales severas extraiga siempre la batería y mantenga sus manos alejadas del interruptor de seguridad al transportar la herramienta Instalación de la batería Tome l...

Page 52: ...NTENIMIENTO de este manual Asegúrese de que no haya objetos u obstrucciones en la cercanía inmediata que puedan entrar en contacto con la barra y cadena Mantenga presionado el interruptor de seguridad Esto permite que el gatillo se vuelva operativo Mantenga presionado el gatillo suelte el interruptor de seguridad y siga apretando el gatillo para que la motosierra funcione continuamente DETENCIÓN D...

Page 53: ...uridad y apriete el gatillo luego suelte el interruptor de seguridad y deje que la sierra acelere a toda velocidad antes de comenzar a cortar Comience a cortar poniendo la sierra contra el tronco Mantenga la unidad funcionando durante todo el tiempo que esté cortando manteniendo una velocidad constante Deje que la sierra corte por usted ejerciendo solo una leve presión hacia abajo Forzar el corte ...

Page 54: ...go córtelos PELIGRO Peligro de electrocución No corte árboles ni ramas cerca de líneas de energía o cables eléctricos El contacto con líneas de energía o cables eléctricos vivos provocará lesiones personales graves o la muerte ADVERTENCIA No corte árboles o ramas cerca de edificios ya que podría provocar lesiones severas o daños a la propiedad ADVERTENCIA Compruebe que el árbol no tenga ramas daña...

Page 55: ...ón incorrecta No corte a través de la bisagra ADVERTENCIA Jamás corte hacia la muesca al hacer el corte posterior La bisagra controla la caída del árbol Esta es la segunda sección de madera entre la muesca y el corte posterior A medida que el corte posterior de tala se acerque a la bisagra el árbol debiera comenzar a caer Si existe alguna posibilidad de que al árbol no caiga en la dirección desead...

Page 56: ... inferior de la sierra contra el tronco ejerza una leve presión hacia abajo Tenga en cuenta que la sierra tenderá a jalarlo TROZADO DESDE ABAJO Consulte la Figura 21 página vii Comience en la cara inferior del tronco con la parte superior de la sierra contra el tronco ejerza una leve presión hacia arriba Durante el trozado desde abajo la sierra tenderá a empujar hacia usted Esté preparado para est...

Page 57: ...s alejado antes para así reducir su peso Esto evita que la corteza se rasgue en el miembro principal Corte desde abajo la rama 1 3 a través de su primer corte Su segundo corte debe comenzar desde arriba para dejar caer la rama Ahora haga su corte final parejo y suavemente contra el miembro principal de manera tal que la corteza vuelva a crecer y selle la herida CORTE DE RAMAS TENSADAS Consulte la ...

Page 58: ... haya una reducción notable en el desempeño de la motosierra No deje que las baterías se descarguen por completo Cuando la batería se cargue por completo extraiga la batería del cargador y desconéctelo de la toma de corriente No almacene la batería puesta en la herramienta o en el cargador Recargue la batería a una temperatura ambiente entre 39 6 F y 109 4 F 4 y 43 C Si la batería está caliente de...

Page 59: ...ida Un llenado incorrecto y los ajustes del medidor de profundidad y cortador no estándar son las causas de la mayoría de los problemas con la barra guía principalmente provocando un desgaste disparejo de la barra Cuando la barra se desgasta disparejo los rieles se ensanchan por lo que podría ser que la cadena retumbe y se vuelva difícil realizar cortes rectos Si la barra guía no está lo suficient...

Page 60: ...e la sierra ADVERTENCIA Utilice siempre una cadena designada como de bajo retroceso o una cadena que cumpla con los requisitos de bajo retroceso Solo un operador profesional experimentado debiera utilizar una cadena estándar que no posea los eslabones de protección que reducen el retroceso Sin embargo una cadena de bajo retroceso no lo elimina por completo Una cadena de bajo retroceso o de segurid...

Page 61: ...amente cada cinco cortes Consulte la sección PRUEBA DE TENSIÓN Coloque la motosierra sobre una superficie plana Compruebe la tensión de la cadena utilizando una mano para levantar la cadena sobre el borde de la barra La tensión es la correcta cuando puede levantar la cadena de manera tal que los eslabones estén a aproximadamente 3 32 5 32 de pulgada 2 4 mm sobre el borde de la barra Figs 30 Ajuste...

Page 62: ...á gastado y debe cambiarse por uno nuevo del mismo tipo Fig 45 Invierta la barra guía de vez en cuando para que se gaste por parejo y así extender su vida útil Suelte el tornillo y extraiga del disco de tensión desde la barra guía Asegúrese de que la arandela de goma del tornillo no esté gastada Gire la barra guía y fije el disco de tensión con el tornillo Aplique una gota de pegamento adecuado al...

Page 63: ...amente tensada en la barra guía Utilice una lima redonda con un diámetro de 1 1 veces la profundidad de los dientes de corte Asegúrese de que el 20 del diámetro de la lima esté sobre la placa superior del cortador La mayoría de las tiendas de herramientas reconocidas ofrecen guías para limas las cuales ofrecen la manera más sencilla de sostener una lima en la posición correcta Lime perpendicular a...

Page 64: ...je la cubierta de la hoja a la hoja de la sierra Póngale otras protecciones si procede Lleve siempre el producto por los mangos de agarre Proteja el producto de golpes fuertes o vibraciones intensas que puedan ocurrir durante el transporte en vehículos Asegure el producto para evitar que se resbale o se caiga CUIDADO Y MANTENIMIENTO ...

Page 65: ...ctrica y daños al medioambiente Cubra las terminales de la batería con cinta adhesiva aislante NO intente extraer ni destruir alguno de los componentes de la batería NO intente abrir la batería Si ocurre una fuga los electrolitos liberados son corrosivos y tóxicos NO deje que la solución entre en contacto con sus ojos o piel ni tampoco la trague NO coloque estas baterías junto con su basura domést...

Page 66: ... SIN CUERDA CRAFTSMAN CON BATERÍA DE IONES DE LITIO 60 V MÁX NÚMERO DE MODELO 151 98835 PARA ADQUIRIR PIEZAS DE REPUESTO LLAME AL 1 888 331 4569 El número de modelo se encuentra en la etiqueta adjunta a la carcasa del motor ...

Page 67: ...a tensora 1 16 261018116 Funda 1 17 261018117 Tapón del depósito de aceite 1 18 261018118 Depósito de aceite 1 19 261018119 Conjunto de piezas de la protección de la cadena 1 20 261018120 Manilla de apoyo 1 21 261018121 Conjunto de piezas de la carcasa del lado izquierdo del motor 1 22 151 98833 Batería de 60 V y 2 0 Ah 1 23 60LFC01 ETL Cargador OPP de 60 V 1 MOTOSIERRA SIN CUERDA CRAFTSMAN CON BA...

Page 68: ...To order replacement parts or schedule repair service Para ordenar piezas o pedir servicio de reparación 1 888 331 4569 ...

Reviews: