background image

OPERATOR

S MANUAL

MANUAL DEL USUARIO

Conserve este manual para futura referencia.

* Maximum initial battery voltage (measured without workload) is 20 volts.

  Nominal working voltage is 18


volts.

* La tensión inicial máxima de la batería (medida sin carga) es 20 voltios.
  La tensión de trabajo nominal es 18 voltios.

Sears Brands Management Corporation, Hoffman Estates, IL 60179 USA

Save this manual for future reference.

ADVERTENCIA: 

Para reducir el riesgo de lesiones, el usuario debe leer y 

comprender el manual antes de utilizar este producto.

WARNING: 

To reduce the risk of injury, the user must read and understand 

the Operator’s Manual before using this product.

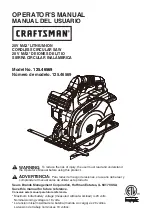
20V MAX* LITHIUM-ION

CORDLESS CIRCULAR SAW

20 V MÁX* DE IONES DE LITIO

SIERRA CIRCULAR INALÁMBRICA

Model N

o. 125.46569

Número de modelo. 125.46569

Summary of Contents for 125.46569

Page 1: ...voltios Sears Brands Management Corporation Hoffman Estates IL 60179 USA Save this manual for future reference ADVERTENCIA Para reducir el riesgo de lesiones el usuario debe leer y comprender el manual antes de utilizar este producto WARNING To reduce the risk of injury the user must read and understand the Operator s Manual before using this product 20V MAX LITHIUM ION CORDLESS CIRCULAR SAW 20 V ...

Page 2: ...e desgastarse debido al uso normal dentro del periodo de garantía La garantía se aplica durante un periodo de solo 90 días si el producto se usa para proporcionar servicios comerciales o si se le arrienda a otra persona Esta garantía le entrega derechos legales específicos que pueden variar según su estado podría tener otros derechos adicionales Sears Brands Management Corporation Hoffman Estates ...

Page 3: ... of electric shock If operating a power tool in a damp location SAFETY INSTRUCTIONS is unavoidable use a ground fault circuit interrupter GFCI protected supply Use of a GFCI reduces the risk of electric shock PERSONAL SAFETY Stay alert watch what you are doing and use common sense when operating a power tool Do not use tool while tired or under the influence of drugs alcohol or medication A moment...

Page 4: ...ns and limitations as well as the specific potential hazards related to this power tool Following this rule will reduce the risk of electric shock fire or serious injury Always wear eye protection with side shields marked to comply with ANSI Z87 1 when assembling parts operating the tool or performing maintenance Following this rule will reduce the risk of serious personal injury Protect your lung...

Page 5: ...interrupting a cut for any reason release the trigger and SAFETY INSTRUCTIONS hold the saw motionless in the material until the blade comes to a complete stop Never attempt to remove the saw from the work or pull the saw backward while the blade is in motion or kickback may occur Investigate and take corrective actions to eliminate the cause of blade binding When restarting a saw in the workpiece ...

Page 6: ...sence of a source of ignition such as a pilot light To reduce the risk of serious personal injury never use any cordless product in the presence of open flame An exploded battery can propel debris and chemicals If exposed flush with water immediately Do not charge battery tool in a damp or wet location Following this rule will reduce the risk of electric shock For best results your battery tool sh...

Page 7: ...e to rain or use in damp locations Read The Operator s Manual To reduce the risk of injury user must read and understand operator s manual before using this product Safety Alert Precautions that involve your safety No Hands Symbol Failure to keep your hands away from the blade will result in serious personal injury Hot Surface To reduce the risk of injury or damage avoid contact with any hot surfa...

Page 8: ...ous situation which if not avoided could result in death or serious injury CAUTION Indicates a potentially hazardous situation which if not avoided may result in minor or moderate injury NOTICE Without Safety Alert Symbol Indicates a situation that may result in property damage The following signal words and meanings are intended to explain the levels of risk associated with this product ...

Page 9: ...tment allows you to set the circular saw for bevel cuts from 0 to 45 BLADE WRENCH STORAGE Convenient wrench storage for quick blade changes DEPTH ADJUSTMENT KNOB The depth adjustment knob adjusts the depth of cut from 0 in to 2 in SAFETY SWITCH The safety switch reduces the possibility of accidental starting SPINDLE LOCK BUTTON The spindle lock button allows you to secure the blade when turning th...

Page 10: ...he packing list are included WARNING Do not use this product if any parts on the Packing List are already assembled to your product when you unpack it Parts on this list are not assembled to the product by the manufacturer and require customer installation Use of a product that may have been improperly assembled could result in serious personal injury Inspect the product carefully to make sure no ...

Page 11: ...efore beginning operation Improper assembly of the battery pack can cause damage to internal components with the blade guard while thicker blades will prevent blade screw from securing blade on spindle Either of these situations could result in a serious accident Remove the battery pack from the saw Obtain the blade wrench 5mm hex key from storage area See Figure 1 page i Depress and hold the spin...

Page 12: ...caused by any action which pinches the blade in the wood OPERATION FOR CIRCULAR SAW DANGER Release switch immediately if blade binds or saw stalls Kickback could cause you to lose control of the saw Loss of control can lead to serious injury To guard against kickback avoid dangerous practices such as the following Setting blade depth incorrectly Sawing into knots or nails in the workpiece Twisting...

Page 13: ...move the battery from the saw Exercise the lower guard by moving it rapidly back and forth from the full open position to the closed position several times Normally this will restore the guard to its normal operating condition If it does not correct a slow or sluggish closing lower guard do not use the saw Take it to an authorized factory service center for repair STARTING STOPPING THE SAW See Fig...

Page 14: ... the cut off piece Place the workpiece with the good side down Draw a guideline along the desired line of cut before beginning your cut CROSS CUTTING RIP CUTTING See Figure 15 page iv When making a cross cut or rip cut align the line of cut with the outer blade guide notch on the base Since blade thicknesses vary always make a trial cut in scrap material along a guideline to determine how much if ...

Page 15: ...ing to zero before making a pocket cut Attempting a pocket cut at any other setting can result in loss of control of the saw possibly causing serious injury Remove the battery pack from the saw Adjust the bevel setting to zero Set the blade to the correct blade depth setting Reinsert the battery pack Swing the lower blade guard up using the lower blade guard lever NOTE Always raise the lower blade...

Page 16: ...k positive 0 bevel stop Remove the battery pack from the saw Place the saw in an upside down position on a work bench Check the squareness of the saw blade to the base of the saw using a carpenter s square To adjust positive 0 bevel stop Remove the battery pack from the saw Loosen the bevel adjustment knob Loosen the hex nut securing the adjustment screw Turn the adjustment screw and adjust the ba...

Page 17: ...ears Service Center WARNING When servicing use only identical replacement parts as listed in this manual Use of any other parts may create a hazard or cause product damage To ensure safety and reliability all repairs should be performed by a qualified service technician STORAGE Remove the battery pack from the tool before storing Clean all foreign material from the tools Store the tools and its ac...

Page 18: ...worn out Tool must be replaced The saw is sluggish and or cuts out Worn damaged saw blade Check the blade and replace with a new blade if necessary Too much force applied Decrease the applied force Motor overheats Cooling vents are clogged with saw dust or debris or are being covered by hand during operation Clear vents with compressed air Do not cover vents with hand during operation ...

Page 19: ...ill be found on a label attached to the motor housing CRAFTSMAN 20V MAX LITHIUM ION CORDLESS CIRCULAR SAW MODEL NUMBER 125 46569 ITEM NO PART NO DESCRIPTION QTY 1 125 CC20A B Circular Saw Tool Body 1 2 411006102 Flange Set 1 3 411006103 Saw Blade 1 4 411006104 Rip Fence 1 1 2 3 4 ...

Page 20: ...de bisel B Spindle Lock Button Botón de bloqueo del husillo C Width of Cut Guide Anchura de la guía de corte D Safety Switch Interruptor de seguridad E Trigger Switch Gatillo interruptor F Lower Blade Guard Protección de la hoja inferior G Rip Fence Guía de rasgado H Blade Wrench Storage Almacenamiento de la llave de la hoja I Depth Adjustment Knob Perilla de ajuste de profundidad A B D C Fig 1 E ...

Page 21: ...husillo B Blade Screw Tornillo de la hoja C Lower Blade Guard Protección de la hoja inferior D To tighten Para apretar E To loosen Para aflojar F Lower Blade Guard Lever Palanca de la protección de la hoja inferior SOPORTE INCORRECTO INCORRECT SUPPORT WRONG INCORRECTO Fig 3 Fig 5 Fig 4 Fig 6 CONTRAGOLPE HOJA AJUSTADA DEMASIADO PROFUNDAMENTE KICKBACK BLADE SET TOO DEEP A Battery Pack not included P...

Page 22: ...MM OR LESS ON UNDERSIDE OF WORKPIECE CONFIGURACIÓN DE PROFUNDIDAD DE LA HOJA CORRECTA HOJA EXPUESTA DE 1 4 pulg 6 35 MM O MENOS EN EL EXTERIOR DE LA PIEZA DE TRABAJO CORRECT SUPPORT SOPORTE CORRECTO A Safety Switch Interruptor de seguridad B Trigger Switch Gatillo interruptor WRONG INCORRECTO Fig 9 Fig 11 Fig 10 Fig 12 A Depth Adjustment Knob Perilla de ajuste de profundidad B Depth of Cut Guide P...

Page 23: ... C C C Fig 16 A Straight Edge Borde recto B Cut Line Línea de corte C C Clamp Abrazadera en C Fig 17 Fig 18 A A Width of Cut Guide Anchura de la guía de corte A Rip Fence Locking Knob Muesca de bloqueo de la guía de rasgado B Notch for sawing at a bevel angle of 45 Muesca para cortar en un ángulo de bisel de 45 C Notch for sawing at a vertical angle of 90 Muesca para cortar en un ángulo vertical d...

Page 24: ... Tuerca hexagonal C 0 Bevel Guide Position Posición de la guía del bisel de 0 D Bevel Adjustment Knob Perilla de ajuste de bisel E Blade Hoja F Carpenter s Square not included Escuadra de carpintero no incluida A Lower Blade Guard Lever Palanca de la protección de la hoja inferior B Pocket Cut Corte de bolsillo C Lower Blade Guard Protección de la hoja inferior A Bevel Guide Guía del bisel B Bevel...

Reviews: