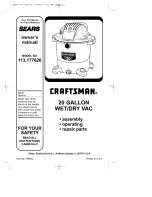
background image

Summary of Contents for 113.177630

Page 1: ...odel and serial numbers may be found on the handle You should record both model and serial numbers in a safe lace for future use FOR YOUR SAFETY READ ALL INSTRUCTIONS CAREFULLY CRRFTSMRN 20 GALLON WET DRY VAC assembly operating repair parts J Sears Roebuck and Co Hoffman Estates IL 60179 U S A Part No SP6503 Printed in U S A ...

Page 2: ...jury Read and understand this owner s manual and all labels on the Wet Dry Vac before operating Use only as described in this manual To reduce the risk of personal injury or damage to Wet Dry Vac use only Sears Craftsman recommended accessories Sparks inside the motor can ignite flammable vapors or dust To reduce the risk of fire or explosion Do not vacuum or use this Wet Dry Vac near flammable or...

Page 3: ...our Wet Dry Vac DOUBLE INSULATED GROUND NOT REQUIRED WHEN SERVICING USE ONLY IDENTICAL REPLACEMENT PARTS WARNING To reduce the risk of electric shock do not expose to rain store indoors WARNING For your own safety read and understand owner s manual Do not pick up hot ashes coals toxic flammable or other hazardous materials Do not use around explosive liquids or vapors SAVE THESE INSTRUCTIONS The o...

Page 4: ... Maintenance 10 Repair Parts 12 Unpacking and Checking Carton Contents Remove entire contents of carton Check each item against the Carton Contents _G List Notify your Sears Store immediately if _ H any parts are damaged or missing Carton Contents List Key Description Qty A Vac Assembly 1 B Pos I Lock Hose Assembly 1 C Utility Nozzle 1 D Wet Nozzle 1 E Car Nozzle 1 F Crevice Tool 1 G Filter Nut 1 ...

Page 5: ...or filter NOTE Your filter has a red stripe that matches an in store displayer When you visit your local Sears store just remember the color of your stripe for the correct size filter WARNING To avoid personal injury or damage to vac be sure to keep hands fingers or any other foreign objects out of the center opening when assembling the float NOTE If filter cage needs to be removed or replaced use...

Page 6: ...cket You will hear the ball snap into the socket and the caster will swivel easily when positioning is correct 7 Turn the drum upright Drum r Ball Foot Vac Assembly 1 Line up front label and switch side of power assembly with drain cap and vac port located on the front of the drum Note Power assembly must be aligned with drum for proper attachment 4 Upon releasing flexible latches the power assemb...

Page 7: ...he Pos I Lock hose into the inlet of the vac The Drum hose should snap into place To remove Drain the hose from the vac press the release button in the hose assembly and pull the hose out of the vac inlet as shown Release P_ess On Off Switch Vaccum Port Release Button Swivel End Utility Nozzle Accessory and Hose Storage Your accessories may be stored in the wrapping it around the unit and plugging...

Page 8: ...n Off symbols 0 is the symbol for OFF and T is the symbol for ON 0 I ON Vacuuming Dry Materials 1 The filter must always be in correct position to reduce the risk of leaks and possible damage to vac 2 When using your vac to pick up very fine dust it will be necessary for you to empty the drum and clean the filter at more frequent intervals to maintain peak vac performance NOTE A dry filter is nece...

Page 9: ...maneuver the vac the push pull handle in the rear of the unit should be used Blowing Feature Your vac features a blowing port It can blow sawdust and other debris Follow the steps below to use your vac as a blower WARNING Always wear safety goggles complying with ANSI Z87 1 or in Canada CSA Z94 3_99 before us ng as a b ower WARNING To reduce the risk of injury to bystanders keep them clear of blow...

Page 10: ...debris can be accomplishedwithout removing the filterfrom the vac Slap your hand on top of the power assembly while the vac is turned off For best cleaning results due to accumulated dust clean the filter in an open area Cleaning SHOULD be done outdoors and not in the living quarters After filter removal from vac remove the dry debris by gently tapping the filter against the inside wall of your du...

Page 11: ... you With fingers on the far side and thumbs holding the latches of the removable insert flip the nozzle over so the latches are on the top and the round inlet opening is facing away from you Make sure the squeegee stays on the insert pins 3 Press down with each thumb below the latching tabs until you see and hear the removable insert snap into the nozzle body Snap the latches over the locking tab...

Page 12: ...829971 4 4 830275 5 829693 6 819280 13 7 829718 5 8 9 16993 9 509822 10 820563 4 11 818961 12 818413 2 13 315534 1 14 826817 15 820563 5 18 829692 17 823200 18 823201 19 9 17816 20 9 16937 21 9 16938 22 830500 23 73185 24 828460 25 29776 28 9 16922 27 9 16978 28 9 17817 29 9 16902 30 822256 31 9 16964 32 9 17822 33 9 17895 34 SP8503 Description Actuator Switch Switch Toggle Cover w Labels Duct Exh...

Page 13: ... SP6503 20 Gallon 4 8 03 9 29 AM P_ 13 Repair Parts 20 Gallon Wet Dry Vac Model Number 113 177620 22 _9 4 J5 21 t0 28 25 _ 32 30 13 ...

Page 14: ... SP6503 20 Gallon 4 8 03 9 29 AM P_ 14 Notes 14 ...

Page 15: ... SP6503 20 Gallon 4 8 03 9 29 AM 15 ...

Page 16: ...For the location of a Sears Parts and Repair Center in your area Call 24 hours a day 7 days a week 1 800 488 1222 For information on purchasing a Sears Maintenance Agreement or to inquire about an existing Agreement Call 9 am 5 pm Monday Saturday r 1 800 827 6655 SM HomeCentral The model and serial numbers will be found on the handle When requesting service or ordering parts always provide the fol...

Reviews: