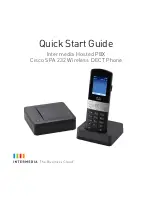
background image

Quick Start Guide

Intermedia Hosted PBX 

Cisco SPA 232 Wireless DECT Phone

Summary of Contents for SPA 232

Page 1: ...Quick Start Guide Intermedia Hosted PBX Cisco SPA 232 Wireless DECT Phone ...

Page 2: ...2 Welcome to your Hosted PBX Service ...

Page 3: ...Start Guide The ports labeled PHONE and LINE at the rear of the Cordless Base are not used Do not connect anything to these connectors The RESET button at the rear of the Cordless Base is not used Pressing the RESET button will make your Cordless Base inoperable and require replacement Note WARNING Setting up the Cordless Handsets 4 Open Cordless Handset box and remove the Cordless Handset Power C...

Page 4: ...to 3 Cordless Handsets per Cordless Base Connecting the Cordless Base 1 Open the Cordless Base box and remove the cordless base power clip power adapter and blue Ethernet cable Connect one end of the blue Ethernet cable to the blue INTERNET port on the rear of the Cordless Base Installing Cordless Base and Handsets 2 Connect the other end of the blue Ethernet cable to any free port on your existin...

Page 5: ...rom the Handset and charging cradle 7 Install the optional Belt Clip on the Cordless Handset Owner s Manual 16 8 Insert the power clip into the power adapter 9 Insert the power adapter into the power source or wall outlet 10 Connect the power adapter to the charging cradle in the port shown below Only use the 1Amp power adapter designed for use with Cisco Cordless Handset SPA300 Series devices DO ...

Page 6: ...elect option 8 for User Options 4 Select option 1 to record the unavailable greeting 5 Follow the voice prompts to record and check your greeting CHANGING THE PIN FROM THE PHONE 1 Log in to your voicemail box 2 Press 8 for User Options 3 Press 7 to change your PIN 4 Enter the new 6 to 10 digit PIN when prompted Your new PIN Must be numeric digits and must not start with 0 Must not contain sequenti...

Page 7: ...LOGGING INTO YOUR VOICEMAIL BOX VIA THE WEB 1 Go to www intermedia net login voice 2 Enter your Phone Number and PIN Password 3 Click LOGIN 7 ...

Page 8: ...calls The followi keys on the key panel of your Cordless Han 1 Earphone speaker 2 Handset display Components Features Earphone Speaker Microphone Handset Display Dial Keypad Mute Button Speakerphone Button Start Call Button Left Softkey 4 Way Navigation Keypad Center Select Button Right Softkey End Call Button ...

Page 9: ...s make and manage calls The following table describes the ys on the key panel of your Cordless Handset Earphone speaker Handset display mponents Headset Port Speaker Notes Right softkey Press the softkey to perform the action shown in the lower right of the Handset display Left softkey Press the softkey to perform the action shown in the lower left of the Handset display End Call button Press the ...

Page 10: ...t New Call by pressing the center button in the Navigation keypad This will place the first call on hold AND provide dial tone to make a second call 4 Dial a 3 digit extension or telephone number 5 Press the Onhook button to hang up the active call 6 Press the Options Softkey and then the center button on the Navigation keypad to resume the original call ANSWERING AN INCOMING CALL On the Handset P...

Page 11: ...Softkey to send the caller to voicemail ENDING A CALL Press the End Call Softkey HOLD Placing a Call On Hold 1 While on a call press the Options Softkey and navigate to the Hold option using the down arrow on the Navigation keypad 2 Press the center button on the Navigation keypad to place the call on hold Retrieving Calls On Hold Press the Options Softkey and select Resume by pressing the center ...

Page 12: ...or Warm Transfers 1 While on a call Press the Options Softkey 2 Scroll down to Transfer using the down arrow button in the Navigation keypad 3 Press the center button in the Navigation keypad 4 Dial the desired phone number or extension number 5 When the party answers announce the call 6 Press the Options Softkey 7 Scroll down to Transfer and press the center button in the Navigation keypad 8 The ...

Page 13: ...d OR 1 Dial your extension number 2 Enter your PIN when prompted VOLUME ADJUSTMENT In Call Volume While on a call press the left and right arrow buttons on the Navigation keypad to raise or lower the volume Ringer Volume While the phone is not in use press the left and right arrow buttons on the Navigation keypad to raise or lower the ringer volume ...

Page 14: ...ct the Swap Softkey to switch to the original call or back again To Reject the Second Call Press the Ignore Softkey to immediately send the caller to voicemail To Ignore the Second Call Press the Ignore Softkey to send the caller to voicemail SPEAKERPHONE While the phone is not in use Press the speakerphone button to activate the speakerphone and get dial tone for an outbound call ...

Page 15: ...the center Select button 2 Scroll right to Call Settings and press the center Select button again 3 Scroll down to Call Forwarding and press the center Select button 4 Choose the type of forwarding needed 5 Enter the forwarding destination number or extension 6 Press Save Forward All Dest Forwards all incoming calls Forward Busy Dest Forwards incoming calls when the phone is busy Forward No Ans De...

Page 16: ... to Call Settings and press the center Select button again 3 Scroll down to Call Forwarding and press the center Select button 4 Clear the numbers in the field by pressing the Delete softkey 5 Press Save FREE Download CallScape for increased desktop productivity www intermedia net callscape ...

Page 17: ...17 www intermedia net knowledgebase voice voicesupport intermedia net 1 877 880 0055 We are here to help ...

Page 18: ...www intermedia net CiscoSPA232D QS 001 CISCOSPA232D QS 001 ...

Reviews: