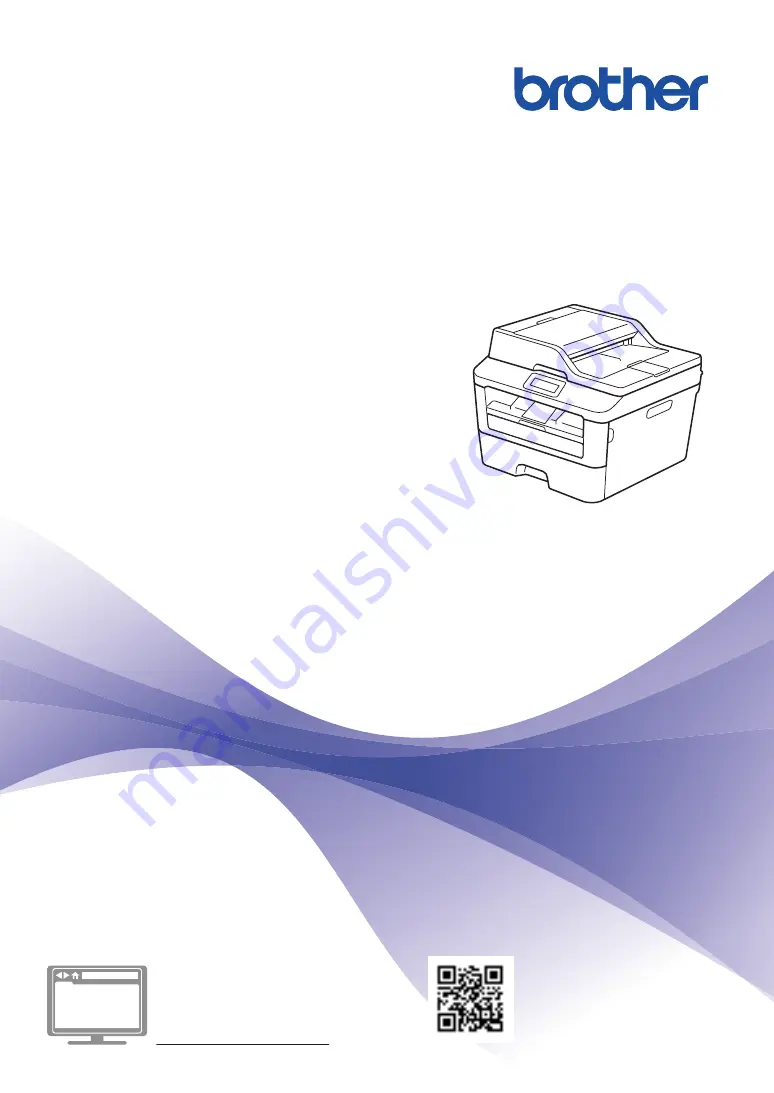
background image

Basic User's Guide

DCP-L2500D

DCP-L2520DW

DCP-L2540DN

MFC-L2700DW 


Online User's Guide

This Basic User's Guide does not contain all
the information about the machine.
To learn detailed information, read the Online
User's Guide at
solutions.brother.com/manuals

Summary of Contents for DCP-L2500D

Page 1: ...0D DCP L2520DW DCP L2540DN MFC L2700DW Online User s Guide This Basic User s Guide does not contain all the information about the machine To learn detailed information read the Online User s Guide at solutions brother com manuals ...

Page 2: ...r your product on line at http www brother com html registration By registering your product with Brother you will be recorded as the original owner of the product Your registration with Brother may serve as confirmation of the purchase date of your product should you lose your receipt may support an insurance claim by you in the event of product loss covered by insurance and will help us notify y...

Page 3: ...iver Updates Go to your model s Downloads page on the Brother Solutions Center at http support brother com to download drivers To keep your machine s performance up to date check there for the latest firmware upgrades i ...

Page 4: ...Search Box 2 Navigation 3 Summary 4 Step by Step Where can I find this manual Windows Click Start All Programs Brother Brother Utilities Brother MFC XXXX series Support User s Guides Windows 8 Tap or click Brother Utilities Brother MFC XXXX series Support User s Guides Select your model from the drop down list if not already selected Macintosh or other options Go to your model s Manuals page on th...

Page 5: ...rch Displays related questions for more information Receives regular updates based on customer feedback Since the Brother Solutions Center is updated regularly this screen shot is subject to change without notice Where can I find these FAQs Brother Solutions Center http support brother com iii ...

Page 6: ...roduct functionality NOTE NOTE specifies the operating environment conditions for installation or special conditions of use Tips icons provide helpful hints and supplementary information Electrical Hazard icons alert you to possible electrical shock Fire Hazard icons alert you to the possibility of a fire Hot Surface icons warn you not to touch hot machine parts Prohibition icons indicate actions ...

Page 7: ... and published to provide the latest product safety information at the time of publication The information contained in this manual may be subject to change For the latest manual visit us at http support brother com 2014 Brother Industries Ltd All rights reserved v ...

Page 8: ... 14 3 Print 15 Print from Your Computer Windows 15 Print a Document Windows 15 Print on Both Sides of the Paper Windows 15 Print More Than One Page on a Single Sheet of Paper N in 1 Windows 16 Printing on Envelopes Thick Paper or Labels 17 Printing on Plain Paper Thin Paper Recycled Paper or Bond Paper using the Manual Feed Slot 19 4 Copy 21 Copy a Document 21 Copy Settings 23 Copy Option 23 Copy ...

Page 9: ...ch Dial Numbers 38 Change or Delete Speed Dial Numbers 39 Telephone Services and External Devices 40 Voice Mail 40 Voice Over Internet Protocol VoIP 40 Connection of an External Telephone Answering Device TAD 40 External and Extension Telephones 40 Send and Receive a Fax Using Your Machine 41 Send a Fax 41 Fax Using Your Computer PC FAX 43 Send Faxes from Your Computer 43 Receive Faxes on Your Com...

Page 10: ...C Index 64 viii ...

Page 11: ...ing a number manually Tel R Press Tel R to have a telephone conversation after picking up the external handset during the F T fast double ring When connected to a PBX use this button to gain access to an outside line to recall an operator or to transfer a call to another extension 3 WiFi Press the WiFi button and launch the wireless installer on your computer Follow the on screen instructions to s...

Page 12: ...Auto Stack Copies 01 c Type of copy d Number of copies e Quality f Contrast g Copy ratio 5 Mode buttons FAX Press to switch the machine to FAX Mode SCAN Press to switch the machine to SCAN Mode COPY Press to switch the machine to COPY Mode 6 Copy buttons Options Press to access temporary settings for copying 2 in 1 ID Copy Press to copy both sides of an identification card onto a single page 2 sid...

Page 13: ...oll up or down through menus and options Press to change the resolution in Fax Mode Press to access speed dial numbers 8 Dial Pad Use to dial fax and telephone numbers Use as a keyboard to enter text or characters 9 Power On Off Turn on the machine by pressing Turn off the machine by pressing and holding The LCD displays Shutting Down and stays on for a few seconds before turning off If you have a...

Page 14: ...10 Stop Exit Press to stop an operation Press to exit from a menu 11 Start Press to start sending faxes Press to start copying Press to start scanning documents 4 ...

Page 15: ... onto a single page 2 sided for certain models only Press to copy on both sides of a sheet of paper 3 Scan Press to switch the machine to Scan Mode 4 WiFi for wireless models Press the WiFi button and launch the wireless installer on your computer Follow the on screen instructions to set up a wireless connection between your machine and your network When the WiFi light is on your Brother machine i...

Page 16: ...ber of copies c Quality d Contrast e Copy ratio 6 7 8 6 Menu buttons Menu Press to access the Menu for programming your machine settings Clear Press to delete entered data Press to cancel the current setting OK Press to store your machine setting a or b Press to scroll up or down through menus and options 7 Stop Exit Press to stop an operation Press to exit from a menu 8 Start Press to start copyi...

Page 17: ... Press to start scanning documents 1 General Information 7 ...

Page 18: ...Brother Utilities Windows 8 and Windows Server 2012 Tap or Click Brother Utilities either on the Start screen or the desktop Windows 8 1 and Windows Server 2012 R2 Move your mouse to the lower left corner of the Start screen and click if you are using a touch based device swipe up from the bottom of the Start screen to bring up the Apps screen When the Apps screen appears tap or click Brother Util...

Page 19: ... and then press OK 3 Press a or b to display the Volume option and then press OK 4 Press a or b to display the Ring option and then press OK 5 Press a or b to display the High Med Low or Off option and then press OK 6 Press Stop Exit Adjust the Beeper Volume Related Models MFC L2700DW When the beeper is on the machine will beep when you press a button make a mistake or after you send or receive a ...

Page 20: ... or b to display the Volume option and then press OK 4 Press a or b to display the Speaker option and then press OK 5 Press a or b to display the High Med Low or Off option and then press OK 6 Press Stop Exit 10 ...

Page 21: ...aper size in the tray you must change the paper size setting in the machine or on your computer at the same time 1 Pull the paper tray completely out of the machine 2 Press and slide the paper guides to fit the paper Press the green release levers to slide the paper guides 3 Fan the stack of paper well 4 Load paper with the printing surface face down in the paper tray DO NOT load different types o...

Page 22: ...machine asking if you changed the paper size The default setting is On 1 Press Menu 2 Press a or b to display the General Setup option and then press OK 3 Press a or b to display the Paper option and then press OK 4 Press a or b to display the Check Size option and then press OK 5 Press a or b to select the On or Off option and then press OK 6 Press Stop Exit Change the Paper Size When you change ...

Page 23: ...y the Paper option and then press OK 4 Press a or b to display the Paper Type option and then press OK 5 Press a or b to display the Thin Plain Thick Thicker Recycled Paper or Label option and press OK 6 Press Stop Exit Recommended Print Media To get the best print quality we recommend using the paper in the table Paper Type Item Plain Paper Xerox Premier TCF 80 g m2 Xerox Business 80 g m2 Recycle...

Page 24: ...damage to your machine DO NOT use paper that is highly textured that is extremely smooth or shiny that is curled or warped that is coated or has a chemical finish that is damaged creased or folded that exceeds the recommended weight specification in this guide with tabs and staples with letterheads using low temperature dyes or thermography that is multipart or carbonless that is designed for inkj...

Page 25: ...th Sides of the Paper Windows Select A4 size paper when using the automatic 2 sided printing option 1 Select the print command in your application 2 Select Brother MFC XXXX series where XXXX is the name of your model and then click the printing properties or preferences button The printer driver window appears 3 Click the 2 sided Booklet drop down list and select the 2 sided option 4 Click the 2 s...

Page 26: ... command in your application 2 Select Brother MFC XXXX series where XXXX is the name of your model and then click the printing properties or preferences button The printer driver window appears 3 Click the Multiple Page drop down list and select the 2 in 1 4 in 1 9 in 1 16 in 1 or 25 in 1 option 4 Click OK 5 Complete your print operation 16 ...

Page 27: ...he paper or envelope into the manual feed slot with the printing surface face up DO NOT load more than one sheet of paper or one envelope in the manual feed slot at any one time Doing this may cause a jam 1 Open the back cover face up output tray 2 For printing envelopes Pull down the two green levers one on the left side and one on the right side to the envelope position as shown in the illustrat...

Page 28: ...ck the printing properties or preferences button The printer driver window appears 8 Click the Paper Size drop down list and select your paper size 9 Click the Media Type drop down list and select the type of paper you are using 10 Click the First Page and Other Pages drop down lists and select Manual 11 Click the Portrait or Landscape option to set the orientation of your printout 12 Change other...

Page 29: ... prevent paper from sliding off the face down output tray or remove each page as soon as it comes out of the machine 2 Open the manual feed slot cover 3 Slide the manual feed slot paper guides to the width of the paper 4 Push one sheet of paper firmly into the manual feed slot Continue pushing the paper until the top edge of the paper presses against the rollers for about two seconds or until the ...

Page 30: ...lick the Paper Size drop down list and select your paper size 8 Click the Media Type drop down list and select the type of paper you are using 9 Click the First Page and Other Pages drop down list and select Manual 10 Click the Portrait or Landscape option to set the orientation of your printout 11 Change other printer settings if needed 12 Click OK 13 Click Print 20 ...

Page 31: ...he following For MFC models Press COPY Use the dial pad to enter the number of copies you want For DCP models Press a or b to enter the number of copies you want The LCD displays 100 Auto Stack Copies 01 4 Press Start If you placed the document in the ADF the machine scans and prints the document If you placed the document on the scanner glass and the machine displays a message asking if you want ...

Page 32: ...next page press a to select the Yes option and then place the next page on the scanner glass Press OK to scan the page No For MFC models After you have scanned the last page press 2 to select the No option or press Start again The machine prints the document For DCP models After you have scanned the last page press b to select the No option or press Start again The machine prints the document 22 ...

Page 33: ...B A B A Brightness Increase the brightness to make the text lighter Decrease the brightness to make the text darker Contrast Increase the contrast to make an image clearer Decrease the contrast to make an image more subdued Enlarge Reduce 100 97 LTR A4 94 A4 LTR 91 Full Page 85 LTR EXE 83 LGL A4 78 LGL LTR 70 A4 A5 50 Custom 25 400 Auto 200 141 A5 A4 104 EXE LTR 4 Copy 23 ...

Page 34: ...Menu selections Options Page Layout Off 1 in 1 2 in 1 P 2 in 1 L 4 in 1 P 4 in 1 L 2 sided available only for certain models Off 1sided 2sided L 1sided 2sided S 24 ...

Page 35: ...ed Long Edge Flip 1 2 1 2 1 sided 2 sided Short Edge Flip 1 2 1 2 1 Make sure you have loaded the correct size paper in the paper tray 2 Do one of the following Place the document face up in the ADF If you are copying multiple pages we recommend using the ADF Place the document face down on the scanner glass 3 For MFC models Press COPY 4 Do one of the following Press 2 sided Press Options Press a ...

Page 36: ... then press OK No Press 2 or b when you have scanned all the pages Copy a 2 sided Document Using the Scanner Glass You must choose a 2 sided copy layout from the following options before you can start 2 sided copying Portrait 2 sided 2 sided 1 2 1 2 Landscape 2 sided 2 sided 1 2 1 2 1 Make sure you have loaded the correct size paper in the paper tray 2 Place your document face down on the scanner ...

Page 37: ... Card onto One Page Use the 2in1 ID Copy feature to copy both sides of an identification card onto one page keeping the original card size Copy an identification card only to the extent permitted under applicable laws For more information see the Product Safety Guide 1 For MFC models Press COPY 2 Place an identification card face down near the upper left corner of the scanner glass 1 1 4 0 mm or g...

Page 38: ... For DCP models Press a or b to enter the number of copies you want 5 Press Start The machine scans one side of the identification card 6 After the machine has scanned the first side turn over the identification card 7 Press Start to scan the other side 28 ...

Page 39: ...ntrolCenter4 Advanced Mode Windows Scan documents and save them to a folder on your computer as PDF files 1 Load your document 2 Click Start All Programs Brother Brother Utilities and then click the drop down list and select your model name if not already selected Click SCAN in the left navigation bar and then click ControlCenter4 The ControlCenter4 application opens 3 When you open the ControlCen...

Page 40: ...lected The folder opens automatically For more information see the Online User s Guide Scan from Your Computer Scan Using the Scan Button on Your Brother Machine Scan Using the Scan Button on the Machine 1 Do one of the following Place the document face up in the ADF If you are scanning multiple pages we recommend using the ADF Place the document face down on the scanner glass 2 Press SCAN 30 ...

Page 41: ...ess OK Go to the next step To use the default scan settings press a or b to select No and then press OK Press Start The machine starts scanning If you are using the machine s scanner glass follow the LCD instructions to complete the scanning job In order to change scan settings Brother s Control Center software must be installed on a computer connected to the machine 7 Select the scan settings you...

Page 42: ...ss OK 5 Enter your fax number up to 20 digits using the dial pad and then press OK 6 Enter your telephone number up to 20 digits using the dial pad and then press OK If your telephone number and fax number are the same enter the same number again 7 Use the dial pad to enter your name up to 20 characters and then press OK To enter text on your machine see Related Information How to Enter Text on Yo...

Page 43: ...eed at 33600 bps Normal Select Normal to set the modem speed at 14400 bps Option Description Basic for VoIP Select Basic for VoIP to reduce the modem speed to 9600 bps and turn off Error Correction Mode ECM Unless interference is a recurring problem on your telephone line you may prefer to use it only when needed To improve compatibility with most VoIP services Brother recommends changing the comp...

Page 44: ...t the handset of the external telephone When you hear fax tones short repeating beeps press Start and then 2 to receive a fax Use the Fax Detect feature to receive faxes when you have lifted a handset on the same line as the machine External TAD Mode External TAD in the Machine s Menu External TAD Mode lets an external answering device manage your incoming calls Incoming calls will be handled in t...

Page 45: ...s the machine No Fax Only Mode Yes Are you using the voice message function of an external telephone answering device Yes External TAD Mode No Do you want the machine to answer fax and telephone calls automatically Yes Fax Tel Mode No Manual Mode 1 Press FAX 2 Press Menu 3 Press a or b to display the Fax option and then press OK 4 Press a or b to display the Setup Receive option and then press OK ...

Page 46: ...7 Press Stop Exit Fax and Telephone Problems on page 50 Related Information 36 ...

Page 47: ...have a voice call and then press OK 7 Press Stop Exit Even if the caller hangs up during the pseudo double ringing the machine will continue to ring for the set time Set the Number of Rings Before the Machine Answers Ring Delay Related Models MFC L2700DW When somebody calls your machine you will hear the normal telephone ring sound The number of rings is set in the Ring Delay option The Ring Delay...

Page 48: ...its and then press OK 5 Do one of the following Enter the name using the dial pad up to 15 characters and then press OK To store the number without a name press OK Store Speed Dial Numbers Related Models MFC L2700DW Use the Speed Dial numbers to store up to 200 numbers with a name 1 Press FAX 2 Press twice and enter a three digit Speed Dial code 001 200 If a number is not stored there the LCD disp...

Page 49: ...r delete Speed Dial Codes 1 Press Menu 2 Press a or b to display the Fax option and then press OK 3 Press a or b to display the Address Book option and then press OK 4 Press a or b to display the Speed Dial option and then press OK 5 Enter the Speed Dial code you want to change or delete and then press OK 6 Do one of the following To change the stored fax or telephone number and name a Press 1 b E...

Page 50: ...o a VoIP system contact your VoIP provider Connection of an External Telephone Answering Device TAD Related Models MFC L2700DW You may choose to connect an external answering device to your Brother machine To receive faxes successfully you must connect it correctly Connect your external TAD to the T piece connector on the Brother line cable supplied with your machine When recording an outgoing mes...

Page 51: ...ng multiple pages we recommend using the ADF Place the document face down on the scanner glass 3 Enter the fax number Using the dial pad Enter the fax number using the dial pad Using the One Touch Buttons Choose a contact stored on a One Touch button Using the Speed Dial Codes Enter the fax number by pressing twice and then enter the three digit Speed Dial code 6 Fax 41 ...

Page 52: ... the table Option Description Yes To scan the next page press 1 to select the Yes option and then place the next page on the scanner glass Press OK to scan the page No Send When you have scanned the last page press 2 to select the No Send option or press Start again The machine sends the document To stop faxing press Stop Exit 42 ...

Page 53: ...application s vendor if you need more support Receive Faxes on Your Computer Windows only Related Models MFC L2700DW Use Brother s PC FAX software to receive faxes on your computer screen them and print only those faxes you want Even if you turn off your computer at night or on the weekend for example your machine will receive and store your faxes in its memory The number of received faxes that ar...

Page 54: ...enu 3 Press a or b to display the Fax option and then press OK 4 Press a or b to display the Remote Fax Opt option and then press OK 5 Press a or b to display the PC Fax Receive option and then press OK 6 Press a or b to select the On option and then press OK The LCD displays a reminder to start the PC FAX Receive program on your computer 7 Press OK 8 Press a or b to display USB or your computer n...

Page 55: ...e securely connected to the machine and the computer Check the LCD or the machine s status in Status Monitor on your computer Find the Error Find the Solution Using the Status Monitor Double click the icon in the task tray Windows If you check Load Status Monitor on Startup the Status Monitor will launch automatically each time you start your PC A green icon indicates the normal stand by condition...

Page 56: ...closed completely Close the back cover of the machine until it locks in the closed position Cartridge Error Put the Toner Cartridge back in The toner cartridge is not installed correctly Remove the toner cartridge and drum unit assembly Take out the toner cartridge and put it back in the drum unit again Reinstall the toner cartridge and drum unit assembly in the machine Document Jam The document w...

Page 57: ...e 2 sided tray firmly back in the machine Jam Inside The paper is jammed inside the machine Open the front cover and remove the toner cartridge and drum unit assembly Pull out the jammed paper Close the front cover If the error message remains press Start Jam Rear The paper is jammed in the back of the machine Open the fuser cover and remove the jammed paper Close the fuser cover If the error mess...

Page 58: ... has a mechanical problem Press and hold to turn off the machine wait a few minutes and then turn it on again If the problem continues contact Brother customer service Replace Drum It is time to replace the drum unit Replace the drum unit The drum unit counter was not reset when a new drum was installed Reset the drum unit counter See the instructions included with the new drum unit Replace Toner ...

Page 59: ...r automatic 2 sided printing is A4 The paper in the tray is not the correct size and is not available for automatic 2 sided printing Load the correct size of paper in the tray and set the tray for that paper size Paper size available for automatic 2 sided printing is A4 Size mismatch The paper in the tray is not the correct size Load the correct size of paper in the tray and set the size of paper ...

Page 60: ...lease contact your telephone service provider for connection issues 2 Check the receive mode See Related Information Receive Modes Choose the Correct Receive Mode 3 Try changing the compatibility settings You may be able to send and receive faxes by lowering the connection speed For more information see Related Information Set Telephone Line Compatibility for Interference and VoIP Systems If the p...

Page 61: ...our Brother machine s Receive Mode to External TAD Make sure your Brother machine s Fax Detect feature is turned On Fax Detect is a feature that allows you to receive a fax even if you have answered the call on an external or extension telephone Received faxes appear as split pages Turn on Auto Reduction Dialling does not work No dial tone Check all line cord connections Poor sending quality Try c...

Page 62: ... Click SCAN in the left navigation bar and then click Scanners and Cameras b Do one of the following Windows XP Right click a scanner device and then select Properties The Network Scanner Properties dialog box appears Windows Vista Windows 7 and Windows 8 Click the Properties button c Click the Network Setting tab to confirm the machine s IP address Try printing with your machine If the problem st...

Page 63: ...s network connection For more information see the Online User s Guide Introduction to Your Brother Machine If you cannot print on both sides of paper check the following 6 Change the paper size setting in the printer driver to A4 A Troubleshooting 53 ...

Page 64: ...nt Jam 2 Jam Rear 3 Jam 2 sided 4 Jam Tray 5 Jam Inside Clear the Document Jam The Document is Jammed in the Top of the ADF 1 Open the ADF cover 2 Pull the jammed document out to the left 3 Close the ADF cover The Document is Jammed under the Document Cover 4 Pull the jammed document out to the right If the document rips or tears remove all small paper scraps to prevent future jams 54 ...

Page 65: ...move the remaining paper from the paper tray and straighten the stack when you are adding new paper This helps prevent multiple sheets of paper from feeding through the machine at one time and prevents paper jams Paper is Jammed in the Paper Tray If the LCD displays Jam Tray do the following 1 Pull the paper tray completely out of the machine 2 Slowly pull out the jammed paper The easiest way to r...

Page 66: ...he paper is below the maximum paper mark b b b 5 Put the paper tray firmly back in the machine Paper is Jammed in the Output Paper Tray When the paper is jammed in the output paper tray do the following 1 Use both hands to open the scanner 2 Remove the paper 3 Push the scanner down with both hands to close it 56 ...

Page 67: ...10 minutes This allows the internal fan to cool the extremely hot parts inside the machine 2 Open the back cover 3 Pull the blue tabs at the left and right sides toward you to release the fuser cover WARNING HOT SURFACE The machine s internal parts will be extremely hot Wait for the machine to cool down before touching them 4 Use both hands to gently pull the jammed paper out of the fuser unit A T...

Page 68: ...r is Jammed inside the Machine If the machine s control panel or the Status Monitor indicates that there is a jam inside the machine complete the following 1 Leave the machine turned on for 10 minutes This allows the internal fan to cool the extremely hot parts inside the machine 2 Open the front cover 3 Remove the toner cartridge and drum unit assembly 58 ...

Page 69: ...t cover Paper is Jammed in the 2 sided Tray If the machine s control panel or the Status Monitor indicates that there is a jam in the 2 sided paper tray do the following 1 Leave the machine turned on for 10 minutes This allows the internal fan to cool the extremely hot parts inside the machine 2 Pull the paper tray completely out of the machine 3 At the back of the machine pull the 2 sided tray co...

Page 70: ... inside the 2 sided tray open the back cover WARNING HOT SURFACE The machine s internal parts will be extremely hot Wait for the machine to cool down before touching them 7 Use both hands to gently pull the jammed paper out of the back of the machine 8 Close the back cover until it locks in the closed position 9 Put the 2 sided tray firmly back in the rear of the machine 60 ...

Page 71: ...ing certain options such as the Station ID you must enter characters The available number and letters are printed on each dial pad button The buttons 0 and are used for special characters Press the appropriate dial pad button the number of times shown in this reference table to access the character you want Press button One time Two times Three times Four times Five times Six times Seven times Eig...

Page 72: ...ant to change it press d or c to move the cursor to the incorrect character and then press Clear Repeating letters To enter a letter on the same button as the previous letter press c to move the cursor right before pressing the button again Special symbols and characters Press or 0 then press d or c to move the cursor to the symbol or character you want Press OK to select it The symbols and charac...

Page 73: ...he toner cartridge and drum unit are two separate parts Toner Cartridge Drum Unit Standard Toner TN 2310 High Yield Toner TN 2320 DR 2300 If you are using Windows double click the Brother CreativeCenter icon on your desktop to access our FREE website designed as a resource to help you easily create and print customized materials for business and home use with photos text and creative touch Mac use...

Page 74: ...lity 33 fax receive 35 Fax from PC 43 J Jams 54 document 54 paper 55 L Labels 13 LCD Liquid Crystal Display 1 M Maintenance messages 46 Manual receive 33 35 Manual feed slot 17 19 O One Touch Dial changing 38 storing 38 P Paper how to load 11 type 13 Print 15 R Receive Mode 33 35 S Scan 29 Speed Dial changing 39 storing 38 Supplies 63 T TAD Telephone Answering Device external 33 40 Troubleshooting...

Page 75: ...V Voice Mail 40 VoIP systems 33 40 Volume 9 C Index 65 ...

Page 76: ...These machines are approved for use in the country of purchase only Local Brother companies or their dealers will support only machines purchased in their own countries LEM598004 00 UK Version 0 ...

Reviews: