background image

BASIC USER’S GUIDE

DCP-J925DW


Version 0

UK/IRE/GEN

Summary of Contents for DCP-J925DW

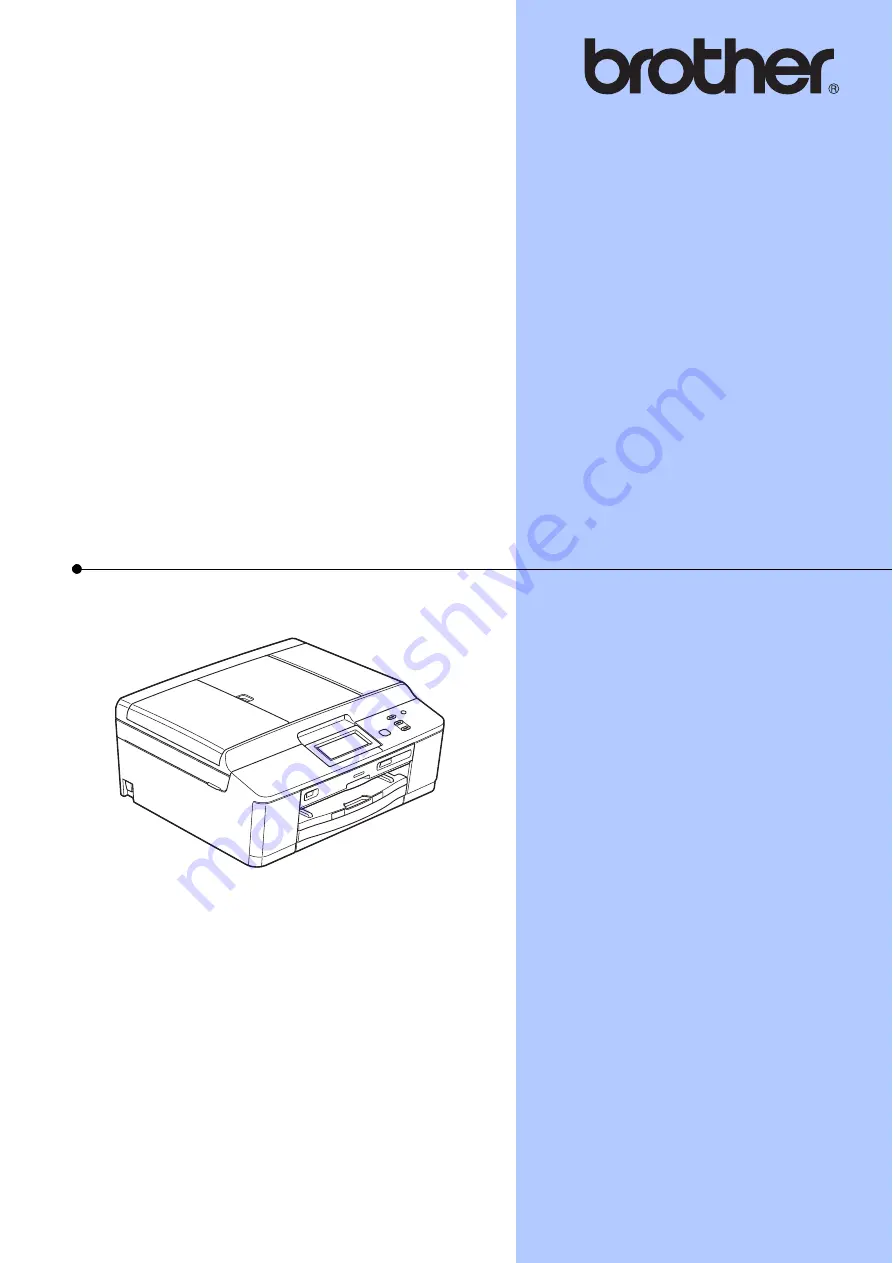
Page 1: ...BASIC USER S GUIDE DCP J925DW Version 0 UK IRE GEN ...

Page 2: ...erial Number 1 Date of Purchase Place of Purchase 1 The serial number is on the back of the unit Retain this User s Guide with your sales receipt as a permanent record of your purchase in the event of theft fire or warranty service Register your product on line at http www brother com registration 2011 Brother Industries Ltd ...

Page 3: ... reports and performing routine maintenance PDF file CD ROM Software User s Guide Follow these instructions for Printing Scanning Network Scanning PhotoCapture Center Disc Print Web Services Scan and using the Brother ControlCenter utility PDF file CD ROM Network Glossary This Guide provides basic information about advanced network features of Brother machines along with explanations about general...

Page 4: ...perations 6 Warning LED indications 7 Beeper Volume 8 LCD display 8 Setting the backlight brightness 8 2 Loading paper 9 Loading paper and other print media 9 Loading envelopes and postcards 11 Loading photo paper 13 Printable area 16 Paper settings 17 Paper Type 17 Paper Size 17 Acceptable paper and other print media 18 Recommended print media 18 Handling and using print media 19 Choosing the rig...

Page 5: ...sing a scanner driver 35 Scanning using the ControlCenter 35 8 How to print on a Disc CD DVD BD 36 Overview 36 How to load a Disc CD DVD BD 36 A Routine maintenance 39 Replacing the ink cartridges 39 Cleaning and checking the machine 42 Cleaning the scanner glass 42 Cleaning the print head 43 Checking the print quality 43 Checking the print alignment 44 B Troubleshooting 45 Error and Maintenance m...

Page 6: ...ing Text 84 Inserting spaces 84 Making corrections 84 Repeating letters 84 D Specifications 85 General 85 Print media 87 Copy 88 PhotoCapture Center 89 PictBridge 90 Scanner 91 Printer 92 Interfaces 92 Computer requirements 93 Consumable items 94 Network LAN 95 E Index 96 ...

Page 7: ...ceive Monochrome only Remote Retrieval Additional receiving operations Polling overview 5 Dialling and storing numbers MFC J825DW only Voice operations Additional dialling operations Additional ways to store numbers 6 Printing reports Fax reports MFC J825DW only Reports 7 Making copies Copy settings 8 Printing photos from a memory card or USB Flash memory drive PhotoCapture Center operations Print...

Page 8: ...vi ...

Page 9: ... is your model name from the programs list and then choose User s Guides If you have not installed the software you can find the documentation on the CD ROM by following the instructions below General information 1 Bold Bold typeface identifies specific buttons on the machine s control panel or on the computer screen Italics Italicized typeface emphasizes an important point or refers you to a rela...

Page 10: ...choose your country After the list of User s Guides appears choose the guide you want to read Viewing Documentation Macintosh 1 a Turn on your Macintosh Insert the Brother CD ROM into your CD ROM drive The following window will appear b Double click the Documentation icon c Double click your language folder d Double click top pdf If the country screen appears choose your country e After the list o...

Page 11: ...ck Setup Guide If your wireless access point or router supports Wi Fi Protected Setup or AOSS uuQuick Setup Guide Network setup uuNetwork User s Guide Accessing Brother Support Windows 1 You can find all the contacts you will need such as Web support Brother Solutions Center on the CD ROM Click Brother Support on the Top Menu The following screen will appear To access our website http www brother ...

Page 12: ...CD Labeler click NewSoft CD Labeler To download and install Presto PageManager click Presto PageManager To register your machine from the Brother Product Registration Page http www brother com registration click On Line Registration For the latest news and product support information http solutions brother com click Brother Solutions Center To visit our website for original Brother Supplies http w...

Page 13: ...s you start a scanning operation in colour or mono depending on the scan setting in the ControlCenter software 4 You can turn the machine on and off Press to turn the machine on Press and hold down to turn the machine off The LCD will show Shutting Down and will stay on for a few seconds before going off If you turn the machine off using it will still periodically clean the print head to maintain ...

Page 14: ...ntenance message For details see Error and Maintenance messages uu page 45 Status LED 1 When you turn the machine on the status LED lights up When the memory card or USB Flash memory drive is being read or written to the status LED blinks When the machine is in Sleep Mode the status LED will be off Basic Operations 1 To operate the Touchscreen use your finger to press the Menu or option button dir...

Page 15: ... the machine as shown in the table LED DCP status Description Off Ready The DCP is ready for use Red Cover open The cover is open Close the cover See Error and Maintenance messages uu page 45 Cannot Print Replace the ink cartridge with a new one See Replacing the ink cartridges uu page 39 Paper error Put paper in the tray or clear the paper jam Check the LCD message See Error and Maintenance messa...

Page 16: ...s General Setup d Press a or b to display Beeper e Press Beeper f Press Low Med High or Off g Press Stop Exit LCD display 1 Setting the backlight brightness 1 If you are having difficulty reading the LCD try changing the brightness setting a Press Menu b Press a or b to display General Setup c Press General Setup d Press a or b to display LCD Settings e Press LCD Settings f Press Backlight g Press...

Page 17: ... the paper tray completely out of the machine Note If the paper support flap 1 is open close it and then close the paper support 2 b Lift the output paper tray cover 1 c With both hands gently press and slide the paper side guides 1 and then the paper length guide 2 to fit the paper size Make sure that the triangular marks 3 on the paper side guides 1 and paper length guide 2 line up with the mark...

Page 18: ...he tray IMPORTANT Be careful not to push the paper in too far it may lift at the back of the tray and cause paper feed problems Note When there are only a few sheets of paper left in the paper tray the machine may start to misfeed Load at least 10 sheets of paper in the paper tray f Gently adjust the paper side guides 1 to fit the paper using both hands Make sure the paper side guides touch the si...

Page 19: ... margin settings to be set in the application Make sure you do a test print first before printing many envelopes IMPORTANT DO NOT use any of the following types of envelopes as they will cause paper feed problems That are of a baggy construction That have windows That are embossed have raised writing on them That have clasps or staples That are pre printed on the inside Occasionally you may experi...

Page 20: ...postcards are double feeding put one envelope or postcard in the paper tray at a time b Put envelopes or postcards in the paper tray with the address side down and the leading edge top of the envelopes in first as shown in the illustration Using both hands gently press and slide the paper side guides 1 and paper length guide 2 to fit the size of the envelopes or postcards 1 2 ...

Page 21: ...uSoftware User s Guide Printing and Faxing Macintosh Loading photo paper 2 Use the photo paper tray which has been assembled on the top of the output paper tray cover to print on Photo 10 15 cm and Photo L 89 127 mm size paper When you use the photo paper tray you do not have to take out the paper that is in the tray beneath it For the maximum number of photo cards you can load see Paper weight th...

Page 22: ...er side guides to the paper Make sure the paper side guides touch the sides of the paper Check that the paper is flat in the tray Note Always make sure that the paper is not curled or wrinkled The Photo indicator confirms that the photo paper tray is in the Photo printing position The A4 LTR indicator confirms that the photo paper tray is in the Normal printing position 2 1 ...

Page 23: ...he blue photo paper tray release button 1 using your right index finger and thumb and pull the photo paper tray back until it clicks 2 IMPORTANT If you do not return the photo paper tray to the Normal printing position after printing photos you will get a No Paper Fed error when you use cut sheet paper Photo paper tray in the normal printing position Photo paper tray in the photo printing position...

Page 24: ...in the shaded areas of cut sheet paper when the Borderless print feature is available and turned on uuSoftware User s Guide Printing Windows uuSoftware User s Guide Printing and Faxing Macintosh Note The Borderless feature is not available for envelopes and duplex printing Cut Sheet Paper Envelopes Top 1 Bottom 2 Left 3 Right 4 Cut Sheet 3 mm 3 mm 3 mm 3 mm Envelopes 22 mm 22 mm 3 mm 3 mm 3 4 1 2 ...

Page 25: ...jects paper with printed surfaces face up onto the paper tray at the front of the machine When you use transparencies or glossy paper remove each sheet at once to prevent smudging or paper jams Paper Size 2 You can use four sizes of paper for printing copies A4 A5 Letter and 10 15 cm When you change the size of paper you load in the machine you will need to change the paper size setting at the sam...

Page 26: ...ou print on Brother Photo paper load one extra sheet of the same photo paper in the paper tray An extra sheet has been included in the paper package for this purpose When printing on to transparencies load one extra sheet in the paper tray When you use transparencies or photo paper remove each sheet at once to prevent smudging or paper jams Avoid touching the printed surface of the paper immediate...

Page 27: ...quality Transparencies designed for laser printers copiers may stain your next document Use only transparencies recommended for inkjet printing IMPORTANT DO NOT use the following kinds of paper Damaged curled wrinkled or irregularly shaped paper 1 2 mm or greater curl may cause jams to occur Extremely shiny or highly textured paper Paper that cannot be arranged uniformly when stacked Short grain p...

Page 28: ...105 148 mm 4 1 5 8 in Yes Cards 10 15 cm 4 6 in Yes Yes Yes 89 127 mm 3 1 2 5 in Yes 13 18 cm 5 7 in Yes Yes 127 203 mm 5 8 in Yes Postcard 1 100 148 mm 3 9 5 8 in User Defined Postcard 2 Double 148 200 mm 5 8 7 9 in User Defined Envelopes C5 Envelope 162 229 mm 6 4 9 in Yes DL Envelope 110 220 mm 4 3 8 7 in Yes COM 10 105 241 mm 4 1 8 9 1 2 in Yes Monarch 98 191 mm 3 7 8 7 1 2 in Yes Y4 Envelope ...

Page 29: ...pecially designed for Brother inkjet machines Paper Type Weight Thickness No of sheets Cut Sheet Plain Paper 64 to 120 g m2 0 08 to 0 15 mm 100 1 Inkjet Paper 64 to 200 g m2 0 08 to 0 25 mm 20 Glossy Paper Up to 220 g m2 Up to 0 25 mm 20 2 3 Cards Photo Card Up to 220 g m2 Up to 0 25 mm 20 2 3 Index Card Up to 120 g m2 Up to 0 15 mm 30 Postcard Up to 200 g m2 Up to 0 25 mm 30 Envelopes 75 to 95 g ...

Page 30: ...s 3 IMPORTANT DO NOT pull on the document while it is feeding DO NOT use paper that is curled wrinkled folded ripped stapled paper clipped pasted or taped DO NOT use cardboard newspaper or fabric Make sure documents written with ink or modified with correction fluid are completely dry a Unfold the ADF Document Support 1 and the ADF Document Support Flap 2 b Fan the pages well c Adjust the paper gu...

Page 31: ...lass 3 You can use the scanner glass to copy or scan pages of a book or one page at a time Document Sizes Supported 3 How to load documents 3 Note To use the scanner glass the ADF must be empty a Lift the document cover b Using the document guidelines on the left and top place the document face down in the upper left corner of the scanner glass c Close the document cover IMPORTANT If you are scann...

Page 32: ...able area 3 The scannable area depends on the settings in the application you are using The figures below show unscannable areas Usage Document Size Top 1 Bottom 2 Left 3 Right 4 Copy All paper sizes 3 mm 3 mm Scan 3 4 1 2 ...

Page 33: ...er the number up to 99 d Press Mono Start or Colour Start Stop copying 4 To stop copying press Stop Exit Copy settings 4 You can change the following copy settings Press Copy and then press d or c to scroll through the copy settings When the setting you want is displayed press it and choose your option Basic User s Guide For details about changing the following copy settings uu page 26 Paper Type ...

Page 34: ... BP71 Brother BP61 Other Glossy or Transparency g If you do not want to change additional settings press Mono Start or Colour Start Paper Size 4 If you are copying on paper other than A4 size you will need to change the Paper Size setting You can copy only on A4 A5 Photo 10 15 cm or Letter paper a Press Copy b Load your document c Enter the number of copies you want d Press d or c to display Paper...

Page 35: ...in the front of the machine from your computer uuSoftware User s Guide PhotoCapture Center Windows uuSoftware User s Guide Remote Setup PhotoCapture Center Macintosh Using a memory card or USB Flash memory drive 5 Your Brother machine has media drives slots for use with the following popular digital camera media Memory Stick Memory Stick PRO Memory Stick Duo Memory Stick PRO Duo SD Memory Card SDH...

Page 36: ...mass storage as standard Any other USB devices are not supported 2 Memory card slot Slot Compatible memory cards Upper slot Memory Stick Memory Stick PRO Memory Stick Duo Memory Stick PRO Duo Memory Stick Micro Adapter required Lower slot SD Memory Card SDHC Memory Card SDXC Memory Card MultiMedia Card MultiMedia Card plus mini SD Adapter required mini SDHC Adapter required micro SD Adapter requir...

Page 37: ...lash memory drive is being read or written to the status LED blinks IMPORTANT DO NOT unplug the power cord or remove the memory card or USB Flash memory drive from the media drive slot or USB direct interface while the machine is reading or writing to the memory card or USB Flash memory drive the status LED is blinking You will lose your data or damage the card The machine can only read one device...

Page 38: ...r and total number of pages listed under the thumbnails Press d or c repeatedly to select each page of photos or hold down to scroll through all pages of photos Press to start Slide Show c Press a photo from the thumbnail d Enter the number of copies you want either by pressing the number box and entering the number of copies or by pressing or Press OK e Repeat step c and d until you have chosen a...

Page 39: ... PDF PDF or JPEG JPG file formats The factory setting is Color 200 dpi and the default file format is PDF The machine automatically creates file names based on the current date uuQuick Setup Guide For example the fifth image scanned on July 1 2011 would be named 01071105 PDF You can change the colour and quality a Make sure you have put the memory card or USB Flash memory drive in the correct slot...

Page 40: ...change the file name press d or c to display File Name Press File Name and enter the file name You can only change the first 6 characters Press OK To start scanning without changing additional settings go to step g Note If you chose colour in the resolution setting you cannot choose the file type TIFF If you chose monochrome in the resolution setting you cannot choose the file type JPEG g Press Mo...

Page 41: ...cintosh a Install the Brother printer driver from the CD ROM uuQuick Setup Guide b From your application choose the Print command c Choose the name of your machine in the Print dialog box and click Preferences d Choose the settings you want to change in the Properties dialog box Media Type Print Quality Paper Size Orientation Colour Greyscale Ink Save Mode Scaling e Click OK f Click Print to begin...

Page 42: ...omatically Use the scanner glass to scan a page of a book or one sheet at a time c Do one of the following To scan using the Scan key go to Scanning using the scan key To scan using a scanner driver at your computer go to Scanning using a scanner driver Scanning using the scan key 7 For more information uuSoftware User s Guide Using the Scan key a Press Scan b Choose the scan mode you want to File...

Page 43: ... document using the TWAIN driver Macintosh uuSoftware User s Guide Scanning a document using the ICA driver Mac OS X 10 6 x a Start a scanning application and click the Scan button b Adjust the settings such as Resolution Brightness and Scan Type in the Scanner Setup dialog box c Click Start or Scan to begin scanning Scanning using the ControlCenter 7 uuSoftware User s Guide ControlCenter4 Windows...

Page 44: ... select an image stored in a memory card or USB Flash memory drive and print the image on to a printable disc Printing from a computer Windows Macintosh You can create a label image using NewSoft CD Labeler and print the image on to a printable disc How to load a Disc CD DVD BD 8 The Disc Tray accommodates 12 cm discs only Note If you want to do a test print on paper DO NOT load a CD DVD BD a Open...

Page 45: ...placed with the printable surface face up onto the Disc Tray Make sure there is no dirt on the Disc Tray e Insert the Disc Tray into the Disc Guide and line up the triangular marks f After the disc has finished printing close the Disc Guide and store the Disc Tray back in the scanner cover Note For How to print on a Disc CD DVD BD from your computer uuSoftware User s Guide Printing on a Disc 1 ...

Page 46: ... area near the center of the disc gets printed on immediately wipe off the ink from those areas Always close the Disc Guide and store the Disc Tray in the scanner cover after printing If you do not the Disc Tray may become warped or bent and may cause the machine to malfunction when used ...

Page 47: ... it out with water at once and call a doctor if you are concerned IMPORTANT Brother multifunction machines are designed to work with ink of a particular specification and will work to a level of optimum performance and reliability when used with Brother Original ink cartridges Brother cannot guarantee this optimum performance and reliability if ink or ink cartridges of other specifications are use...

Page 48: ... bag for the colour shown on the LCD and then take out the ink cartridge d Turn the green release lever on the orange protective packing 1 clockwise until it clicks to release the vacuum seal Then remove the orange protective packing as shown e Each colour has its own correct position Insert the ink cartridge in the direction of the arrow on the label 1 1 ...

Page 49: ...Original Brother and that they are installed correctly IMPORTANT DO NOT take out ink cartridges if you do not need to replace them If you do so it may reduce the ink quantity and the machine will not know the quantity of ink left in the cartridge DO NOT touch the cartridge insertion slots If you do so the ink may stain your skin If ink gets on your skin or clothing immediately wash it off with soa...

Page 50: ...th a non flammable glass cleaner Note In addition to cleaning the glass strip with a non flammable glass cleaner run your finger tip over the glass strip to see if you can feel anything on it If you feel dirt or debris clean the glass strip again concentrating on that area You may need to repeat the cleaning process three or four times To test make a copy after each cleaning attempt 2 1 3 1 2 i Wh...

Page 51: ...s not improved try installing a new Brother Original Innobella ink cartridge for each problem colour Try cleaning the print head again up to five more times If the print has not improved call your Brother dealer Checking the print quality A If faded or streaked colours and text appear on your printouts some of the print head nozzles may be clogged You can check this by printing the Print Quality C...

Page 52: ... print alignment A You may need to adjust the print alignment after transporting the machine if your printed text becomes blurred or images become faded a Press d or c to display Ink b Press Ink c Press Test Print d Press Alignment e Press Mono Start or Colour Start The machine starts printing the Alignment Check Sheet f For the A pattern press the number of the test print that has the least visib...

Page 53: ...s have reached the end of their life You can use the machine in monochrome mode for approximately four weeks depending on the number of pages you print While this message appears on the LCD each operation works in the following way Printing If you choose Greyscale in the Advanced tab of the printer driver you can use the machine as a monochrome printer Copying If the paper type is set to Plain Pap...

Page 54: ...e is no disc in the Disc Tray Make sure a disc is correctly placed in the Disc Tray Cover is Open The scanner cover is not completely closed Lift the scanner cover and then close it again The ink cartridge cover is not completely closed Firmly close the ink cartridge cover until it clicks Data Remaining Print data is left in the machine s memory Press Stop Exit The machine will cancel the job and ...

Page 55: ...ment jam uu page 52 Failed to detect the original The machine failed to detect the original disc or photo when scanning Do one of the following Remove any dirt from the scanner glass Before scanning choose what type the document is disc or paper While scanning close the scanner cover Place only one sheet on the scanner glass Make sure the document is placed correctly on the scanner glass High Temp...

Page 56: ...airs resulting from the use of non Brother supplies may not be covered under the stated product warranty The ink absorber box or flushing box will need to be replaced Contact Brother Customer Service or your local Brother Authorised Service Centre to have your machine serviced Other reasons for cleaning are 1 The machine automatically cleans itself after sitting idle for more than 30 days infreque...

Page 57: ...e Important note in Loading photo paper uu page 13 The machine is out of paper or paper is not correctly loaded in the paper tray Do one of the following Refill the paper in the paper tray and then press Mono Start or Colour Start Remove the paper and load it again and then press Mono Start or Colour Start See Loading paper and other print media uu page 9 The paper is jammed in the machine Remove ...

Page 58: ... jammed paper by following the steps in Paper is jammed at the back of the machine uu page 53 Make sure the paper length guide is set to the correct paper size Paper dust has accumulated on the surface of the paper pick up rollers Clean the paper pick up rollers uuAdvanced User s Guide Cleaning the paper pick up rollers Touchscreen initialization failed The Touchscreen was pressed before the power...

Page 59: ...f and then on again Wrong Ink Color A colour ink cartridge has been installed in the Black ink cartridge position Check which ink cartridges are not matched by colour to their ink cartridge positions and move them to their correct positions Wrong Paper Size The Paper Size setting does not match the size of paper in the tray Or you did not set the paper guides in the tray to the indicators for the ...

Page 60: ... to clear a document jam Document is jammed in the top of the ADF unit B a Take out any paper from the ADF that is not jammed b Open the ADF cover c Remove the jammed document by pulling it upward d Close the ADF cover e Press Stop Exit IMPORTANT To avoid document jams close the ADF cover correctly by pushing it gently in the middle Document is jammed inside the ADF unit B a Take out any paper fro...

Page 61: ... of the machine c Pull out the jammed paper 1 d Lift the Jam Clear flap and remove the jammed paper from the Disc Guide e Push the paper tray firmly back into the machine f While holding the paper tray in place pull out the paper support until it clicks and then unfold the paper support flap Make sure you pull out the paper support until it clicks g Re connect the power cord Paper is jammed at the...

Page 62: ... power cord Paper is jammed at the front and back of the machine B If the LCD shows Paper Jam Front Rear follow these steps a Unplug the machine from the electrical socket b If the paper support flap is open close it and then close the paper support Pull the paper tray completely out of the machine c Pull out the jammed paper 1 1 ...

Page 63: ...per out of the machine g Close the Jam Clear Cover Make sure the cover is closed correctly h Using both hands use the plastic tabs on both sides of the machine to lift the scanner cover 1 to the open position Move the print head if necessary to take out any paper remaining in this area Make sure that jammed paper is not left in the corners of the machine 2 and 3 1 1 2 3 ...

Page 64: ...sh with soap and plenty of water i Using both hands grasp the plastic tabs on both sides of the machine and gently close the scanner cover j Push the paper tray firmly back into the machine k While holding the paper tray in place pull out the paper support until it clicks and then unfold the paper support flap Make sure you pull out the paper support until it clicks l Re connect the power cord Add...

Page 65: ...s jammed under the print head unplug the machine from the power source and then move the print head to take out the paper If the print head is in the right corner as shown in the illustration you cannot move it Re connect the power cord Hold down Stop Exit until the print head moves to the middle Then unplug the machine from the power source and take out the paper If ink gets onto your skin immedi...

Page 66: ...clicks and then unfold the paper support flap Make sure you pull out the paper support until it clicks j Re connect the power cord Disc Jam B Take out the Disc Tray depending on where the disc is jammed in the machine Disc Tray is jammed at the front of the machine B If the LCD shows Disc Jam Front follow these steps a Unplug the machine from the electrical socket b Remove the Disc Tray from the D...

Page 67: ...ne from the electrical socket b Make sure there is enough space behind the machine for removing the Disc Tray c Using both hands grasp the plastic tabs on both sides of the machine and lift the scanner cover to the open position d Gently push the Disc Tray toward the back of the machine e Remove the Disc Tray from the rear of the machine ...

Page 68: ...60 f Using both hands grasp the plastic tabs on both sides of the machine and gently close the scanner cover g Close the Disc Guide h Re connect the power cord ...

Page 69: ... then Printers and Faxes Right click and choose Brother DCP XXXXX where XXXXX is your model name and make sure that Use Printer Offline is unchecked Poor print quality Check the print quality See Checking the print quality uu page 43 Make sure that the Media Type setting in the printer driver or the Paper Type setting in the machine s menu matches the type of paper you are using See Paper Type uu ...

Page 70: ...ains appear on the reverse side or at the bottom of the page Make sure the printer platen is not dirty with ink uuAdvanced User s Guide Cleaning the machine s printer platen Make sure you are using Brother Original Innobella ink Make sure you are using the paper support flap See Loading paper and other print media uu page 9 Make sure the paper feed roller is not dirty with ink uuAdvanced User s Gu...

Page 71: ...ink Clean the paper feed rollers uuAdvanced User s Guide Cleaning the paper feed rollers Printed pages are not stacked neatly Make sure you are using the paper support flap See Loading paper and other print media uu page 9 Machine does not print from Adobe Illustrator Try to reduce the print resolution uuSoftware User s Guide Printing Windows uuSoftware User s Guide Printing and Faxing Macintosh I...

Page 72: ...am will repair and reinstall the software Device Busy Make sure the machine is not showing an error message on the LCD Cannot print images from FaceFilter Studio To use FaceFilter Studio you must install the FaceFilter Studio application from the CD ROM supplied with your machine uuQuick Setup Guide Also before you start FaceFilter Studio for the first time you must make sure your Brother machine ...

Page 73: ...ample Brother NetScan In Port number Enter 54925 In Protocol UDP is selected Please refer to the instruction manual that came with your third party Security Firewall Software or contact the software manufacturer Macintosh users Re select your machine in the Device Selector application located in Macintosh HD Library Printers Brother Utilities DeviceSelector or from the model list in ControlCenter2...

Page 74: ...word and IP address information 2 All Settings You can restore all settings to their factory defaults Brother strongly recommends performing this procedure before handing over or disposing of the machine Note Unplug the interface cable before you choose Network or All Settings How to reset the machine B a Press Menu b Press a or b to display Initial Setup c Press Initial Setup d Press a or b to di...

Page 75: ...ndly programming helps you take full advantage of all the menu selections your machine has to offer Since your programming is done on the LCD we have created step by step on screen instructions to help you program your machine All you need to do is follow the instructions as they guide you through the menu selections and programming options Menu and features C ...

Page 76: ...aper tray 17 Paper Size A4 A5 10x15cm Letter Sets the size of paper in the paper tray 17 Beeper Off Low Med High Adjusts the beeper volume 8 LCD Settings Backlight Light Med Dark You can adjust the brightness of the LCD backlight 8 Dim Timer Off 10 Secs 20 Secs 30 Secs You can set how long the LCD backlight stays on for after the last key press See Sleep Mode 1 Min 2 Mins 3 Mins 5 Mins 10 Mins 30 ...

Page 77: ...Address 000 255 000 255 000 255 000 255 Enter the IP address Subnet Mask 000 255 000 255 000 255 000 255 Enter the Subnet mask Gateway 000 255 000 255 000 255 000 255 Enter the Gateway address Node Name BRNXXXXXXXXXXXX Enter the Node name WINS Config Auto Static Chooses the WINS configuration mode WINS Server Primary 000 000 000 000 Secondary 000 000 000 000 Specifies the IP address of the primary...

Page 78: ...n see your machine s MAC address WLAN TCP IP BOOT Method Auto Static RARP BOOTP DHCP Chooses the BOOT method that best suits your needs IP Address 000 255 000 255 000 255 000 255 Enter the IP address Subnet Mask 000 255 000 255 000 255 000 255 Enter the Subnet mask Gateway 000 255 000 255 000 255 000 255 Enter the Gateway address Node Name BRWXXXXXXXXXXXX Enter the Node name WINS Config Auto Stati...

Page 79: ... configure your print server for a wireless network WPS AOSS You can easily configure your wireless network settings using the one button push method WPS w PIN Code You can easily configure your wireless network settings using WPS with a PIN code WLAN Status Status You can see the current wireless network status Signal You can see the current wireless network signal strength SSID You can see the c...

Page 80: ...n your machine See Reset Network Resets the print server back to its factory default settings such as the password and IP address information 66 All Settings Resets all the machine s settings back to the factory default Local Language Choose the language you want to use Allows you to change the LCD language for your country See Disc Print Alignment You can align the print position See Advanced Use...

Page 81: ...document 31 File Type If you choose Colour option in Quality setting PDF JPEG If you choose Mono option in Quality setting TIFF PDF File Name You can rename the file Auto Crop On Off Scan multiple documents placed on the scanner glass to a memory card or USB Flash memory drive one at a time See Set New Default Quality File Type Auto Crop You can save your scan settings as the default settings Fact...

Page 82: ... editable text file to Image You can scan a colour picture into your graphics application Web Service Appears when you install a Web Services Scan which is displayed in your computer s Windows Explorer Scan You can scan data by using the Web Services protocol Scan for E mail Scan for OCR Scan for Fax Scan for Print Level1 Option1 Option2 Option3 Descriptions Page Software User s Guide Advanced Use...

Page 83: ...aper in the tray 26 Enlarge Reduce 100 See Enlarge 198 10x15cmiA4 186 10x15cmiLTR 141 A5iA4 You can choose the enlargement ratio for the next copy Reduce 97 LTRiA4 93 A4iLTR 83 LGLiA4 69 A4iA5 47 A4i10x15cm You can choose the reduction ratio for the next copy Fit to Page Your machine will adjust the size automatically to the paper size you set Custom 25 400 You can choose the enlargement or reduct...

Page 84: ...rint settings Portrait LongEdgeFlip Landscape LongEdgeFlip Portrait ShortEdgeFlip Landscape ShortEdgeFlip Off Advanced Settings Off Ink Save Mode Thin Paper Copy Book Copy Watermark Copy You can choose various settings for copy such as Book Copy and Watermark Copy Favorite Settings Store Favorite 1 Favorite 2 Favorite 3 You can save your favourite settings Rename Level1 Level2 Level3 Options Descr...

Page 85: ...CONFIDENTIAL DRAFT COPY Uses a template to place text into your document as a Watermark See Position A B C D E F G H I Pattern Size Small Medium Large Angle 90 45 0 45 90 Transparency 2 1 0 1 2 Colour Black Green Blue Purple Red Orange Yellow Advanced User s Guide The factory settings are shown in Bold with an asterisk ...

Page 86: ...document See Media Select image from media Position A B C D E F G H I Pattern Places a logo or text into your document as a Watermark using an image from removable media Size Small Medium Large Angle 90 45 0 45 90 Transparency 2 1 0 1 2 Option1 Option2 Option3 Option4 Descriptions Page Advanced User s Guide The factory settings are shown in Bold with an asterisk ...

Page 87: ...lide Show of your photos The machine decides the most suitable effect for your photo See Enhance Photo Enhance Auto Correct Enhance Skin Enhance Scenery Remove Red Eye Night Scene Fill Light Whiteboard Monochrome Sepia Auto Correct Remove Red Eye See the print settings in the following table You can adjust your photos with these settings Trim You can trim your photo and print a part of the image A...

Page 88: ...se the print quality See Paper Type Plain Paper Inkjet Paper Brother BP71 Brother BP61 Other Glossy Choose the paper type Paper Size 10x15cm 13x18cm A4 Letter When A4 or Letter is chosen 8x10cm 9x13cm 10x15cm 13x18cm 15x20cm Max Size Choose the paper and print size Brightness Not available when Enhance is chosen Adjusts the brightness Advanced User s Guide The factory settings are shown in Bold wi...

Page 89: ... image Cropping On Off Crops the image around the margin to fit the paper size or print size Turn this feature off if you want to print whole images or prevent unwanted cropping Borderless On Off Expands the printable area to fit the edges of the paper Date Print Not available for DPOF printing On Off Prints the date on your photo Option1 Option2 Option3 Option4 Descriptions Page Advanced User s G...

Page 90: ...re all the settings to the factory default Option1 Option2 Option3 Option4 Descriptions Page Paper Type Plain Paper Inkjet Paper Brother BP71 Brother BP61 Other Glossy Choose the paper type See Paper Size A4 Letter Choose the paper size Advanced User s Guide The factory settings are shown in Bold with an asterisk Option1 Option2 Option3 Option4 Descriptions Page Advanced User s Guide The factory s...

Page 91: ...n the print head 43 Ink Volume Lets you check the available ink volume See Advanced User s Guide The factory settings are shown in Bold with an asterisk Level1 Level2 Level3 Options Descriptions Page Disc Copy from disc You can print on printable media including CD R RW DVD R RW and Blu ray Disc See Copy from photo Print from card Software User s Guide The factory settings are shown in Bold with a...

Page 92: ... special characters then press the space button or Note The characters available may differ depending on your country Making corrections C If you entered an incorrect character and want to change it use the arrow buttons to move the cursor under the incorrect character Then press Re enter the correct character You can also insert letters by moving the cursor and entering a character Repeating lett...

Page 93: ...DF single side printing resolution standard document ISO IEC 24712 printed pattern Specifications D Printer Type Inkjet Print Head Mono Colour Piezo with 210 1 nozzle Piezo with 210 3 nozzles Memory Capacity 64 MB LCD Liquid Crystal Display Touchscreen 3 3 in 82 8 mm TFT Colour LCD Power Source AC 220 to 240V 50 60Hz Power Consumption 1 Copying Mode Approx 24 W 2 Ready Mode Approx 6 5 W Sleep Mode...

Page 94: ...kg Noise Operating LPAm 50 dB or less 1 Noise per ISO9296 Copying LWAd 6 27 B A 2 Mono LWAd 5 83 B A Colour Ready LWAd 3 1 B A Mono Colour Temperature Operating Best Print Quality 10 to 35 C 20 to 33 C Humidity Operating Best Print Quality 20 to 80 without condensation 20 to 80 without condensation ADF automatic document feeder Up to 15 pages 3 Paper 90 g m2 A4 or Letter size Up to 20 pages with c...

Page 95: ...Executive Letter A5 A6 Envelopes commercial No 10 DL C5 Monarch Photo 10 15 cm Photo 2L 13 18 cm Index Card 127 203 mm 3 Width 98 mm 215 9 mm Length 148 mm 297 mm For more details see Paper weight thickness and capacity uu page 21 Maximum paper tray capacity Approx 100 sheets of 80 g m2 plain paper Photo Paper Tray Paper type Plain Paper Inkjet Paper coated paper and Glossy Paper 1 Paper size Phot...

Page 96: ...hrome Yes Yes Copy Width Max 210 mm Multiple Copies Stacks Sorts up to 99 pages Enlarge Reduce 25 to 400 in increments of 1 Resolution Prints up to 1200 1200 dpi Duplex 2 sided Paper type Plain paper Paper size A4 Letter A5 ...

Page 97: ... MultiMedia Card plus 128 MB 4 GB MultiMedia Card mobile with Adapter 64 MB 1 GB SD Memory Card 16 MB to 2 GB miniSD with Adapter microSD with Adapter SDHC Memory Card 4 GB to 32 GB miniSDHC with Adapter microSDHC with Adapter USB Flash memory drive 2 SDXC Memory Card 48 GB 64 GB Resolution Up to 1200 2400 dpi File Extension Media Format DPOF ver 1 0 ver 1 1 Exif DCF up to ver 2 1 Image Format Pho...

Page 98: ...90 PictBridge D Compatibility Supports the Camera Imaging Products Association PictBridge standard CIPA DC 001 Visit http www cipa jp pictbridge for more information Interface USB direct interface ...

Page 99: ...can be selected by using the Brother scanner utility Colour Monochrome Yes Yes TWAIN Compliant Yes Windows XP 1 Windows Vista Windows 7 Mac OS X 10 4 11 10 5 x 10 6 x 2 WIA Compliant Yes Windows XP 1 Windows Vista Windows 7 ICA Compliant Yes Mac OS X 10 6 x Colour Depth 48 bit colour Processing Input 24 bit colour Processing Output Resolution Up to 19200 19200 dpi interpolated 3 Up to 2400 2400 dp...

Page 100: ...USB ports are not supported 3 See Network LAN uu page 95 uuNetwork User s Guide Supported protocols and security features Resolution Up to 1200 6000 dpi Printing Width 3 204 mm 210 mm borderless 1 Borderless 2 A4 Letter A6 Photo 10 15 cm Index Card 127 203 mm Photo L 89 127 mm Photo 2L 13 18 cm Duplex 2 sided Paper type Plain paper Paper size A4 Letter A5 A6 Executive Print Speed 4 USB 1 2 A USB 2...

Page 101: ...a network 64 bit Intel 64 or AMD64 supported CPU Windows Server 2003 R2 printonlyvianetwork Intel Pentium III or equivalent WindowsServer 2003 R2 x64 Edition print only via network 64 bit Intel 64 or AMD64 supported CPU 512 MB 1 GB WindowsServer 2008 print only via network Intel Pentium 4or equivalent 64 bit Intel 64orAMD64 supported CPU 2 GB Windows Server 2008 R2 printonlyvianetwork 64 bit Intel...

Page 102: ...20C Standard Yield Magenta LC1220M Black Yellow Cyan and Magenta Approximately 300 pages 1 High Yield Black LC1240BK High Yield Yellow LC1240Y High Yield Cyan LC1240C High Yield Magenta LC1240M Black Yellow Cyan and Magenta Approximately 600 pages 1 1 Approx cartridge yield is declared in accordance with ISO IEC 24711 For more information about the replacement consumables visit us at http www brot...

Page 103: ...t Brother BRAdmin Professional utility version that is available as a download from http solutions brother com LAN You can connect your machine to a network for Network Printing Network Scanning and access photos from PhotoCapture Center 1 Also included is Brother BRAdmin Light 2 Network Management software Wireless Network Security SSID 32 chr WEP 64 128 bit WPA PSK TKIP AES WPA2 PSK AES Setup Su...

Page 104: ... B W Print Only 45 Cannot Detect 46 Cannot Print 46 Cover is Open 46 Data Remaining 46 Document Jam 47 Ink Absorber Full 48 Ink Absorber NearFull 48 Ink low 48 No Ink Cartridge 49 No Paper Fed 49 Out of Memory 50 Paper Jam 50 Unable to Clean 50 Unable to Init 50 Unable to Print 50 Unable to Scan 50 Wrong Paper Size 51 G Greyscale 91 H Help LCD messages 67 Menu Table 68 I Ink cartridges ink dot cou...

Page 105: ...31 SD Memory Card 27 SDHC Memory Card 27 SDXC Memory Card 27 Slide Show 30 specifications 89 Presto PageManager See Software User s Guide Also see Help in the Presto PageManager application Print difficulties 61 paper jams 53 printable area 16 resolution 92 specifications 92 Printing See Software User s Guide Programming your machine 67 R Resolution copy 88 print 92 scan 91 S Scanning See Software...

Page 106: ...98 V Volume setting beeper 8 W Windows See Software User s Guide Wireless Network See Quick Setup Guide and Network User s Guide ...

Page 107: ... on the World Wide Web http www brother com This machine is approved for use in the country of purchase only Local Brother companies or their dealers will only support machines purchased in their own countries ...

Reviews: